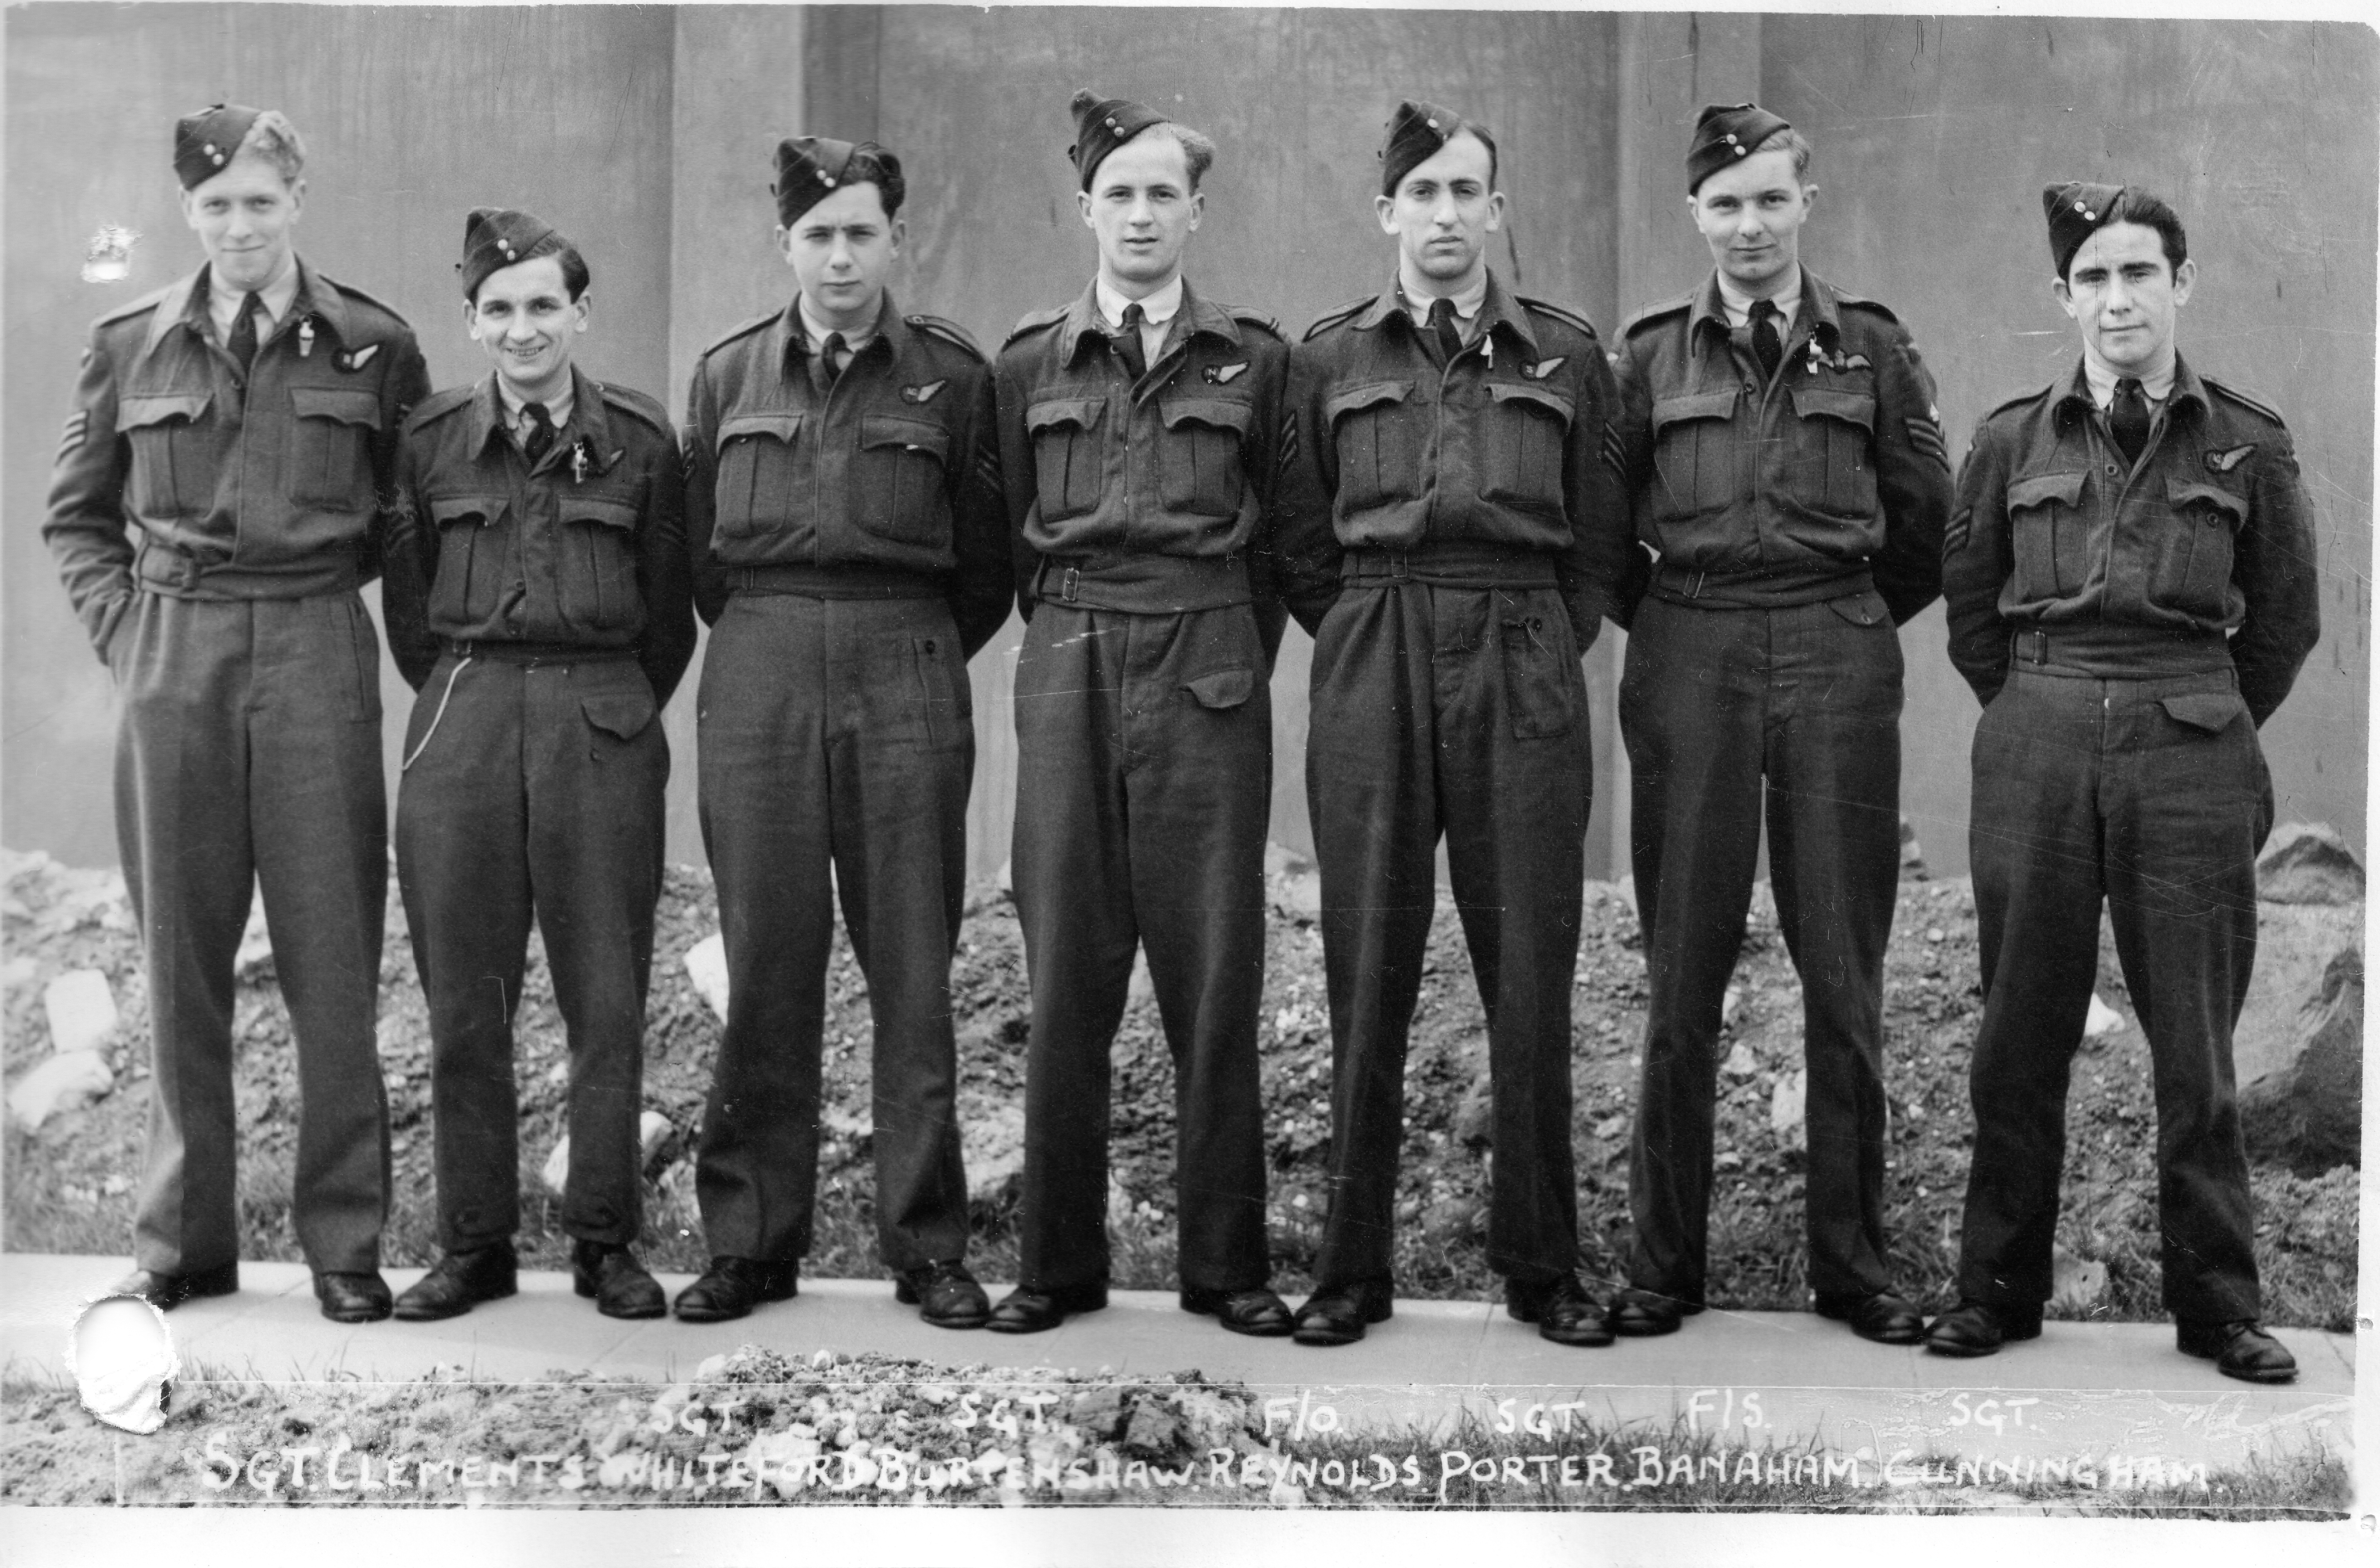
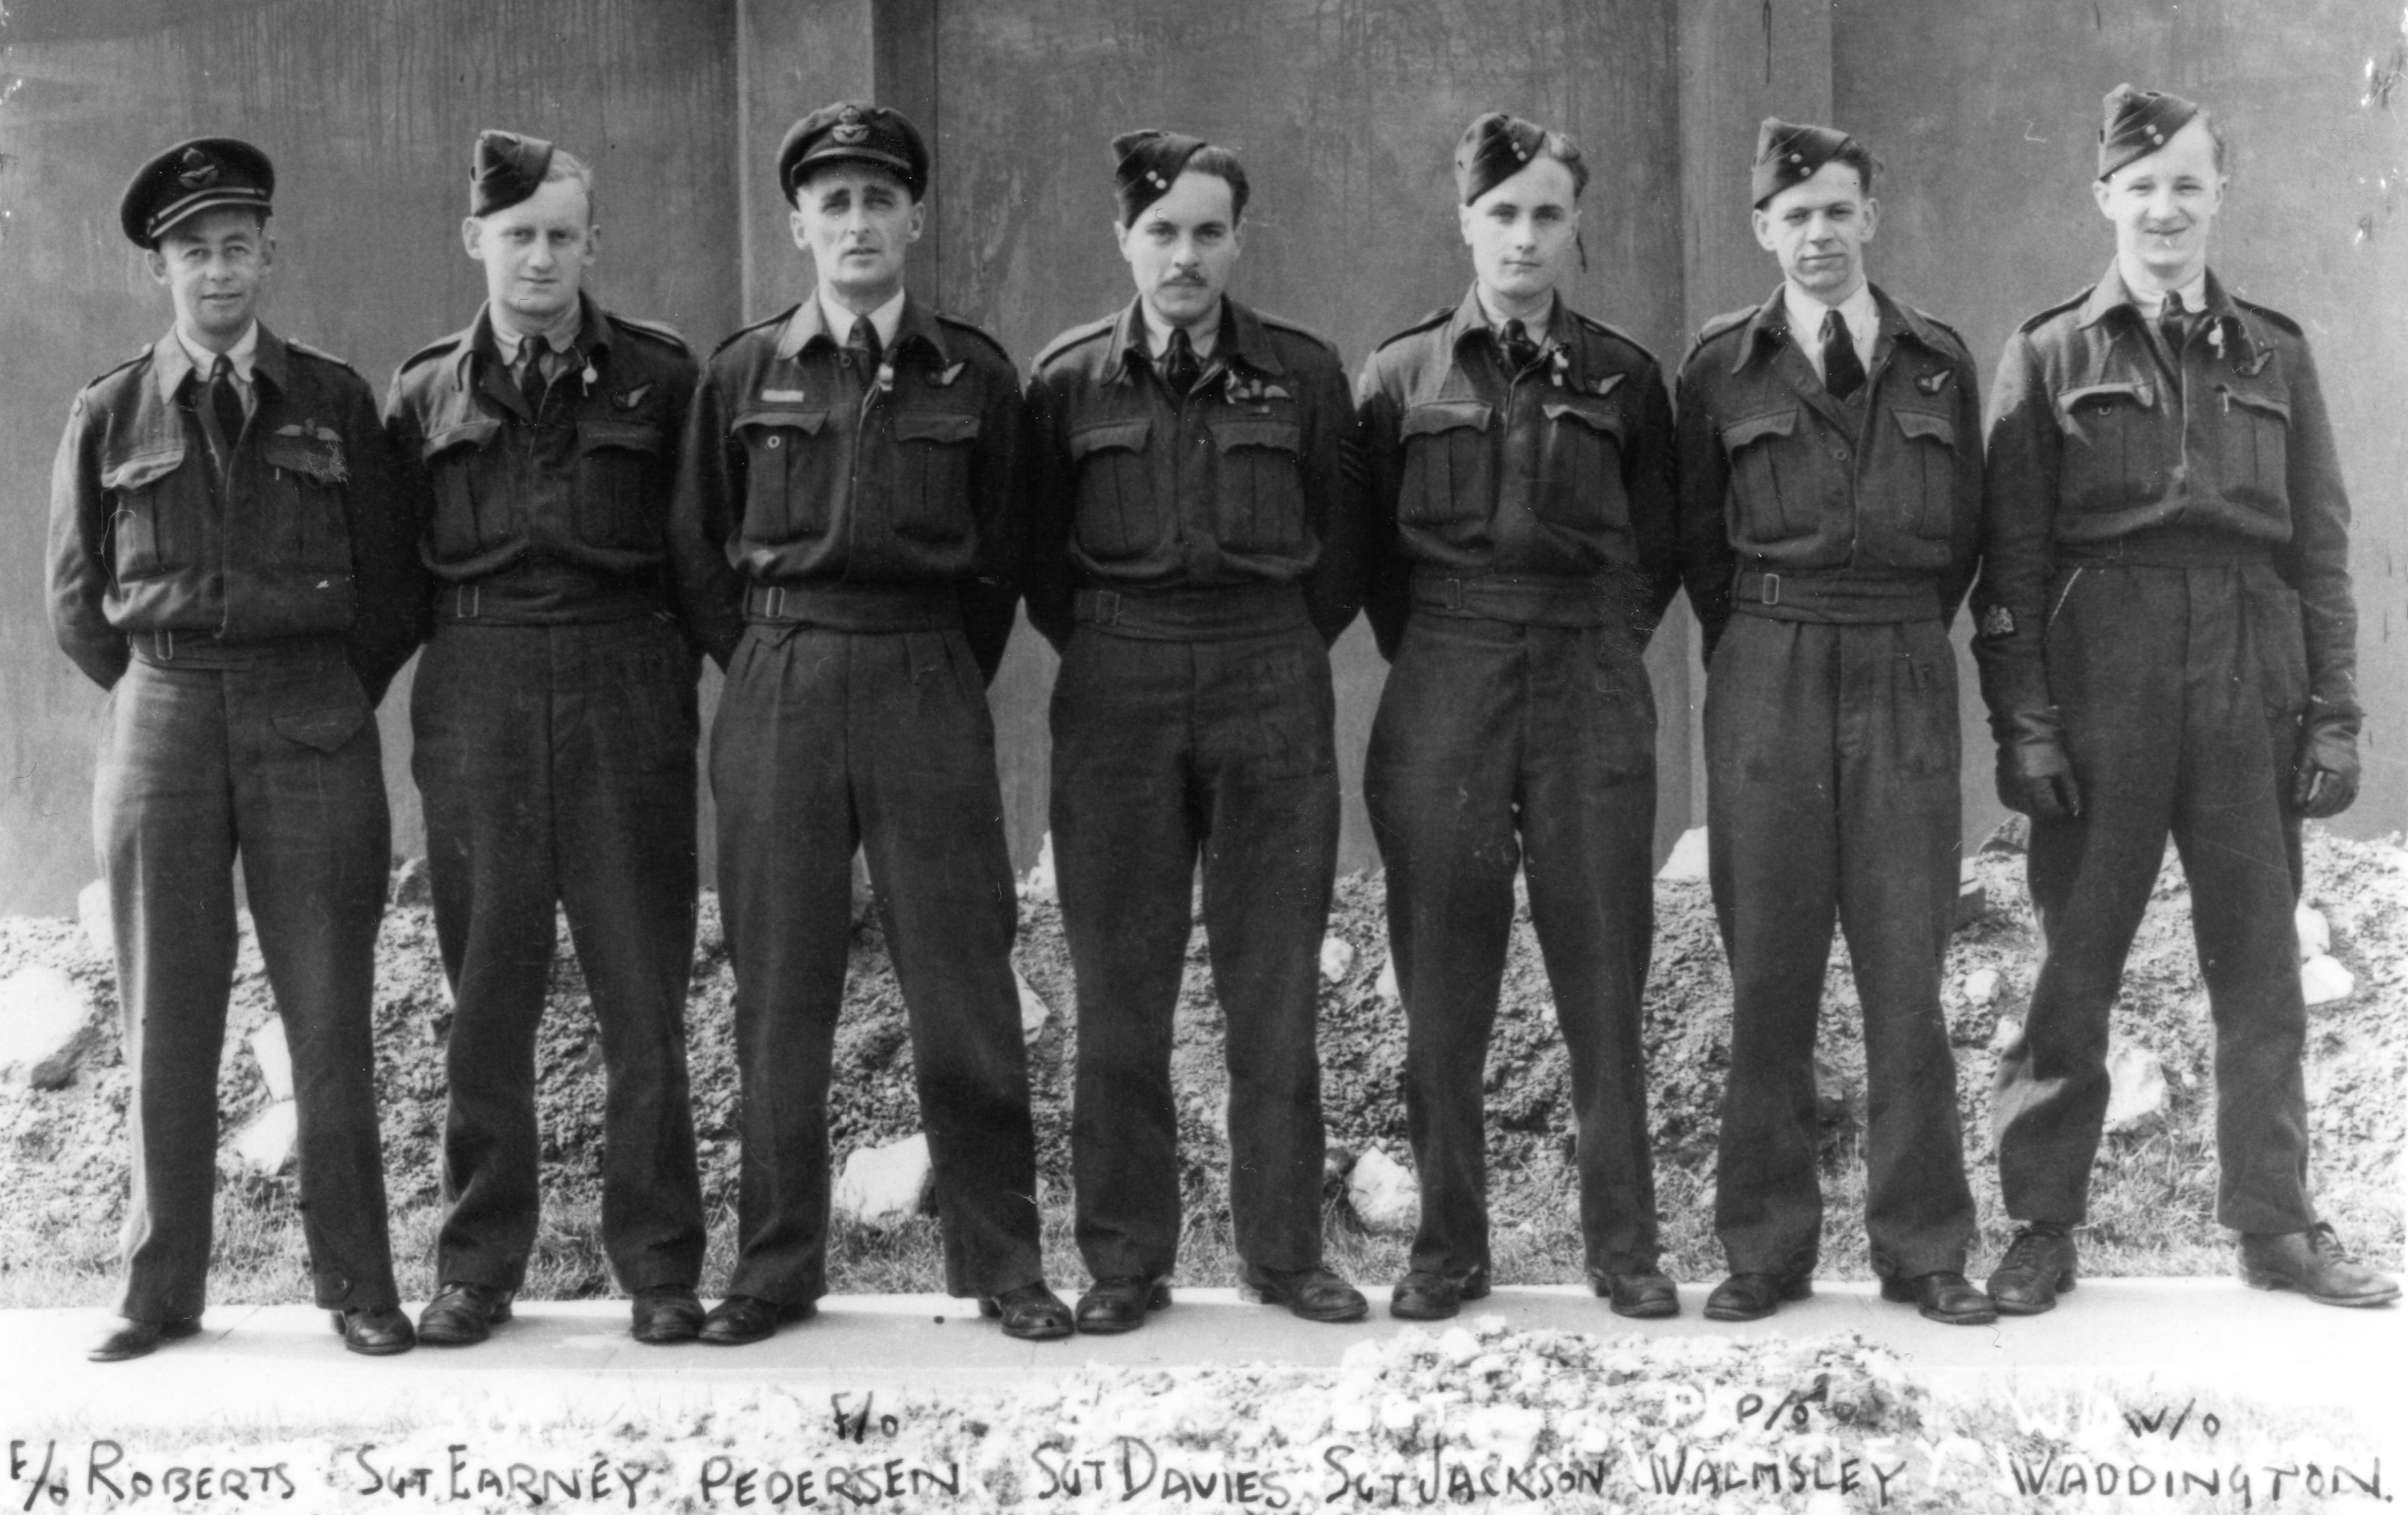
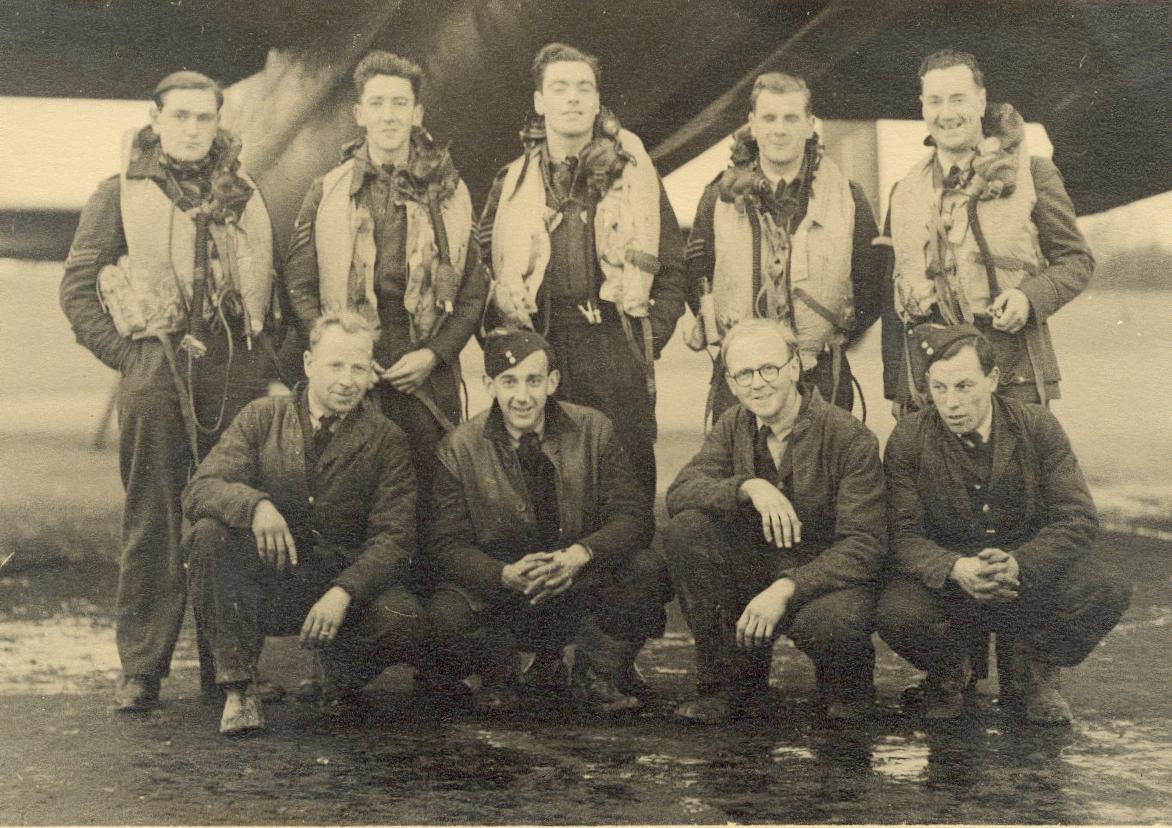
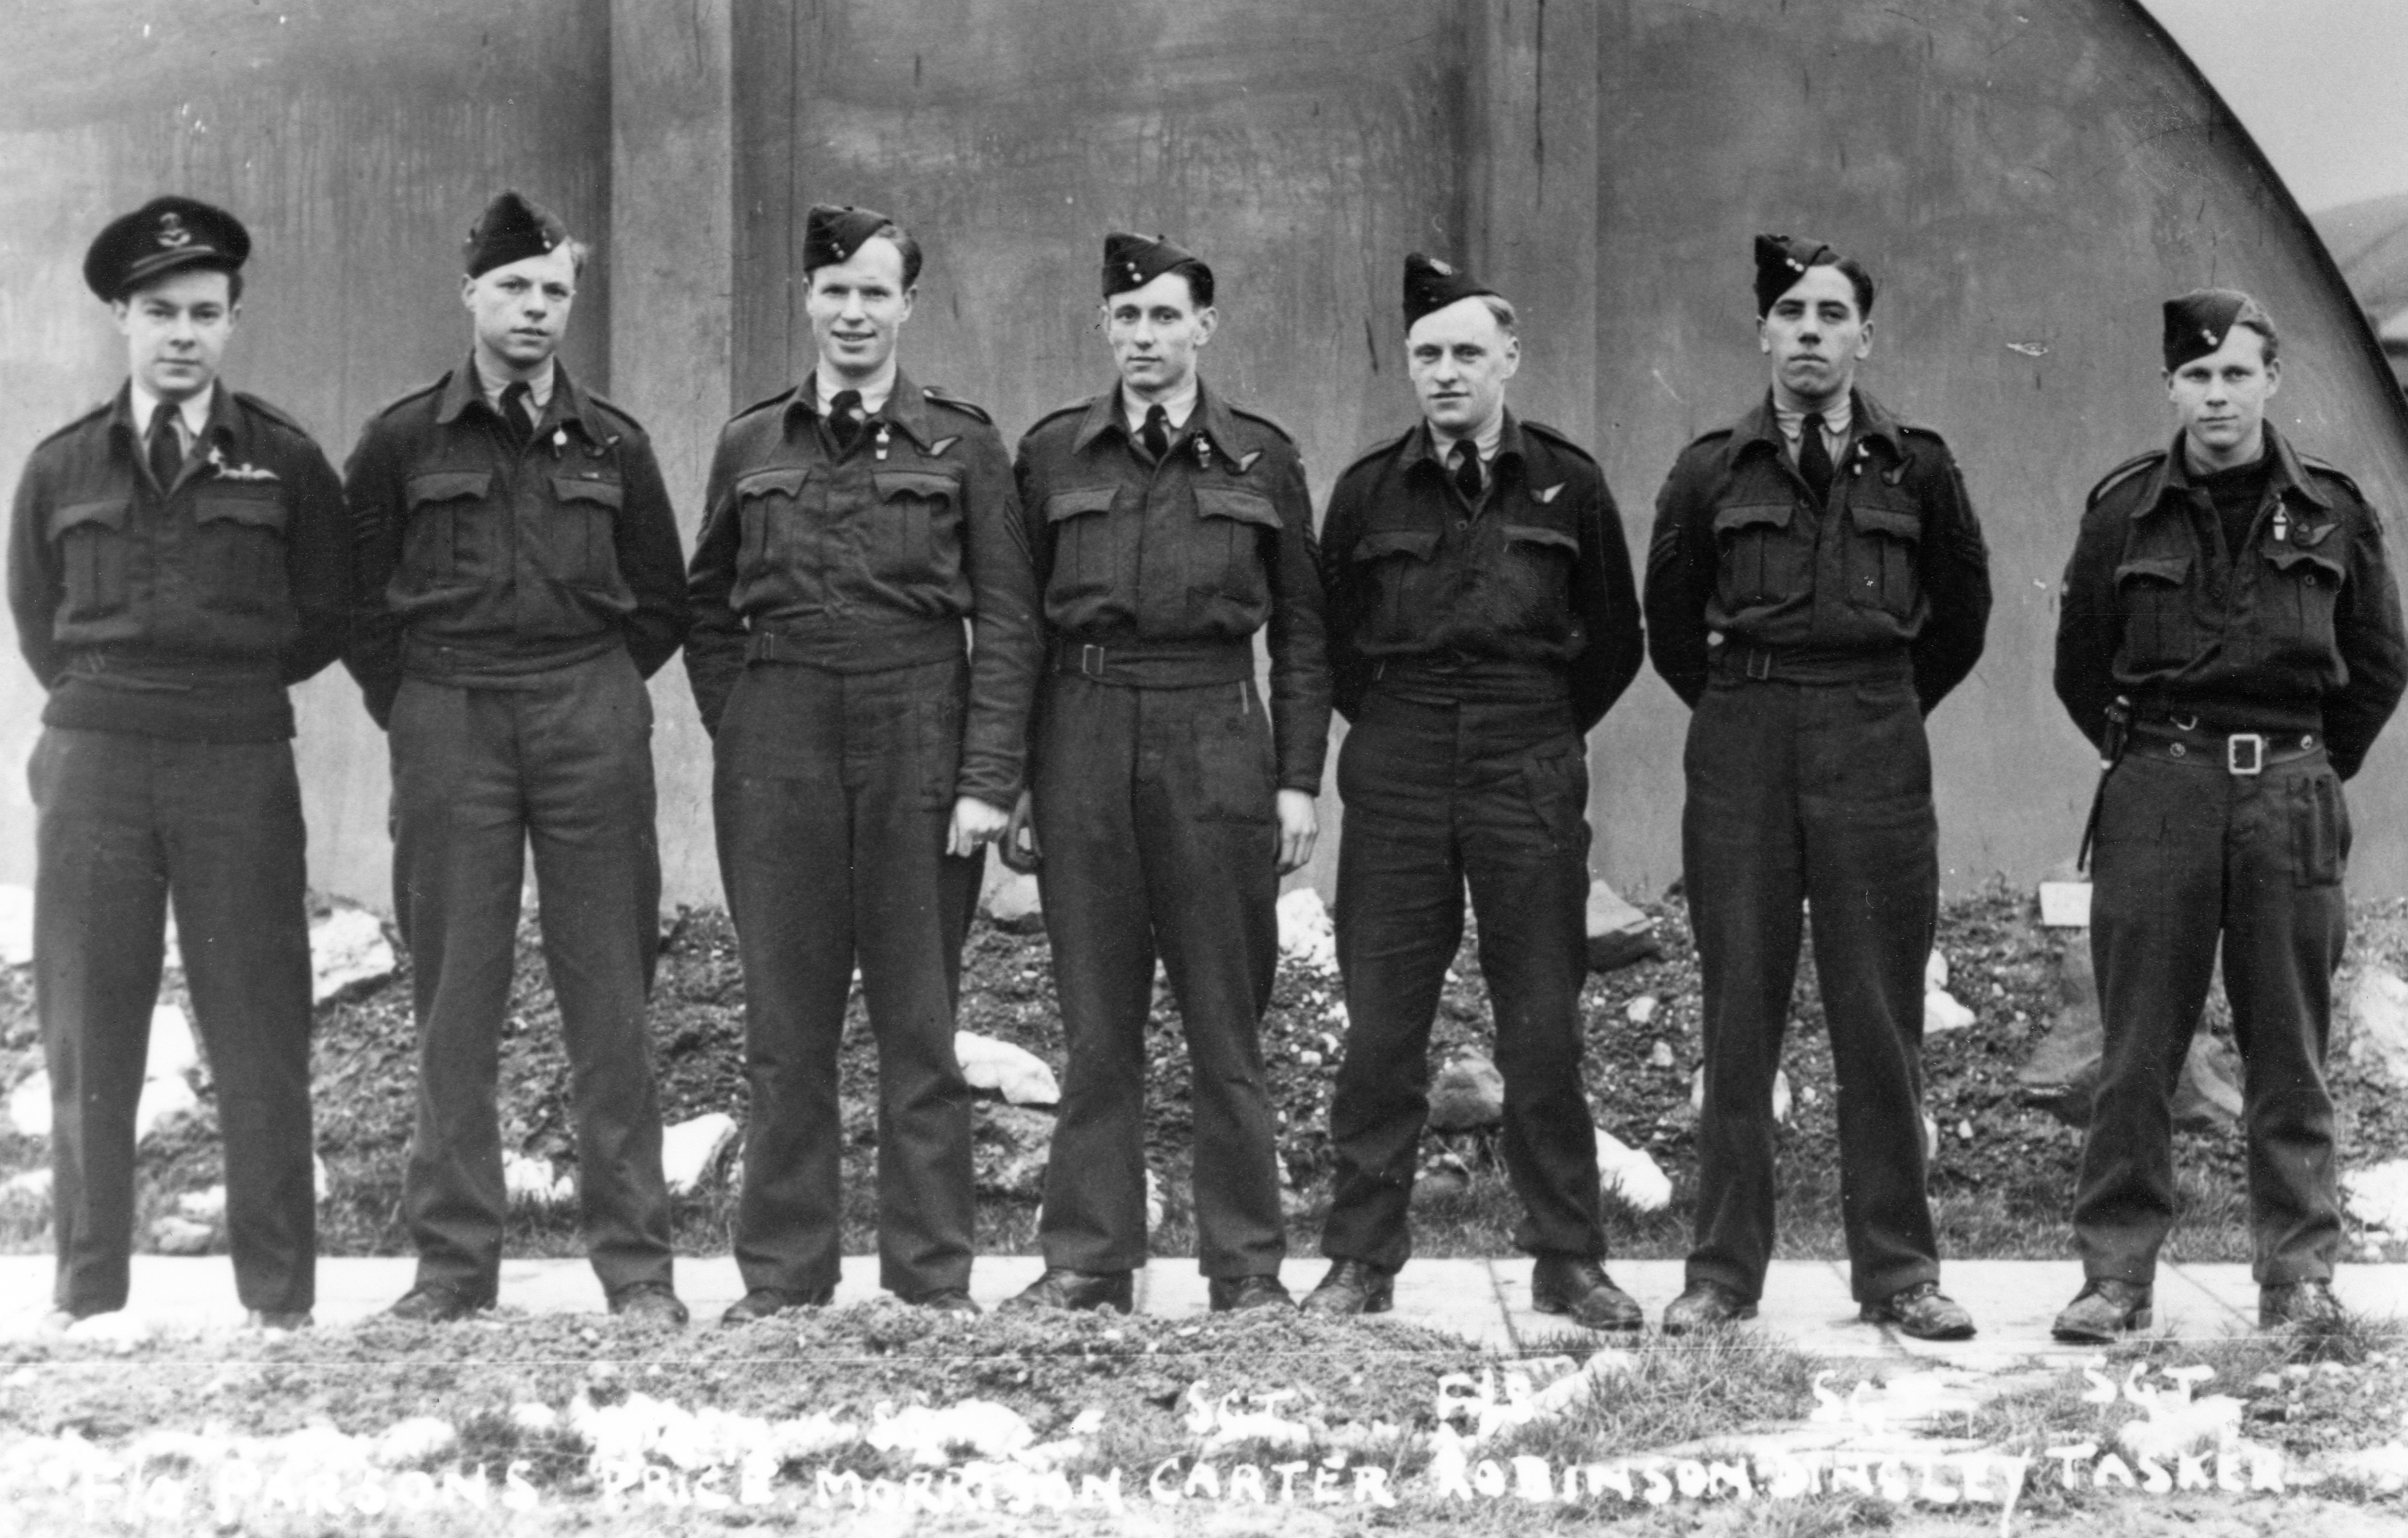
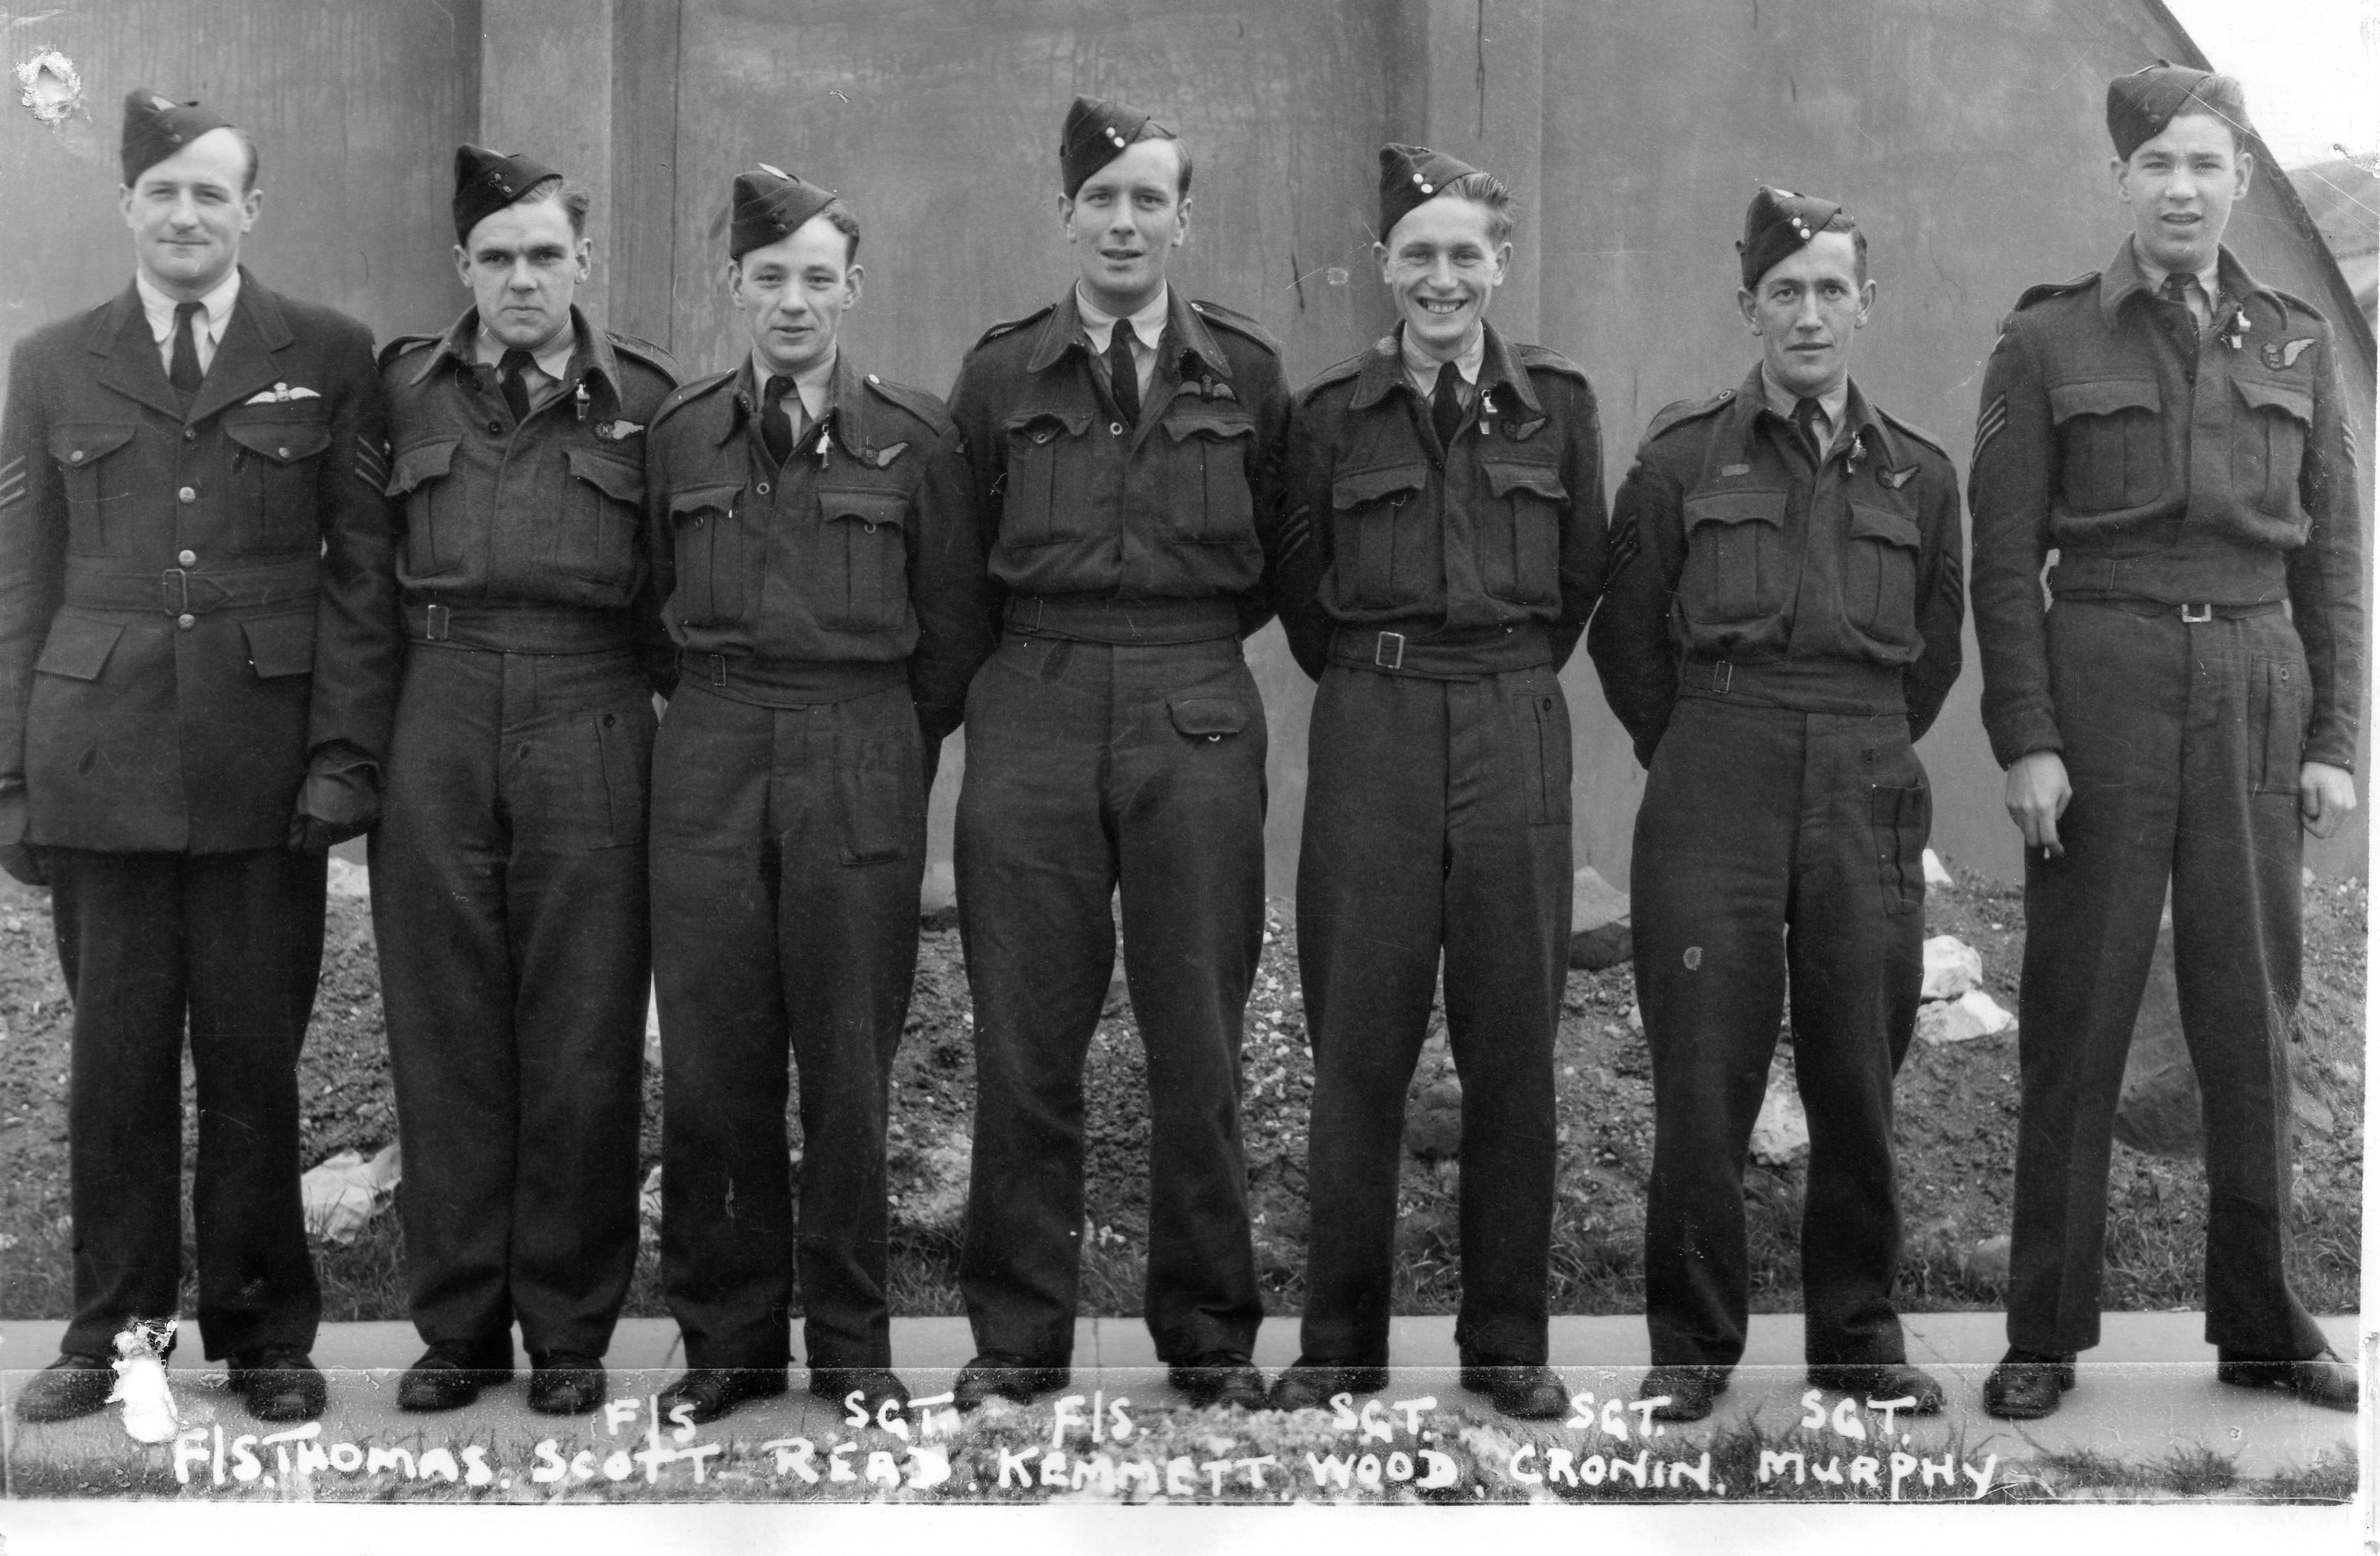
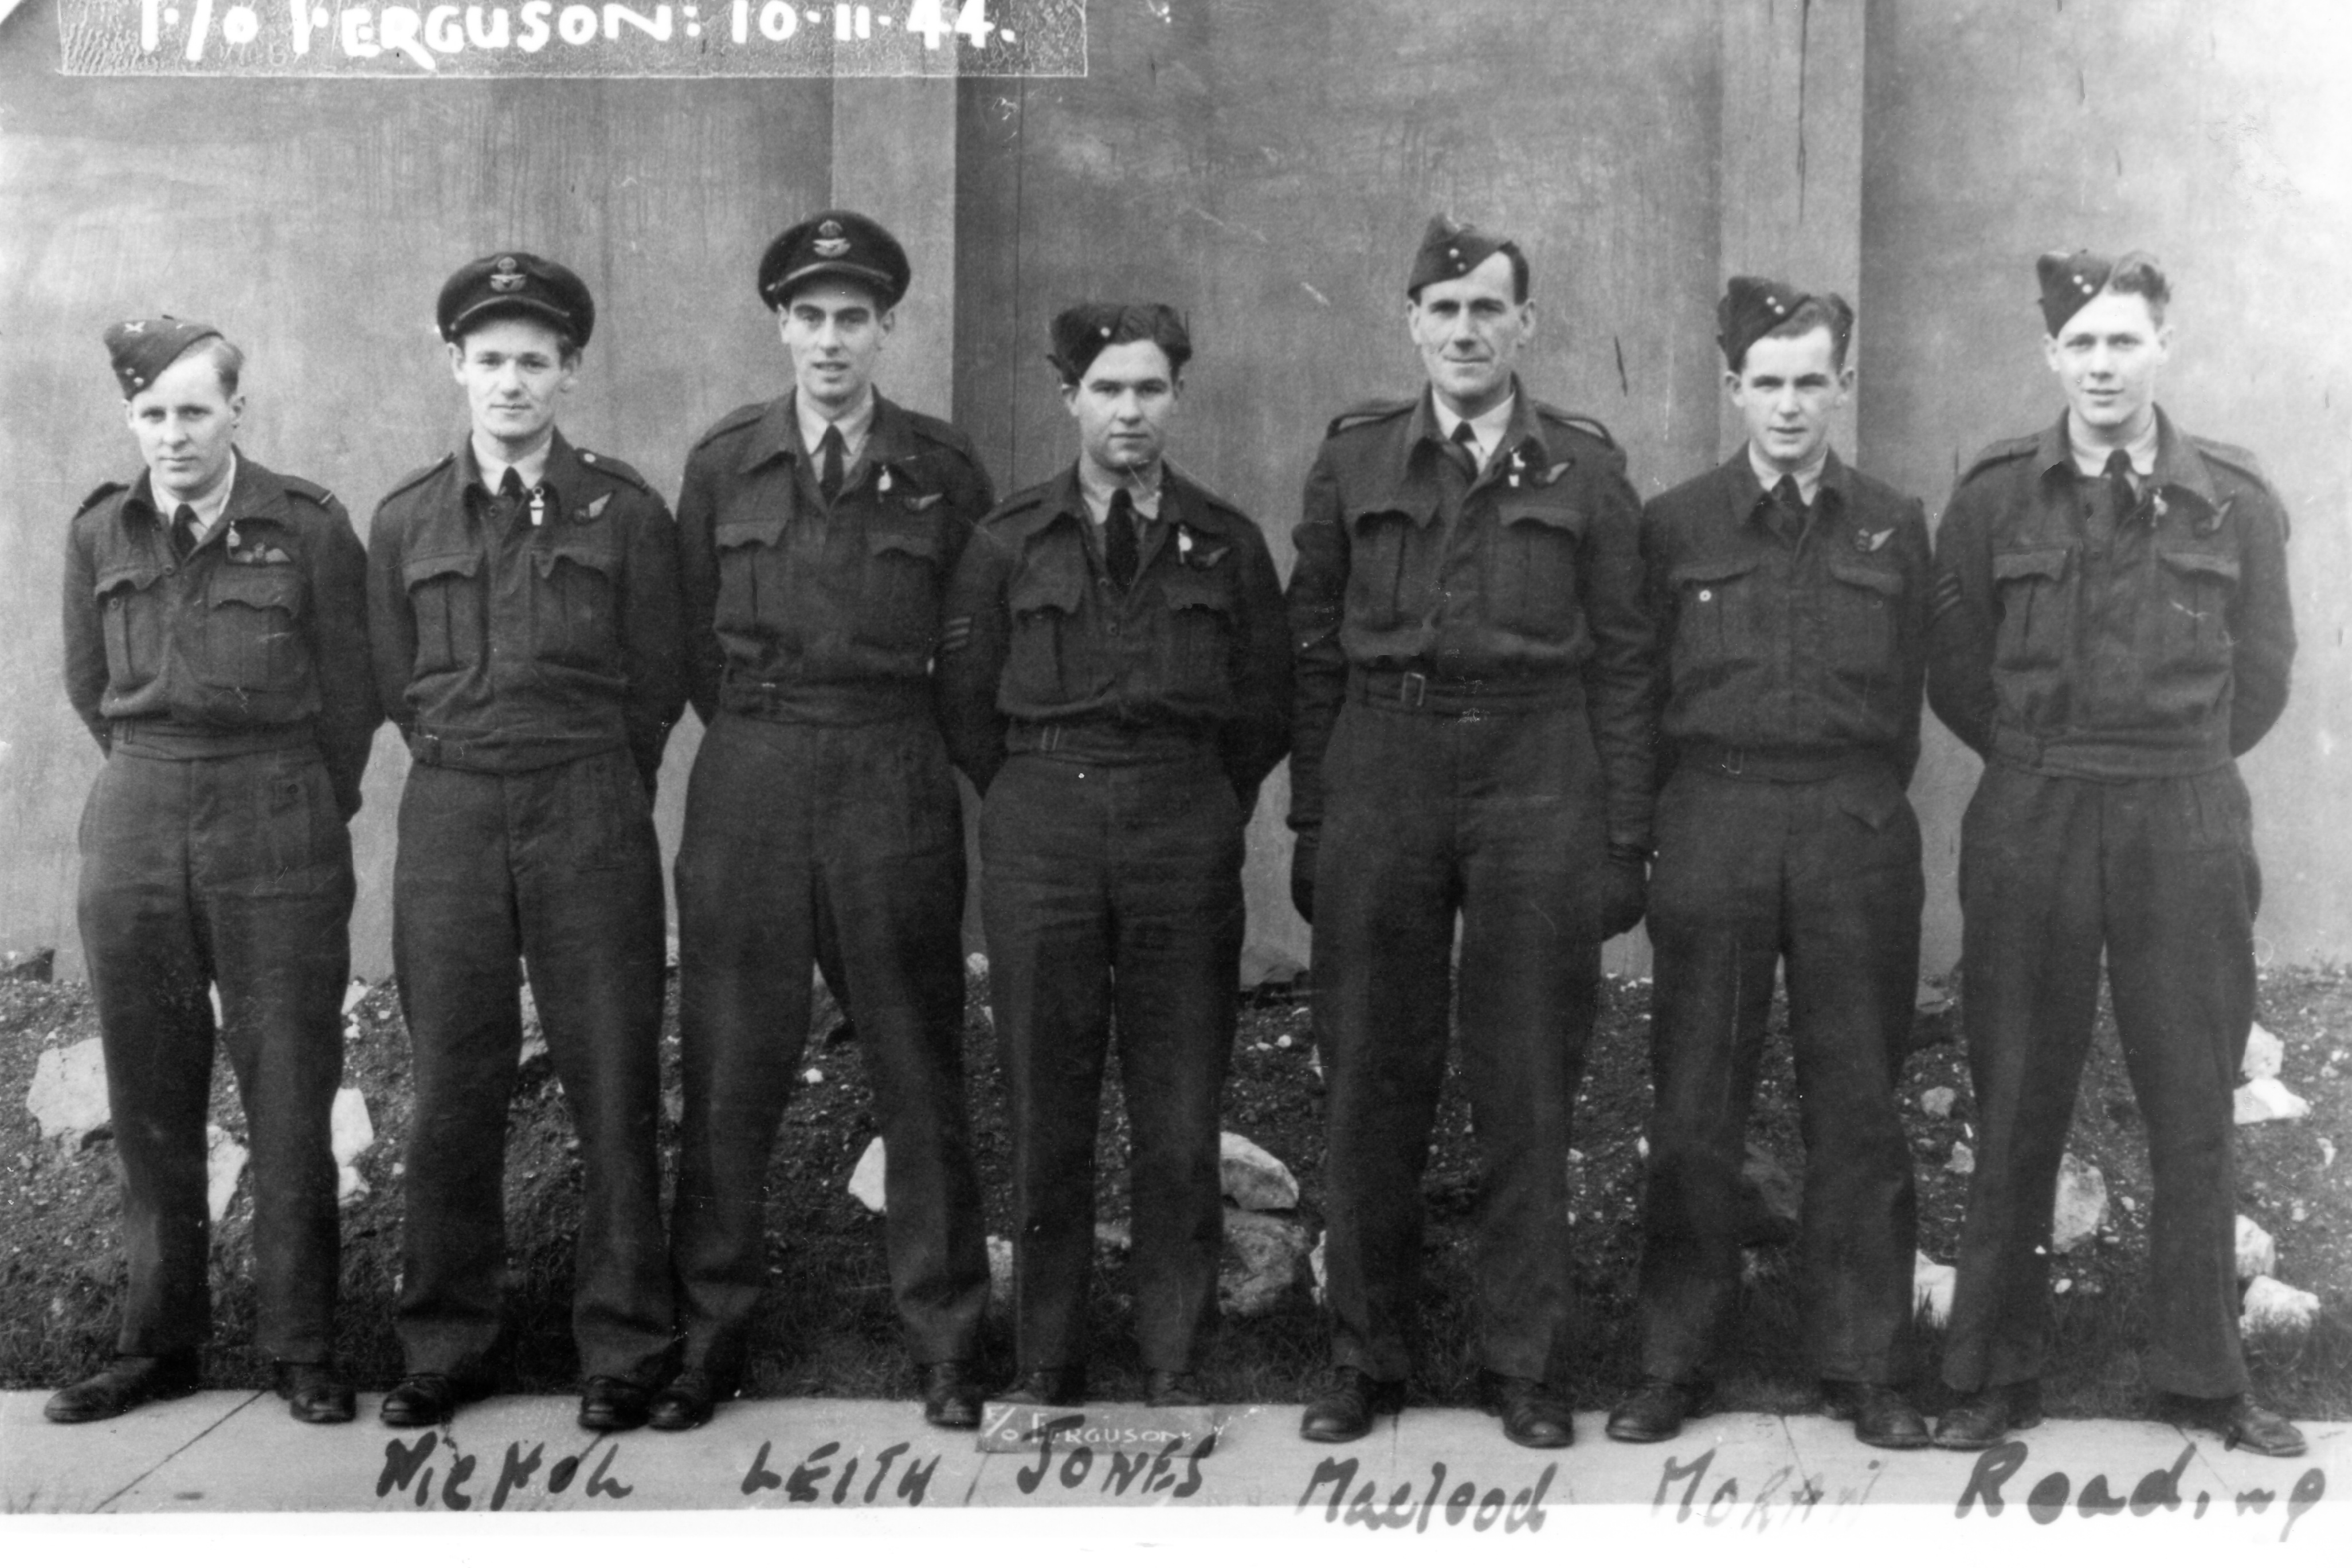
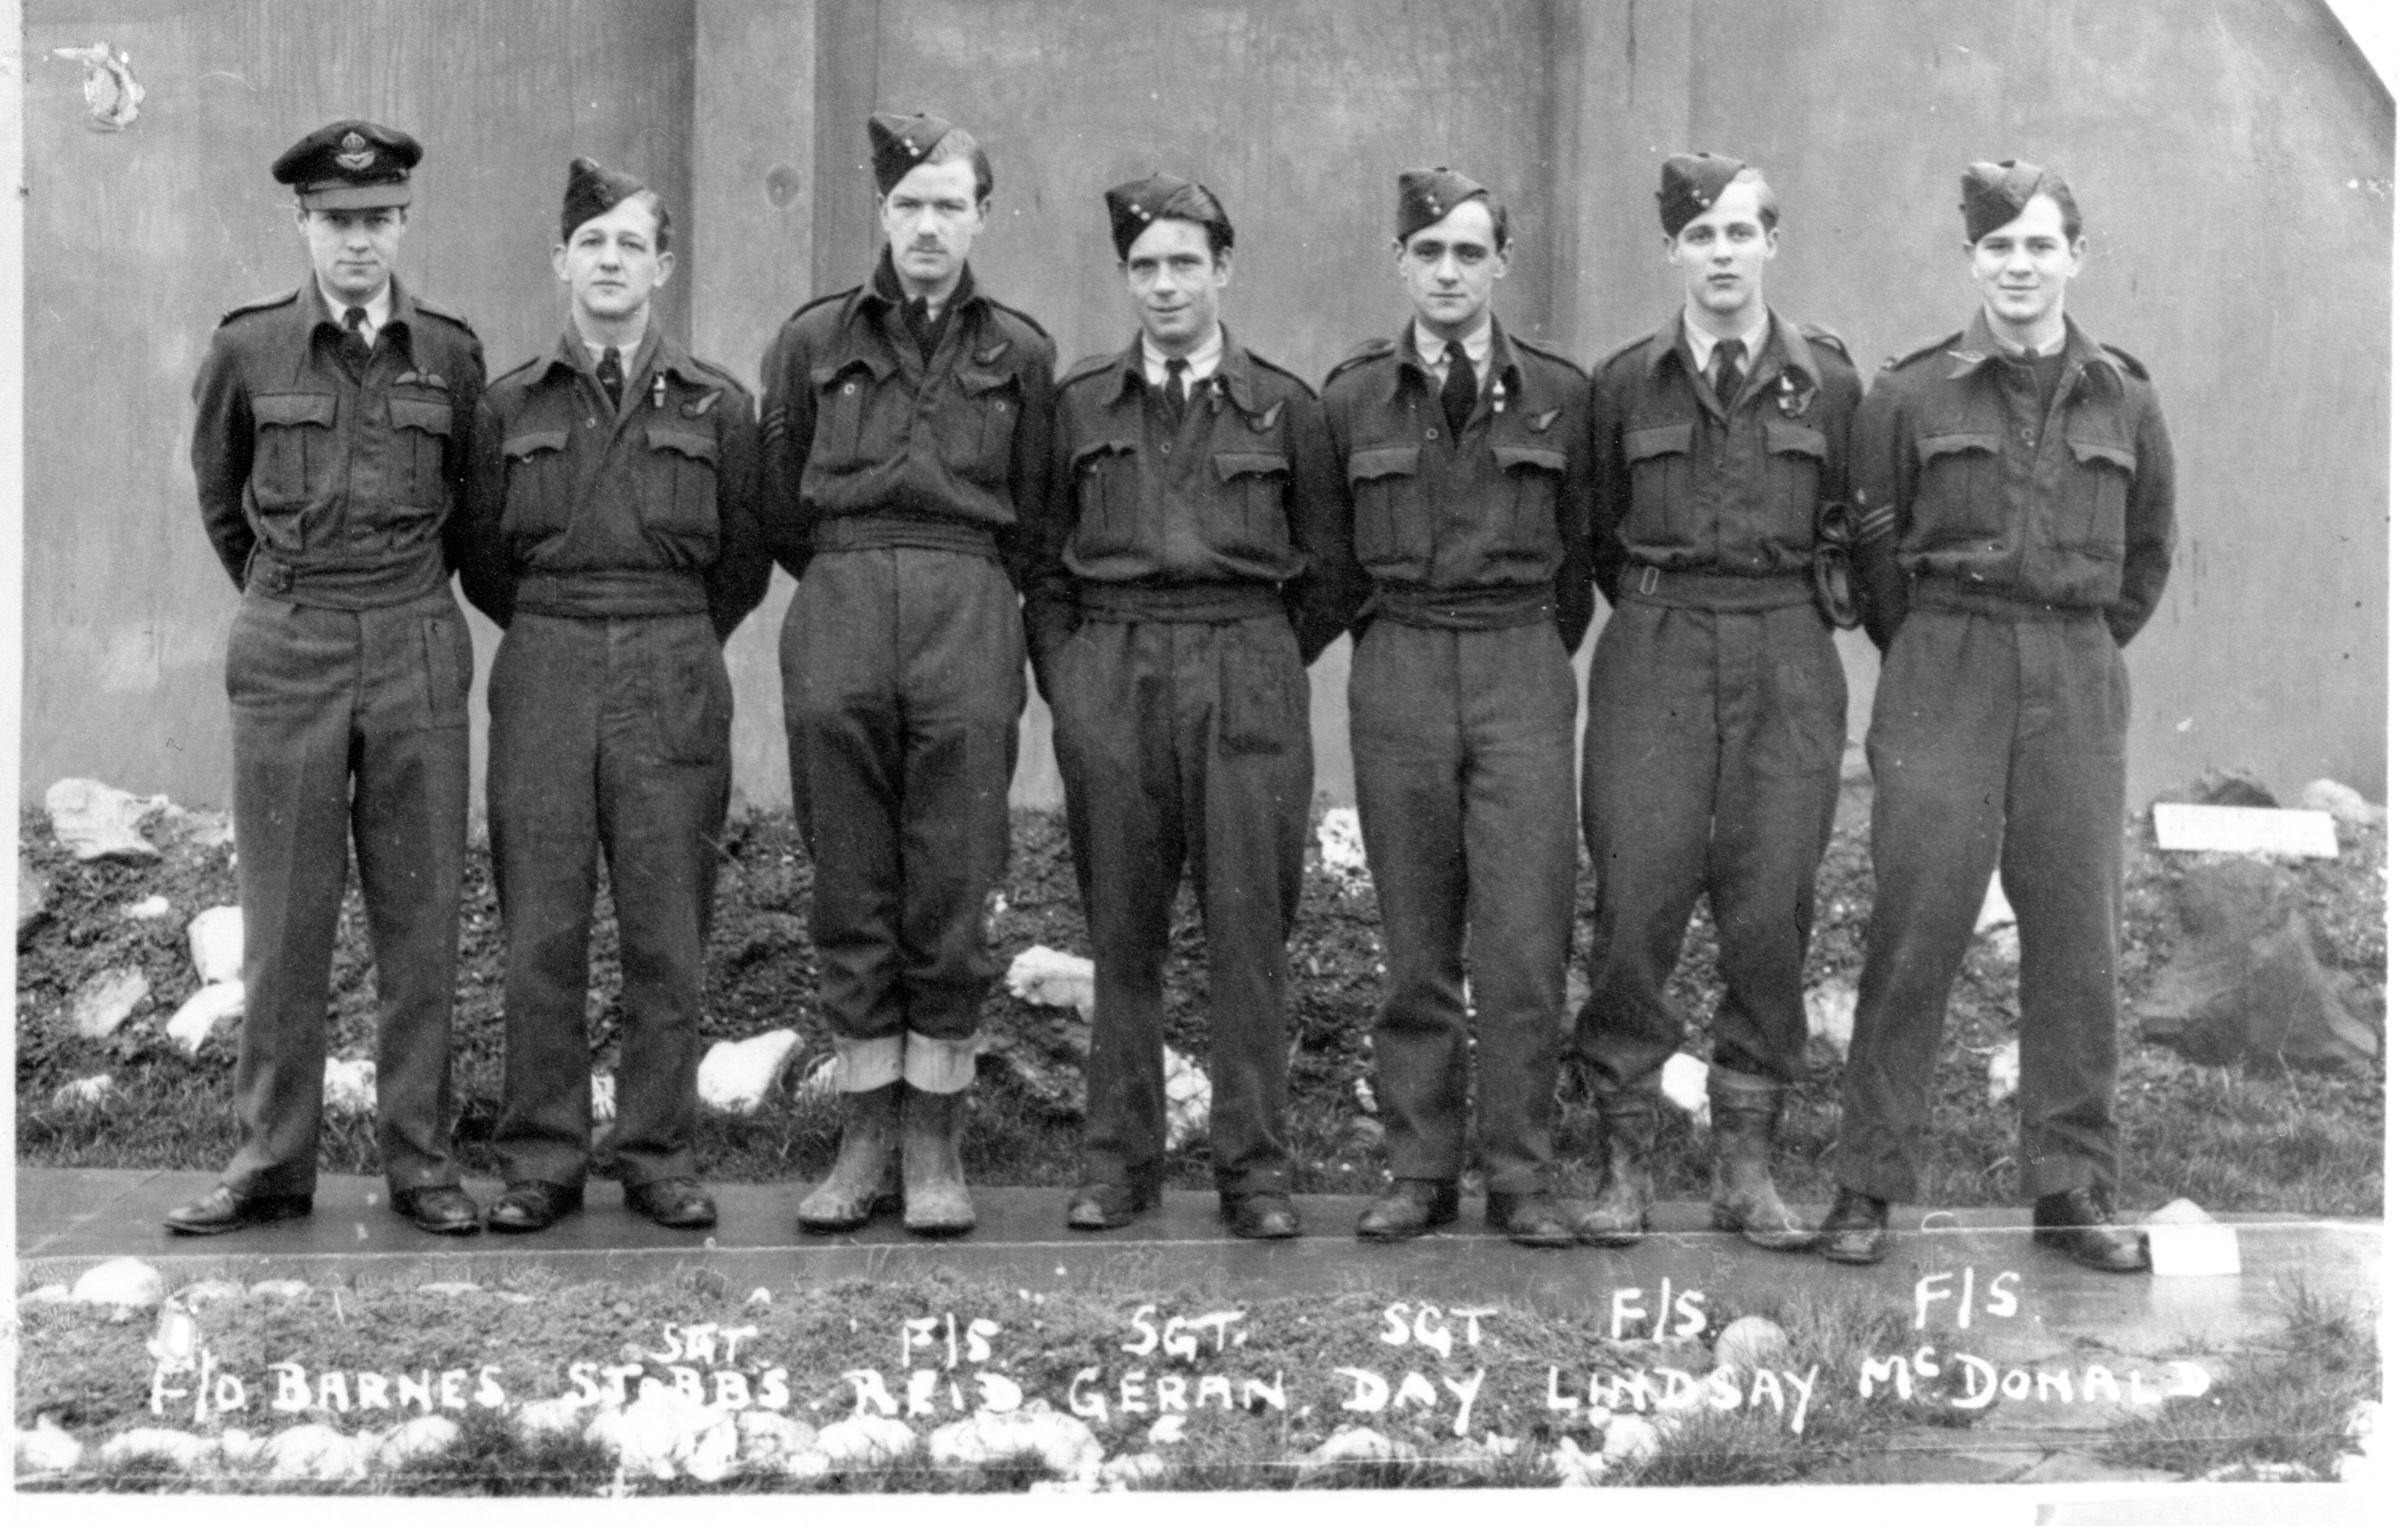
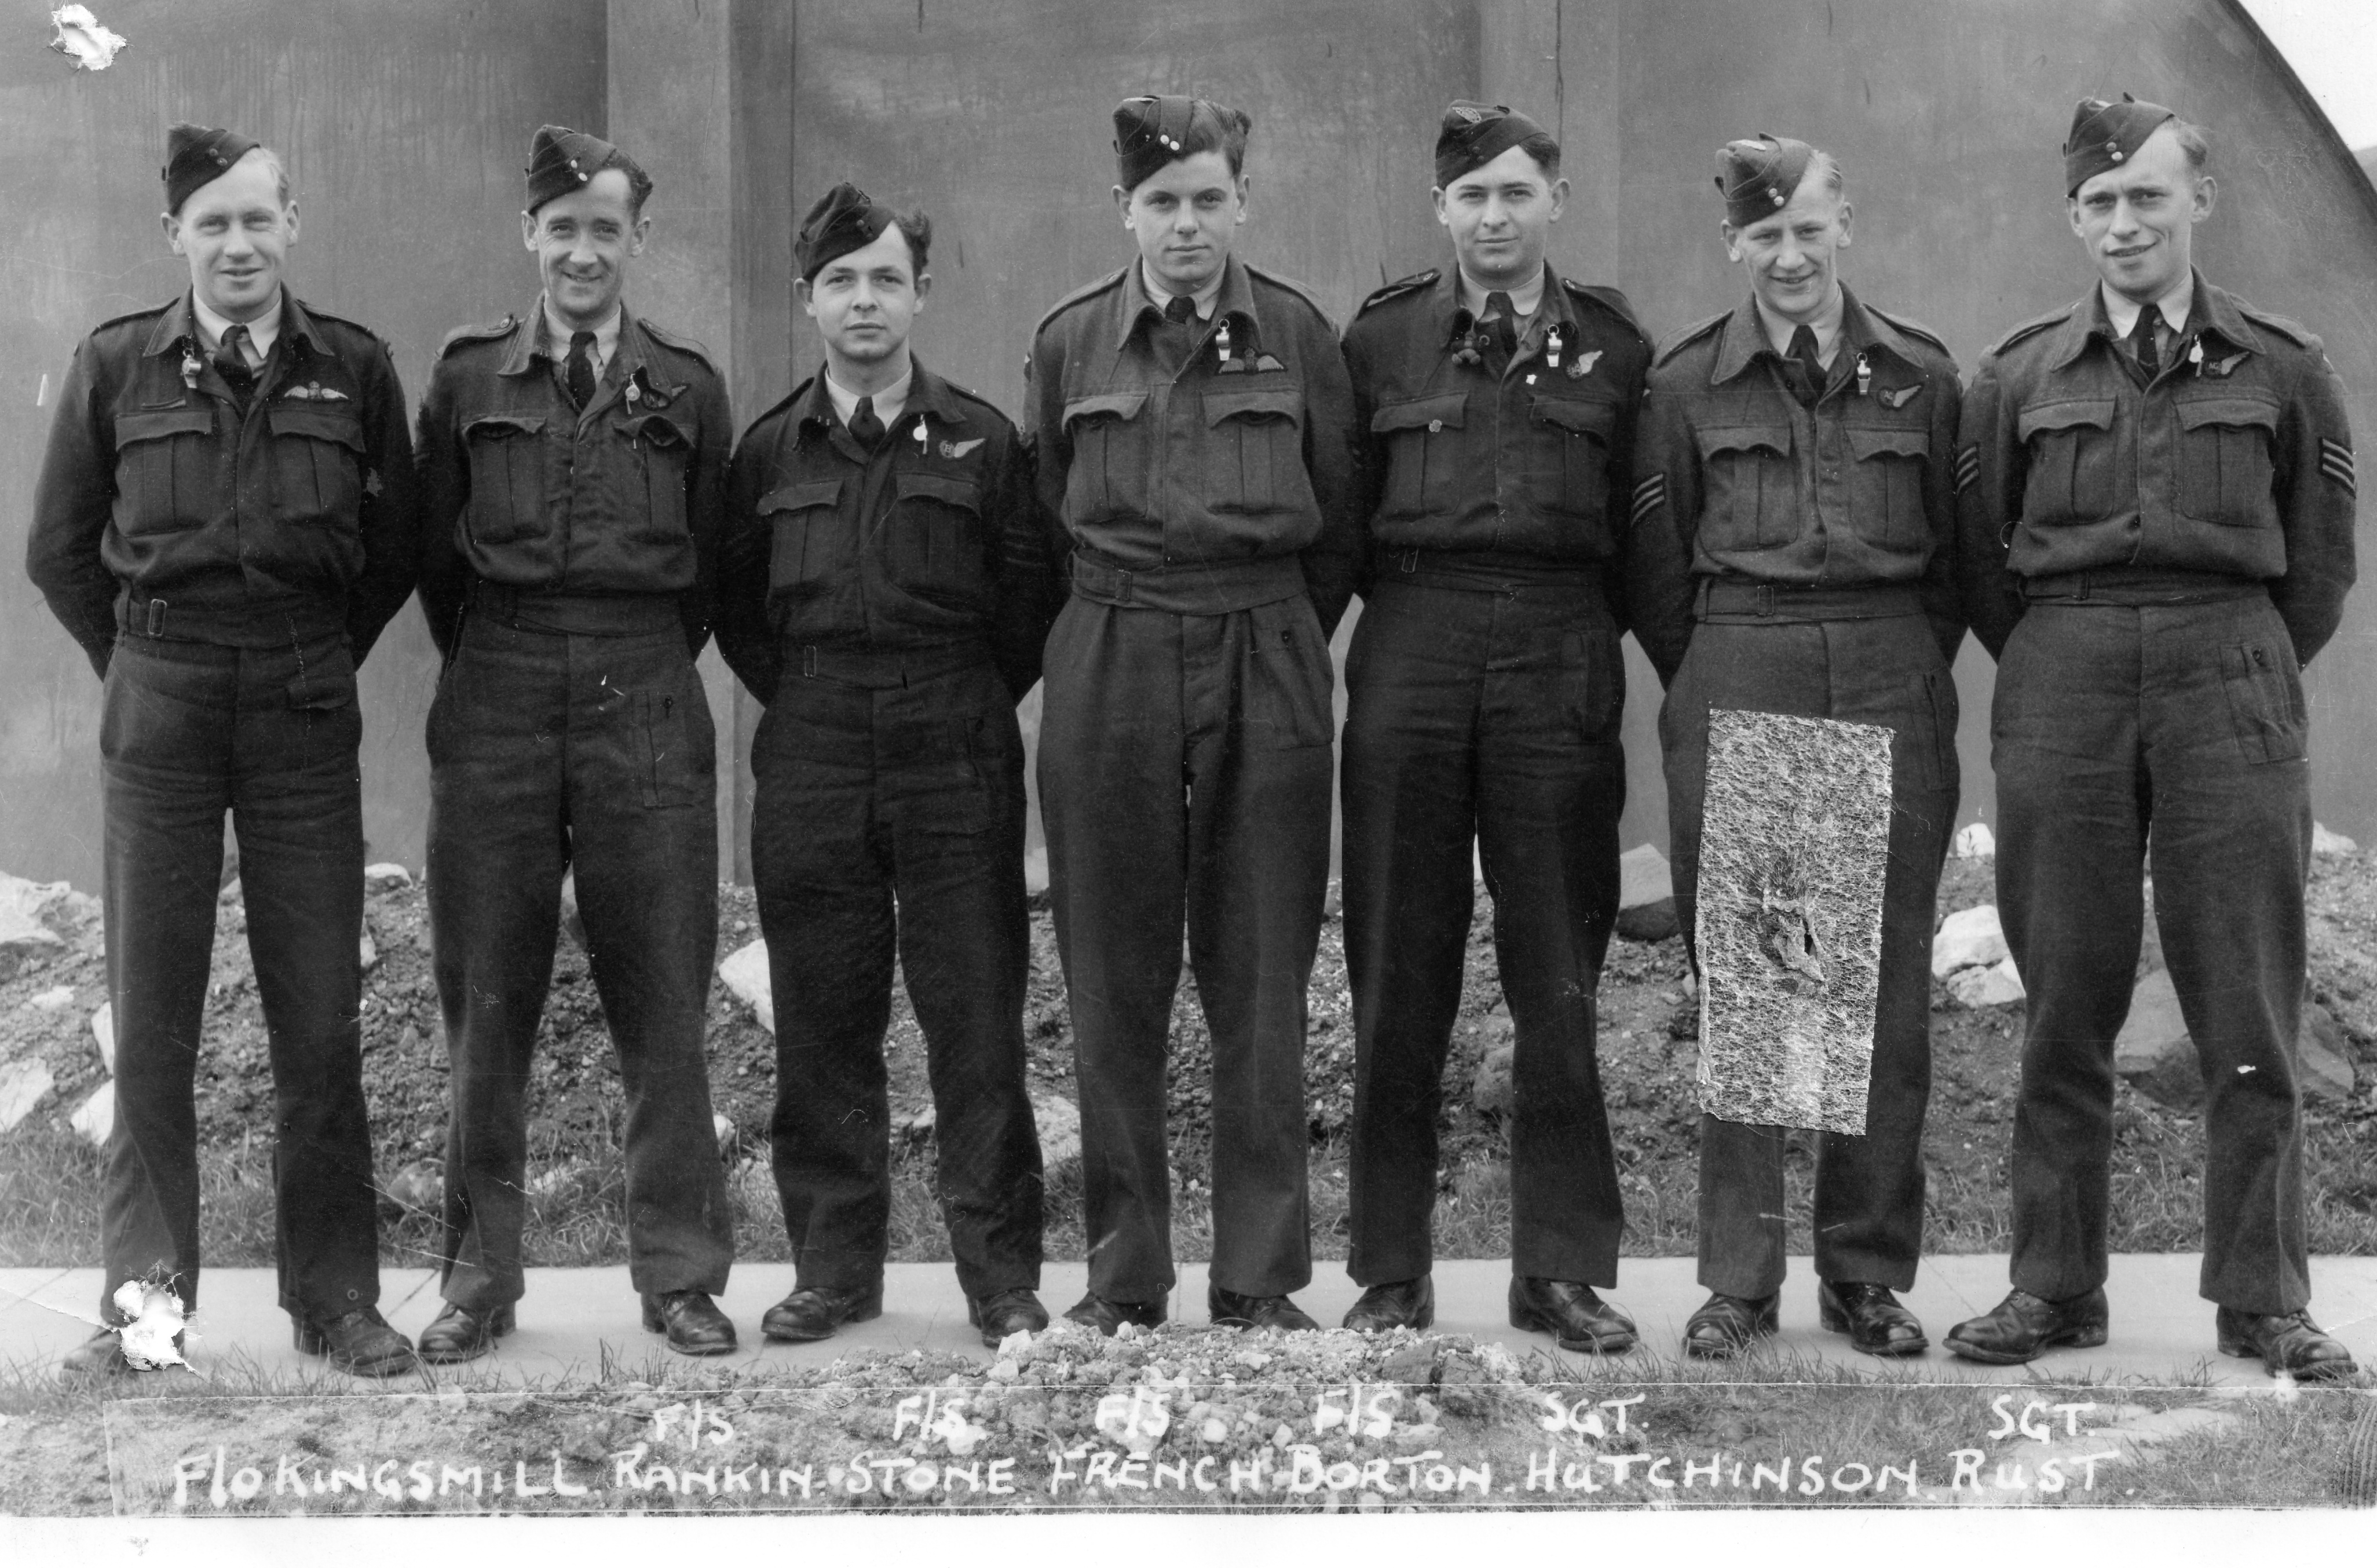
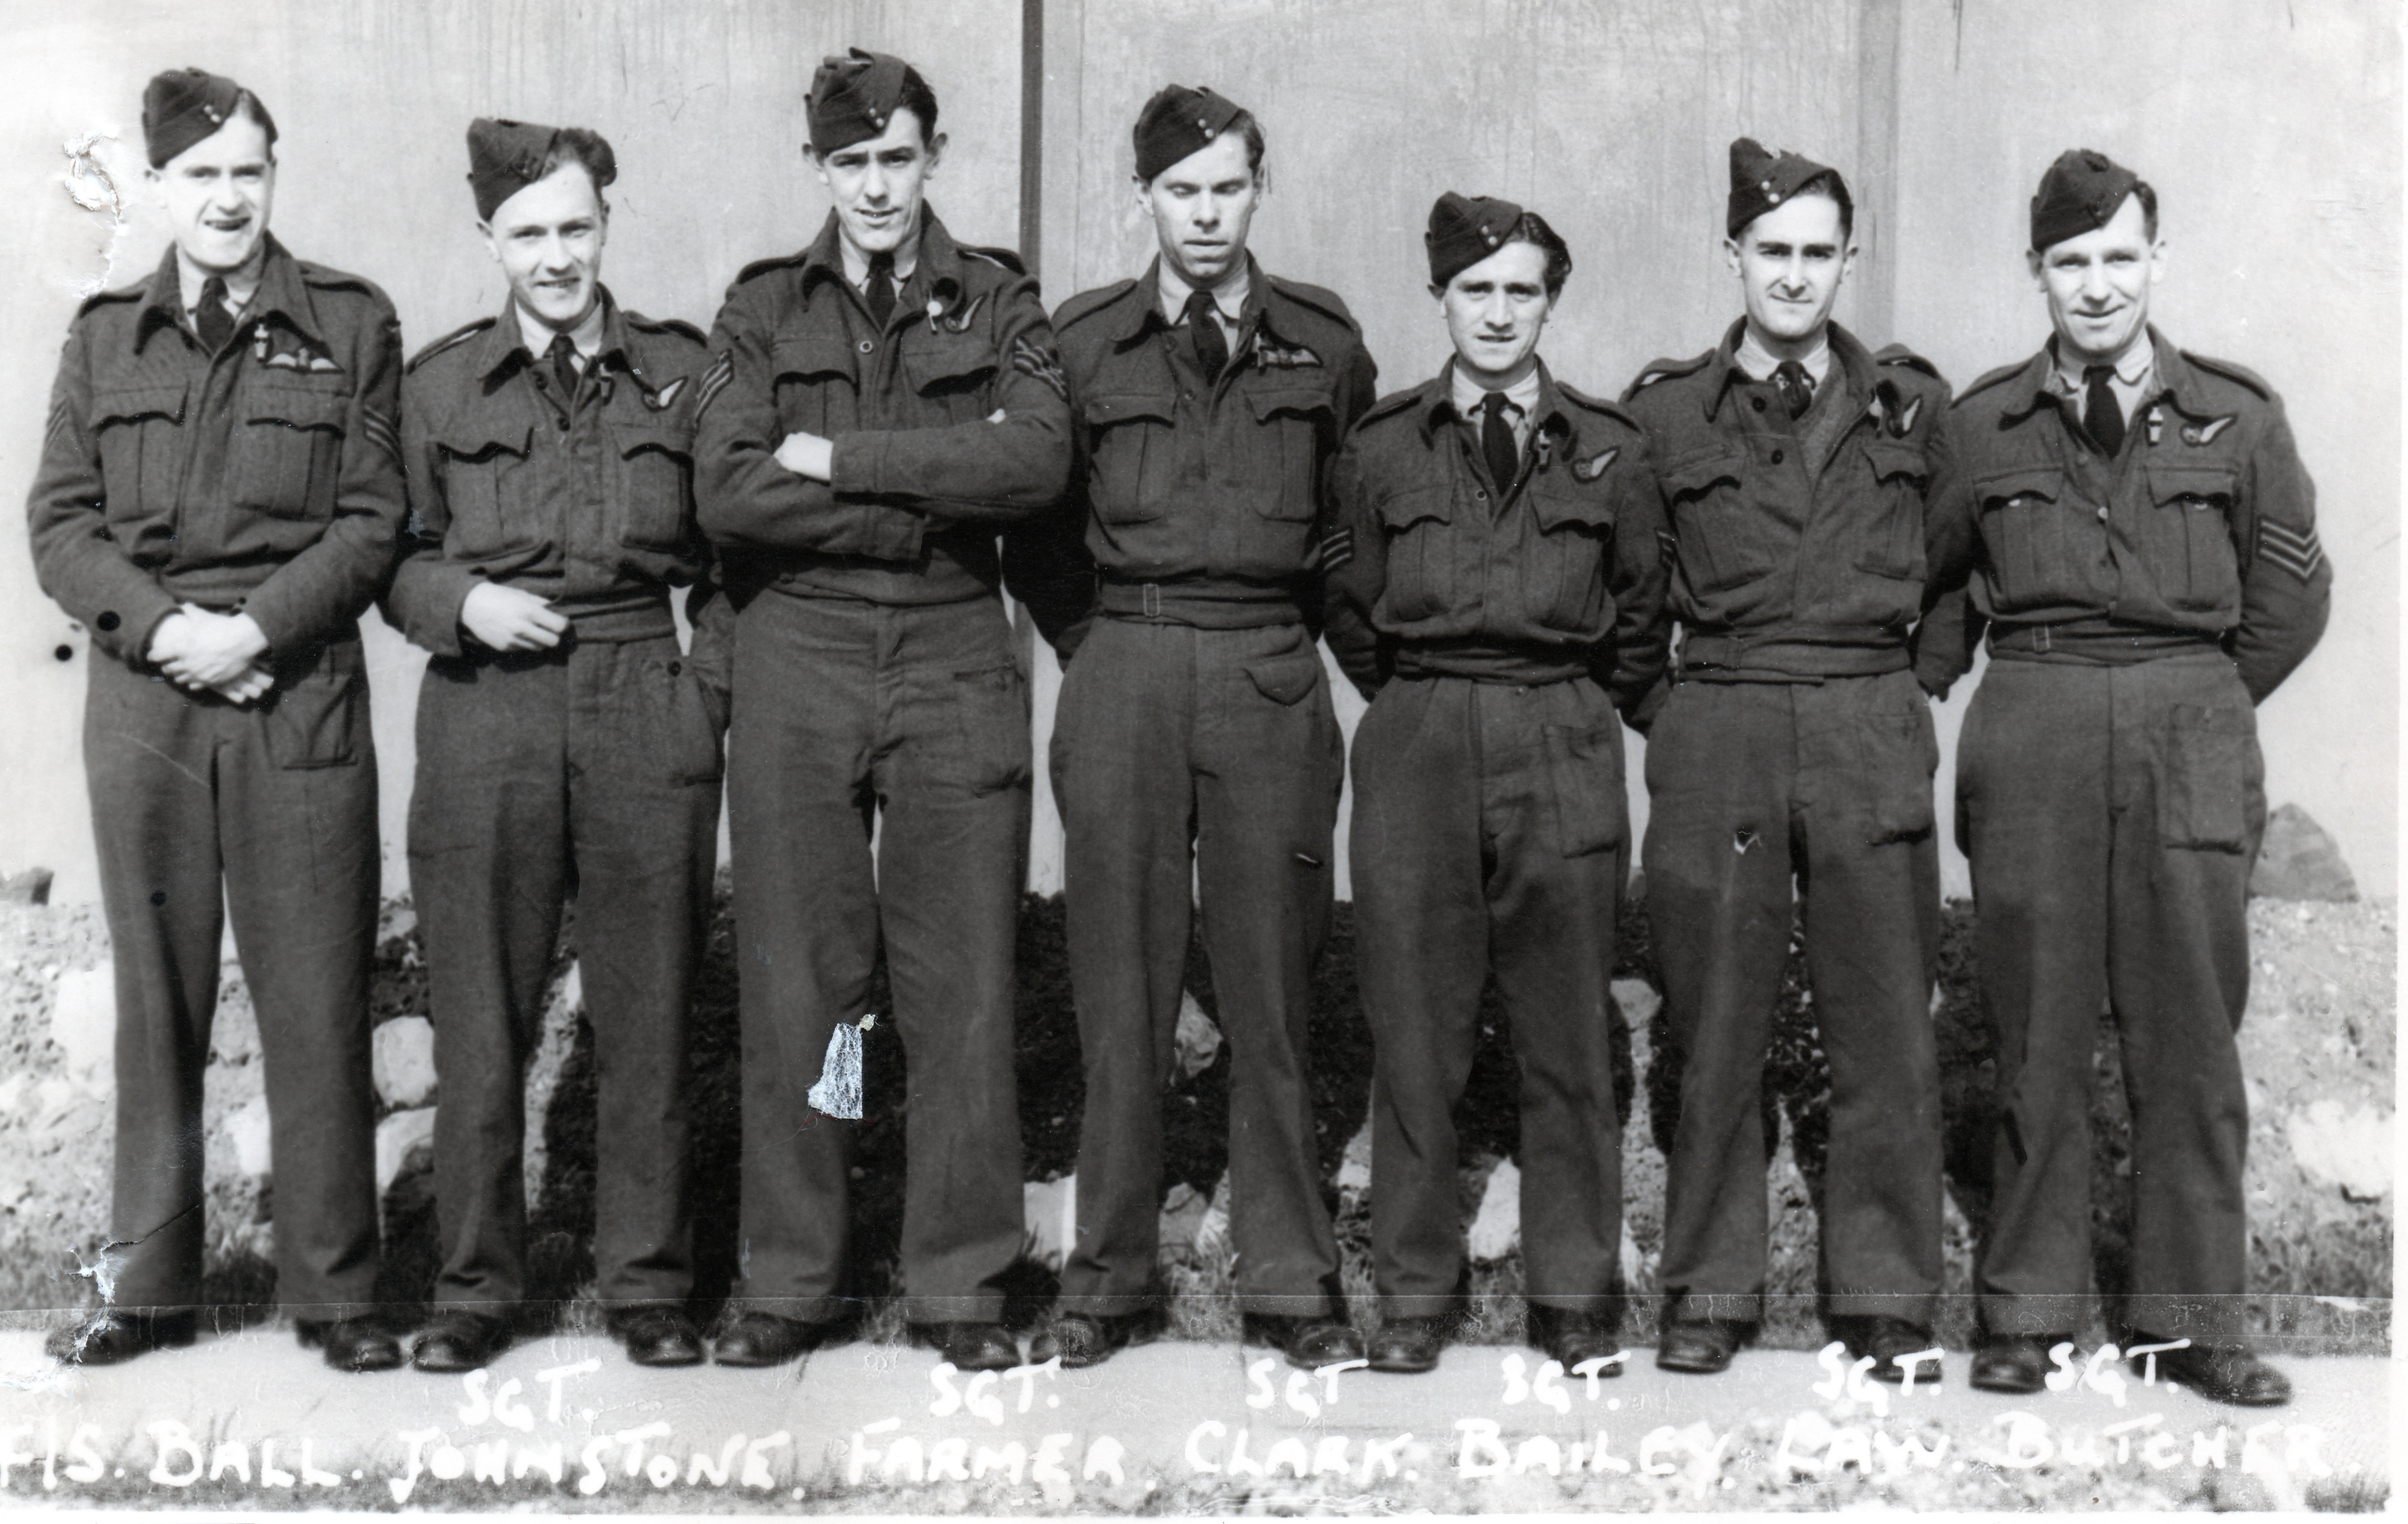
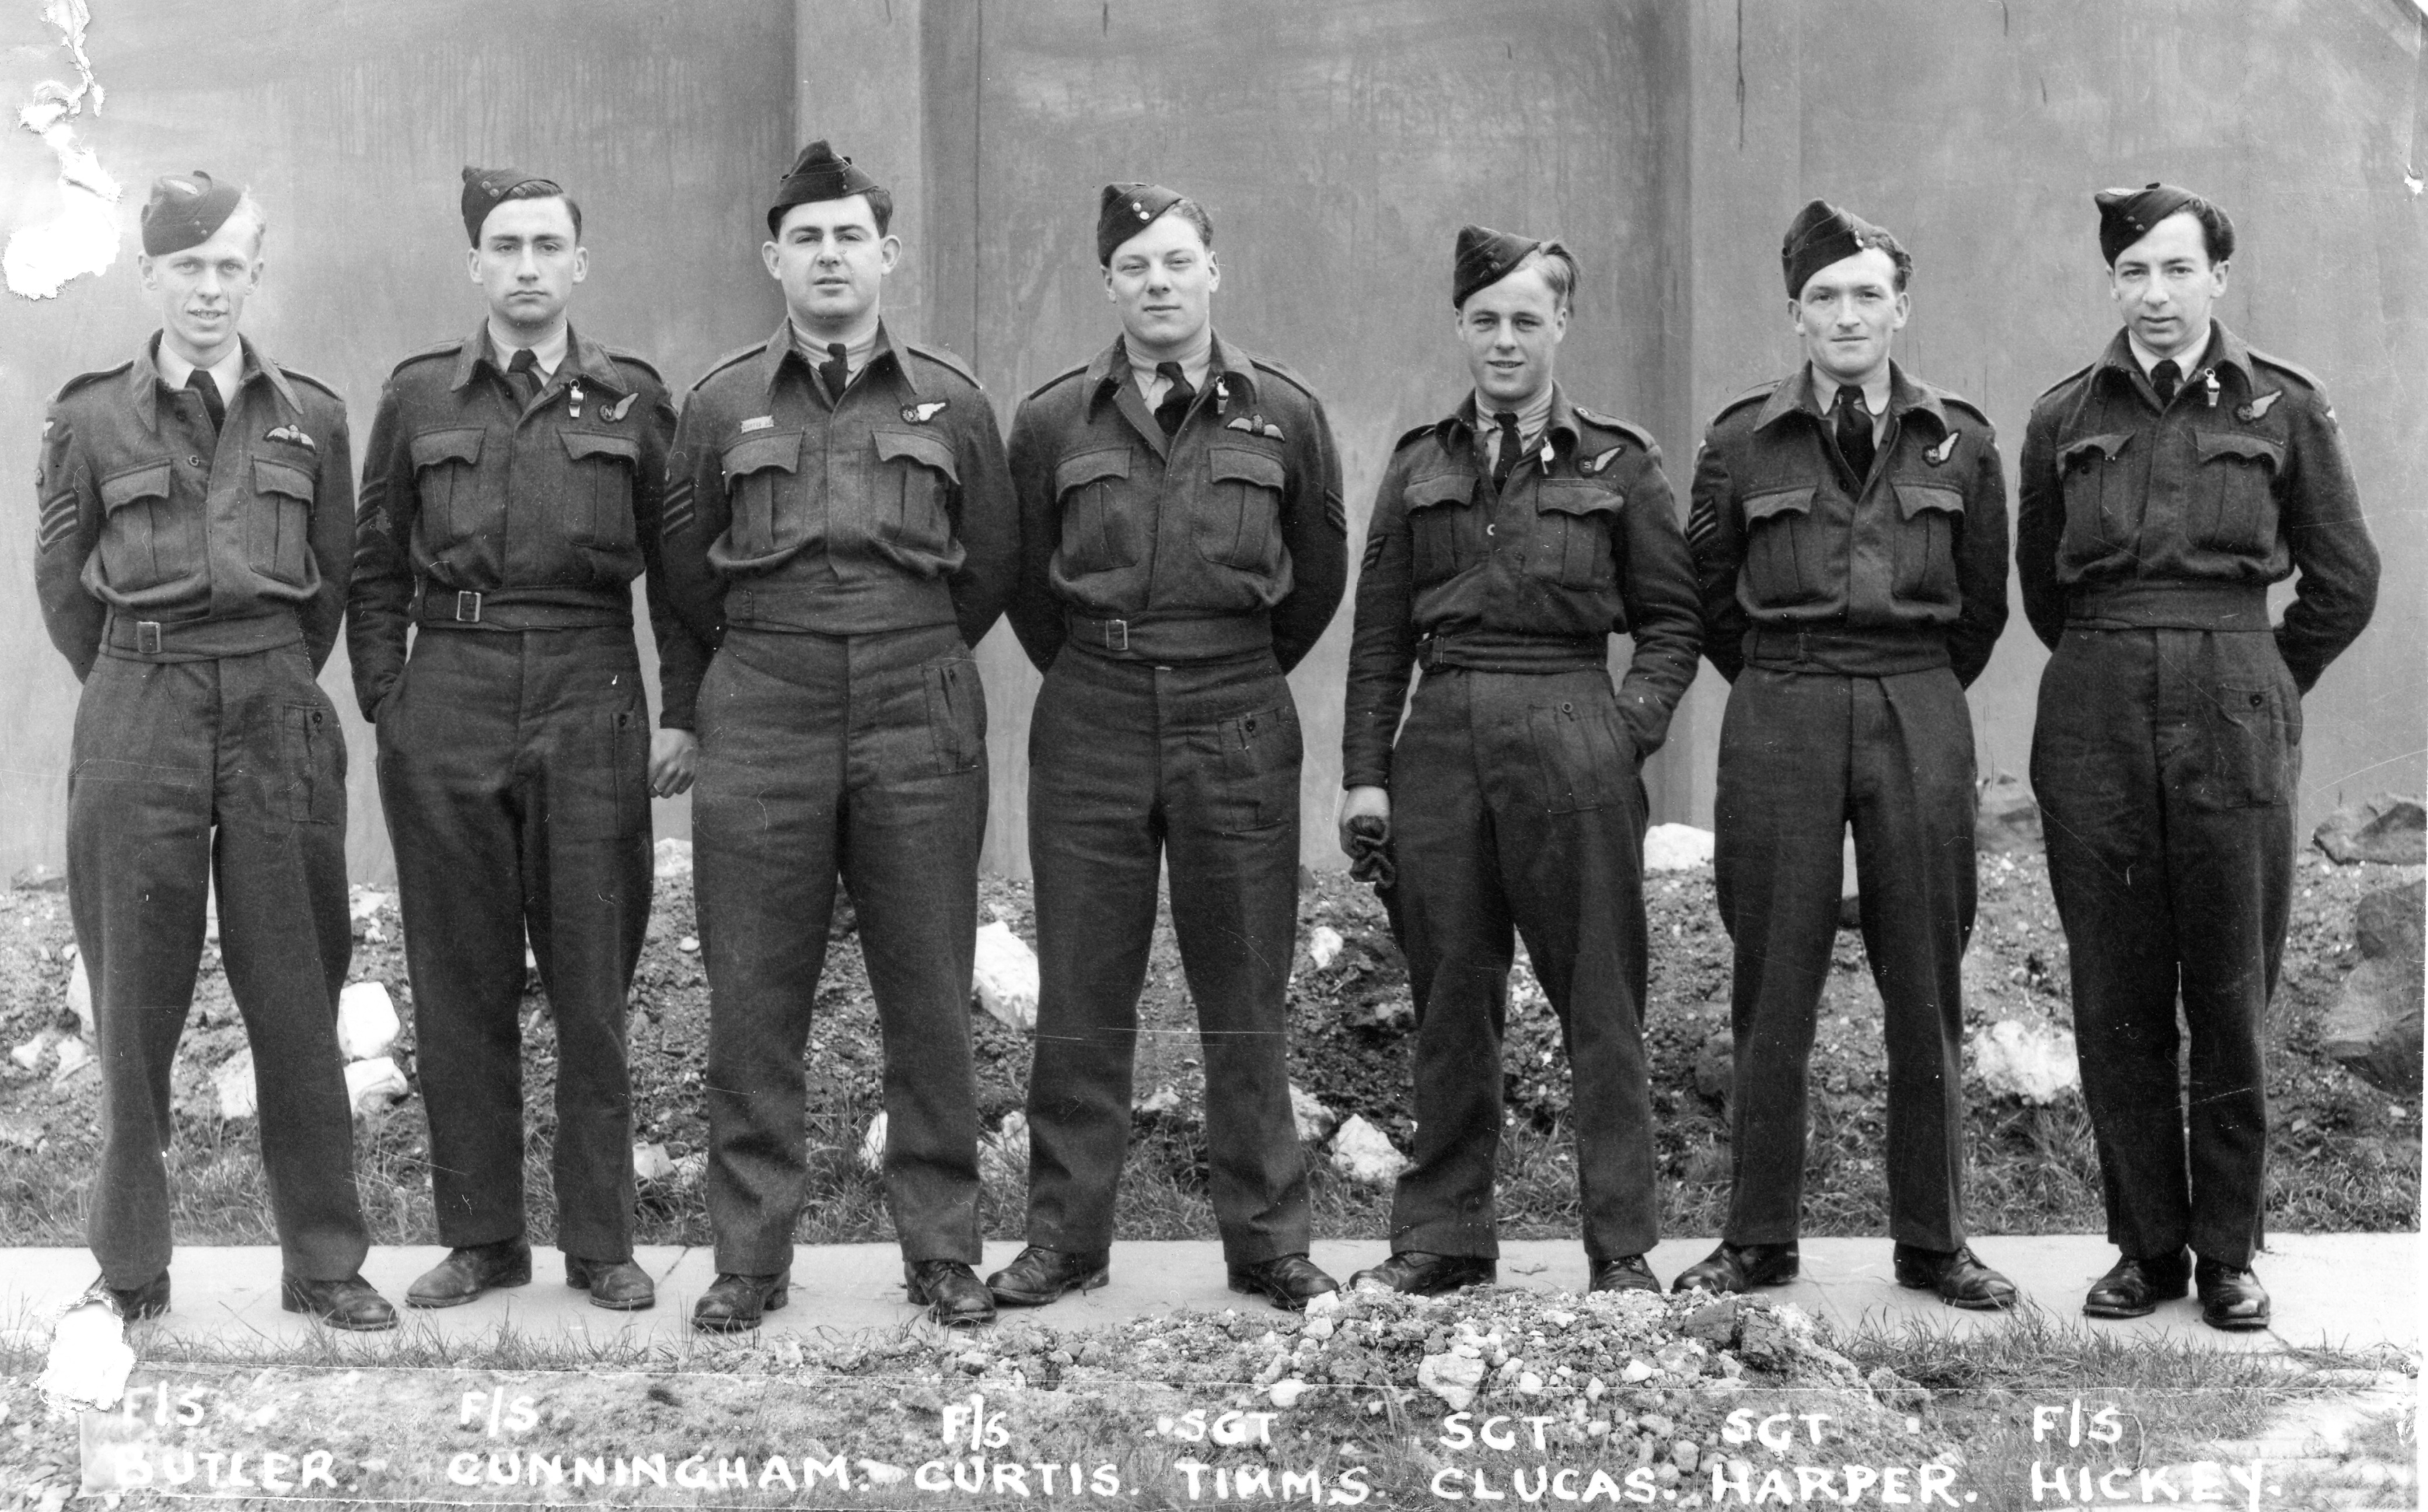
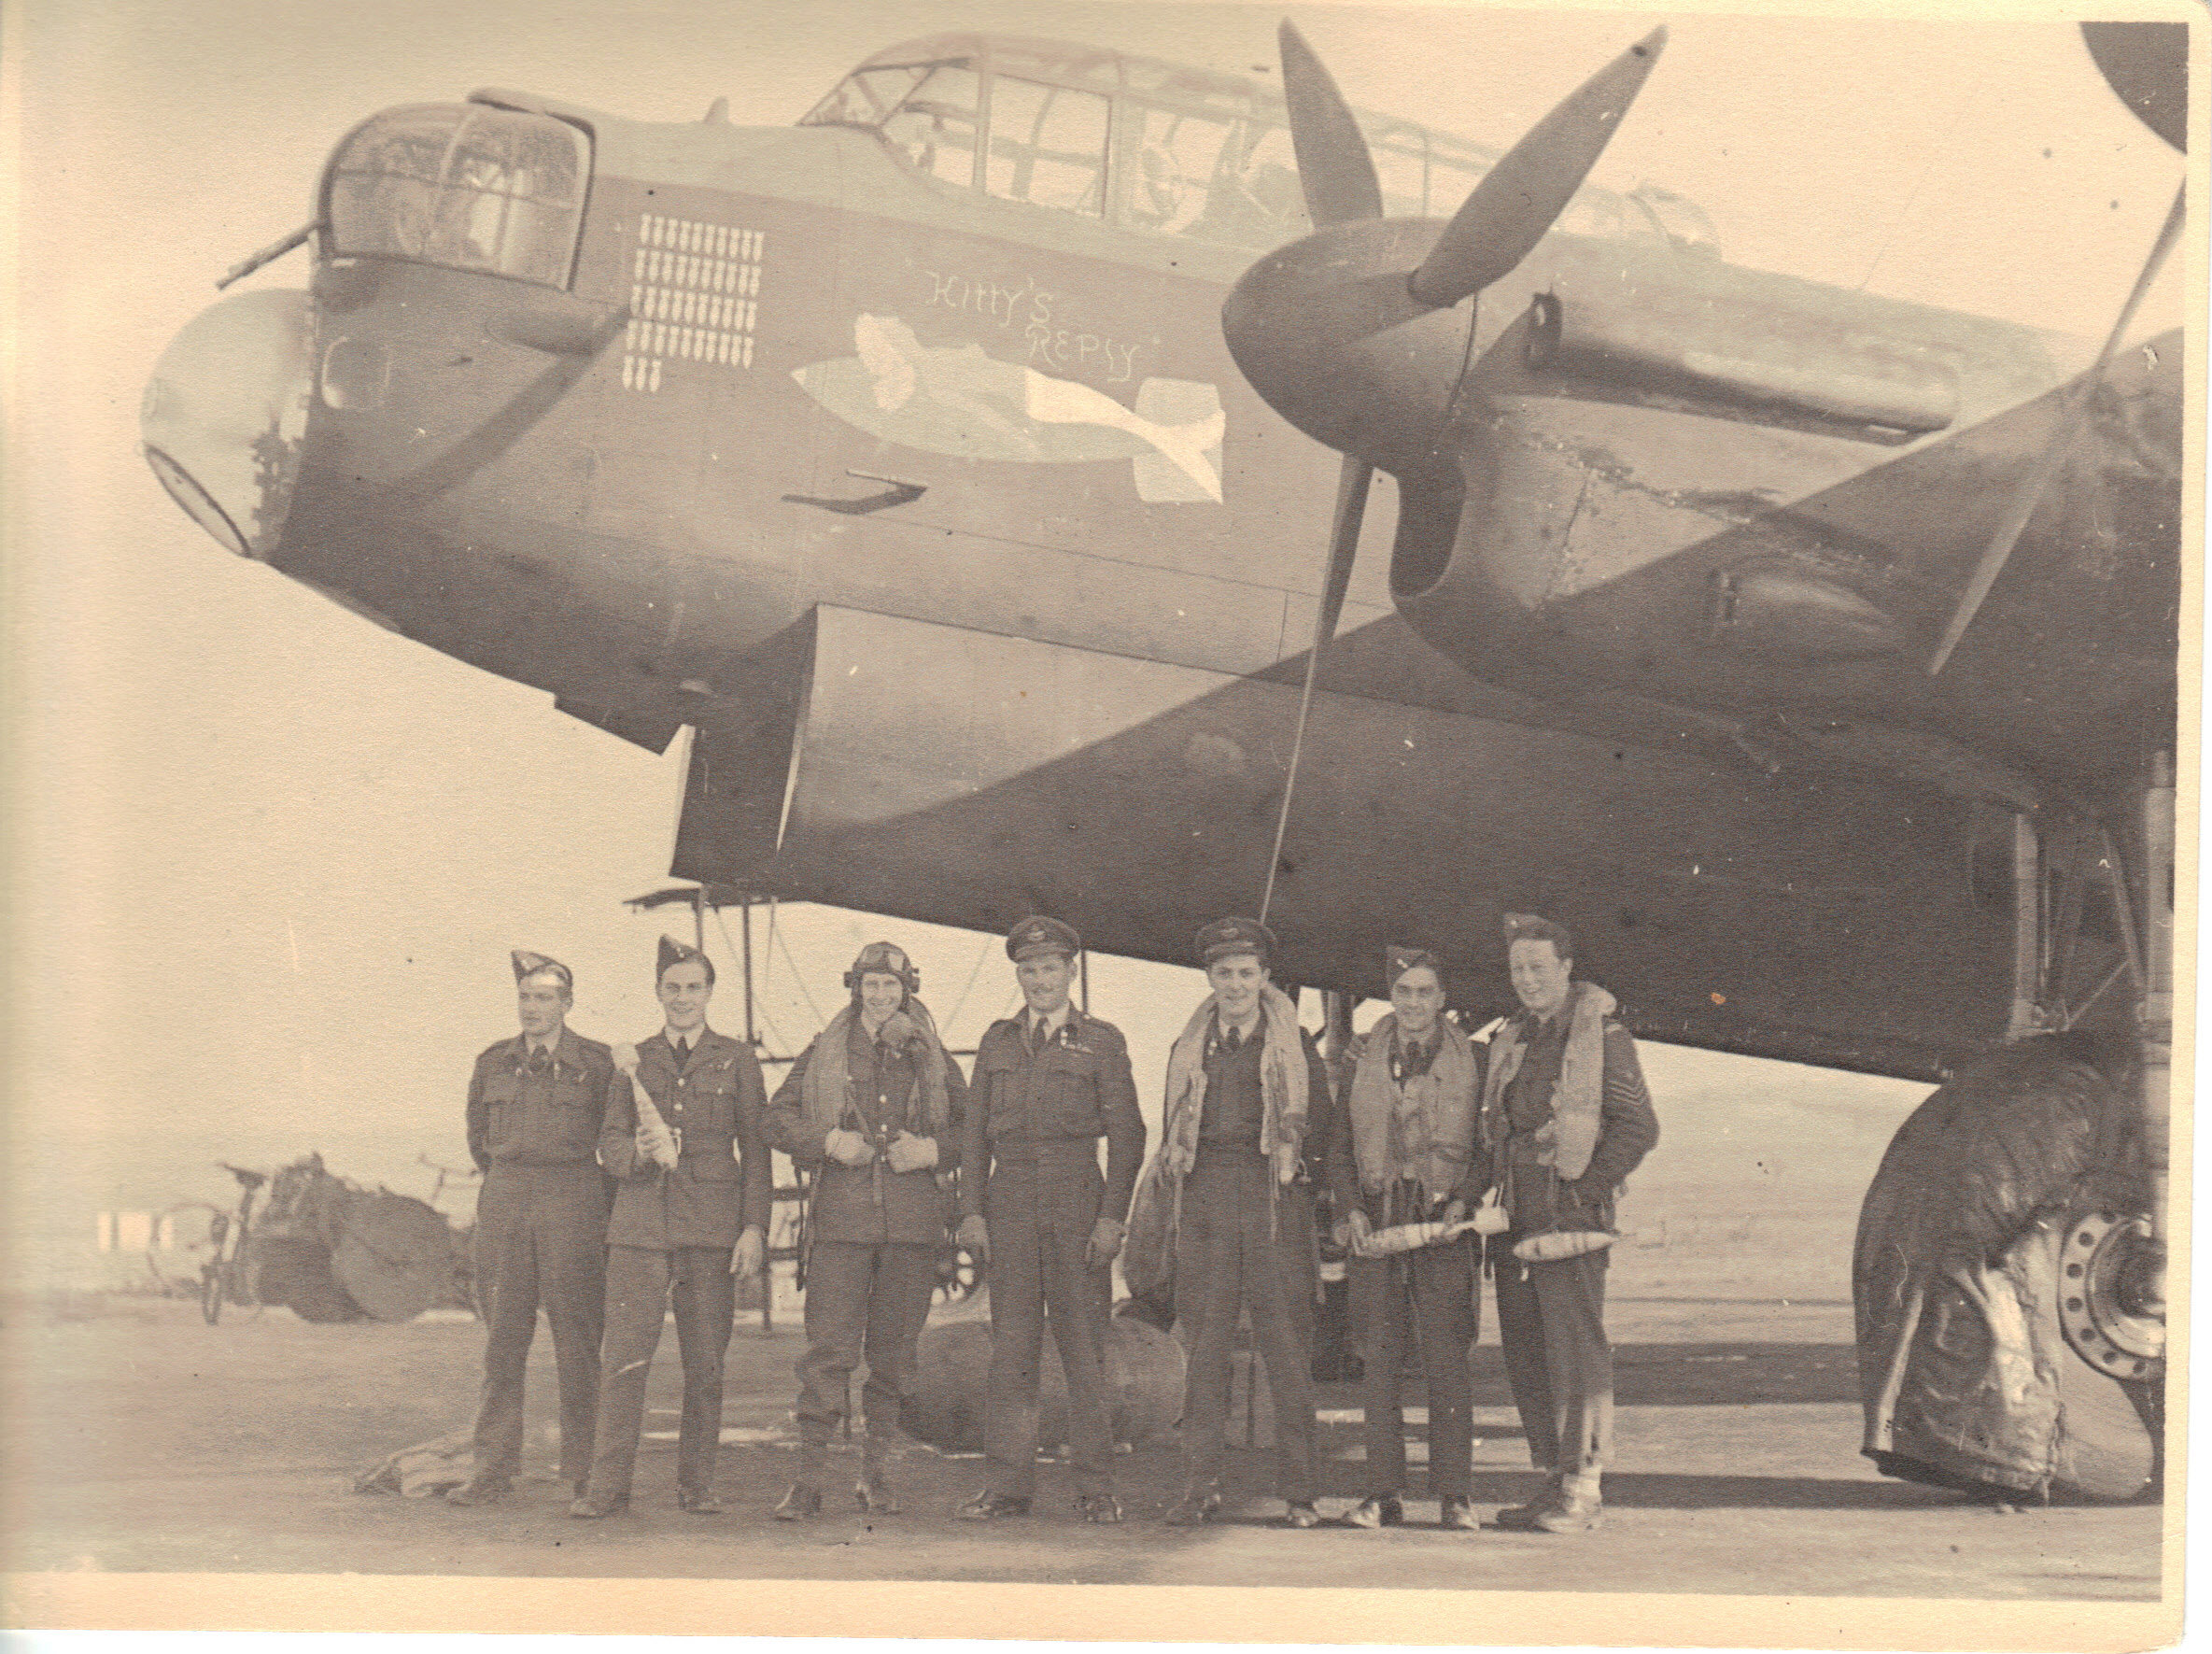
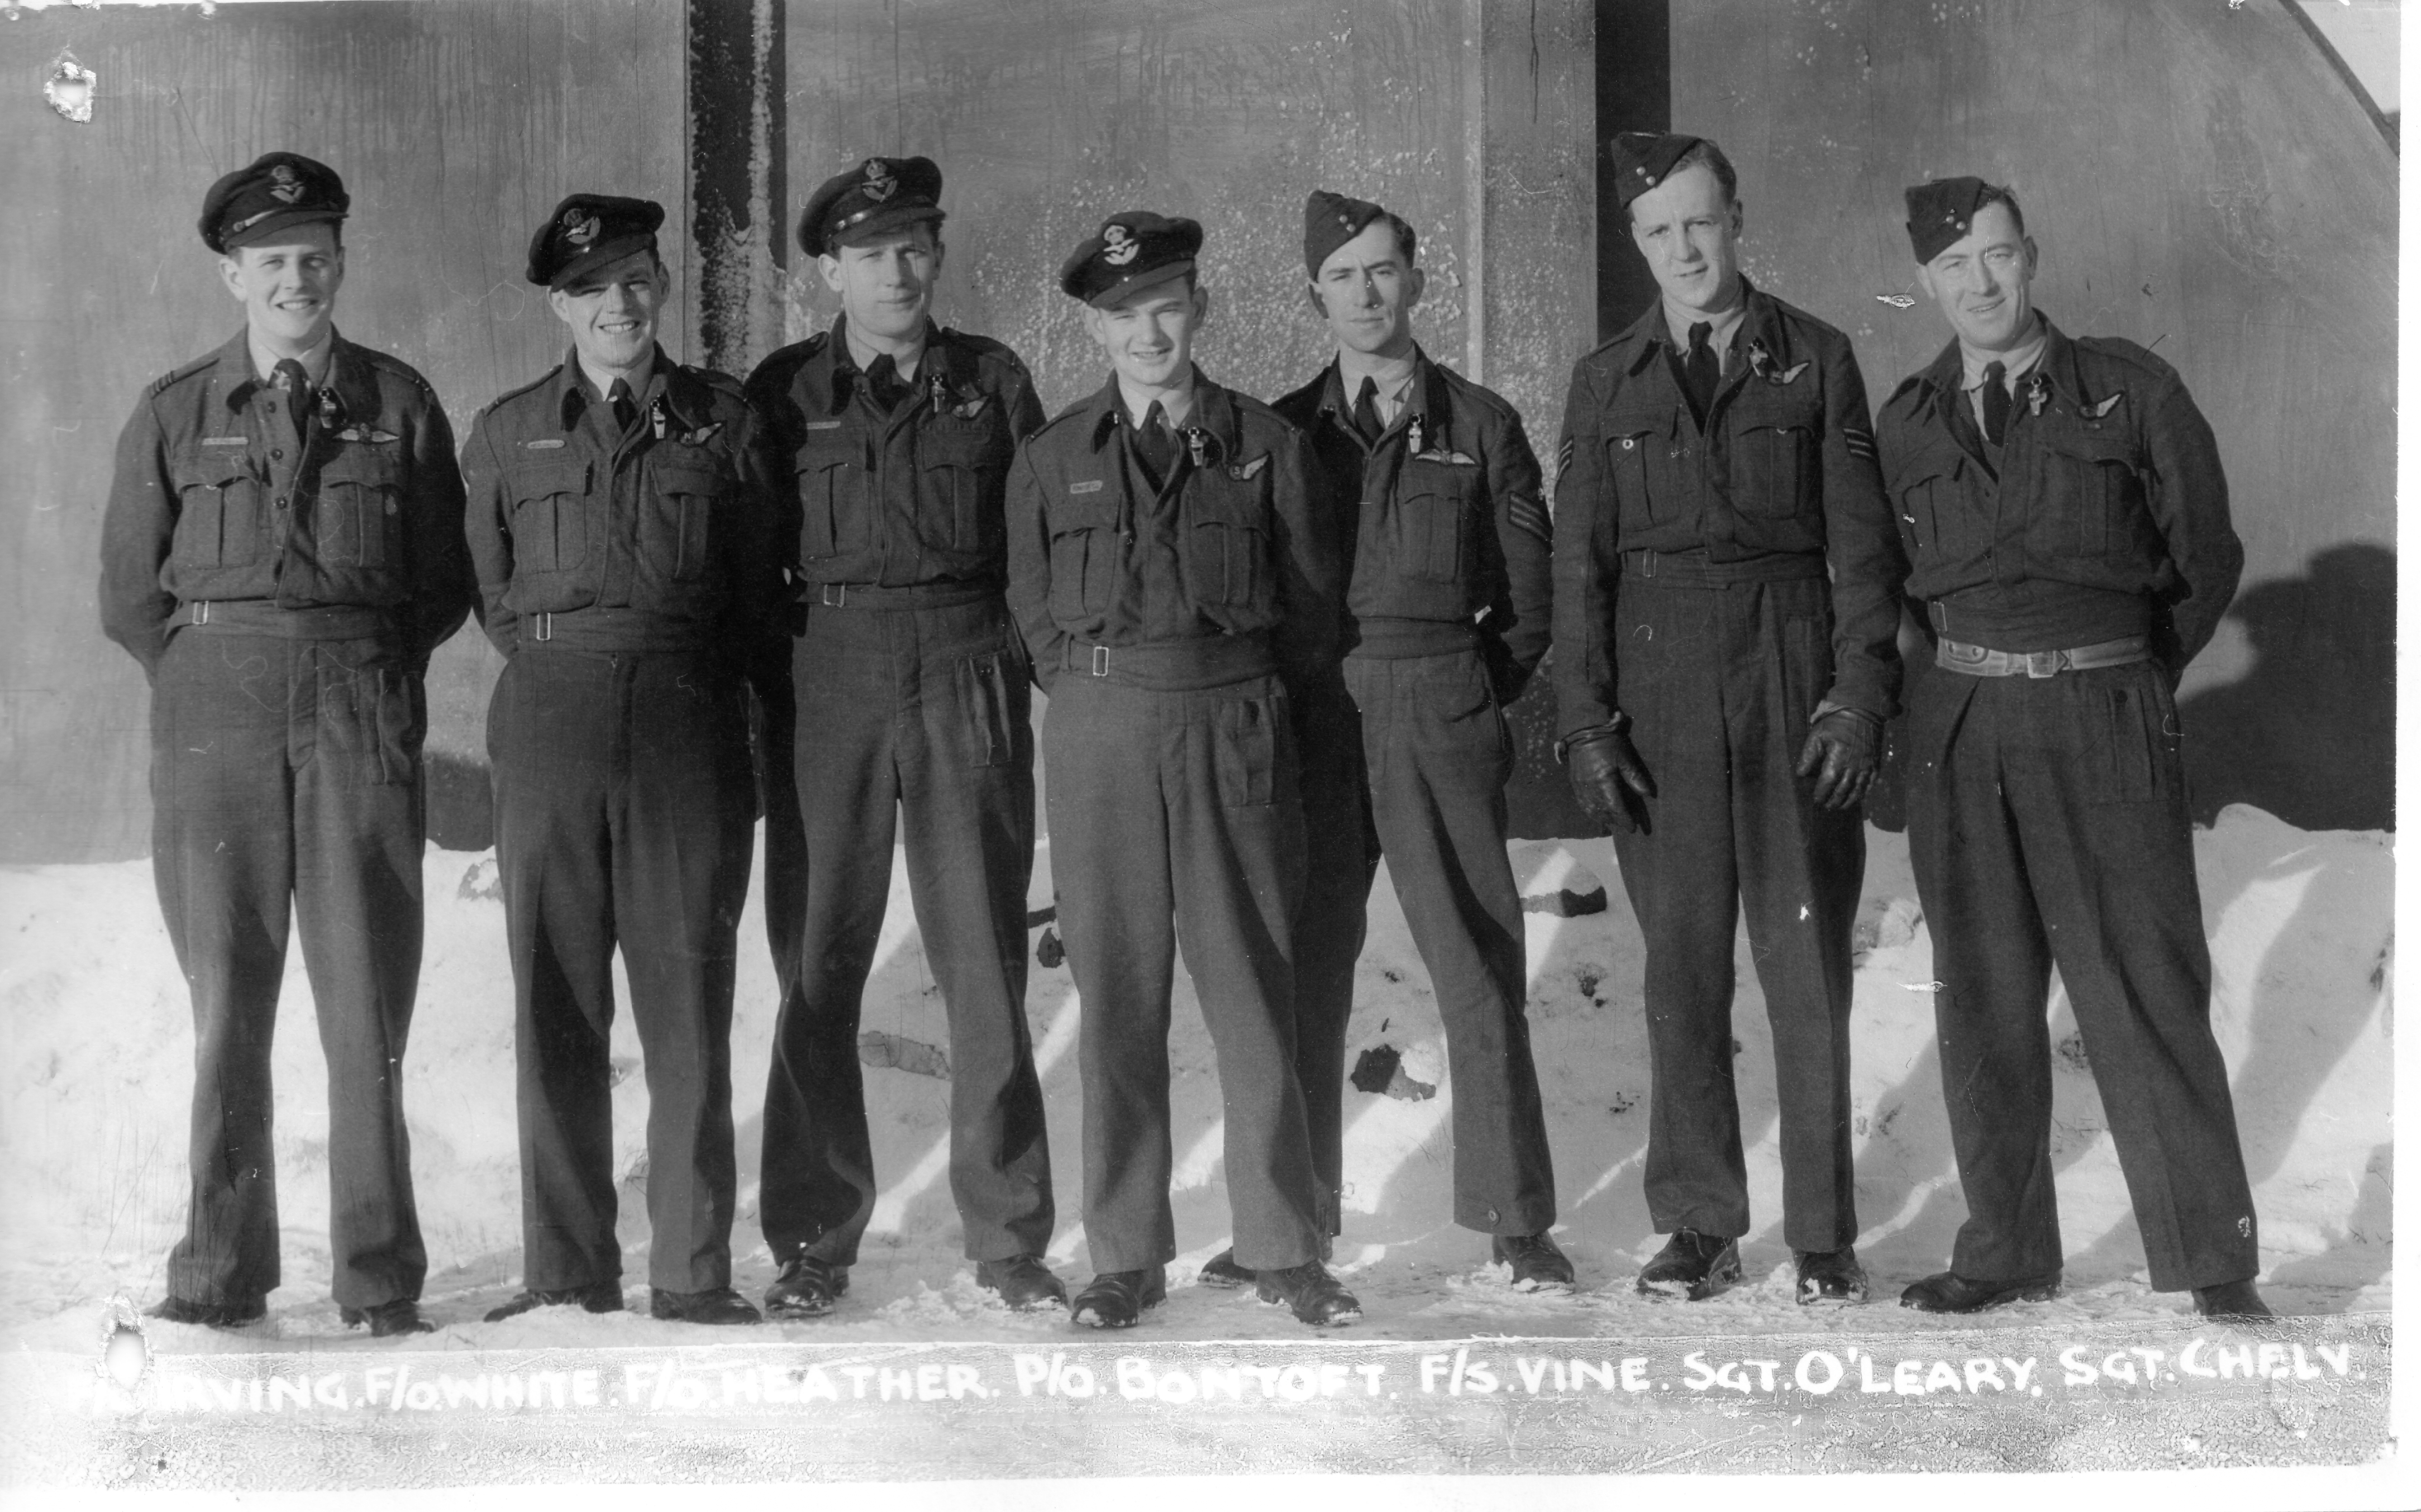
550 Squadron Photos
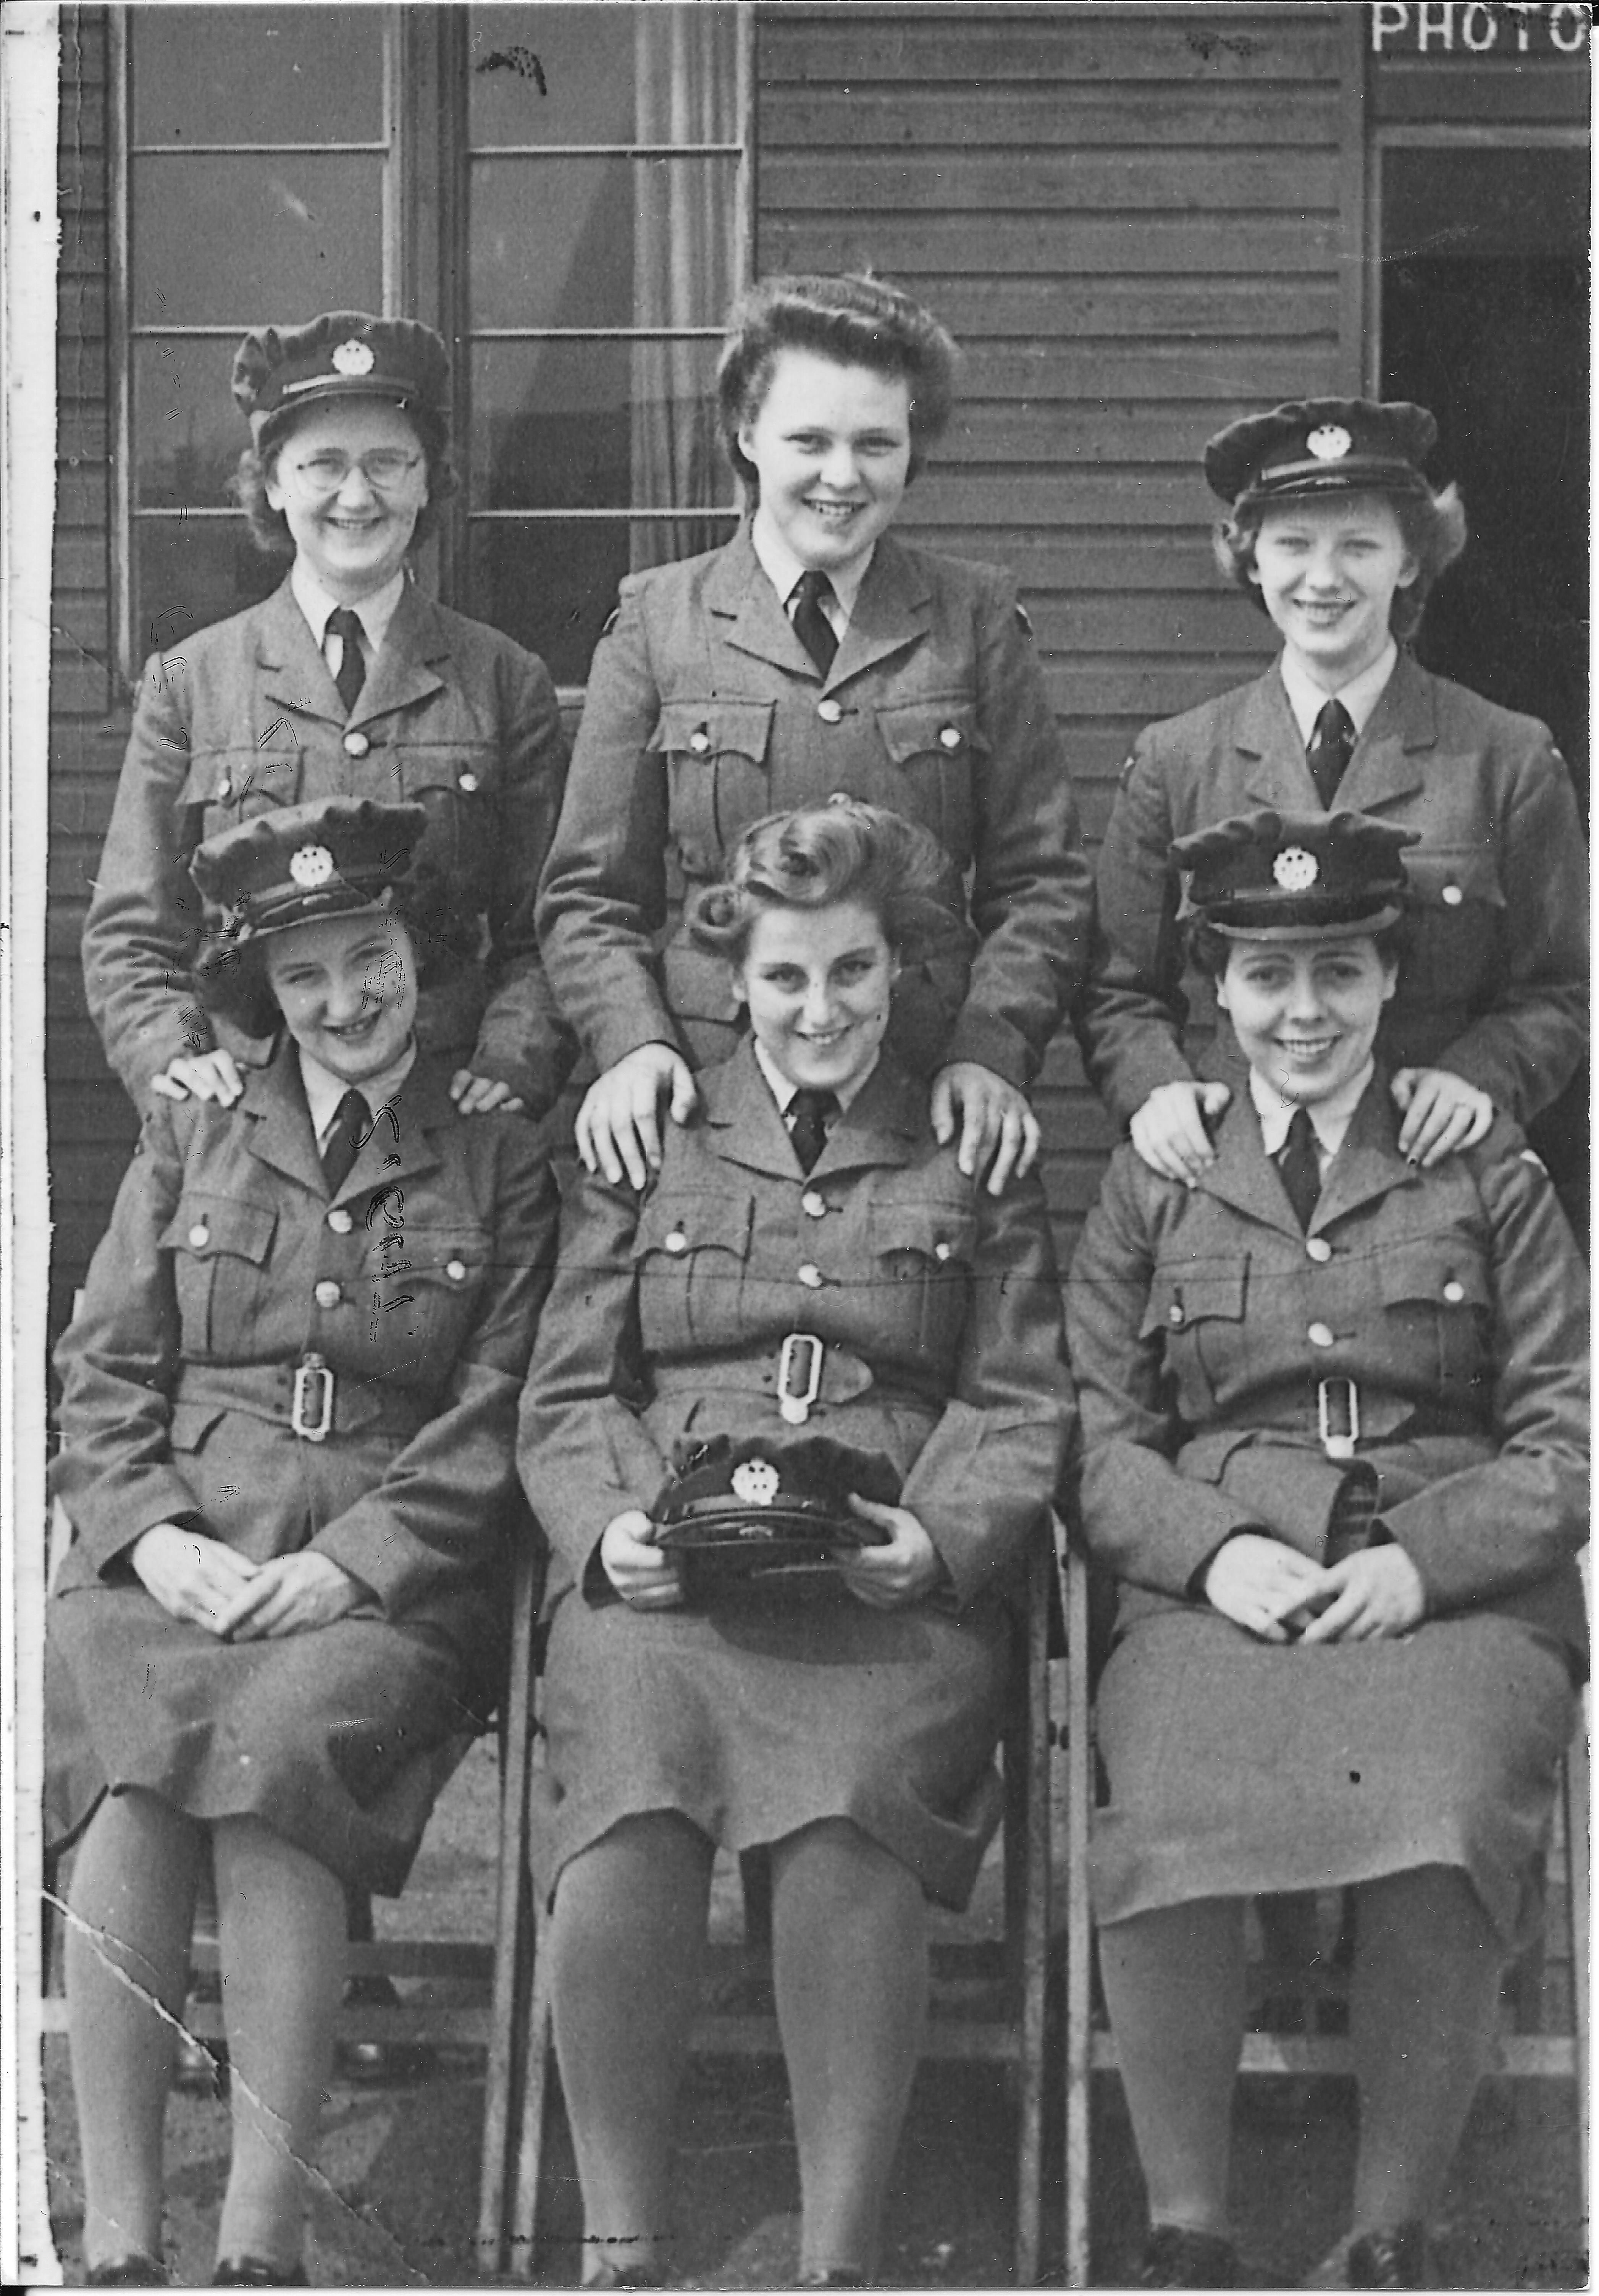
Ground Staff
 |
Lillian May Peet (back row - extreme right). Lillian was with 550 Sqdn from Dec 1943 until Oct 1945; she may have worked as a waitress (not confirmed)
Photo kindly made available by her daughter There is another picture of Lillian Peet and two others in the book "Maximum Effort 3" (page 23). Comparing that photo with this the woman standing on the extreme right might be Elsie Pool Gp Capt R VMcIntyre (front row centre) Station Commander F/Lt Rowland Tilley (front row second from the left) in Flying Control (information from Desmond Tilley (son)) If you can identify others in the picture please send the information in to the web-site |
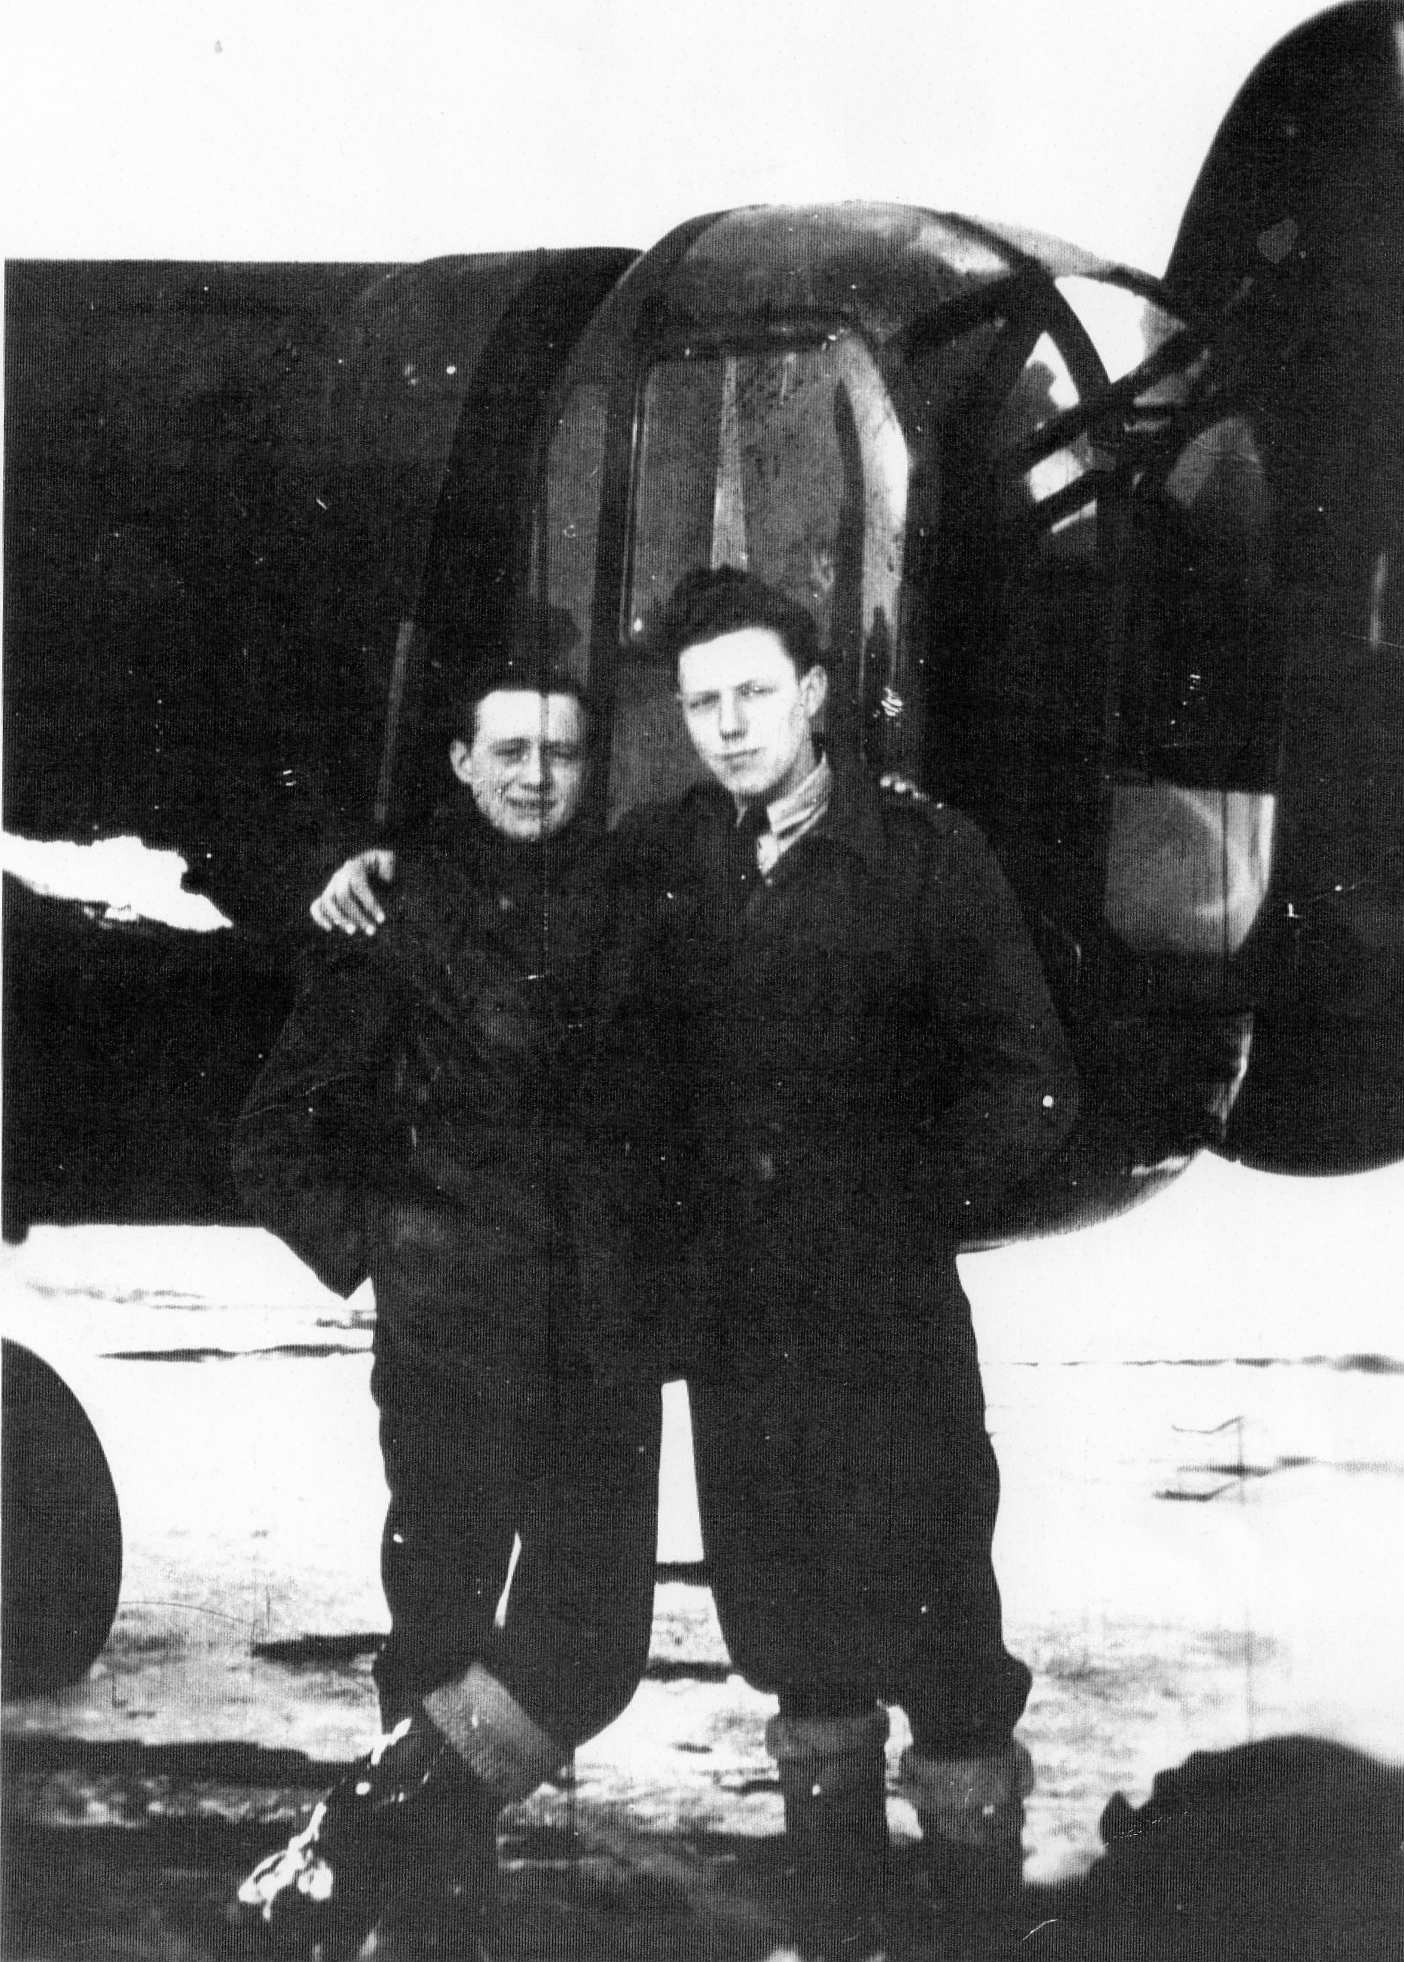 |
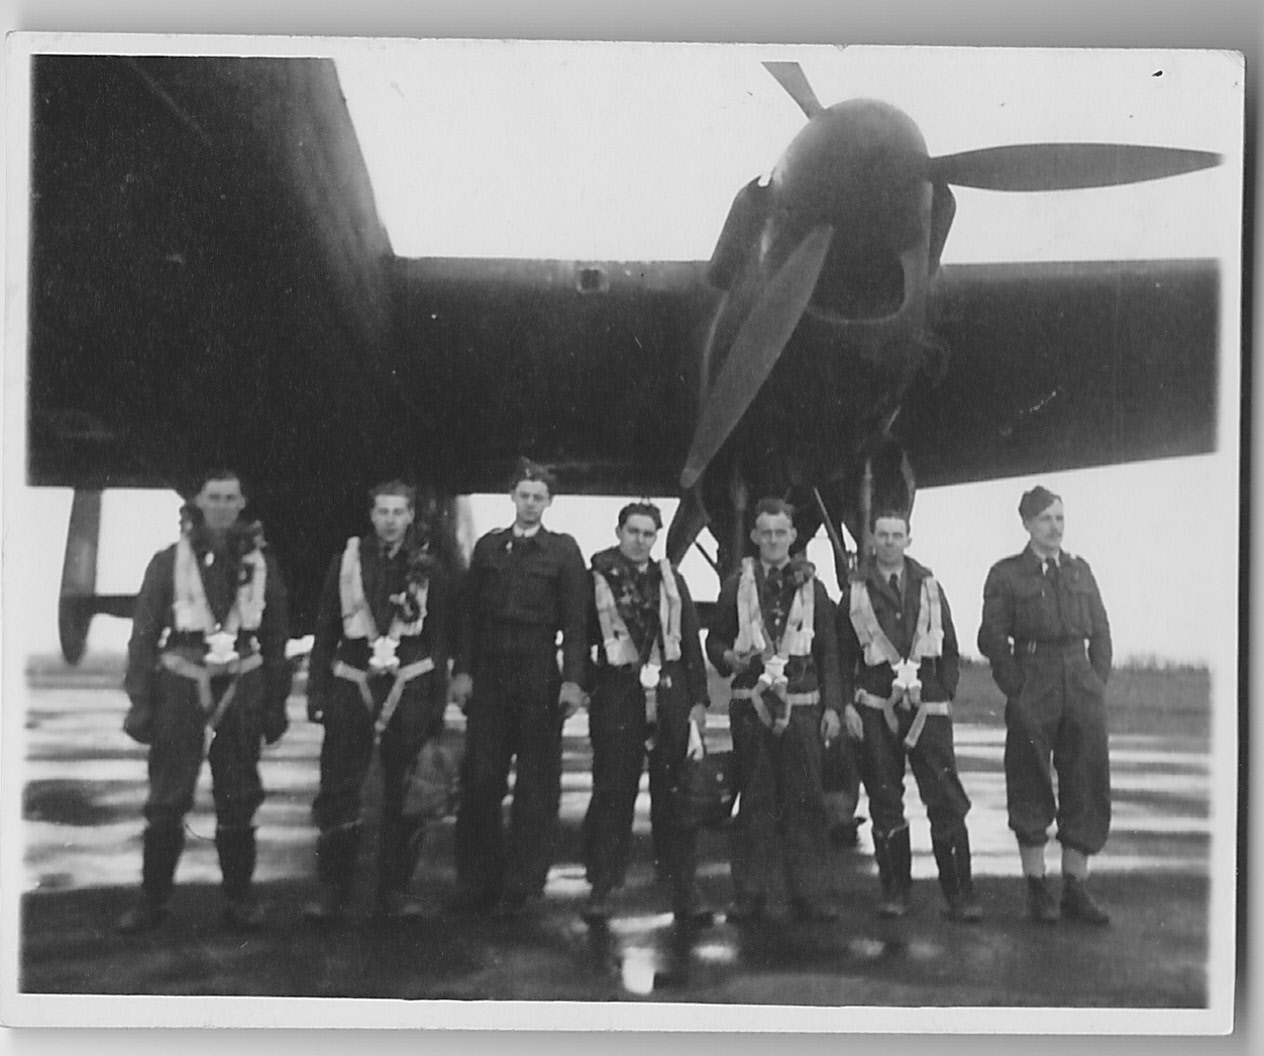
Two aircrew by Lancaster tail-gun
Picture from Jack Harris collection Originally labelled "possibly Bob Towsley and another" (as the photos were received attached) BUT the family of Leslie Robert (Bob) Towsley have confirmed that in fact neither of the men in the photo is their relative So the picture has been removed from the LL81 crew web-page - but is shown here in case it is possible for someone to identify either man Thanks to Geoff Sutton for the following information The one on the right is my Dad, Leslie Sutton Leslie S. Sutton was in 550 Squadron as ground crew loading bombs into the Lancaster Bombers |
 |
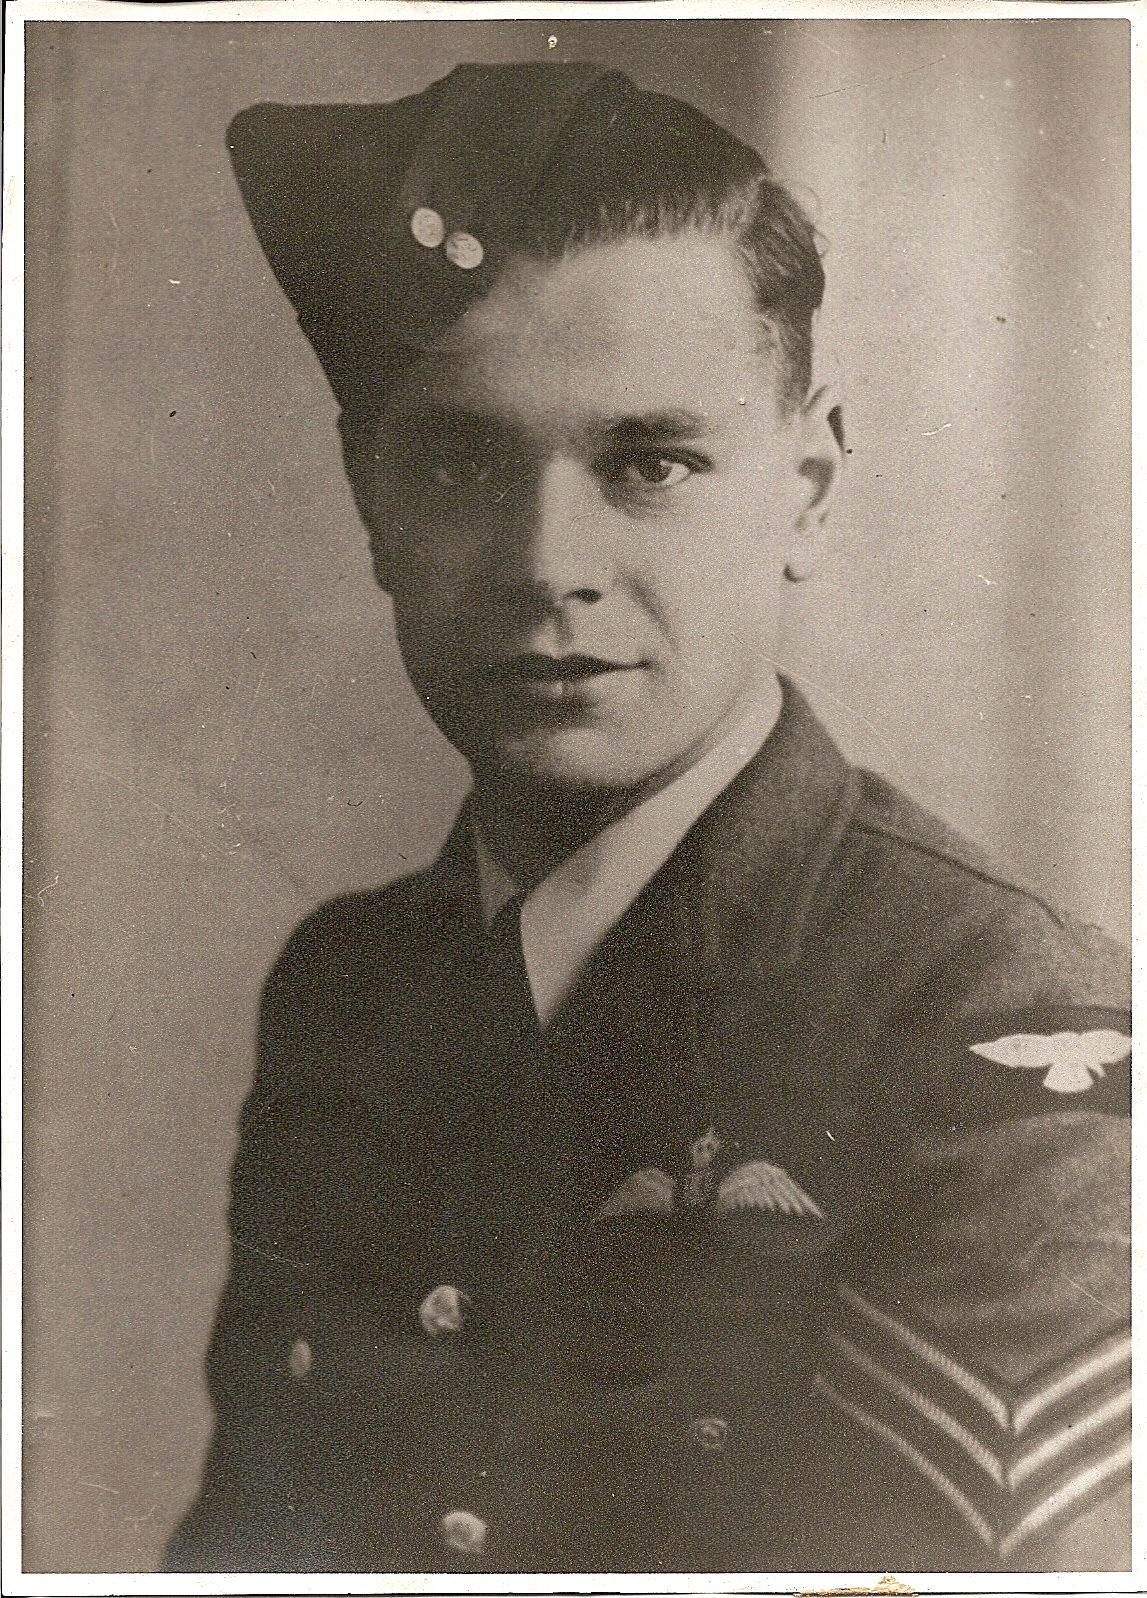
Thanks to Geoff Sutton for the information and photos The one on the right is my Dad |
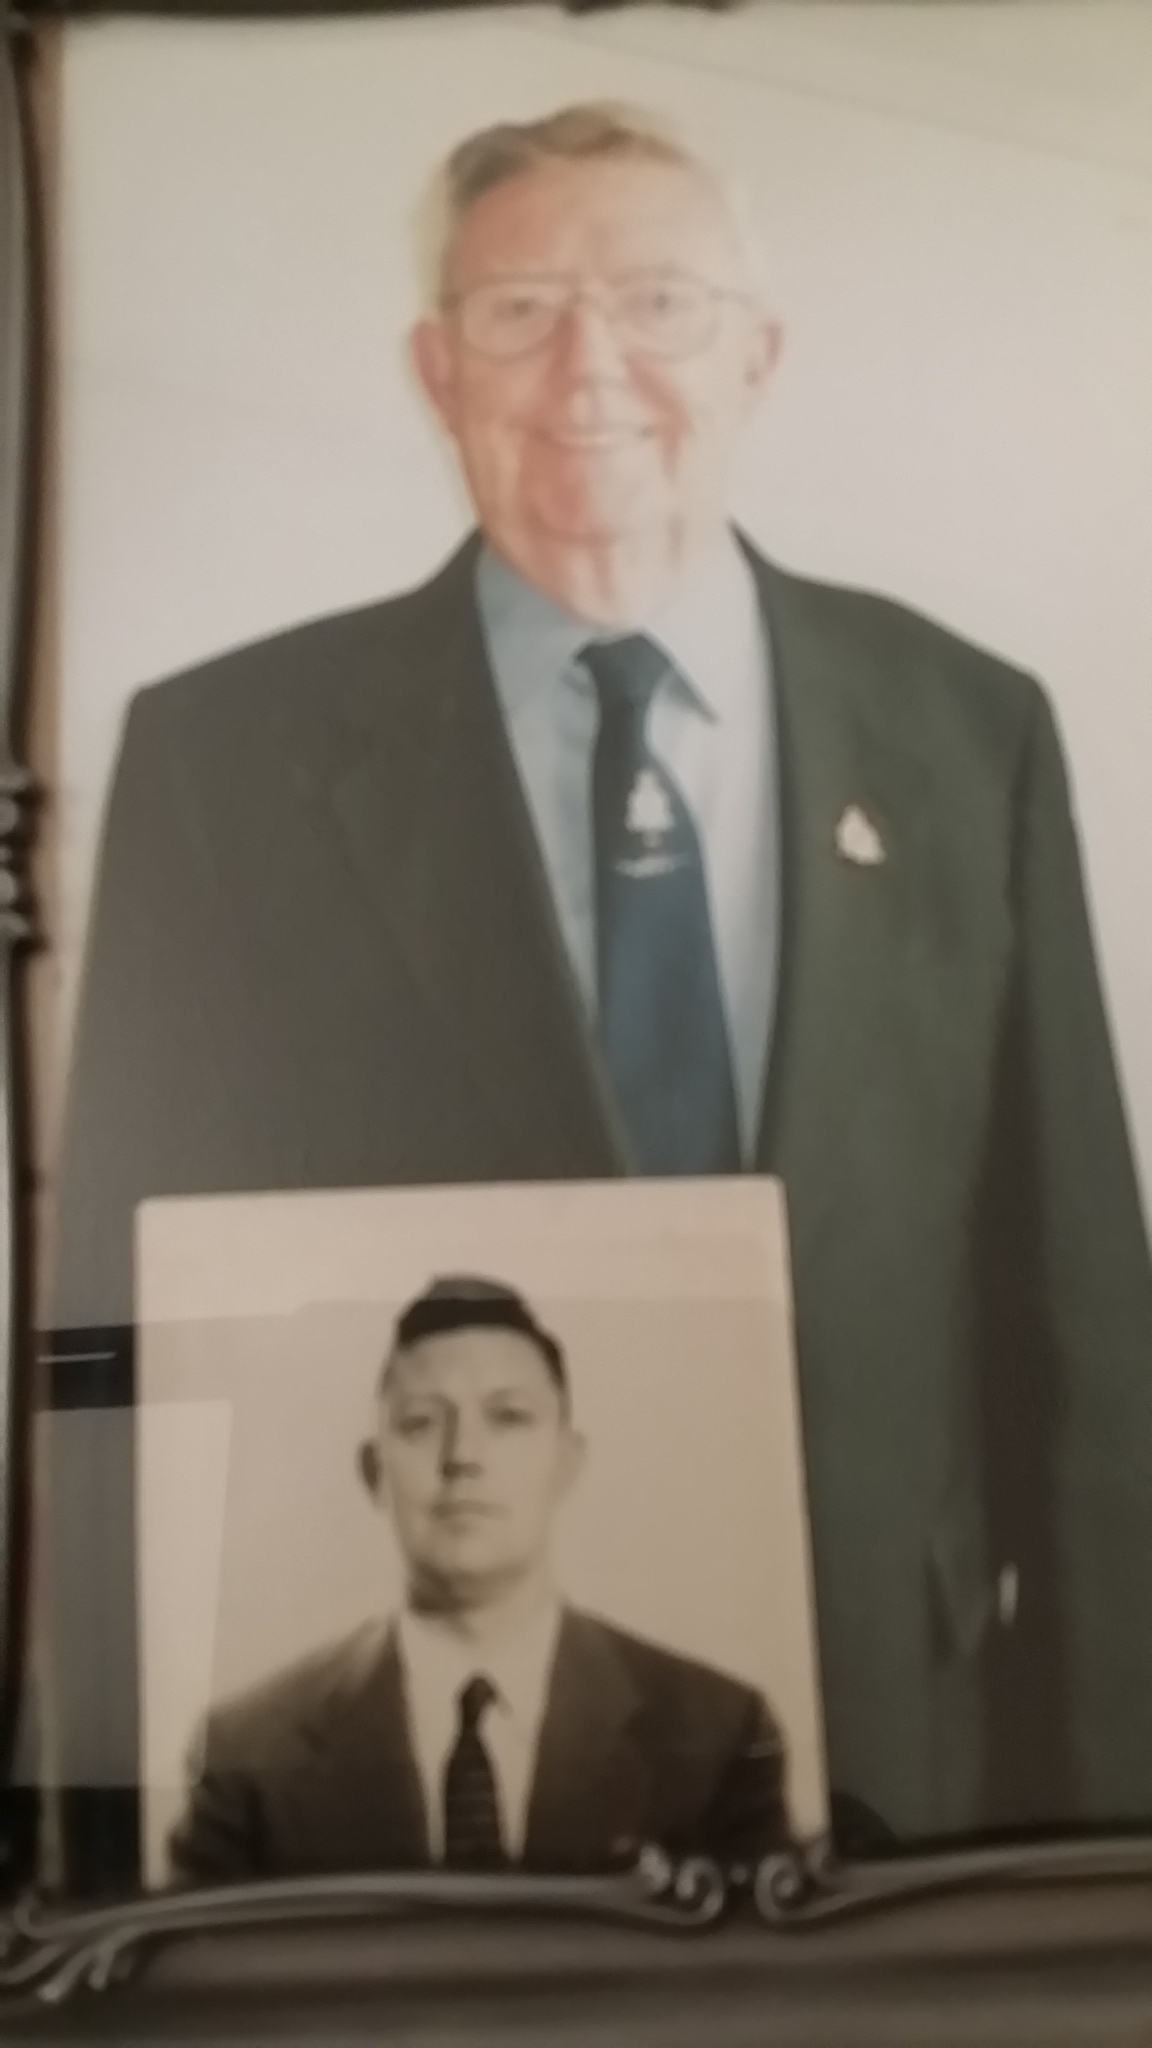 |
Thanks to Geoff Sutton for the information and photos Note the hairstyle of the younger photo of my dad taken in the late 1950's. In the picture taken in 2004 in the blue jacket, the pins and tie are from one of the Squadron Reunions, which he regularly attended until his passing in December 2006 |
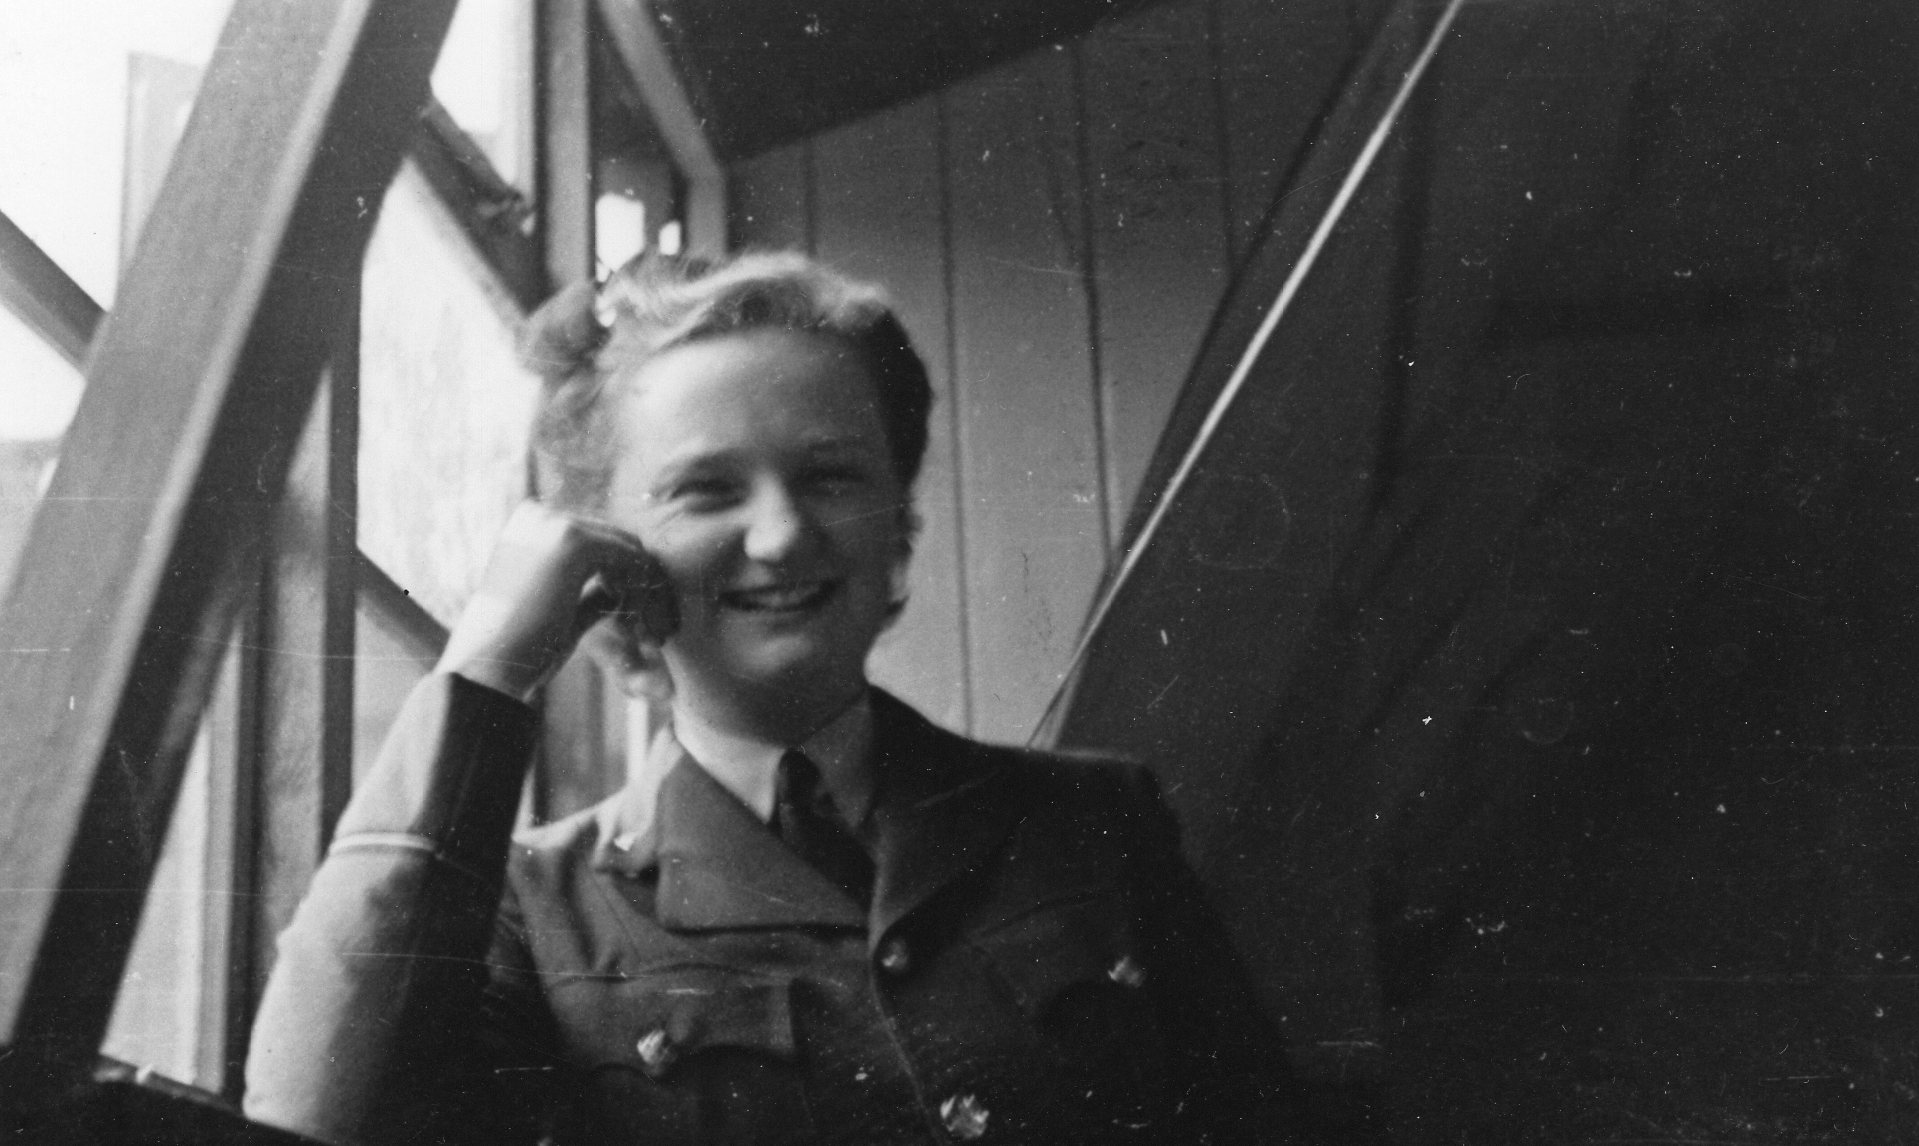
WAAFs
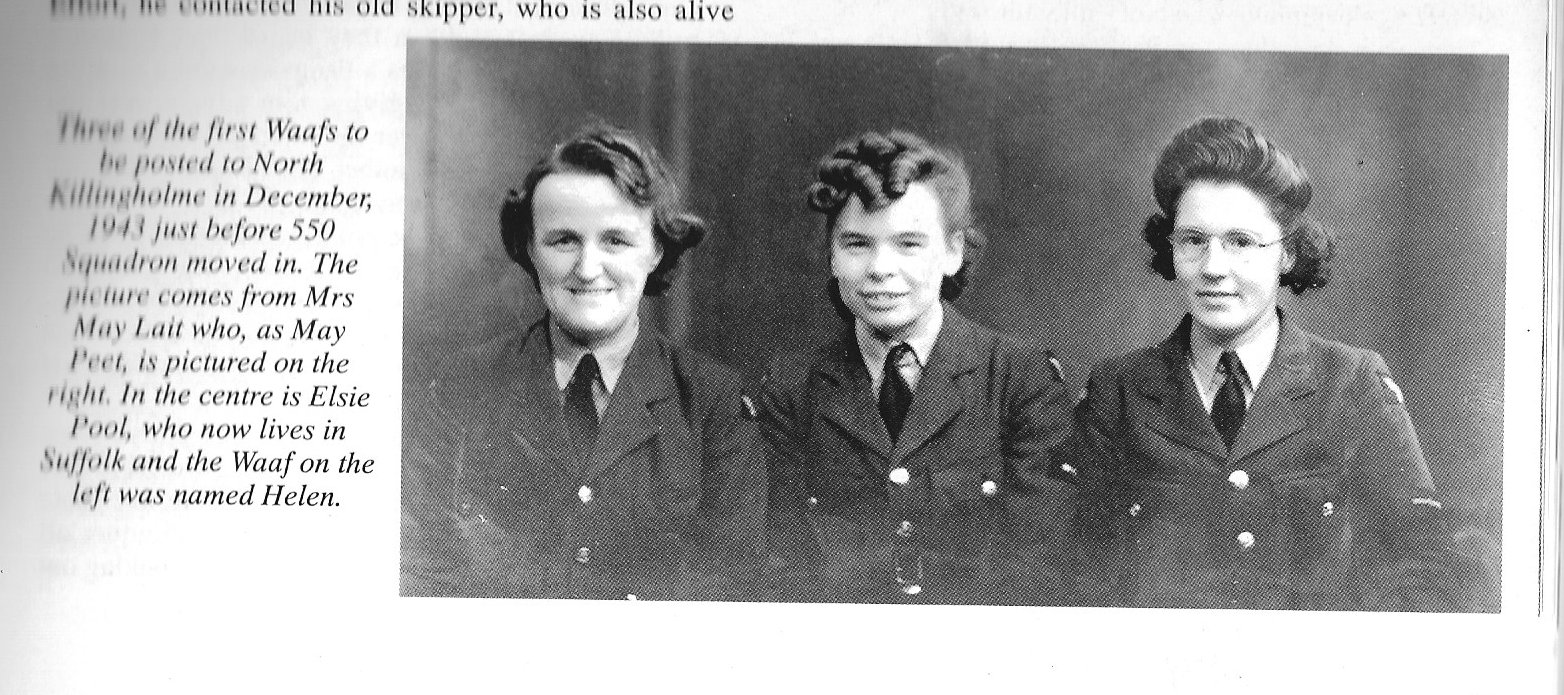 |
WAAFs posted to North Killingholme December 1943
L-to-R: Helen (?), Elsie Pool, Lillian May Lait (neé Peet) |
 |
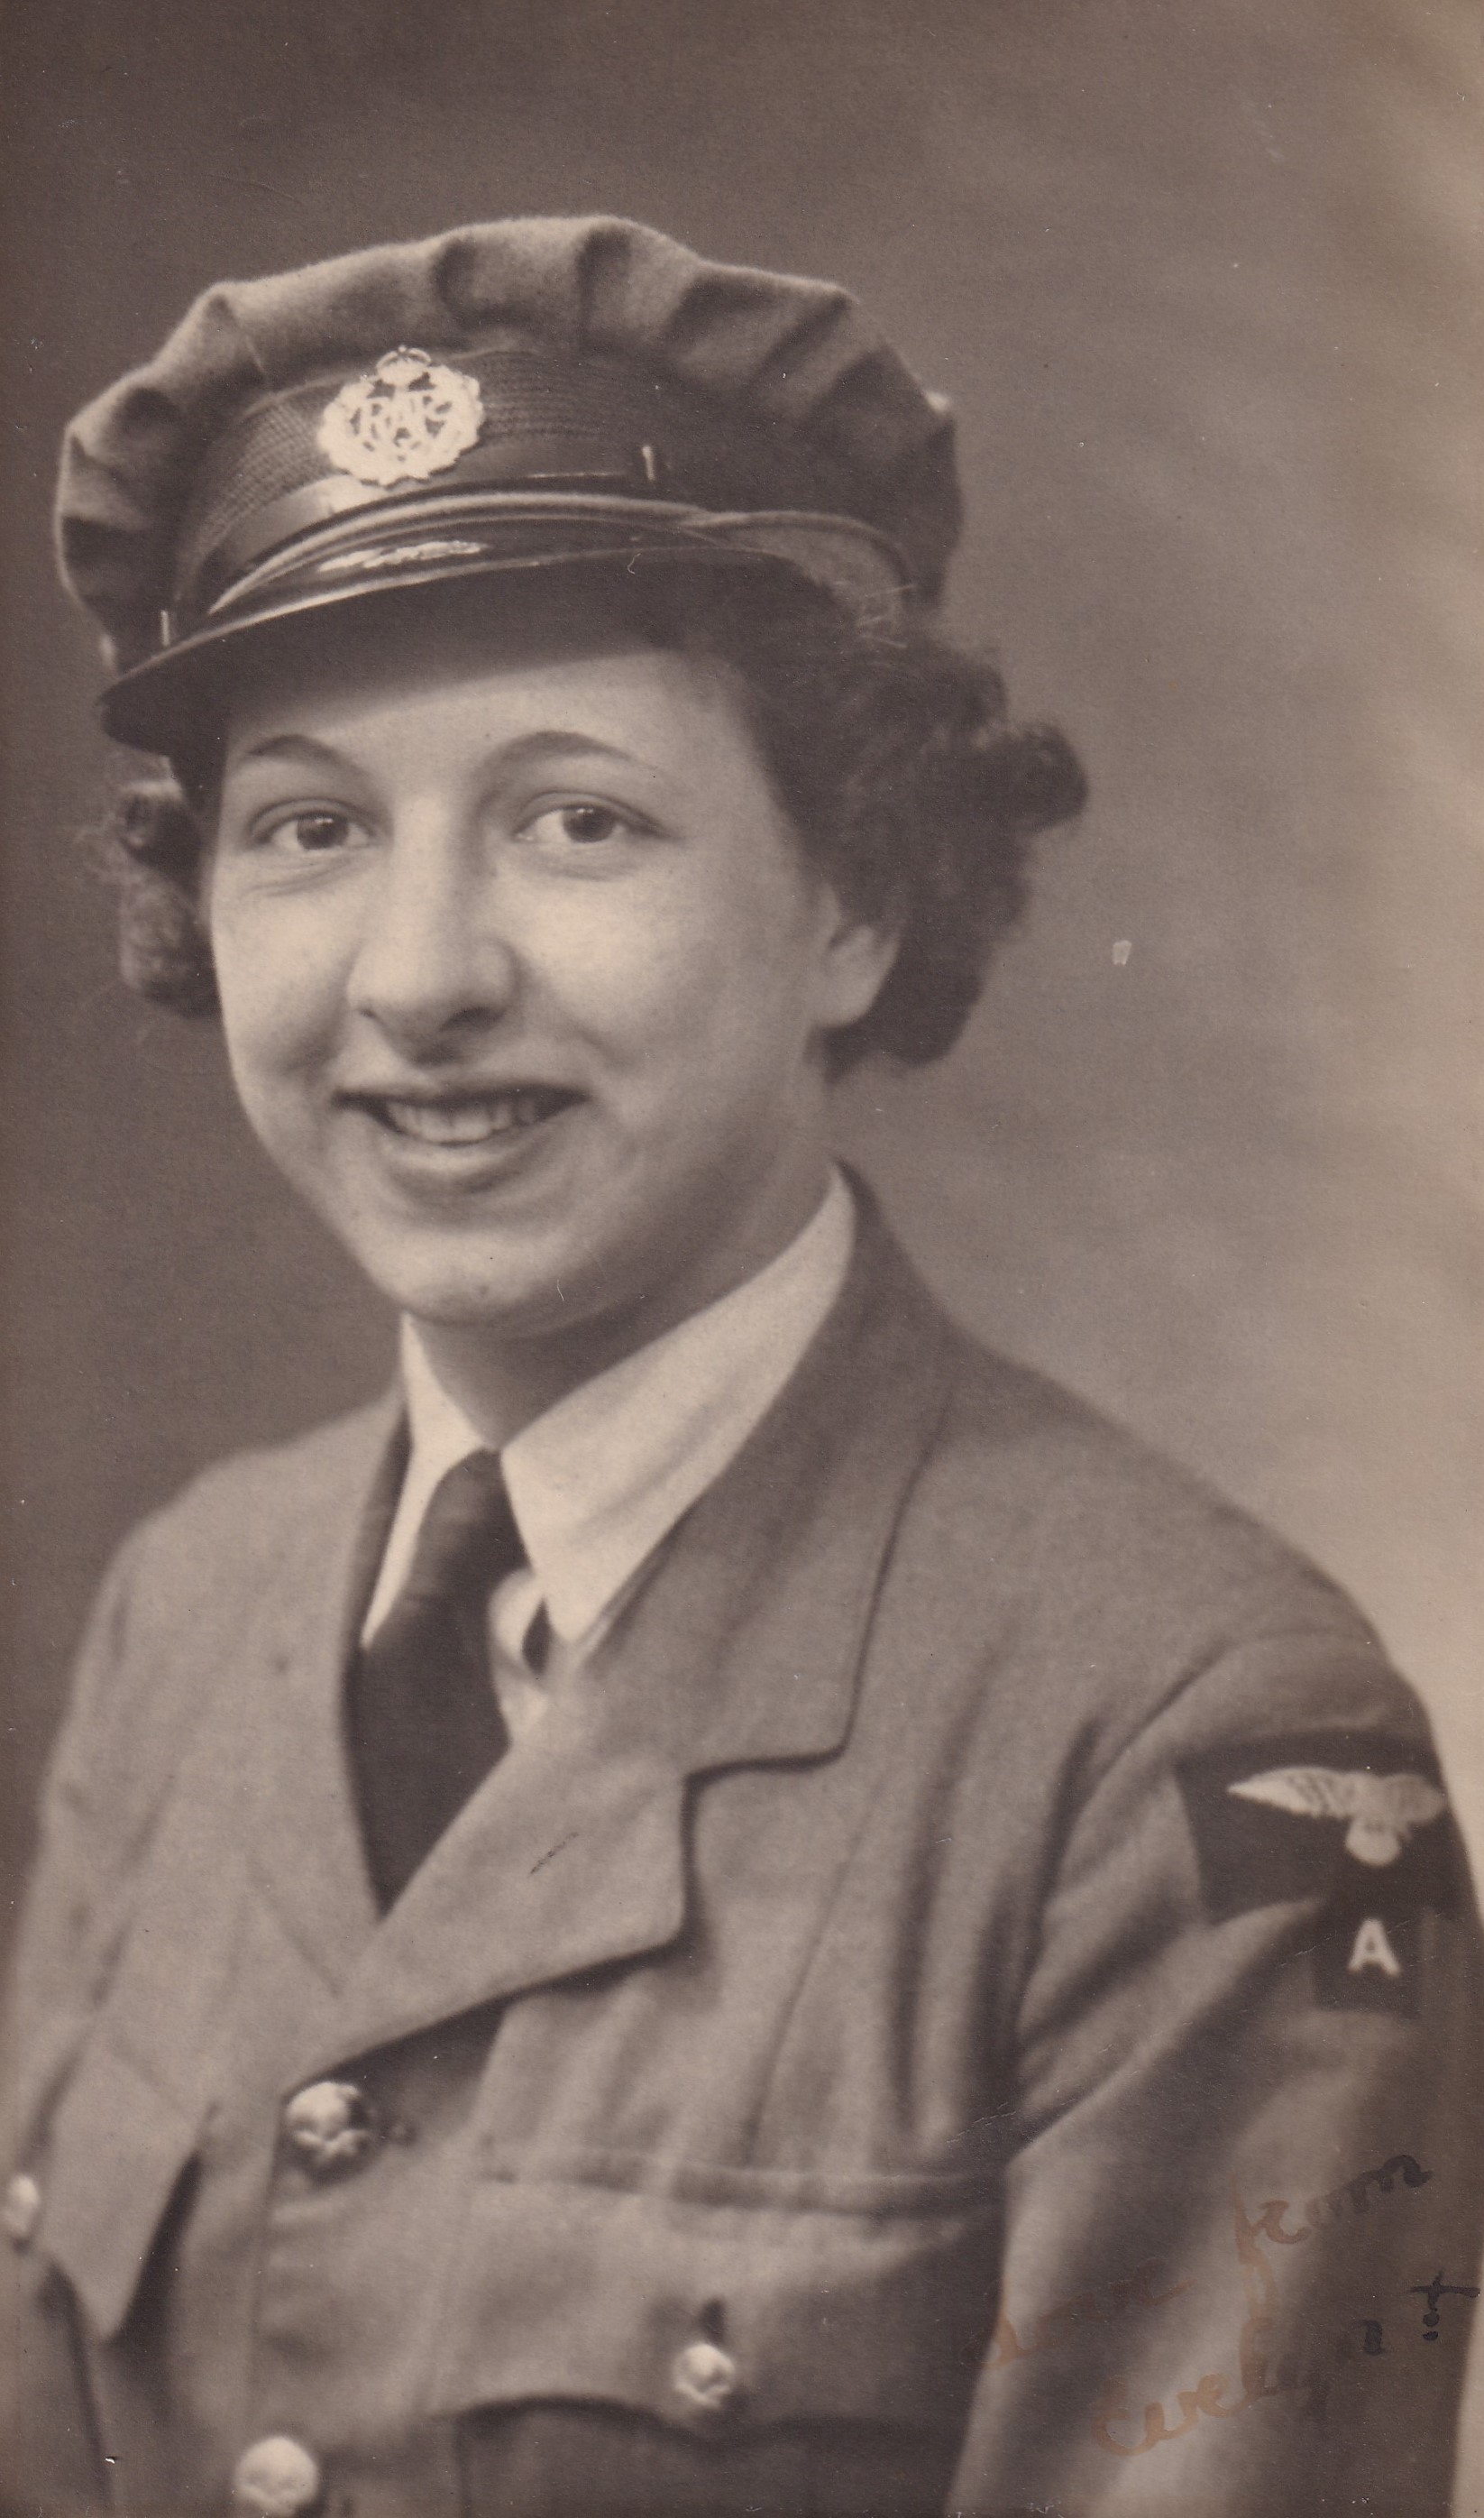
S/O Rosemary Britton |
 |
North Killingholme WAAFs, August 1944
Gwen Doonen, Joan Halton, Sylvia Dutton, Joyce Leigh, Nora Buck, Vivianne Johnson (back row, end right) Picture from Jack Harris collection |
 |
LACW Evelyn Marlow
Many thanks to Nigel Sayer-Payne (son of LACW Evelyn Marlow) for making the photo available See also the Motor Transport Section (below) |
 |
LACW Evelyn Marlow
Many thanks to Nigel Sayer-Payne for making the photo available |
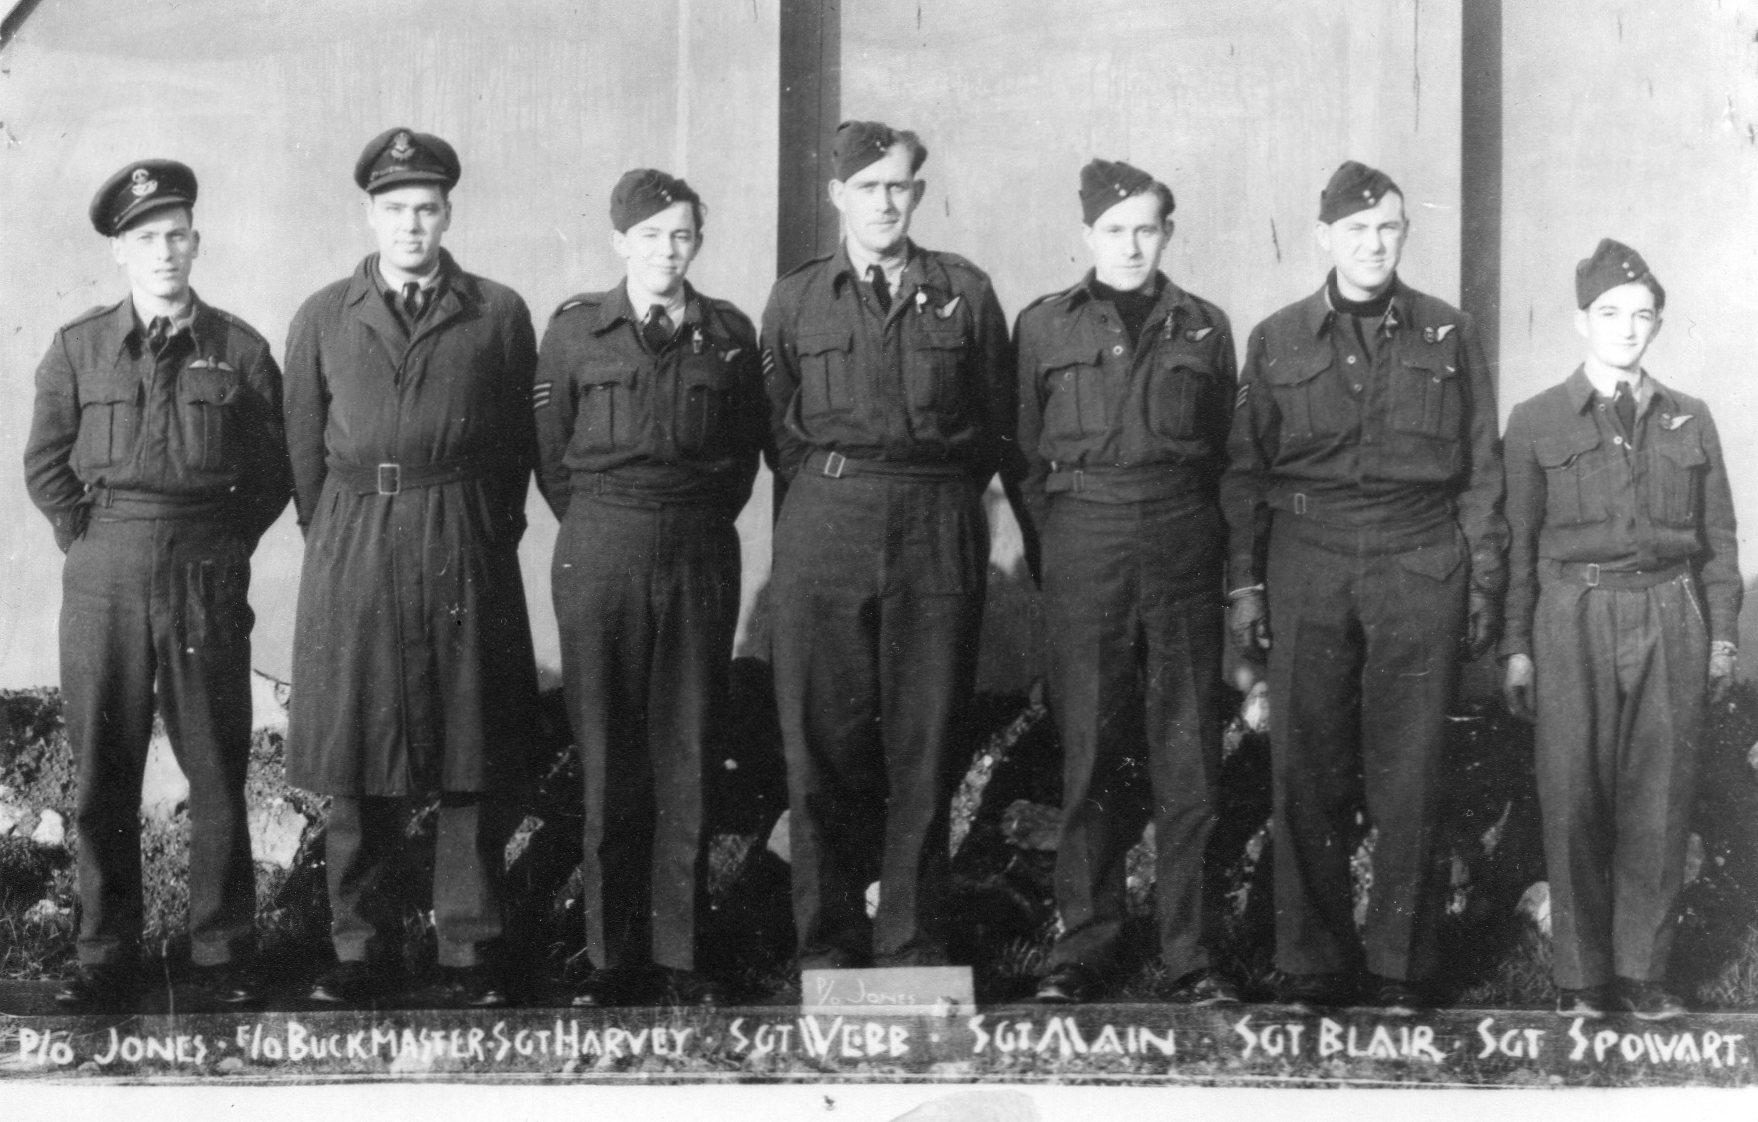
Radar Section
 |
Radar Section - 550 Squadron, May 1944
On the reverse side of the photo are the signatures of most of the Section (see below) Seated second from the right is LAC(W) 486283 Helen Lambie (later married to Sgt D S Price of the engineering ground staff) Thanks to David Price for making the photo available |
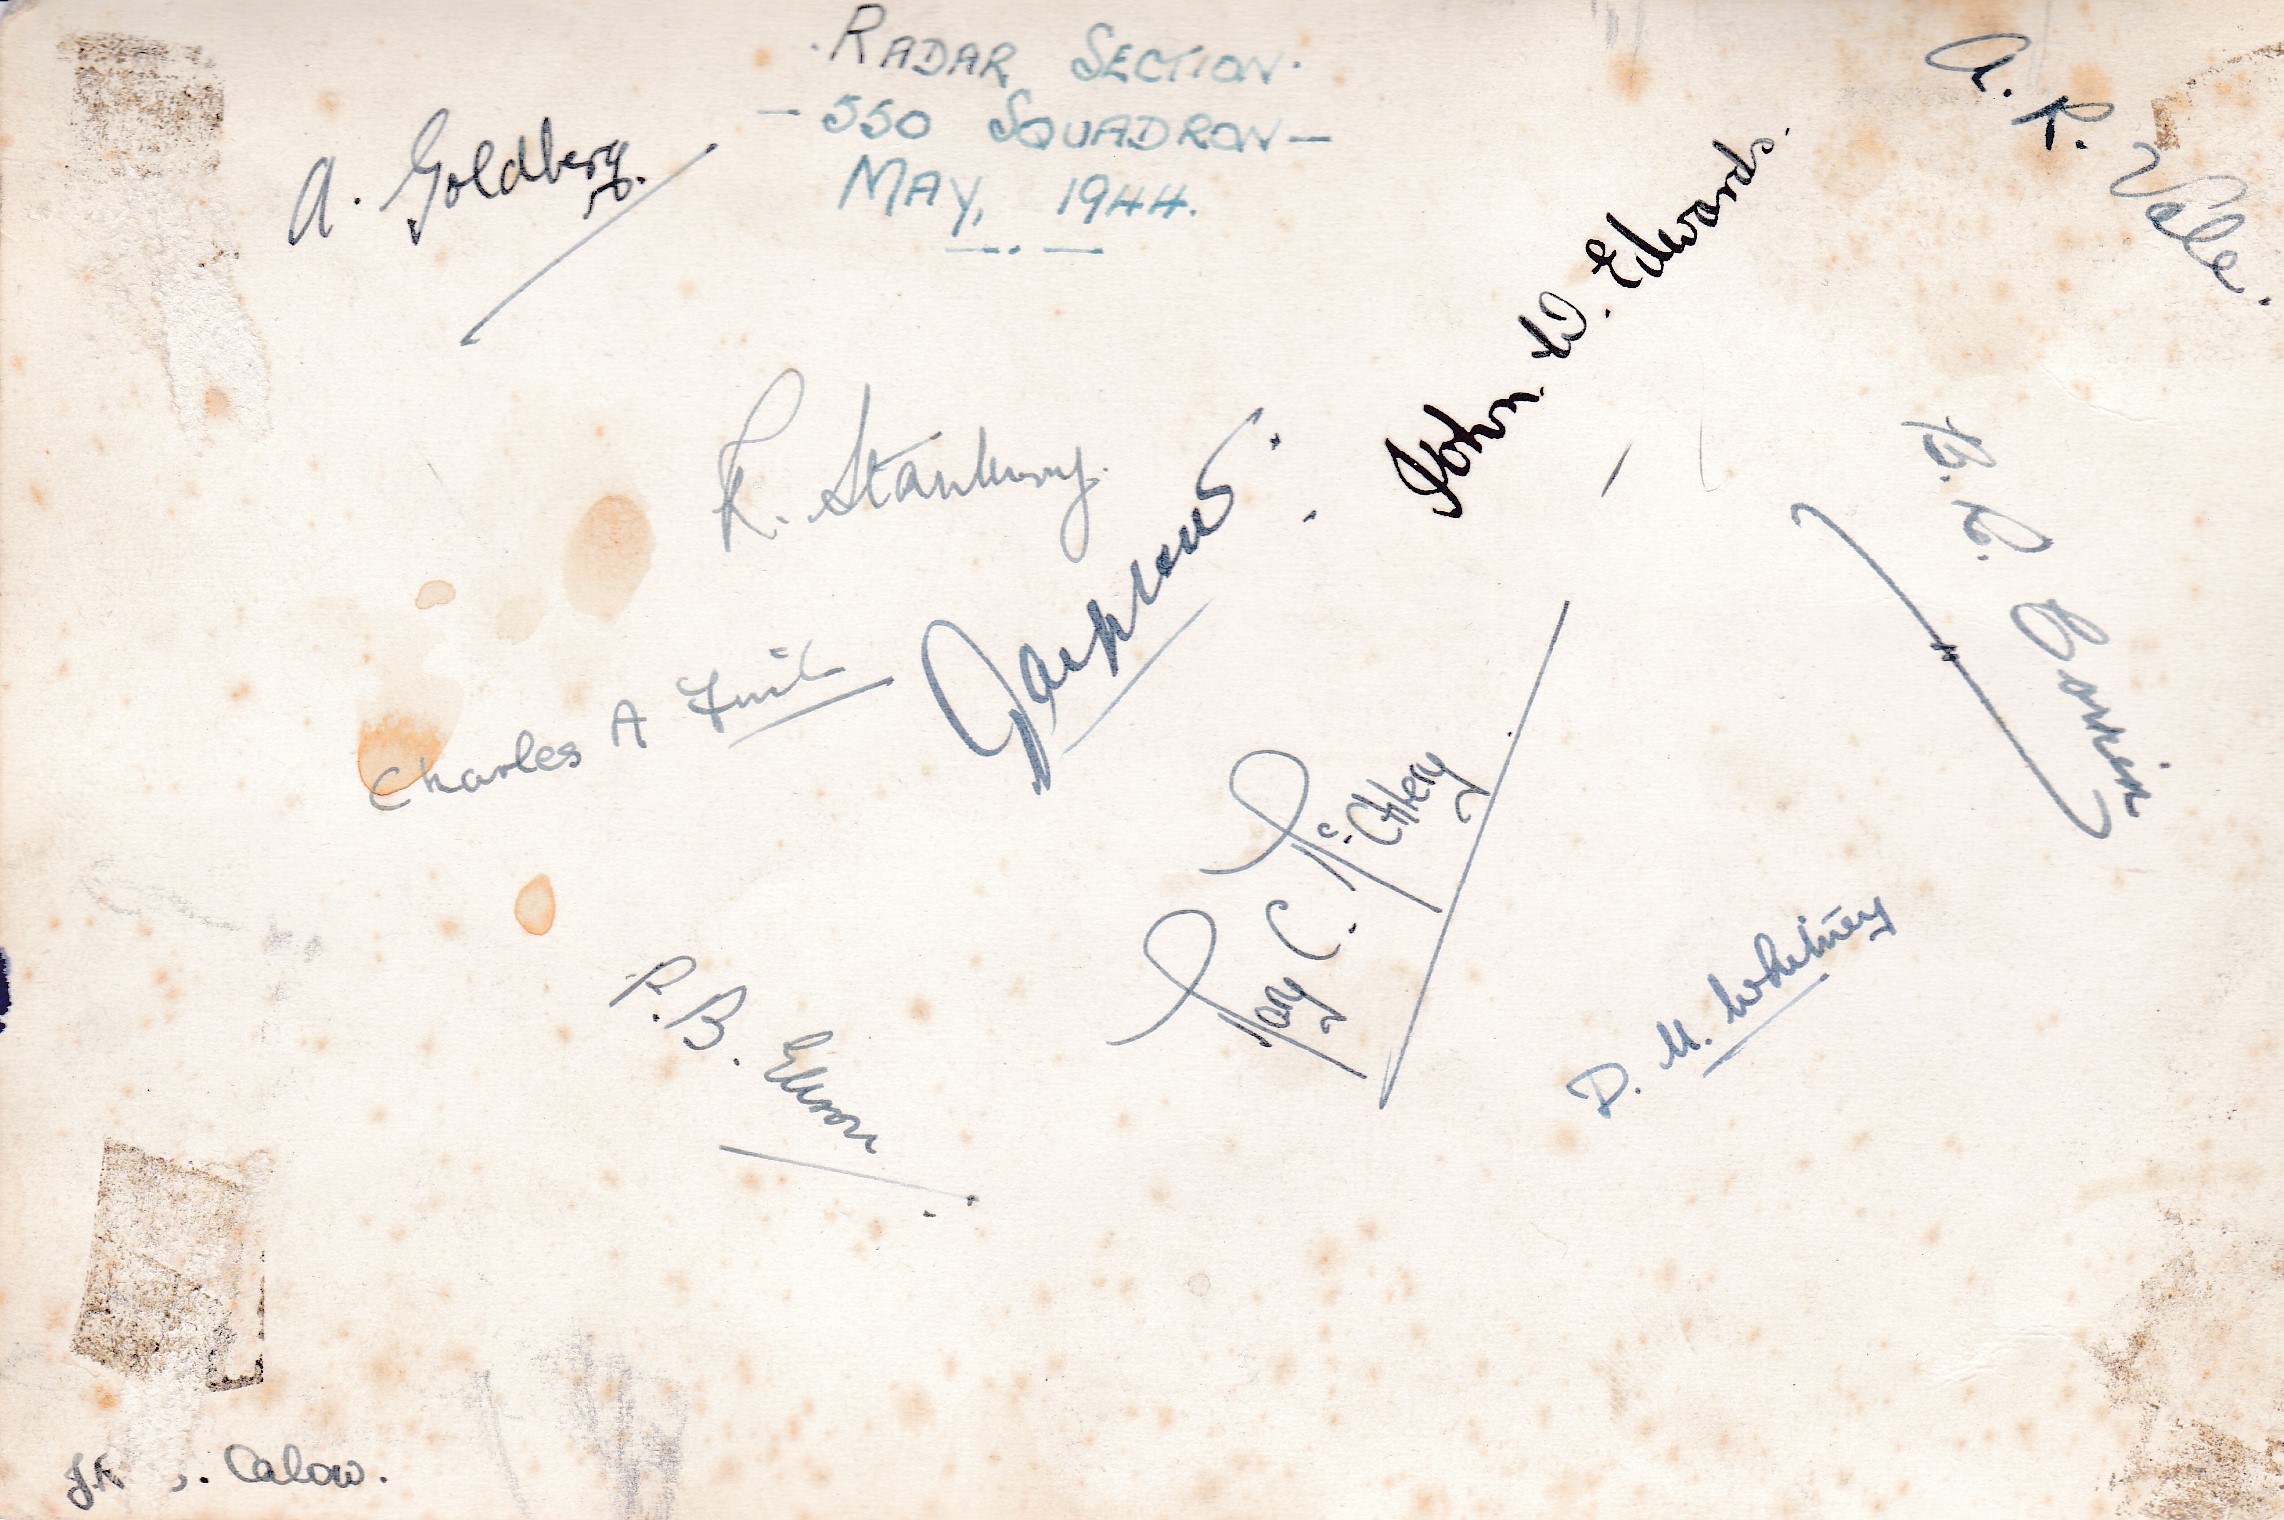 |
Radar Section - 550 Squadron, May 1944
Reverse side with signatures |
Motor Transport Section
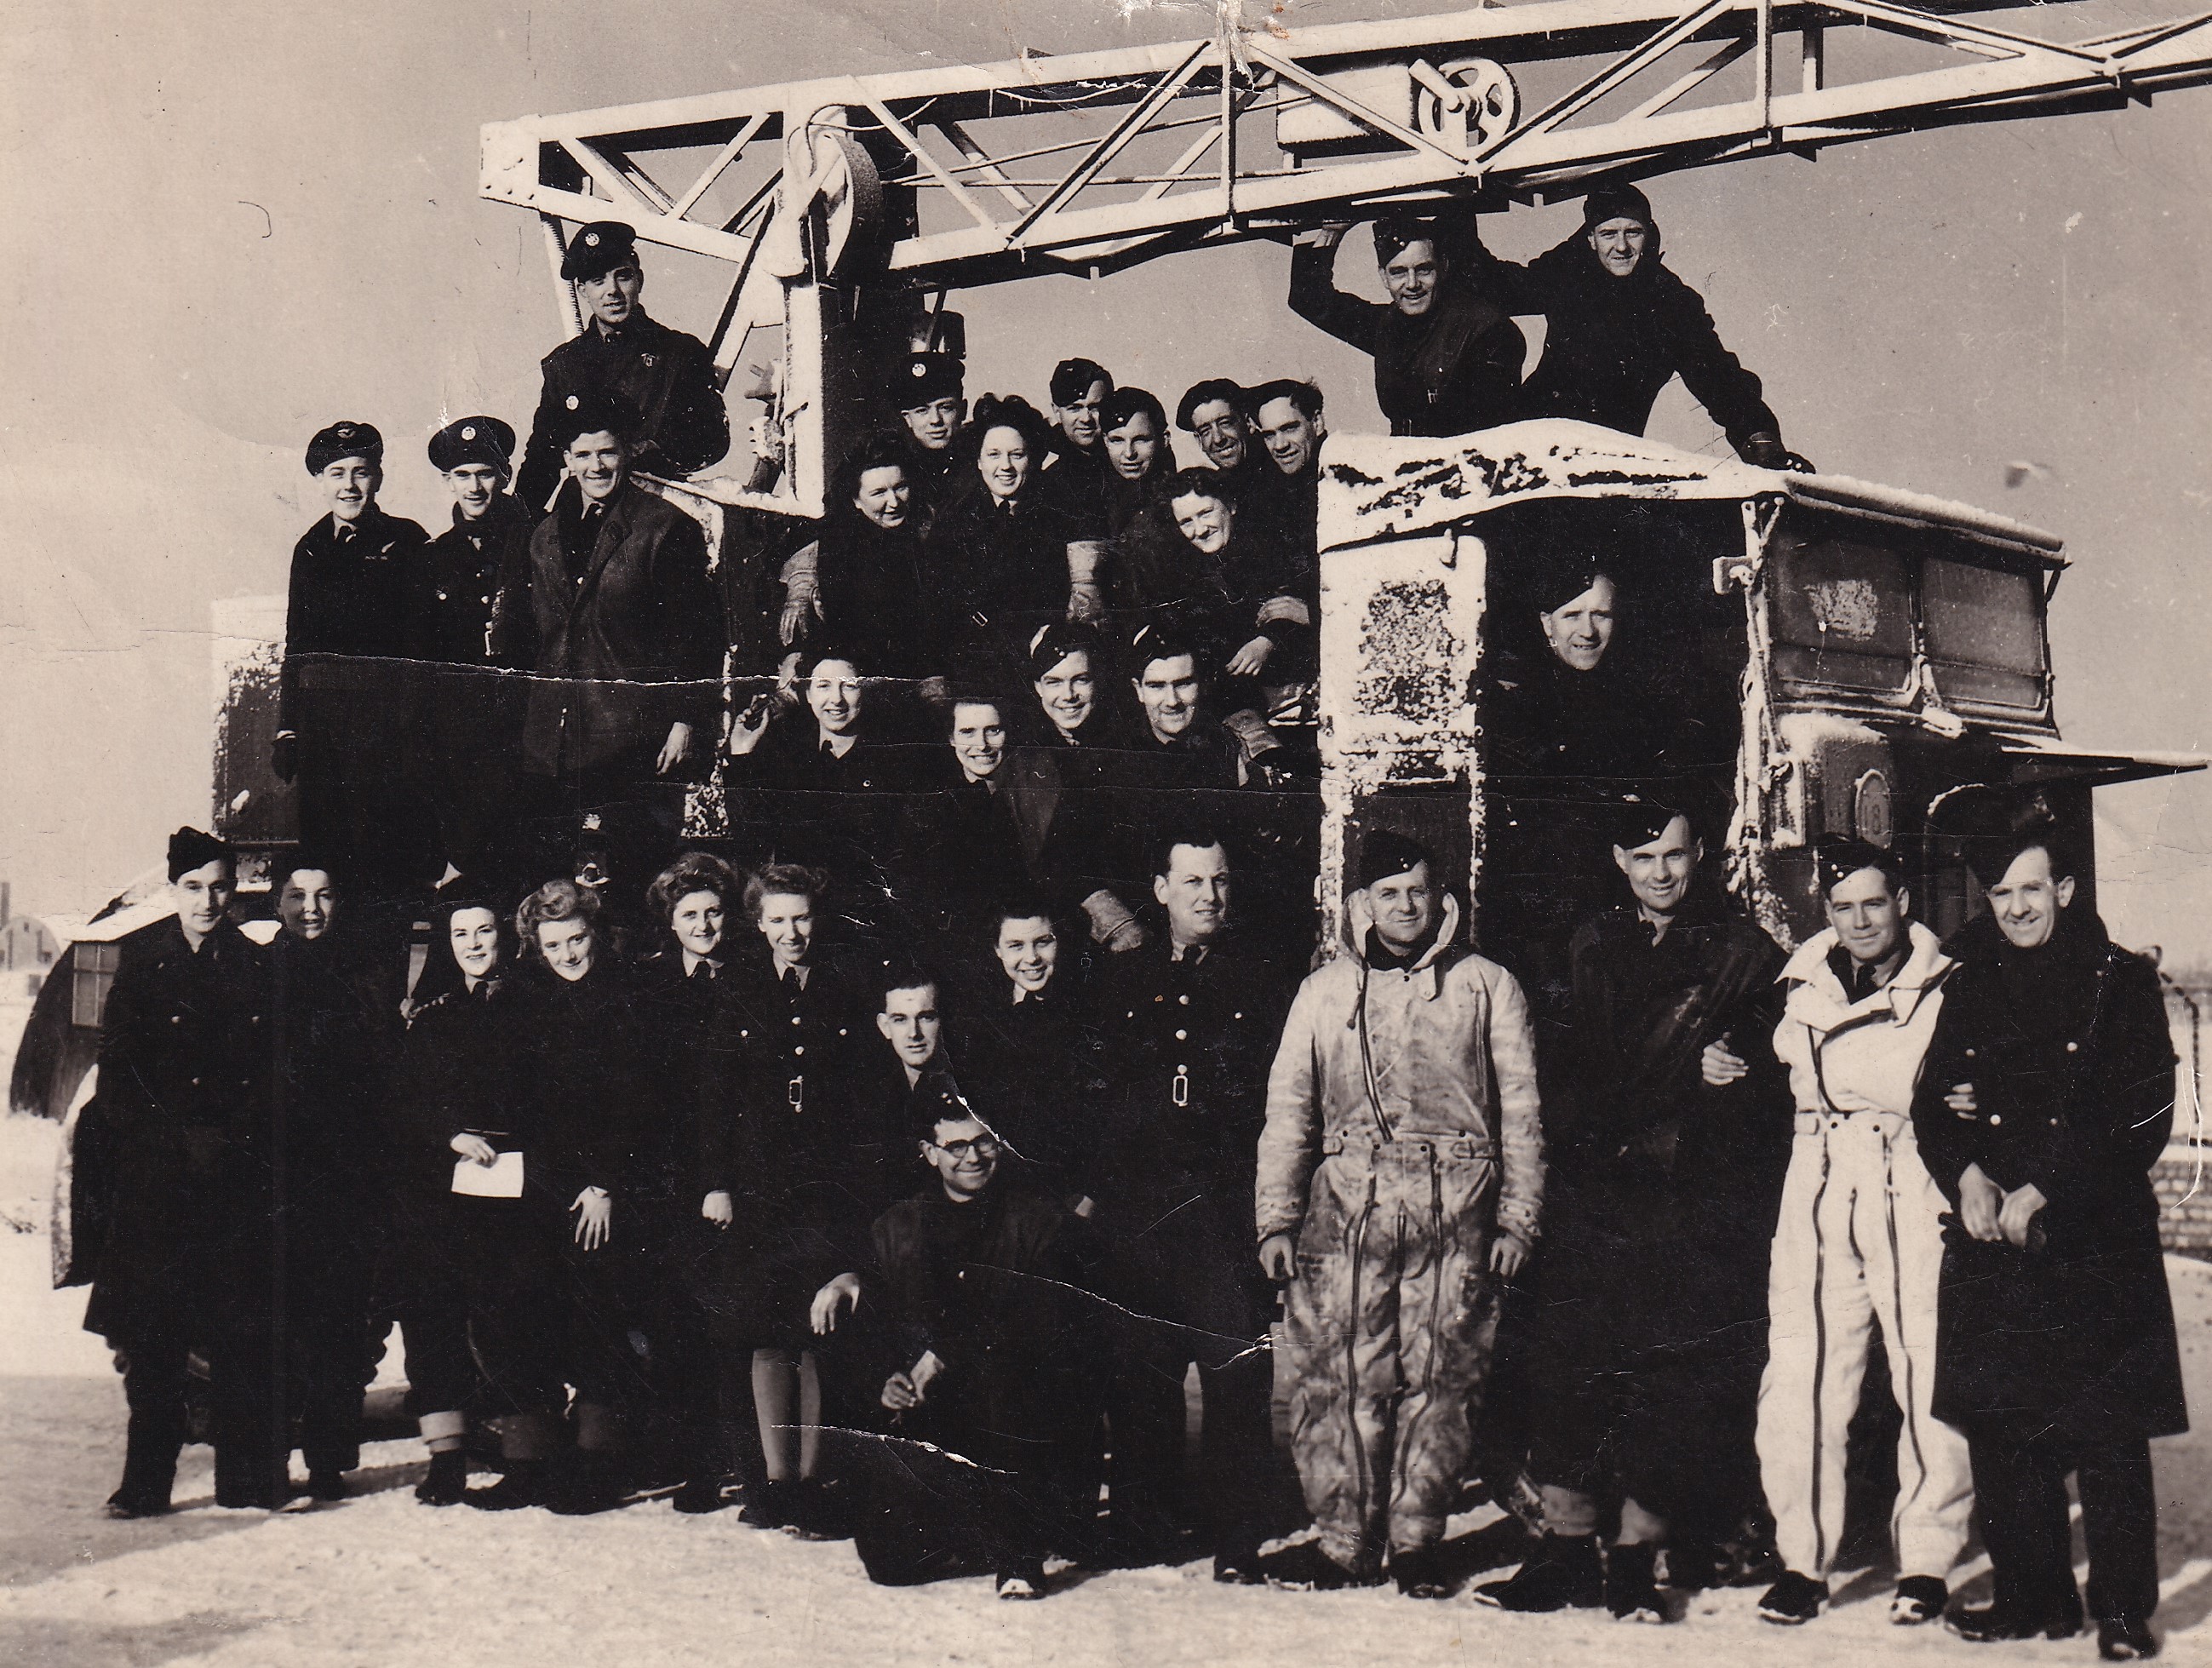 |
Motor Transport Section - 550 Squadron, February 1945
Many thanks to Nigel Sayer-Payne (son of LACW Evelyn Marlow) for making the photo available |
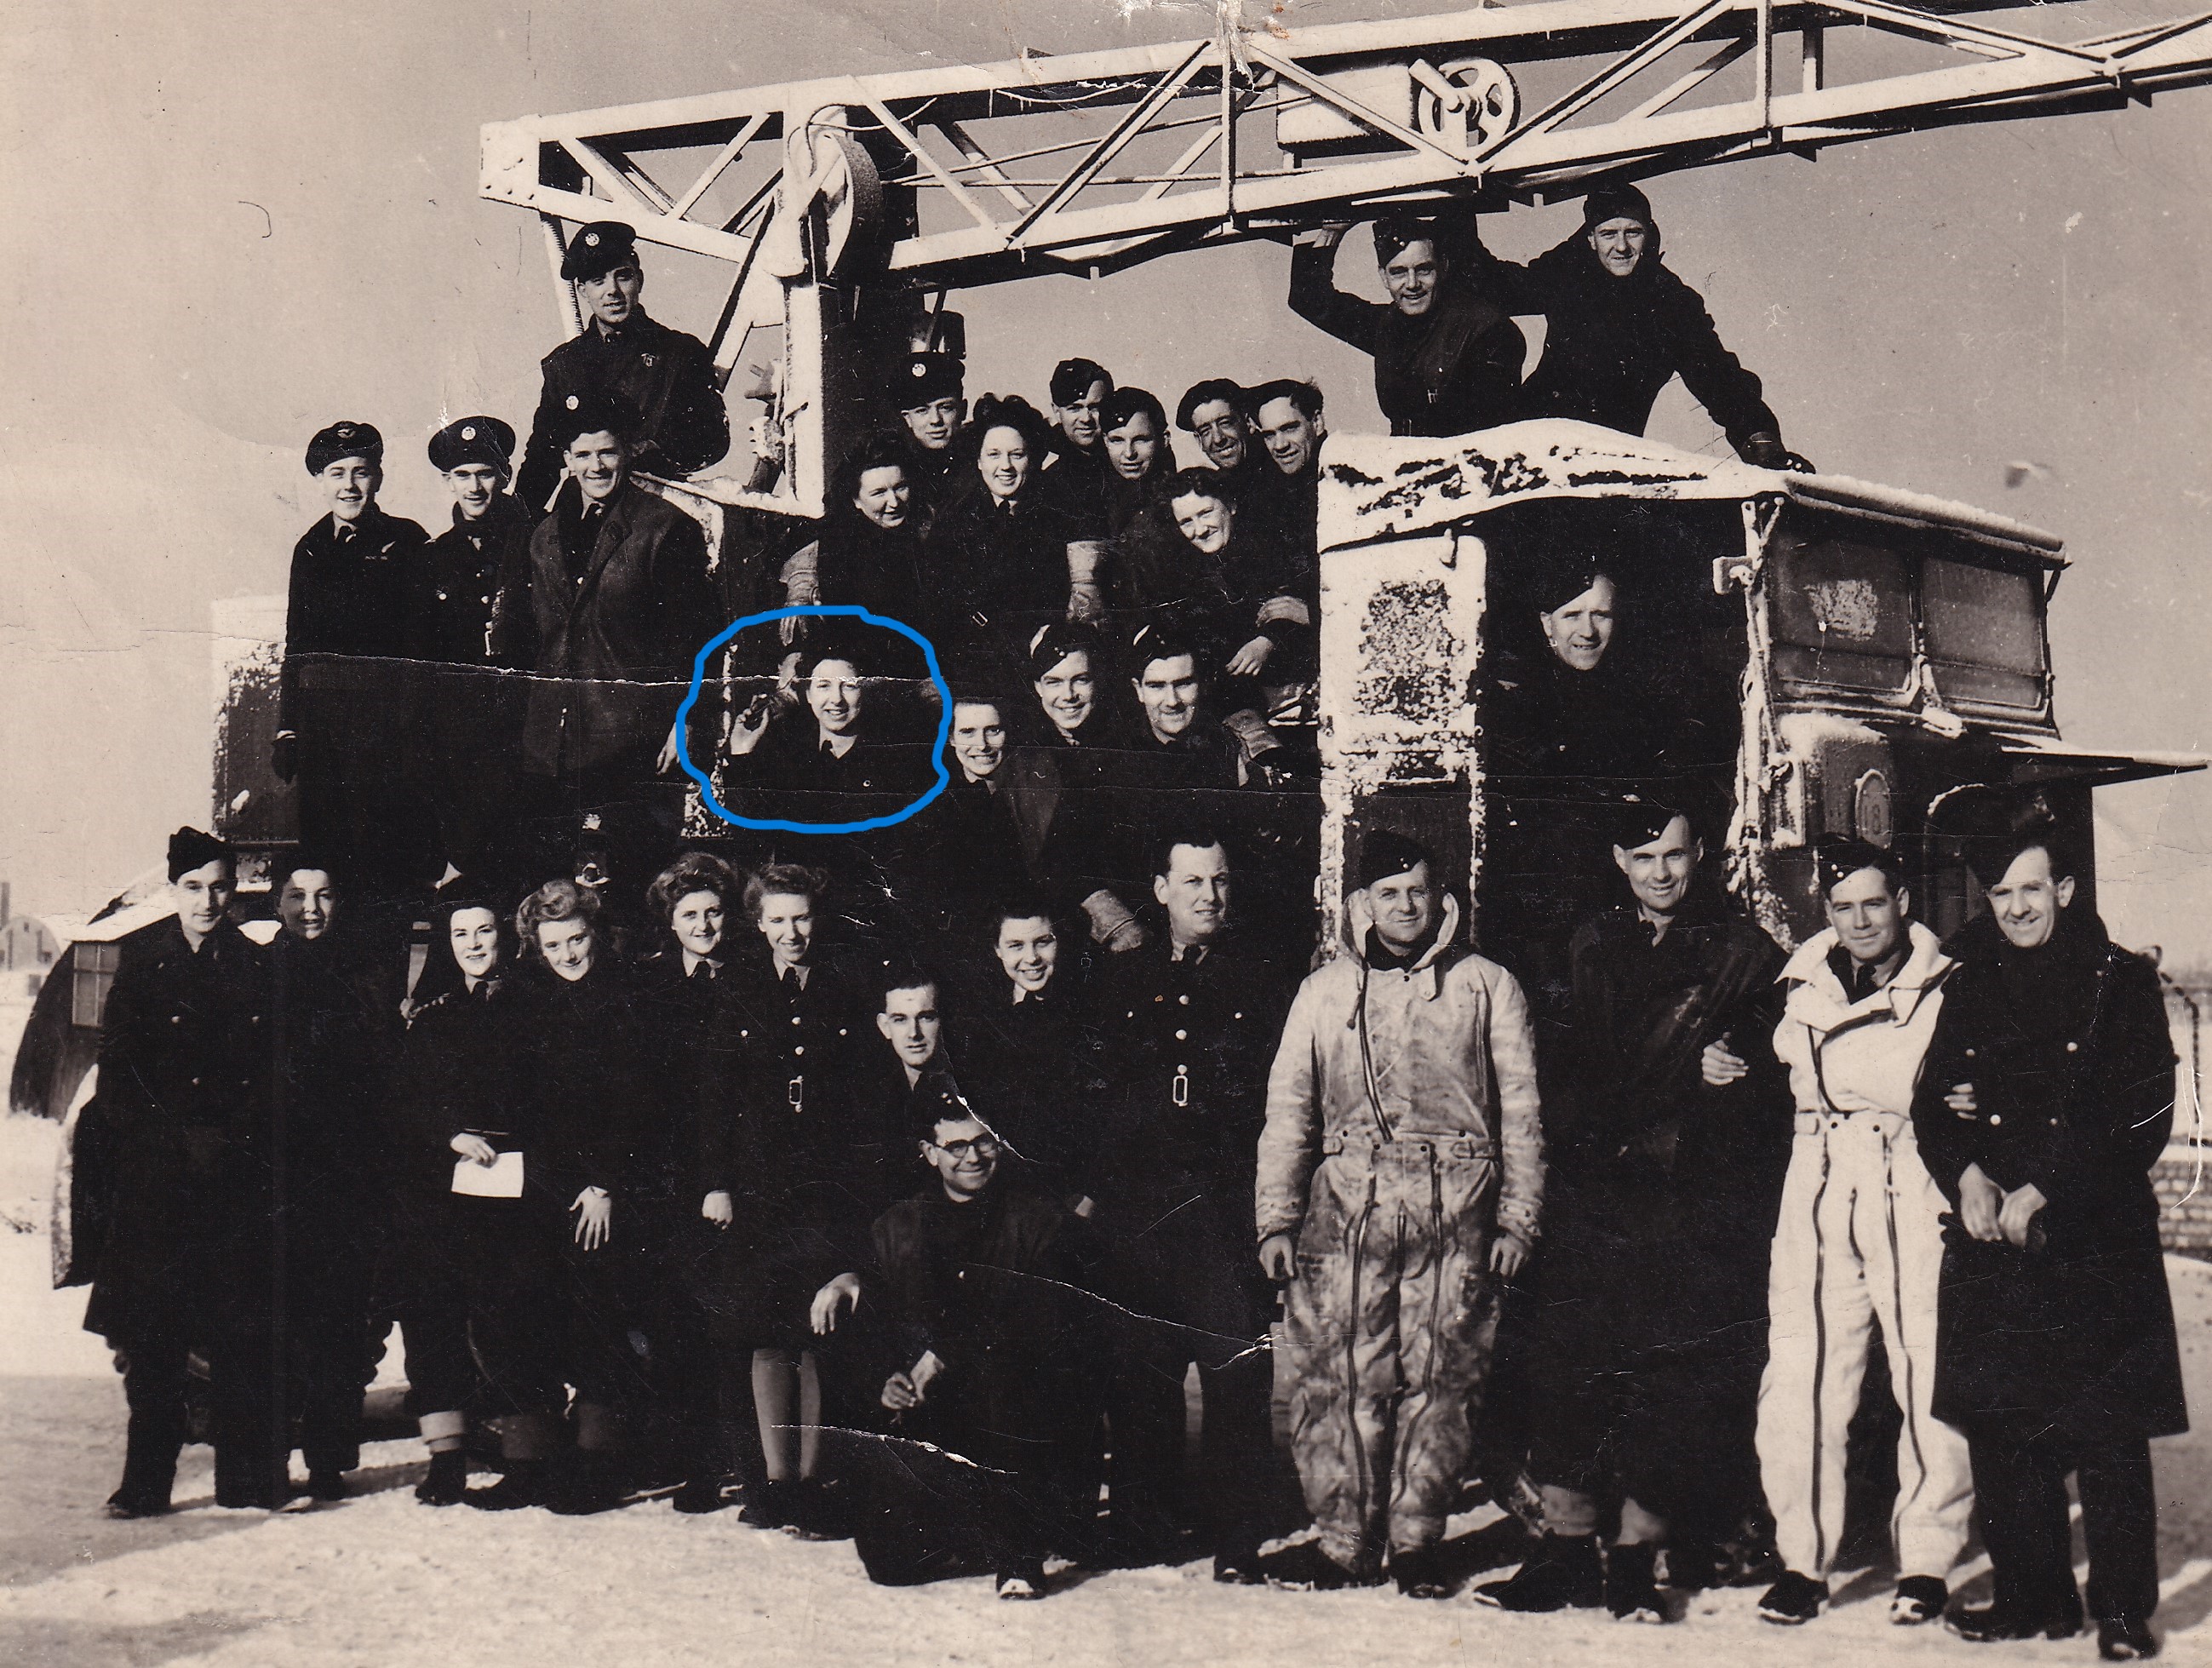 |
Motor Transport Section - 550 Squadron, February 1945 (same photo as above, LACW Evelyn Marlow circled) |
Aircrew
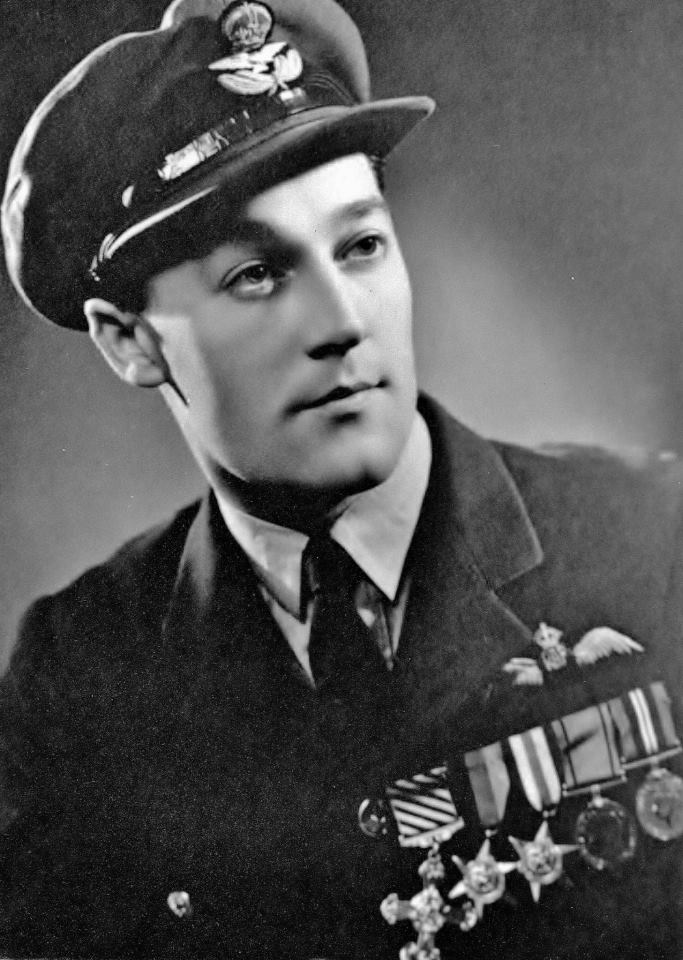
W/Cmdr Bryan "Dingle" Bell
|
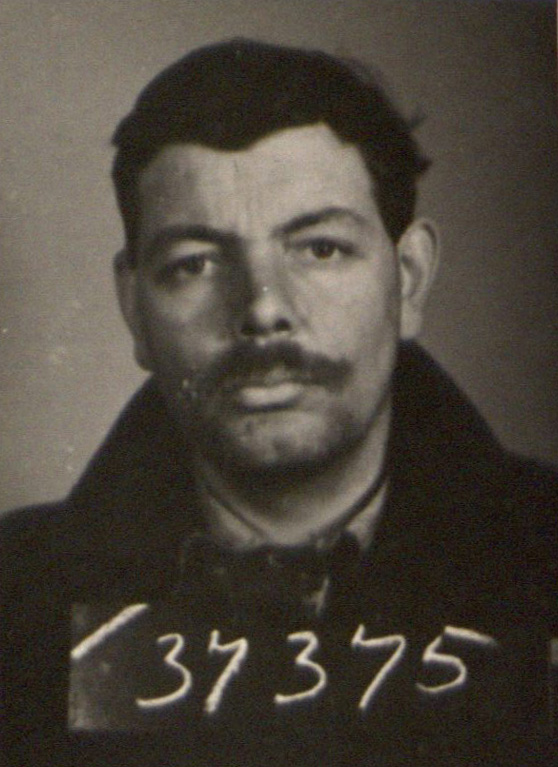
Wing Commander Bryan "Dingle" Bell PoW (FTR 22 Feb 45) PoW picture from German archive: taken when W/Cmdr Bell was captured after going on the run following the crash. To find out how W/Cmdr Bell's family acquired this picture and learn more about him click here Picture courtesy of Gordon Bell |
P/O P J Dukelow and Crew
LL851 was shot down by a Messerschmitt over Belgium on 21/21 May 1944 on the operations to Duisburg. LL851 was one of three 550 Sqdn Lancasters lost on this operation. The aircraft crashed into a field owned by Albert Van Hoornick at Heimolen (Oost-Vlaanderen) between the Wever and Heimolenstraat some 3 km south of Sint Niklass, where all were buried in the town's communal cemetery.
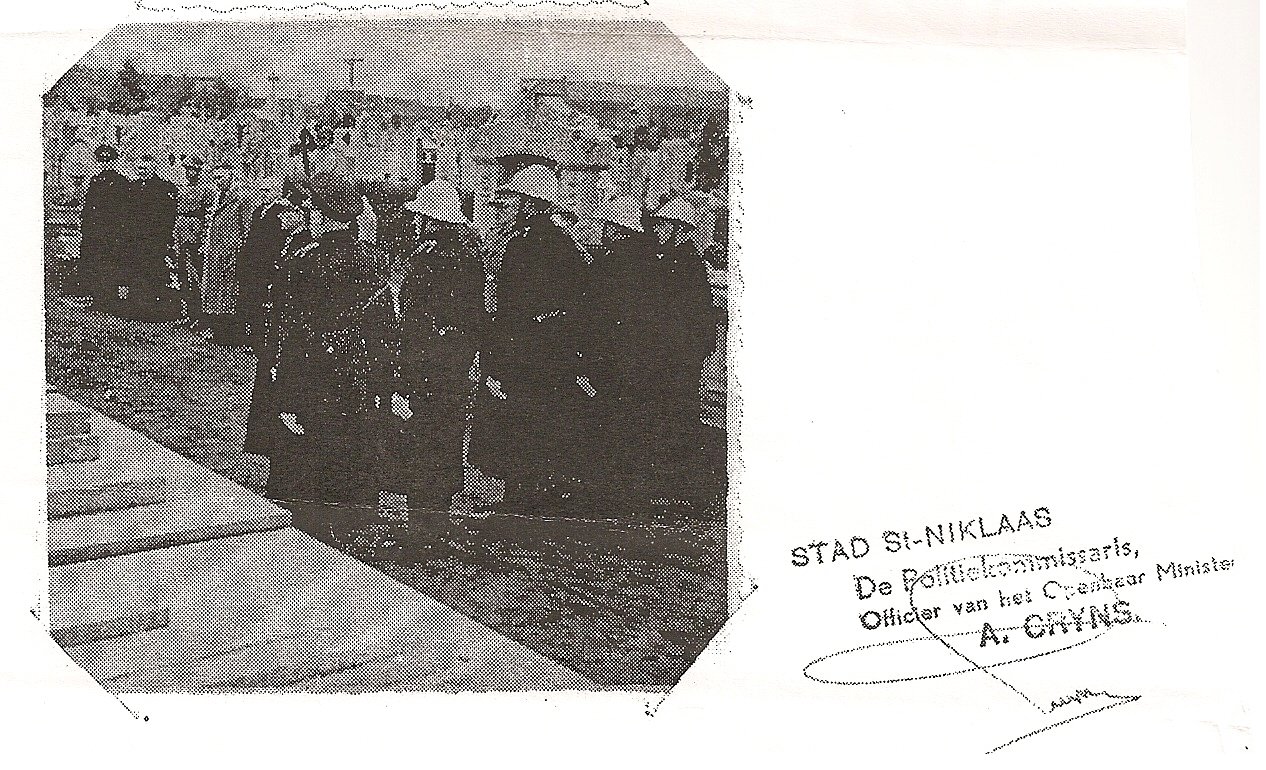 |
St Niklaas Cemetery 1944
To find out more about LL851 and this crew lost over Belgium click here |
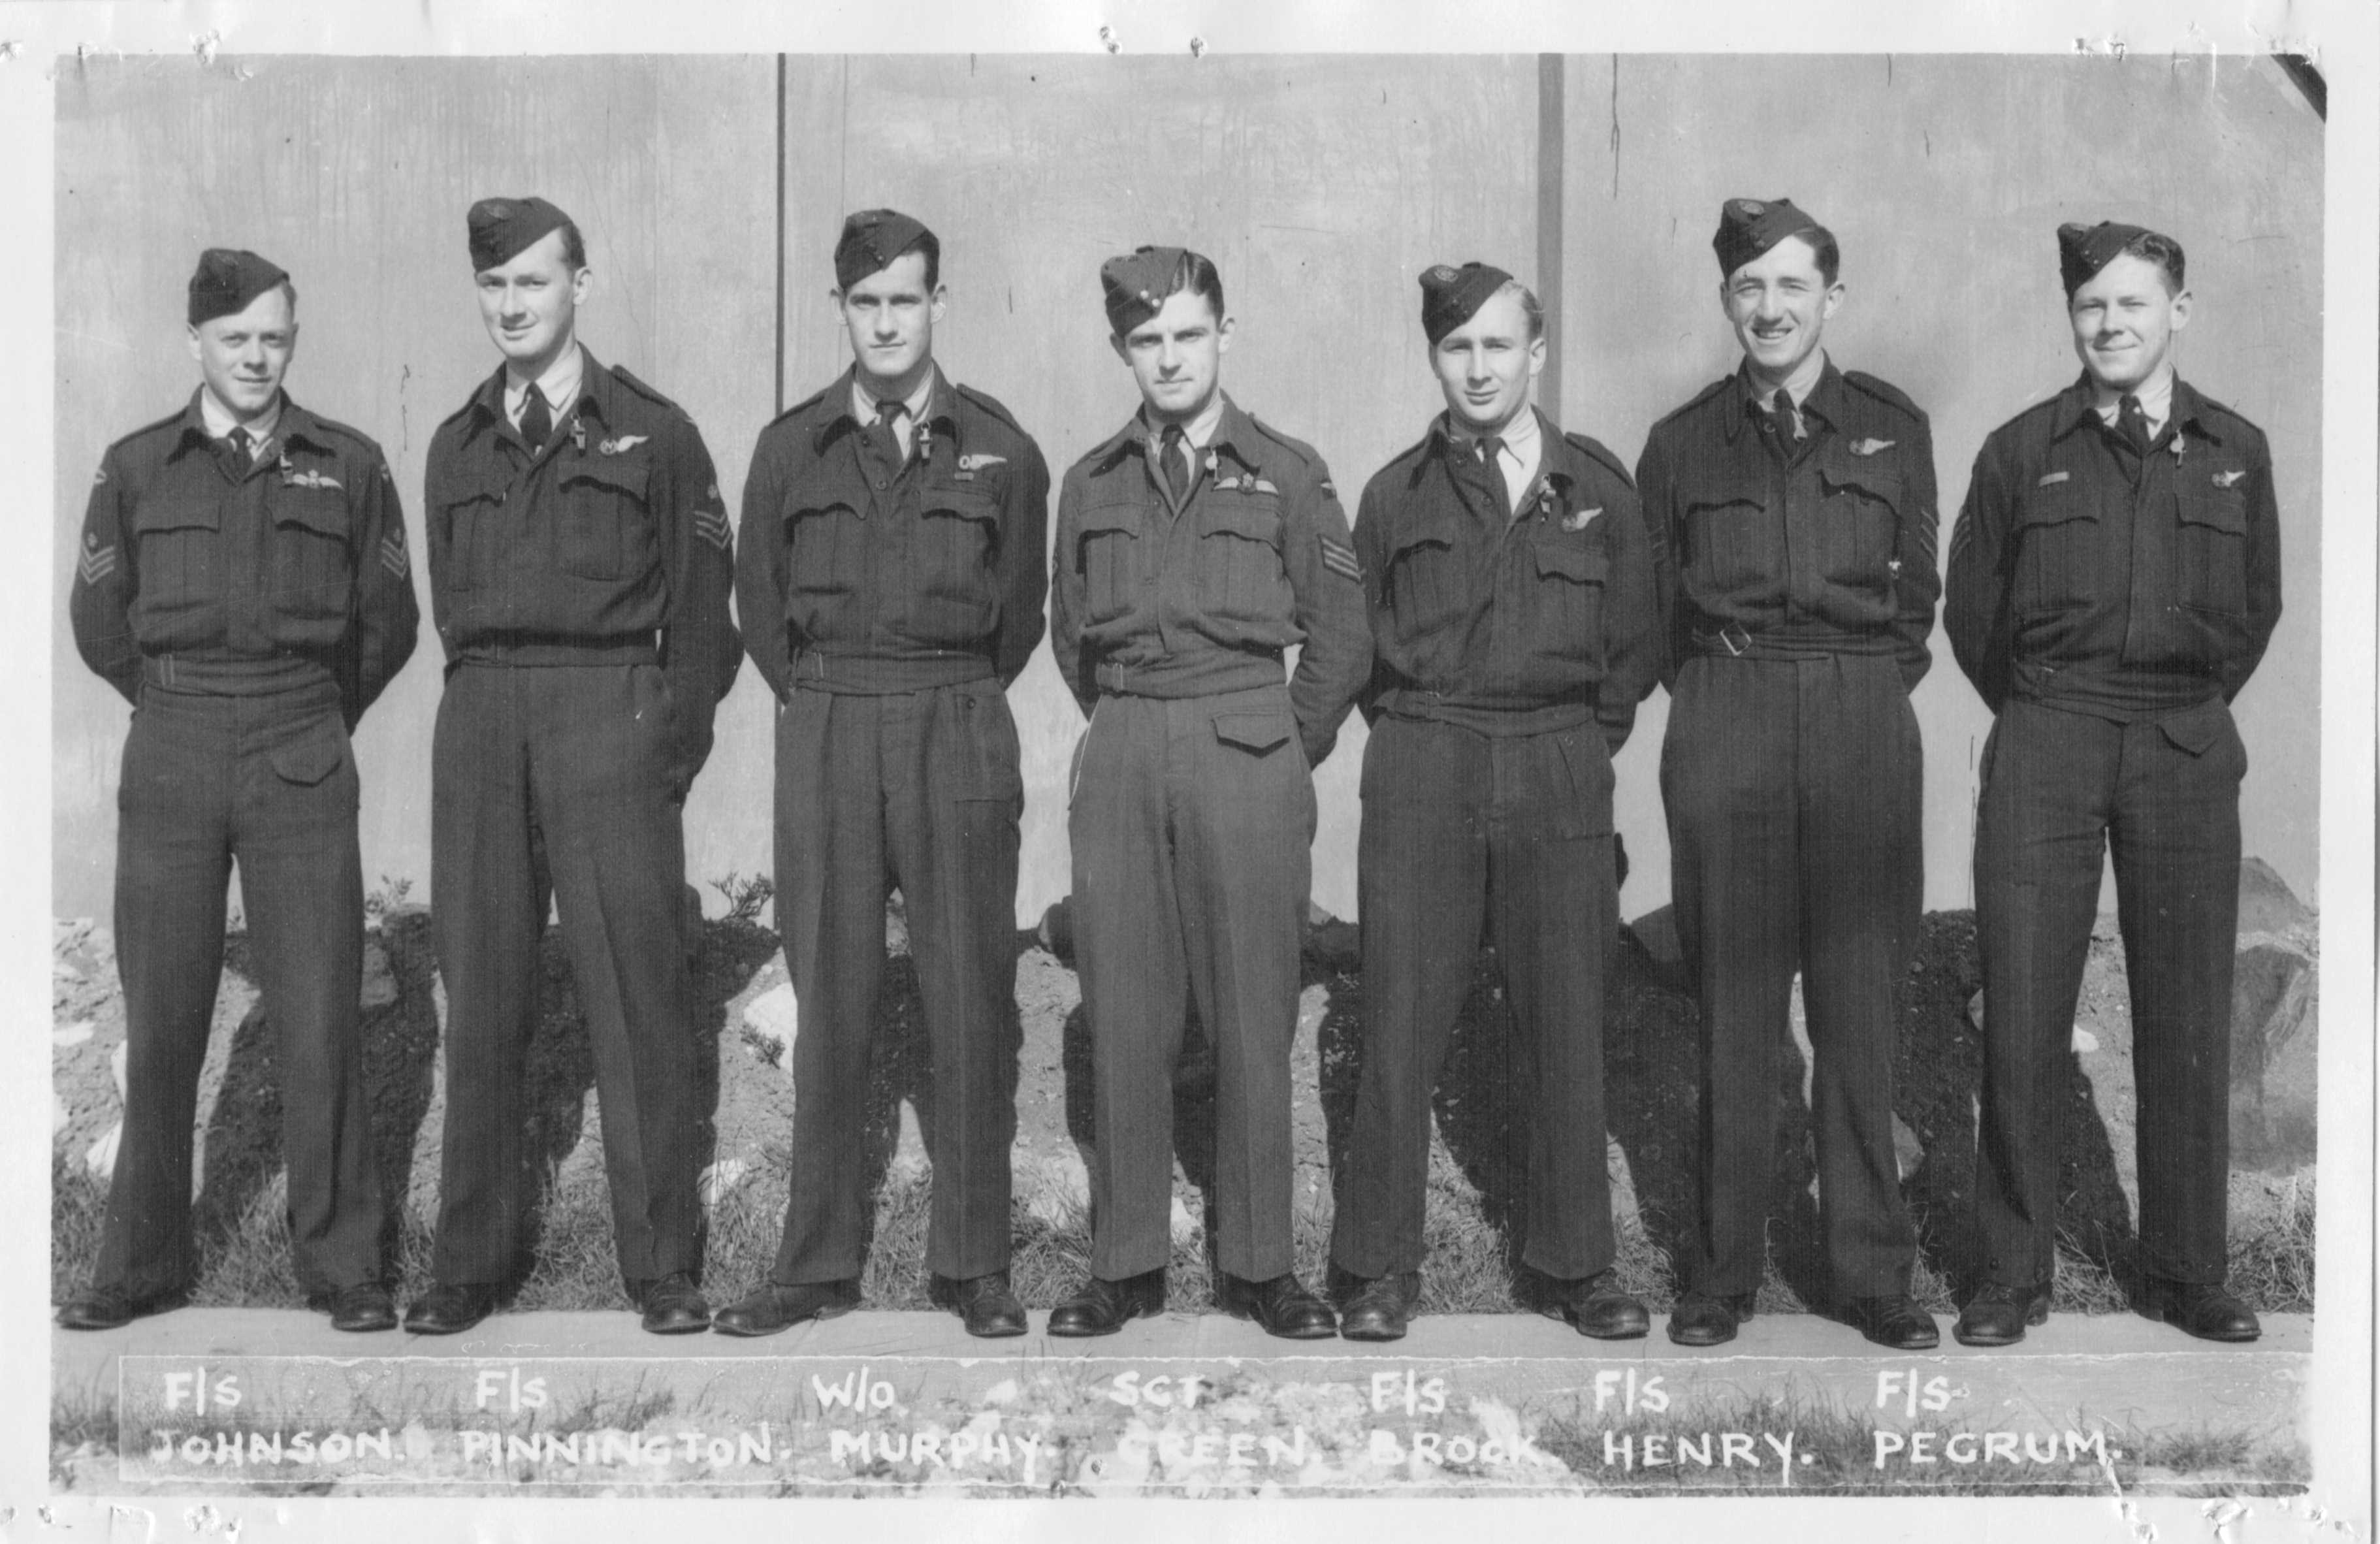
F/S G W Hinde and Crew
DV309 was shot down on the outskirts of Westerlo, Belgium, one of three 550 Sqdn Lancasters lost on the Duisburg operation on 21/22 May 1944.
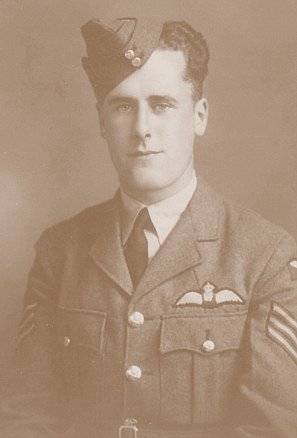 |
F/S G W Hinde
To find out more about DV309 and this crew lost over Belgium click here See also the Westerlo Commemorations pages. |
F/O J C Adams and Crew
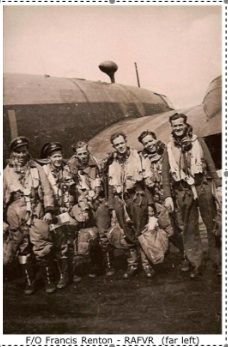 |
Crew photo (minus the F/Eng, Sgt Scott) L-to-R: F/O Renton, F/O Elcoate, Sgt Winstanley, F/Sgt Sterman, F/O Adams (P), F/Sgt Papple For further information and photos click here. Picture courtesy of Brian Goodwin |
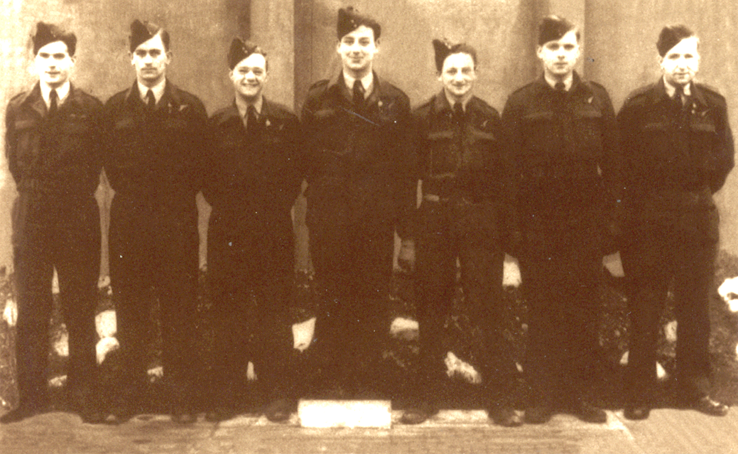
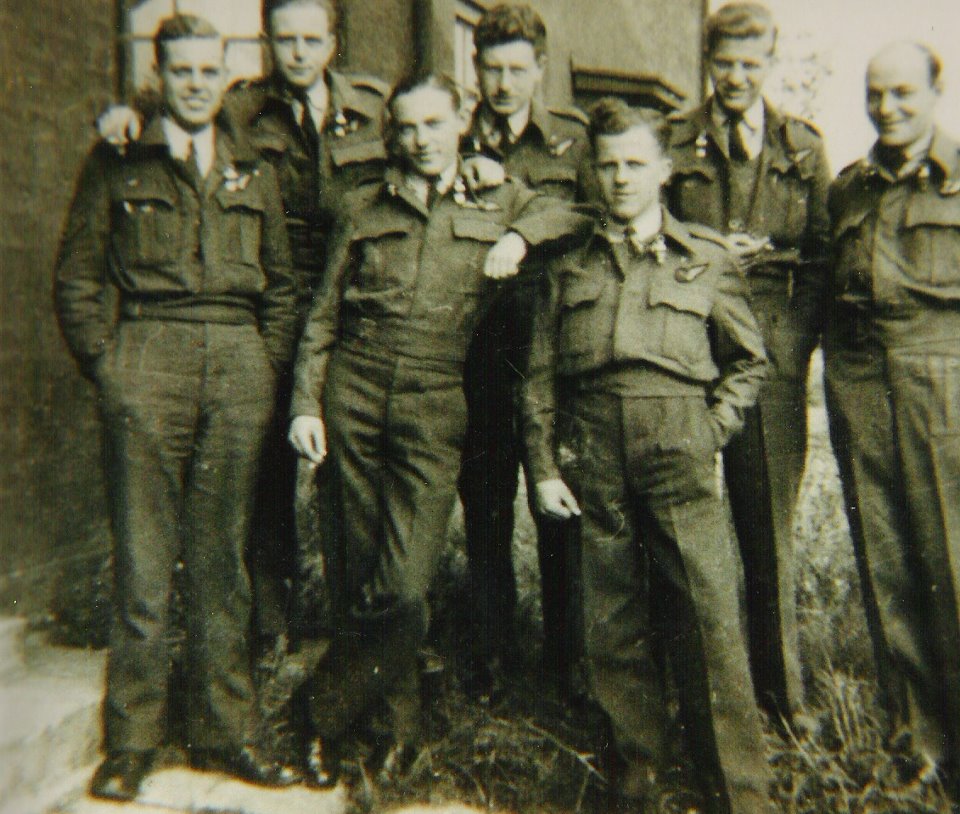
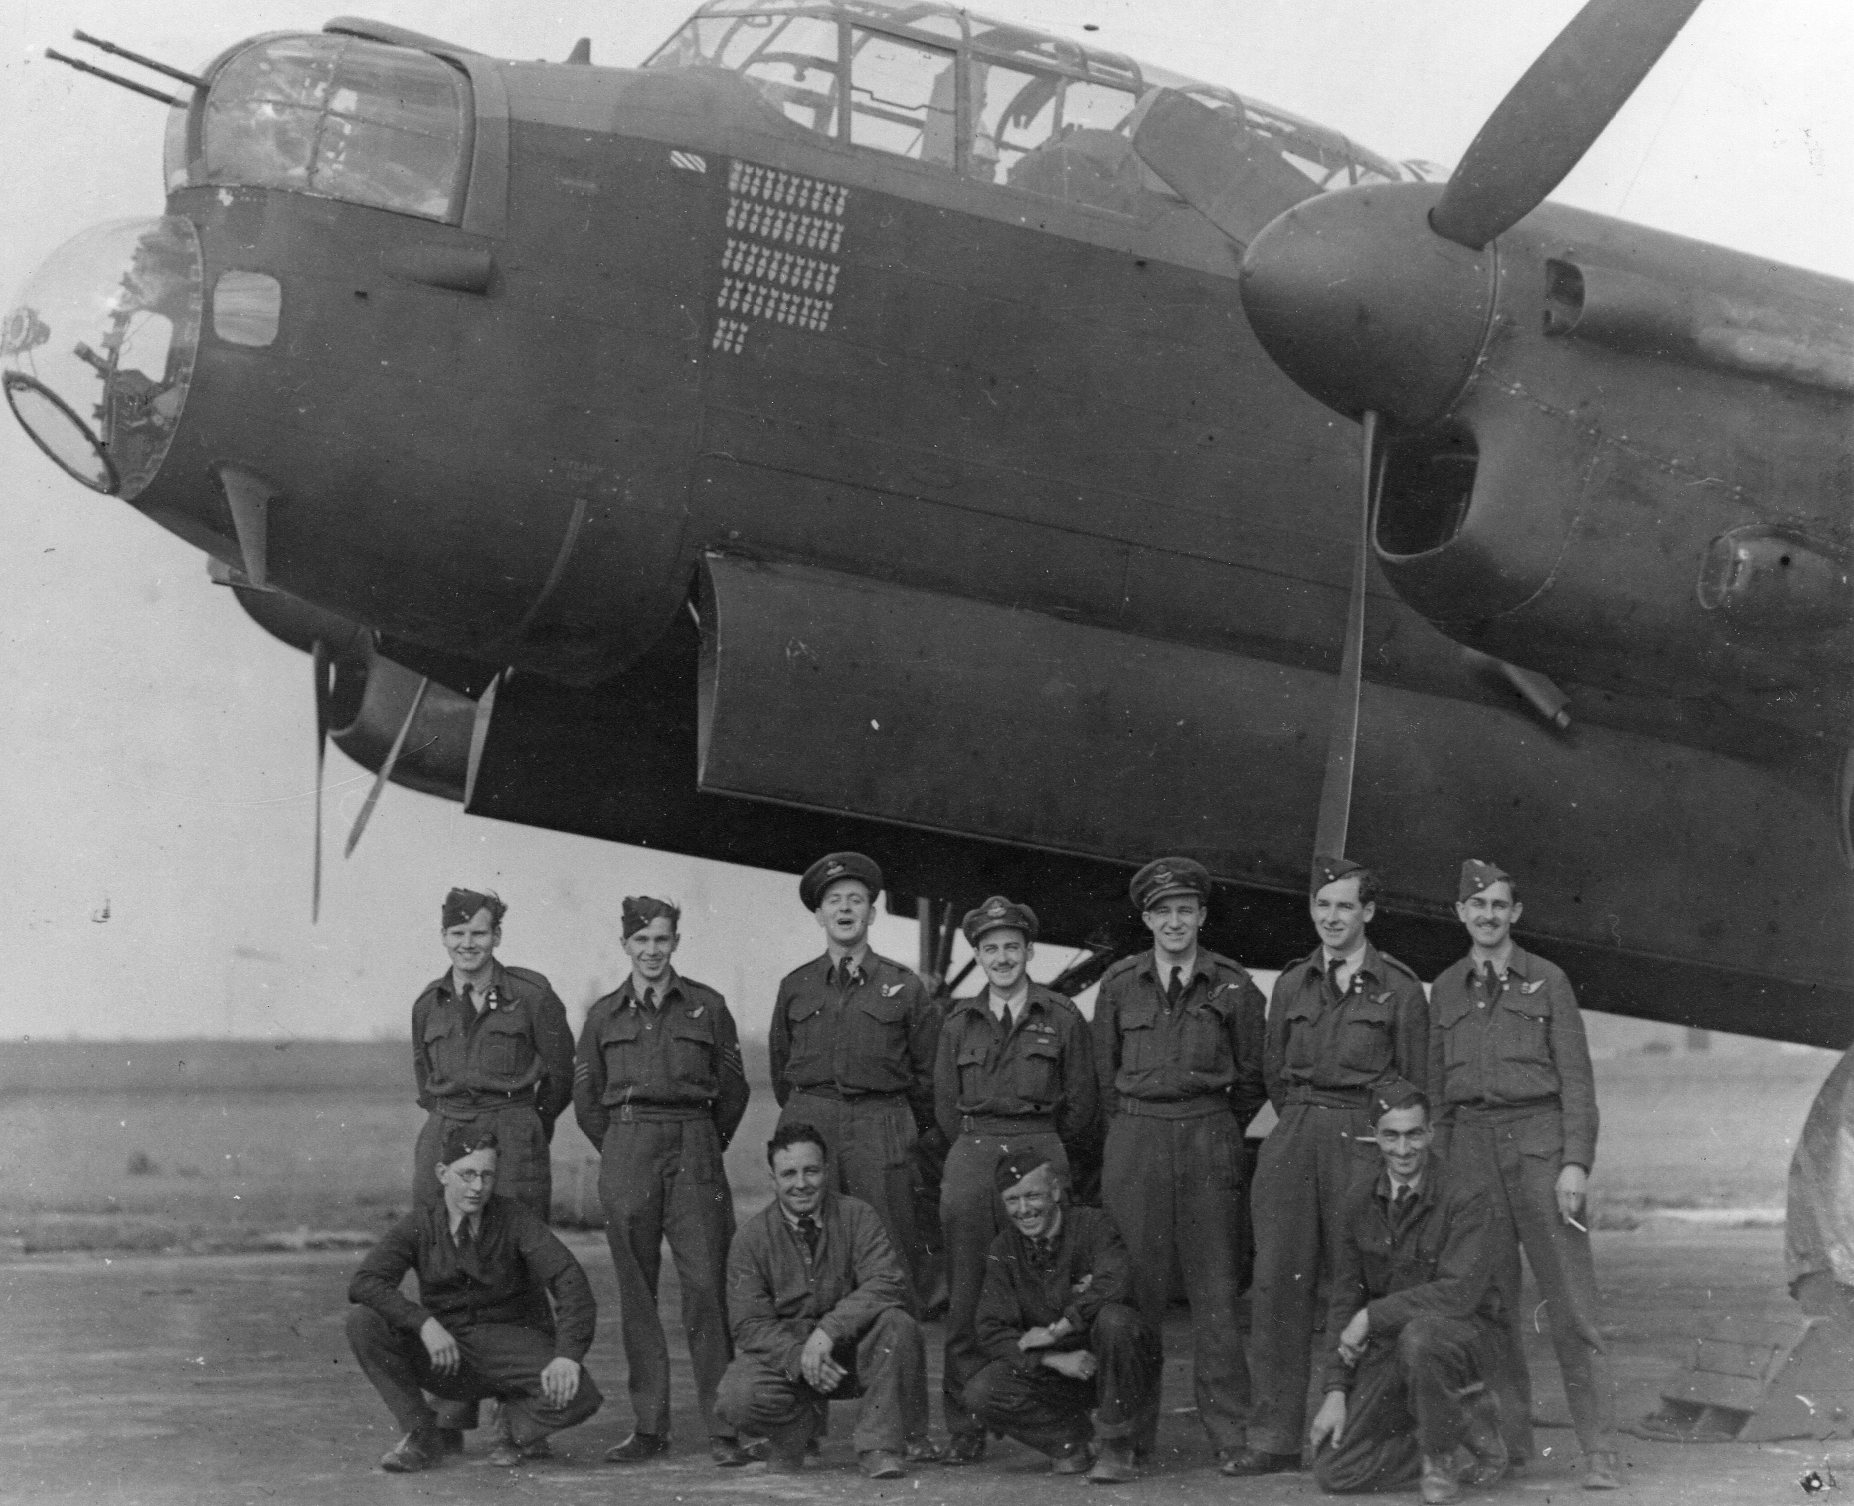
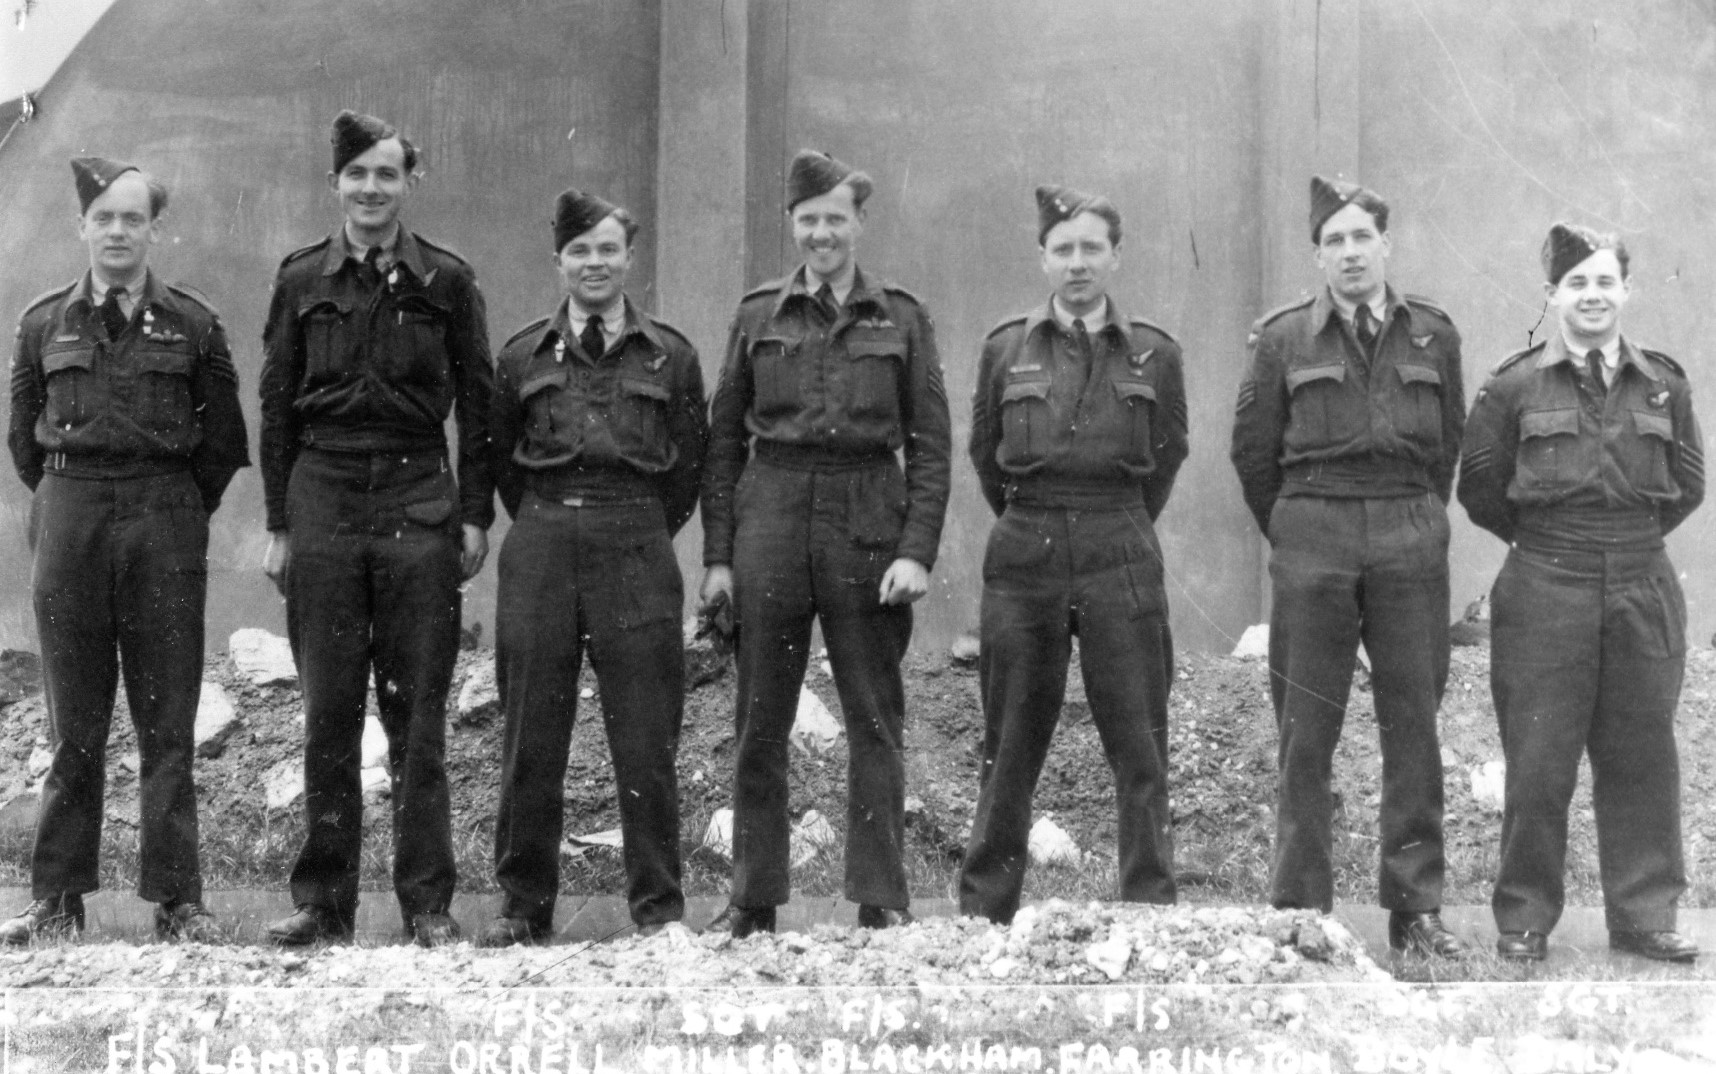
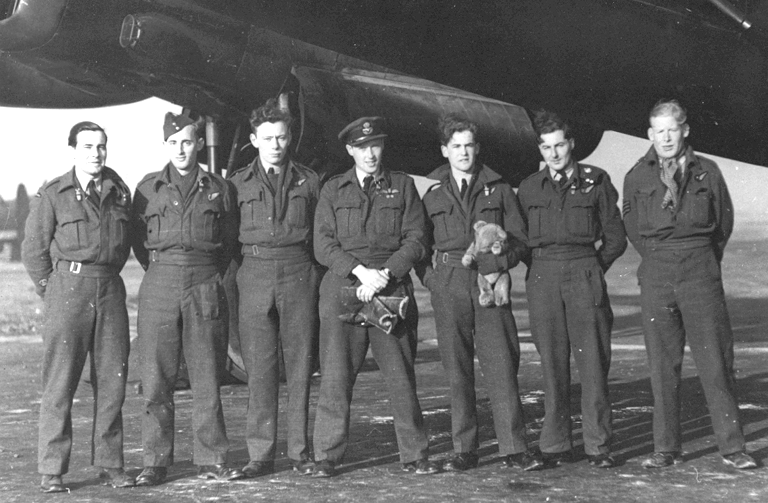
F/O L B Cameron DFC and Crew
F/O Cameron and his crew did a full operational tour, many of the flights in LM273.
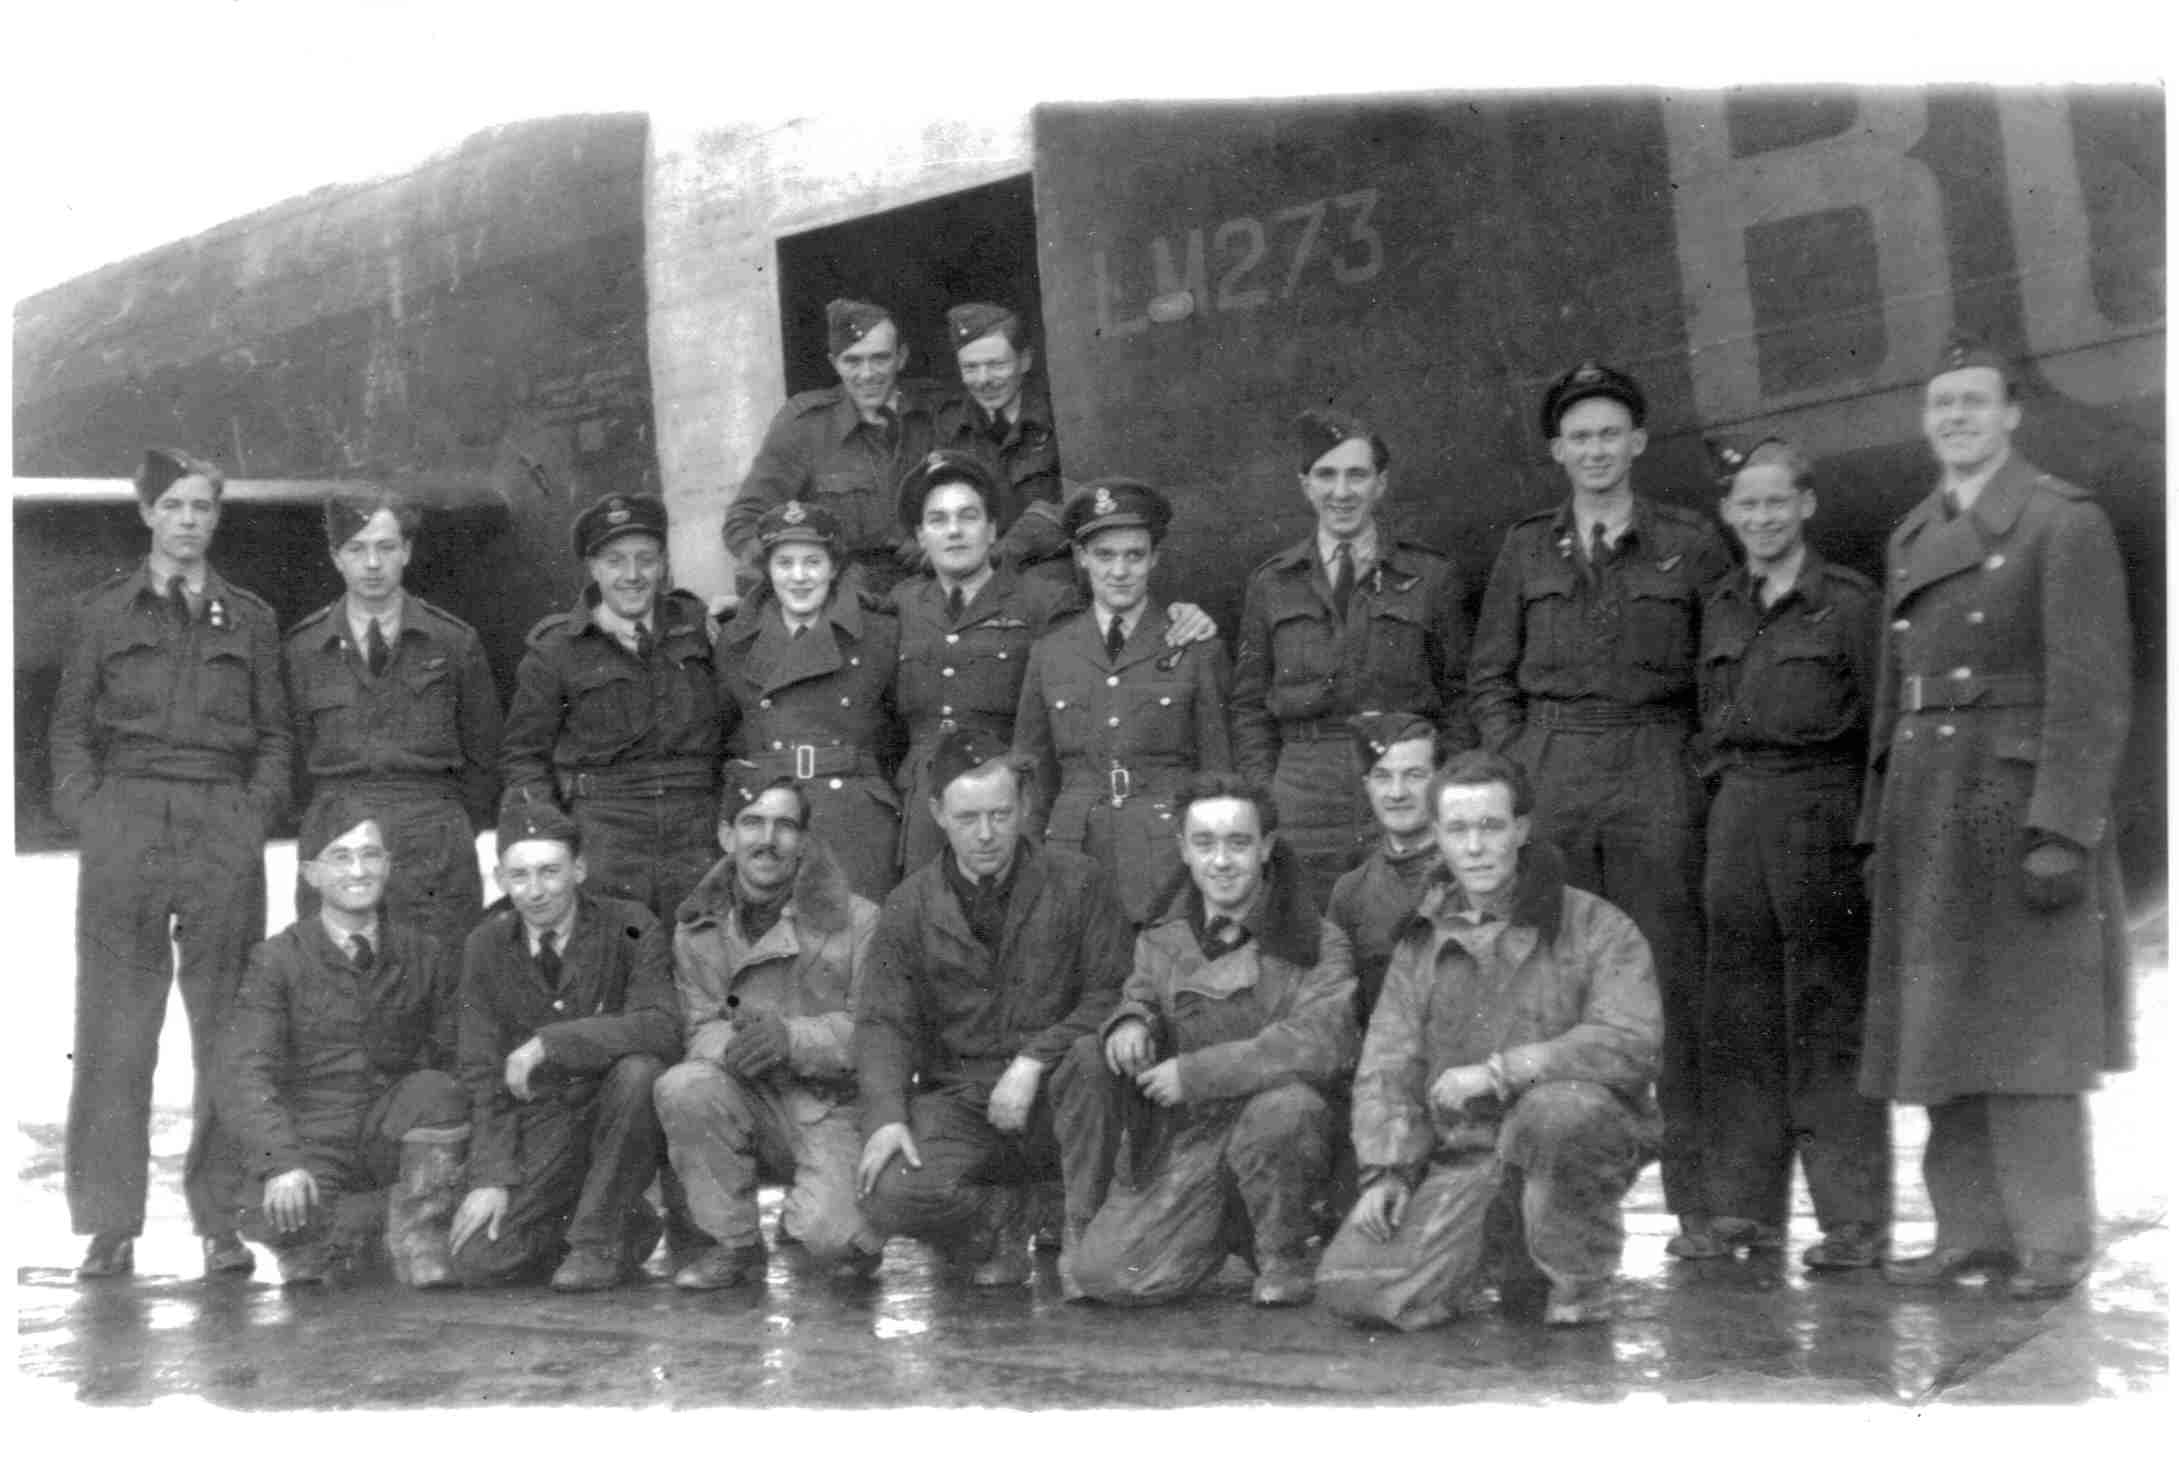 |
Doorway: F/L Avery (Navigation Leader), F/L Bill Peek (Bombing Leader)
Back Row: Sgt Dave Eldridge, Sgt Frank Popple, F/Lt Jock Shaw, F/O Peggy Burnside (intel.), F/O Les Cameron, Sgt. Joe White Sgt Glen Sutherland, P/O Joe Rigby, Sgt F Piertney, S/Ldr B J Redmond Front Row: LM273 ground crew technical team (names unknown) Picture courtesy of Jim Cameron To see more photos of this crew and the list of the operations they completed click here |
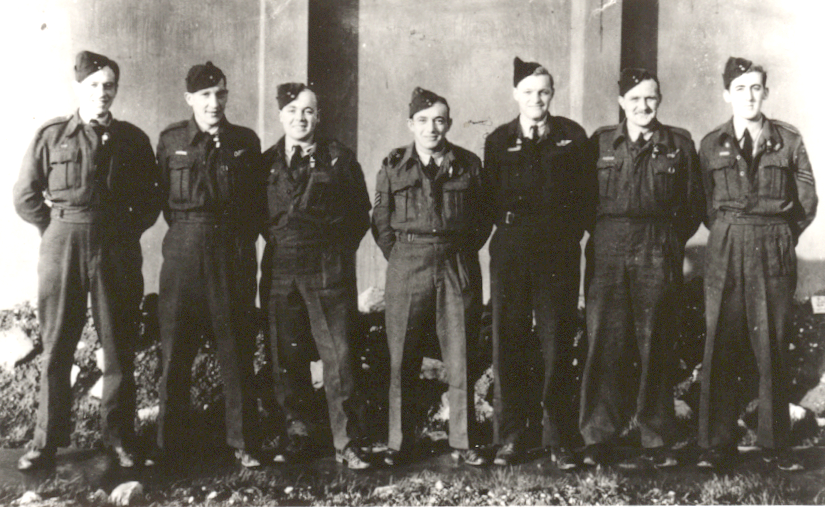
F/O D H Grundy and Crew
LM273 was one of two 550 Sqdn Lancasters lost on the Pforzheim operation on 23/24 February 1945. The crew on this flight was not the Cameron crew in the photograph above but the F/O Grundy crew.
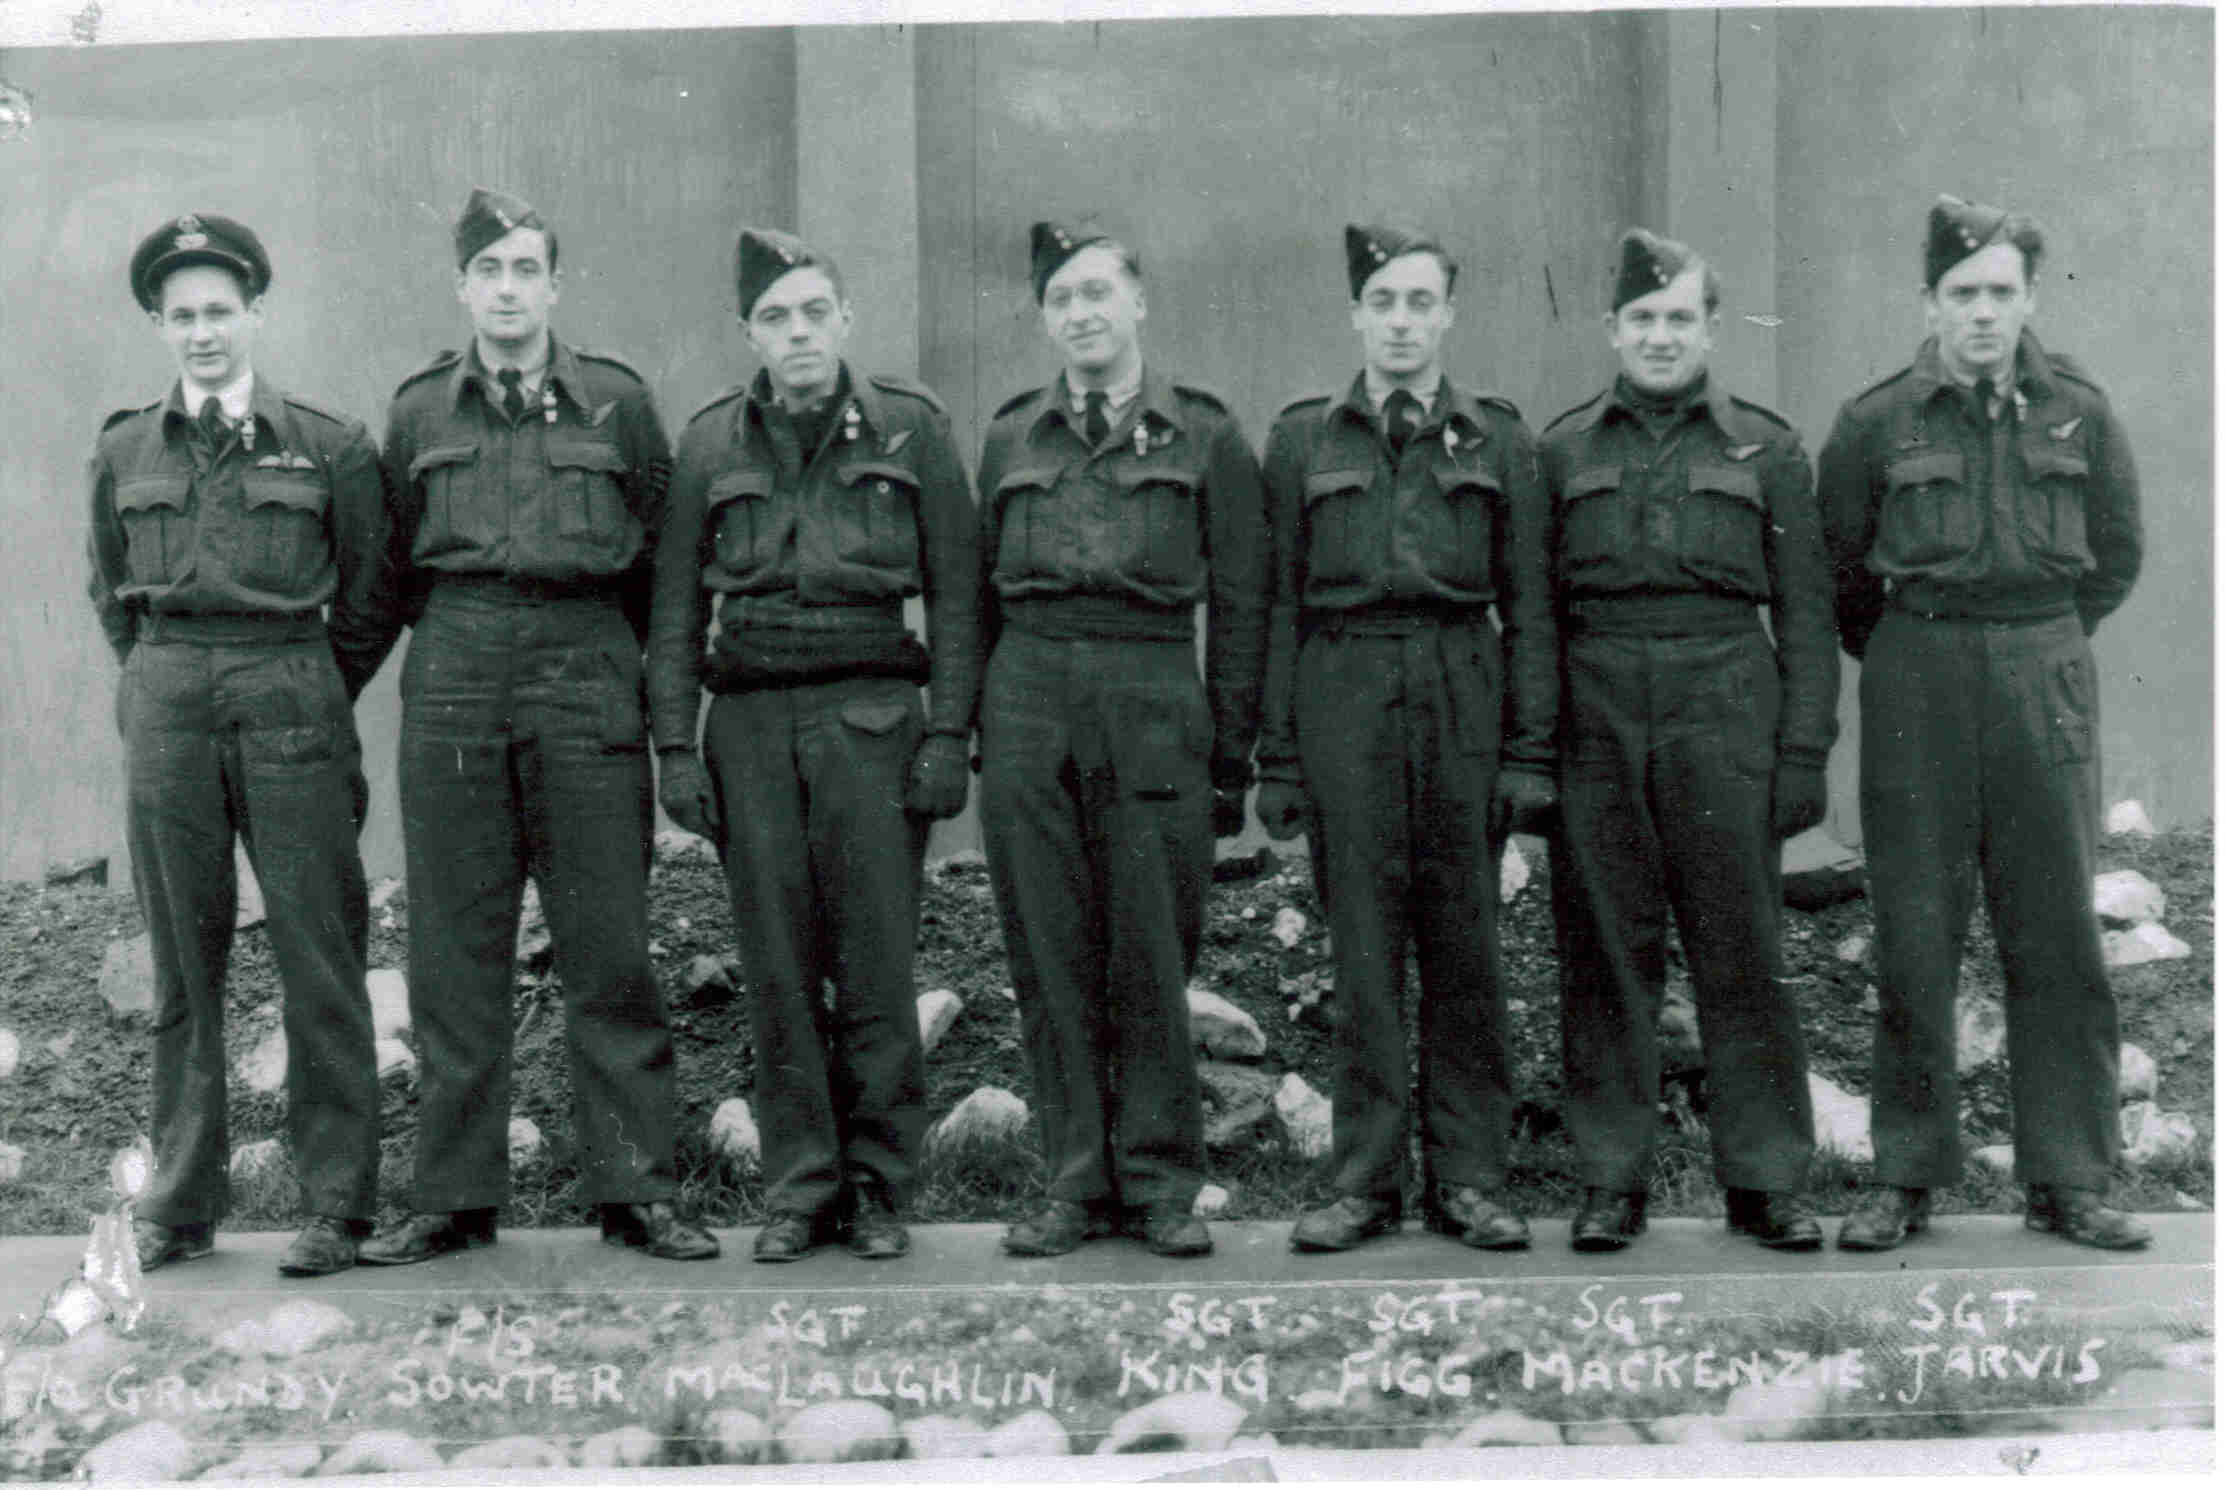 |
Left-to-right: F/O Grundy, F/Sgt Sowter, Sgt McLauchlan Sgt E W King, Sgt Figg, Sgt Mackenzie, Sgt Jarvis Picture courtesy of Jim Cameron For further information click here |
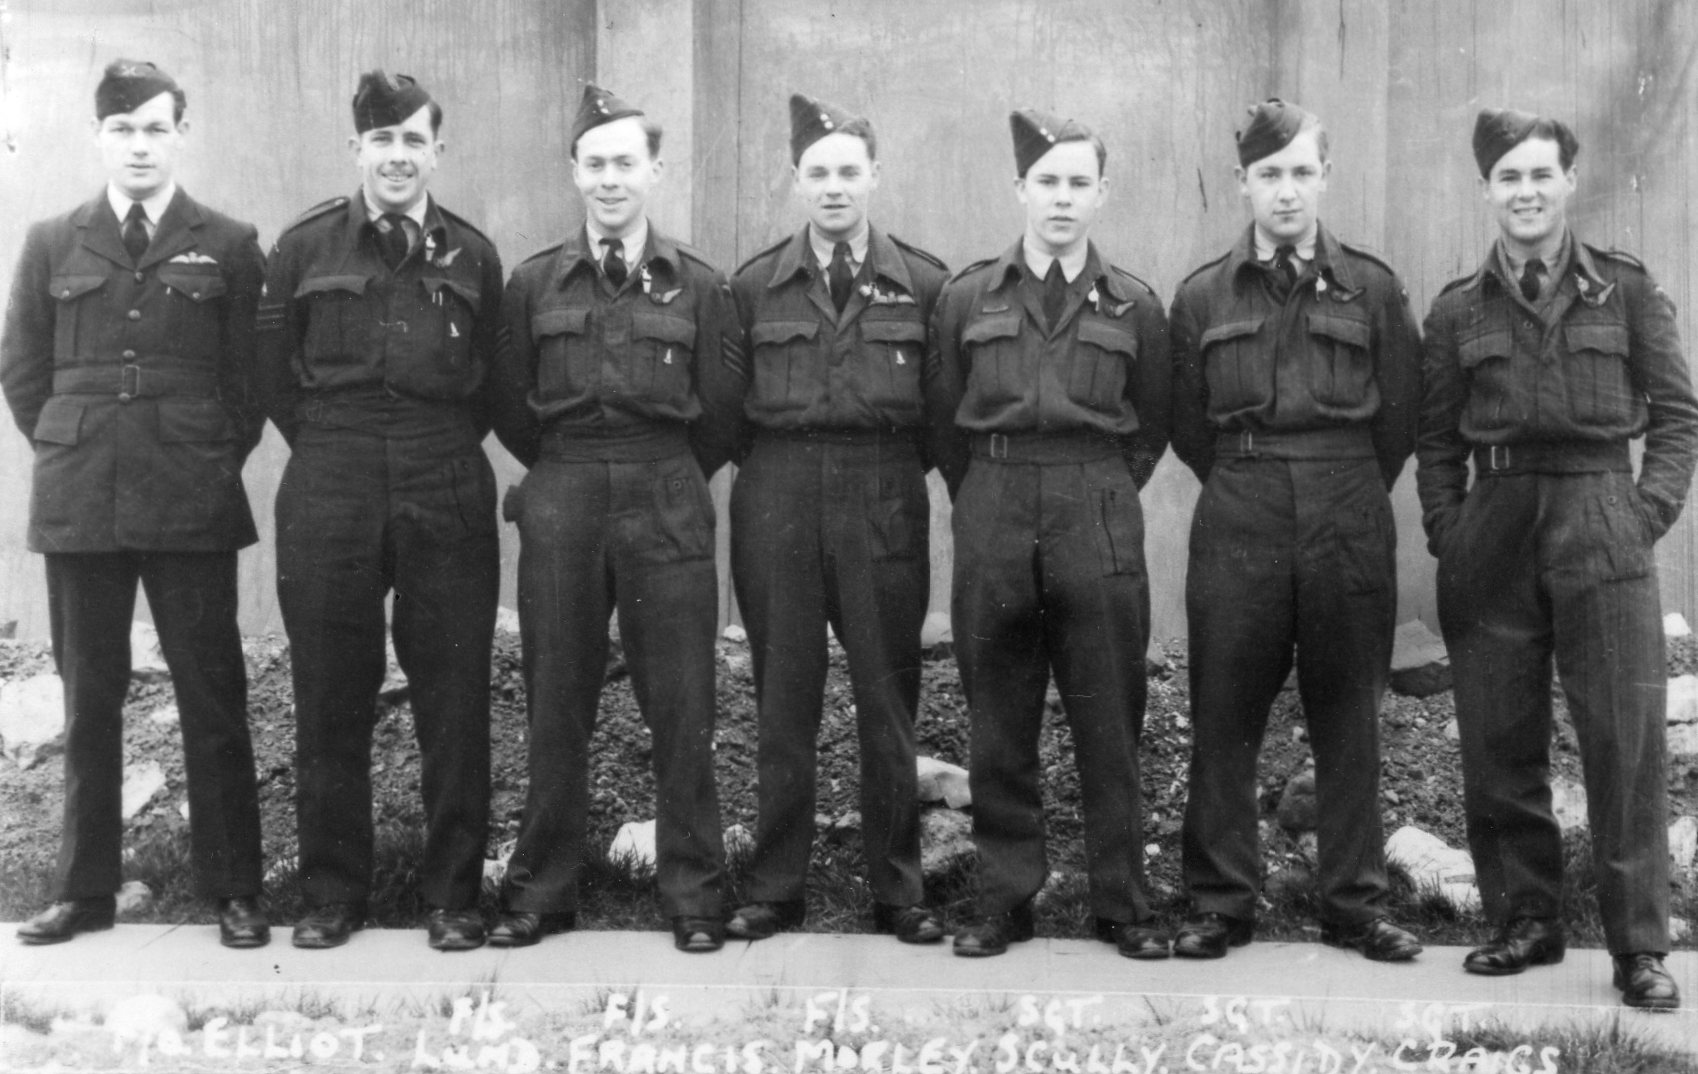
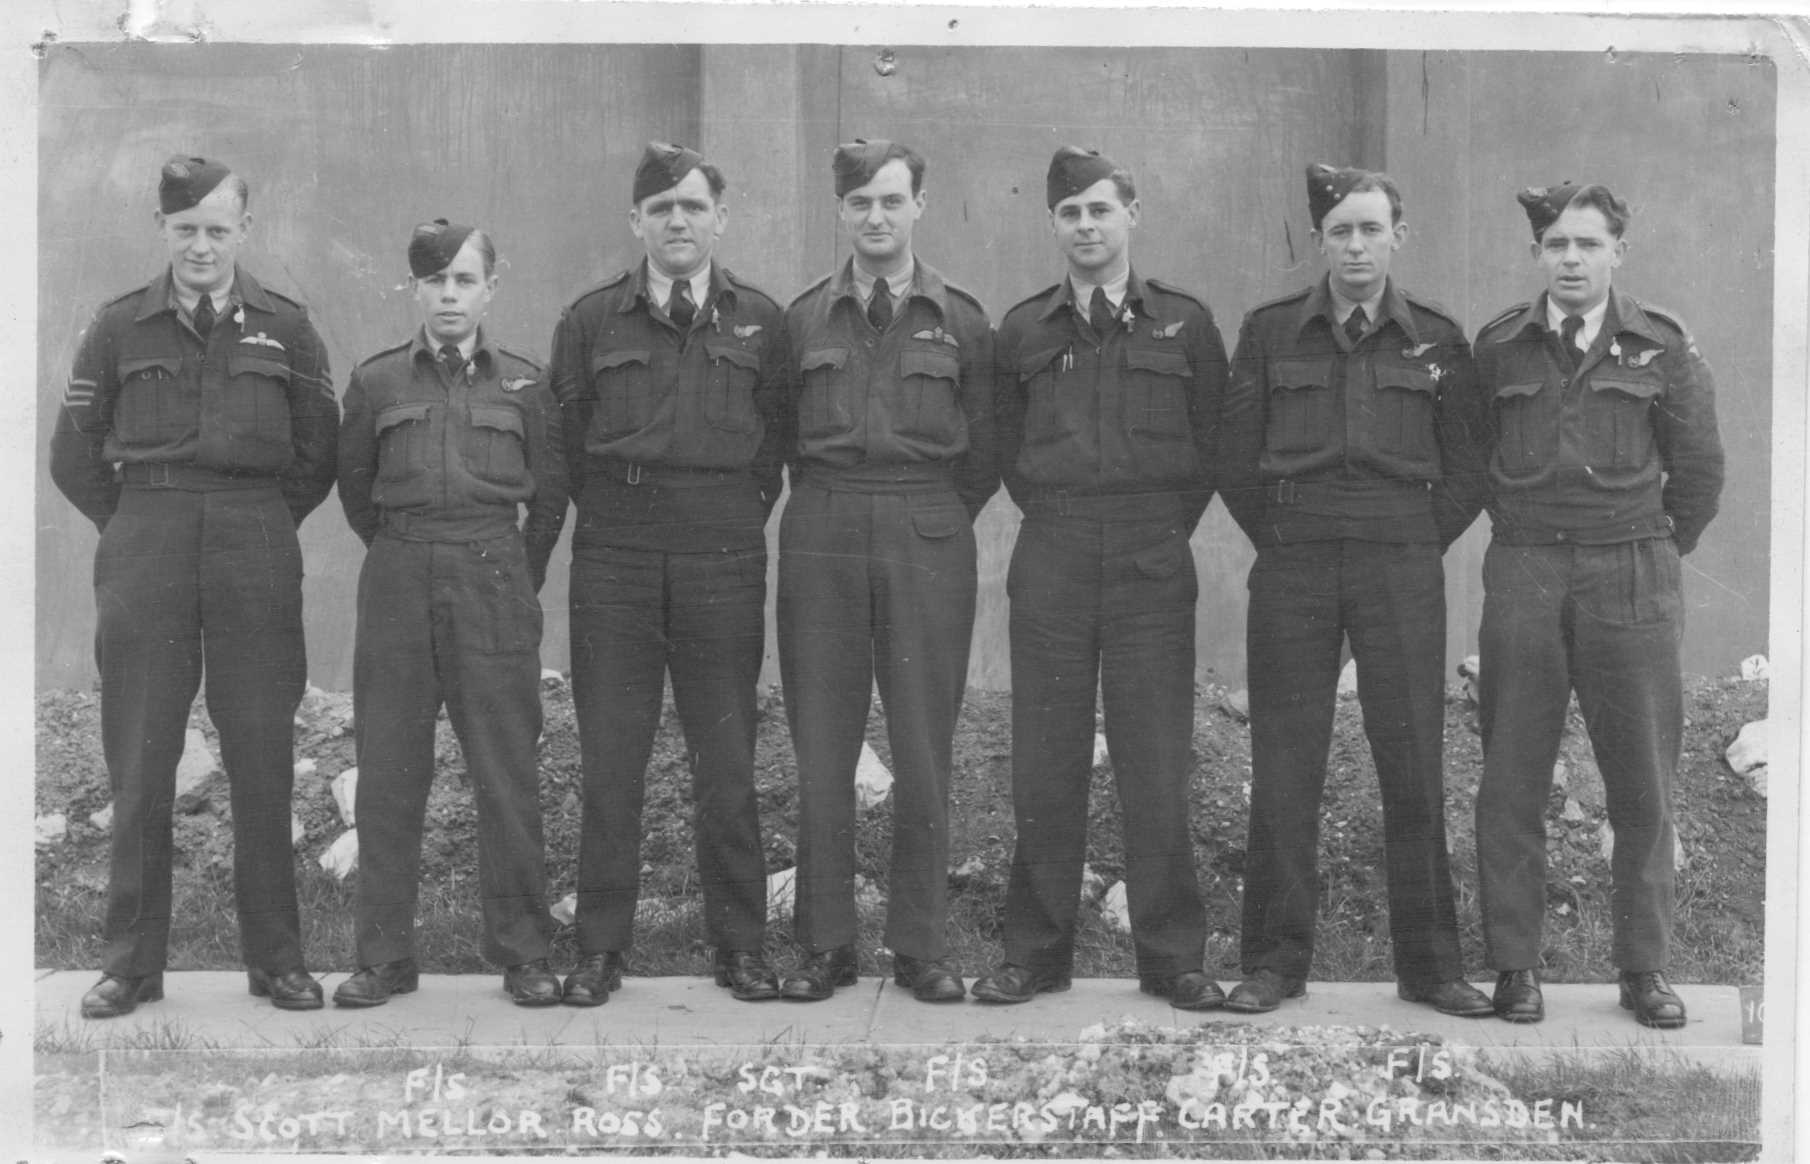
F/Lt J Lord DFC and Crew
 |
F/Lt Jim Lord and crew. F/Lt Lord and his crew did a full operational tour
Left To Right: Ken Down, Jim Lord, Guss Vass, Jock Elliott, Pat Scully, Bob Sebaski, Jack Shomberg Picture courtesy of Jim Cameron To see more photos of this crew and the list of the operations they completed click here |
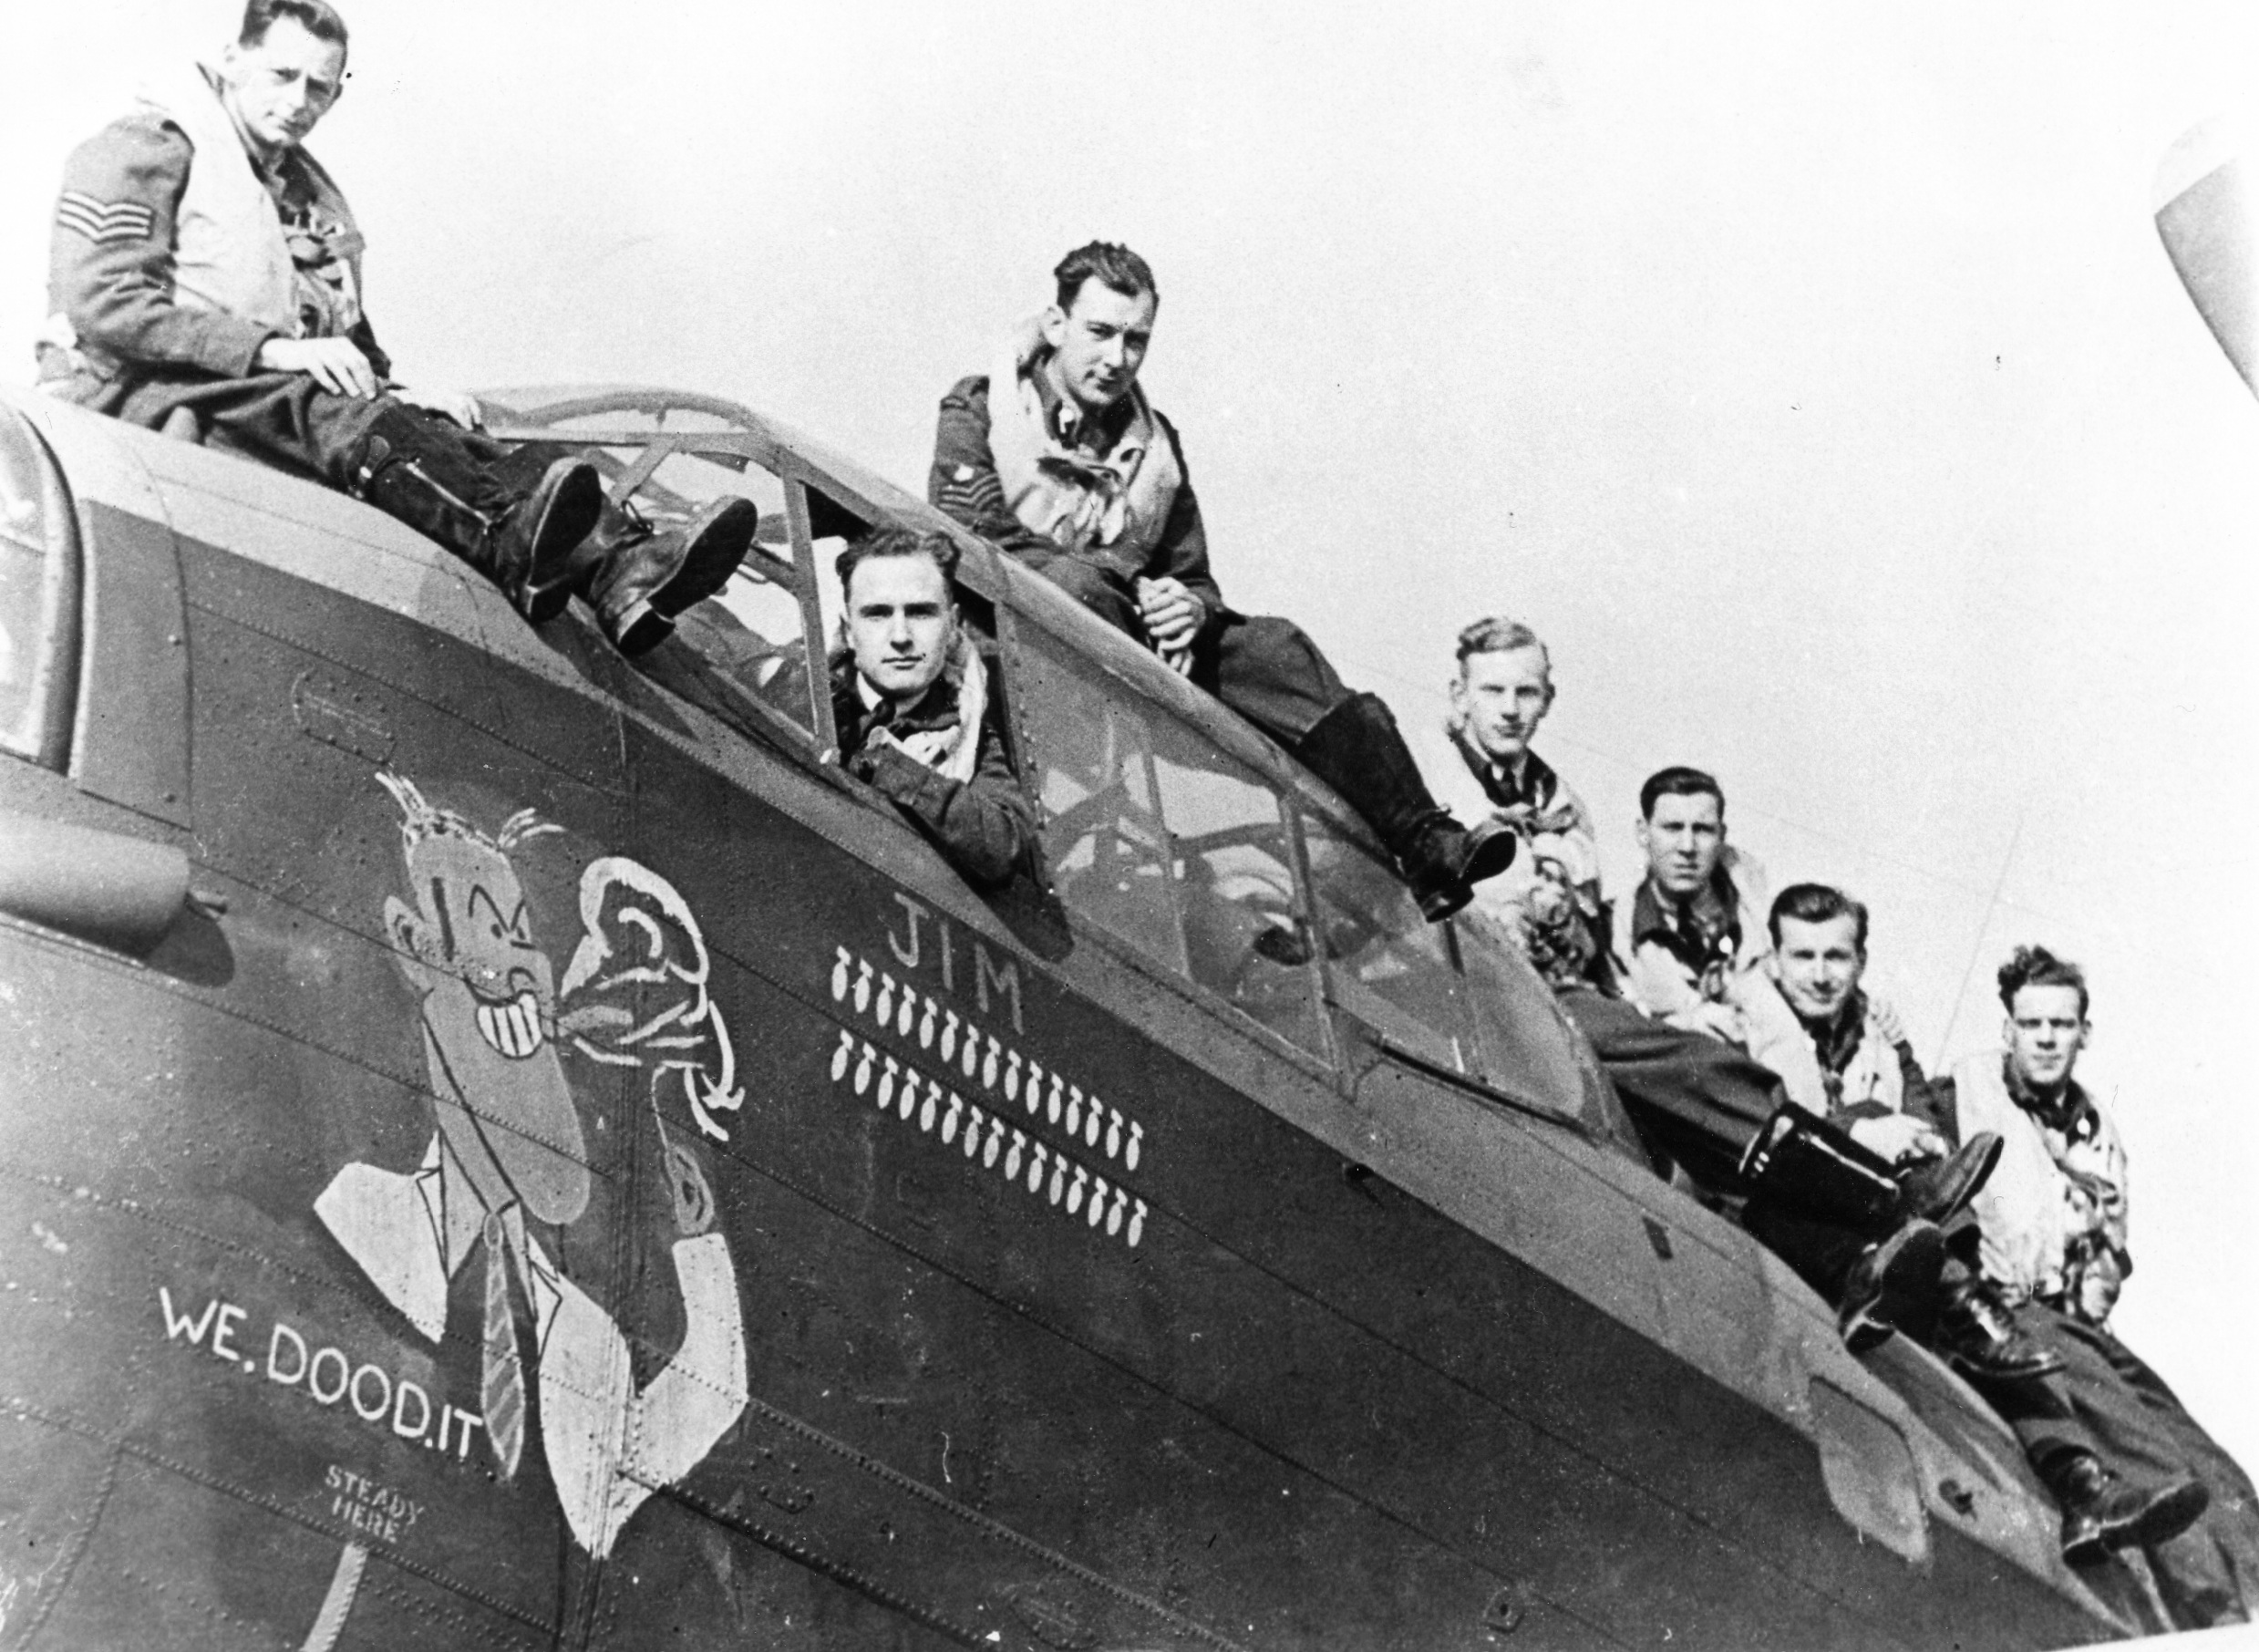
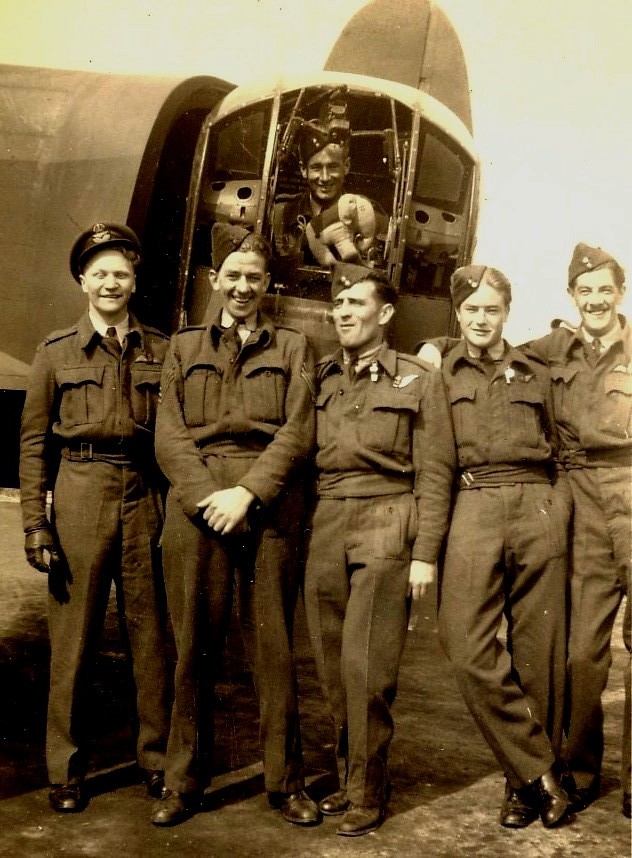
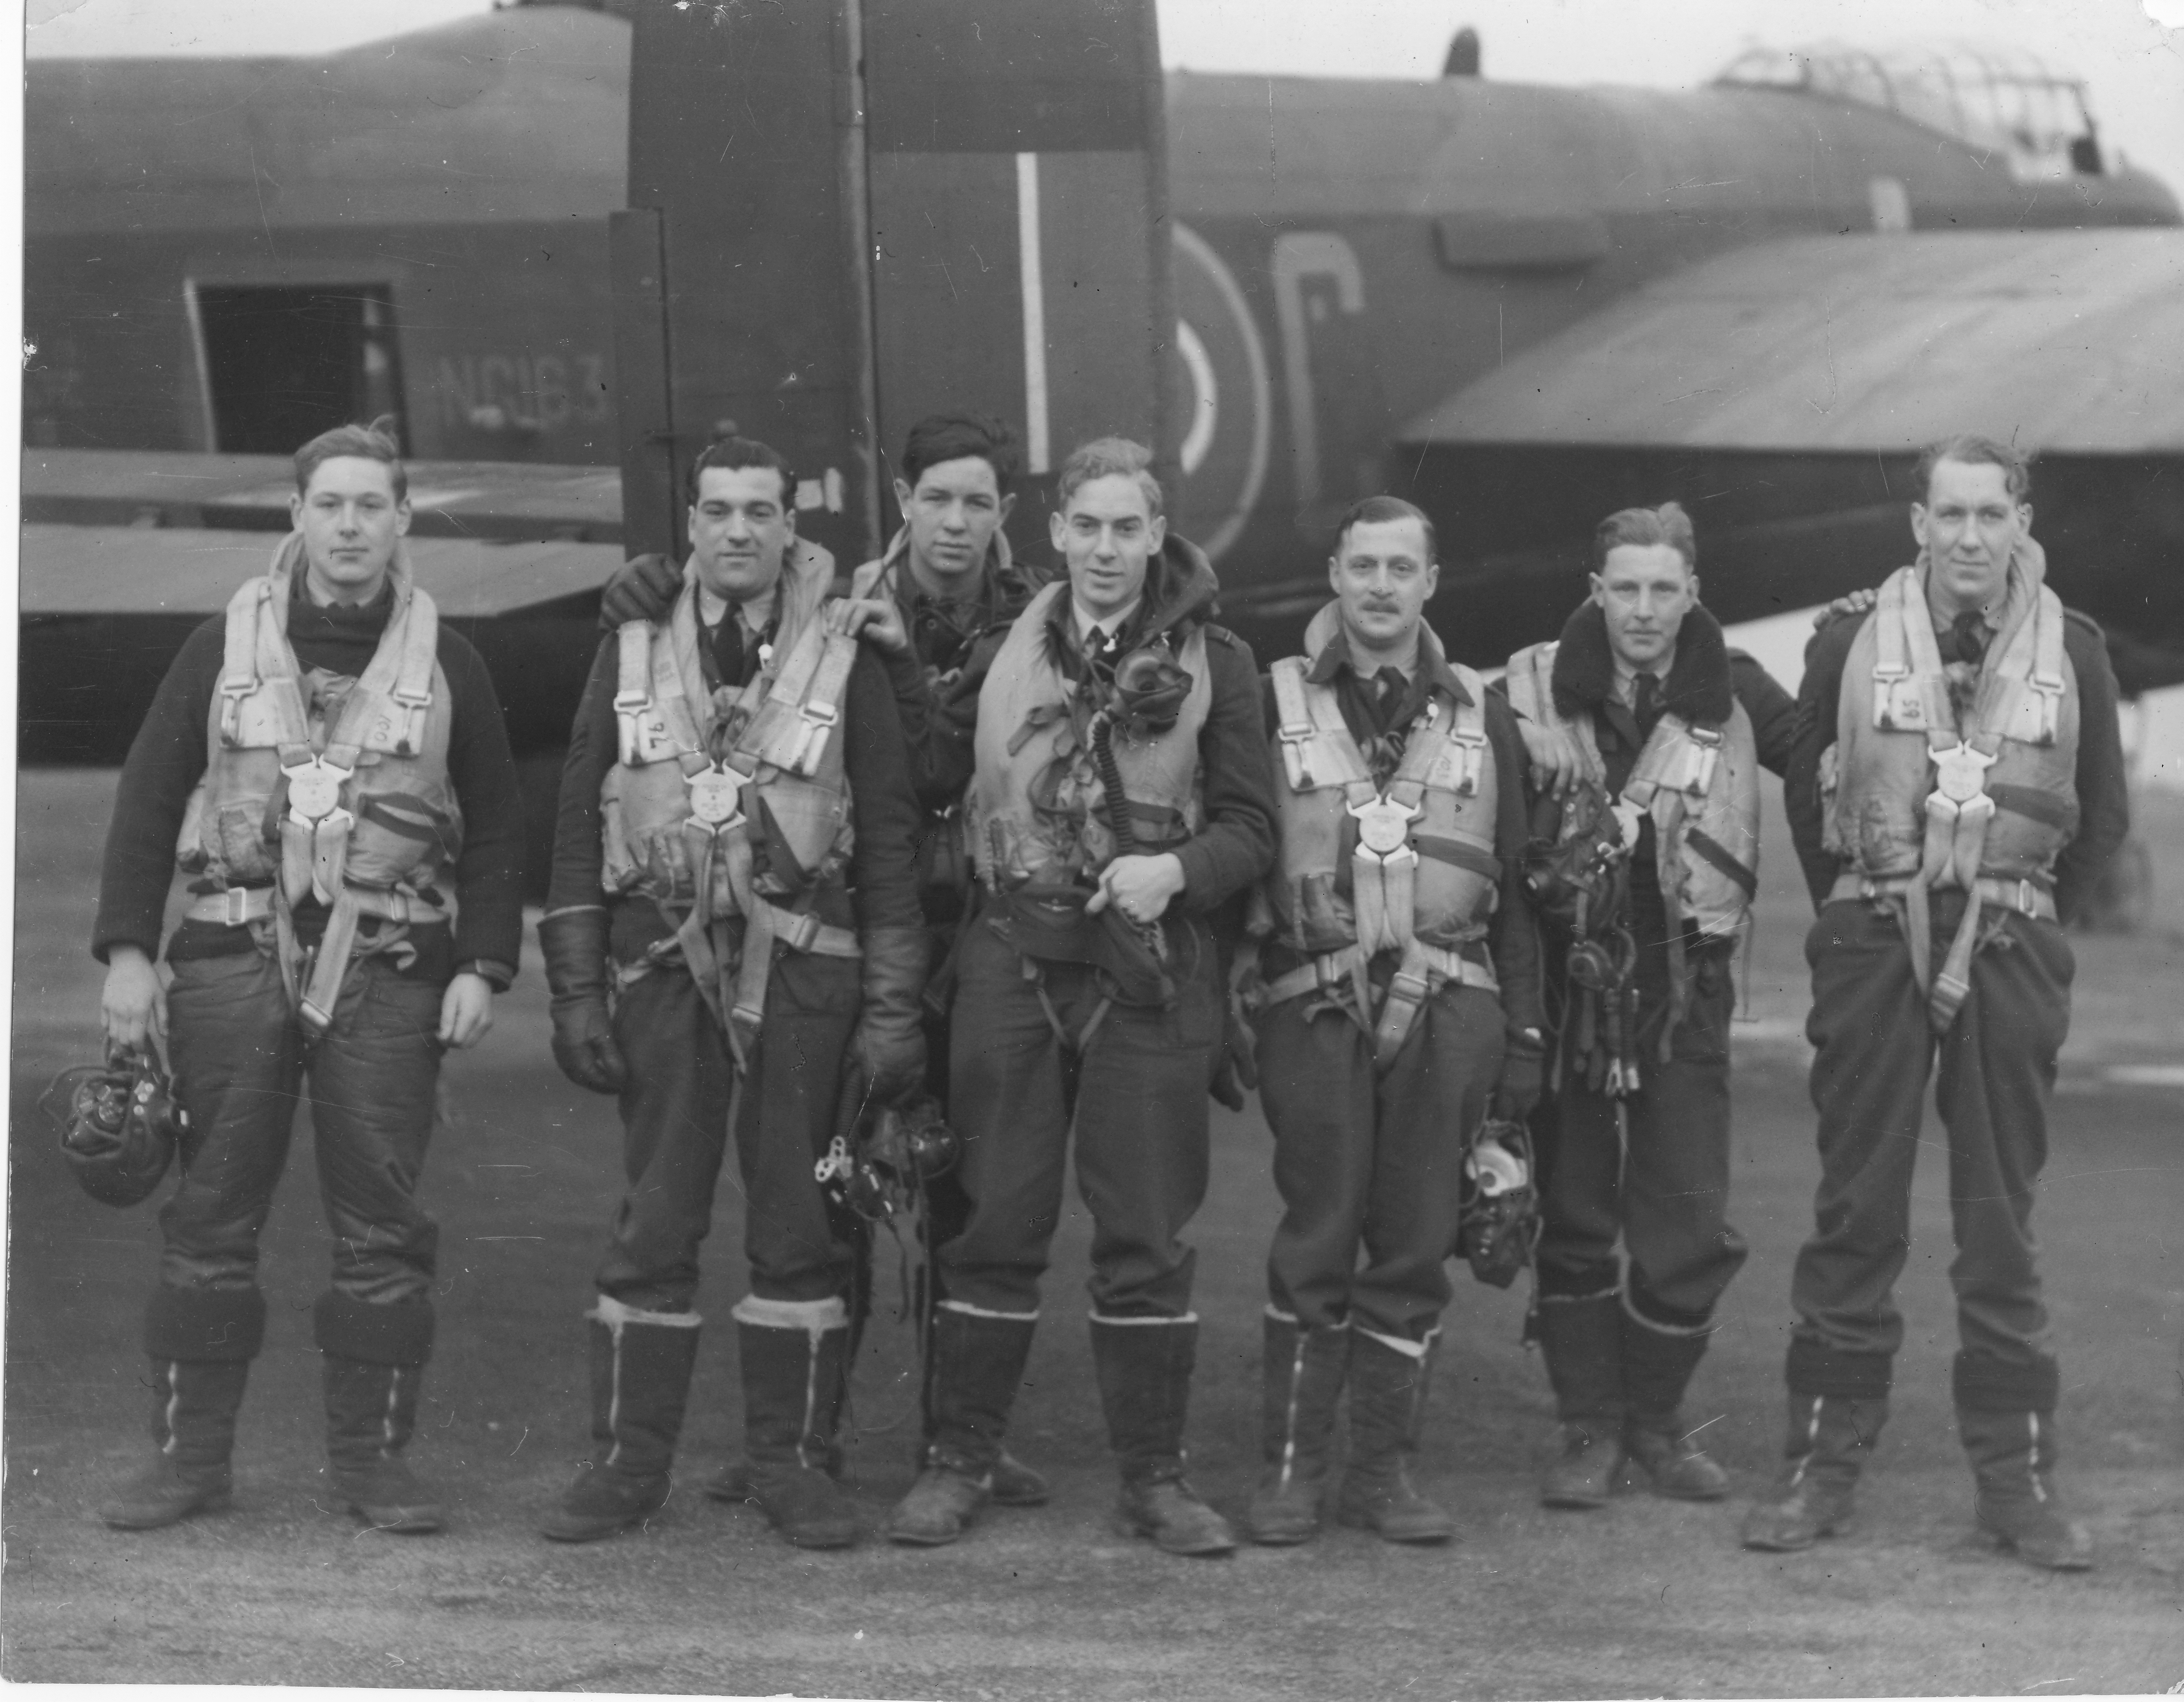
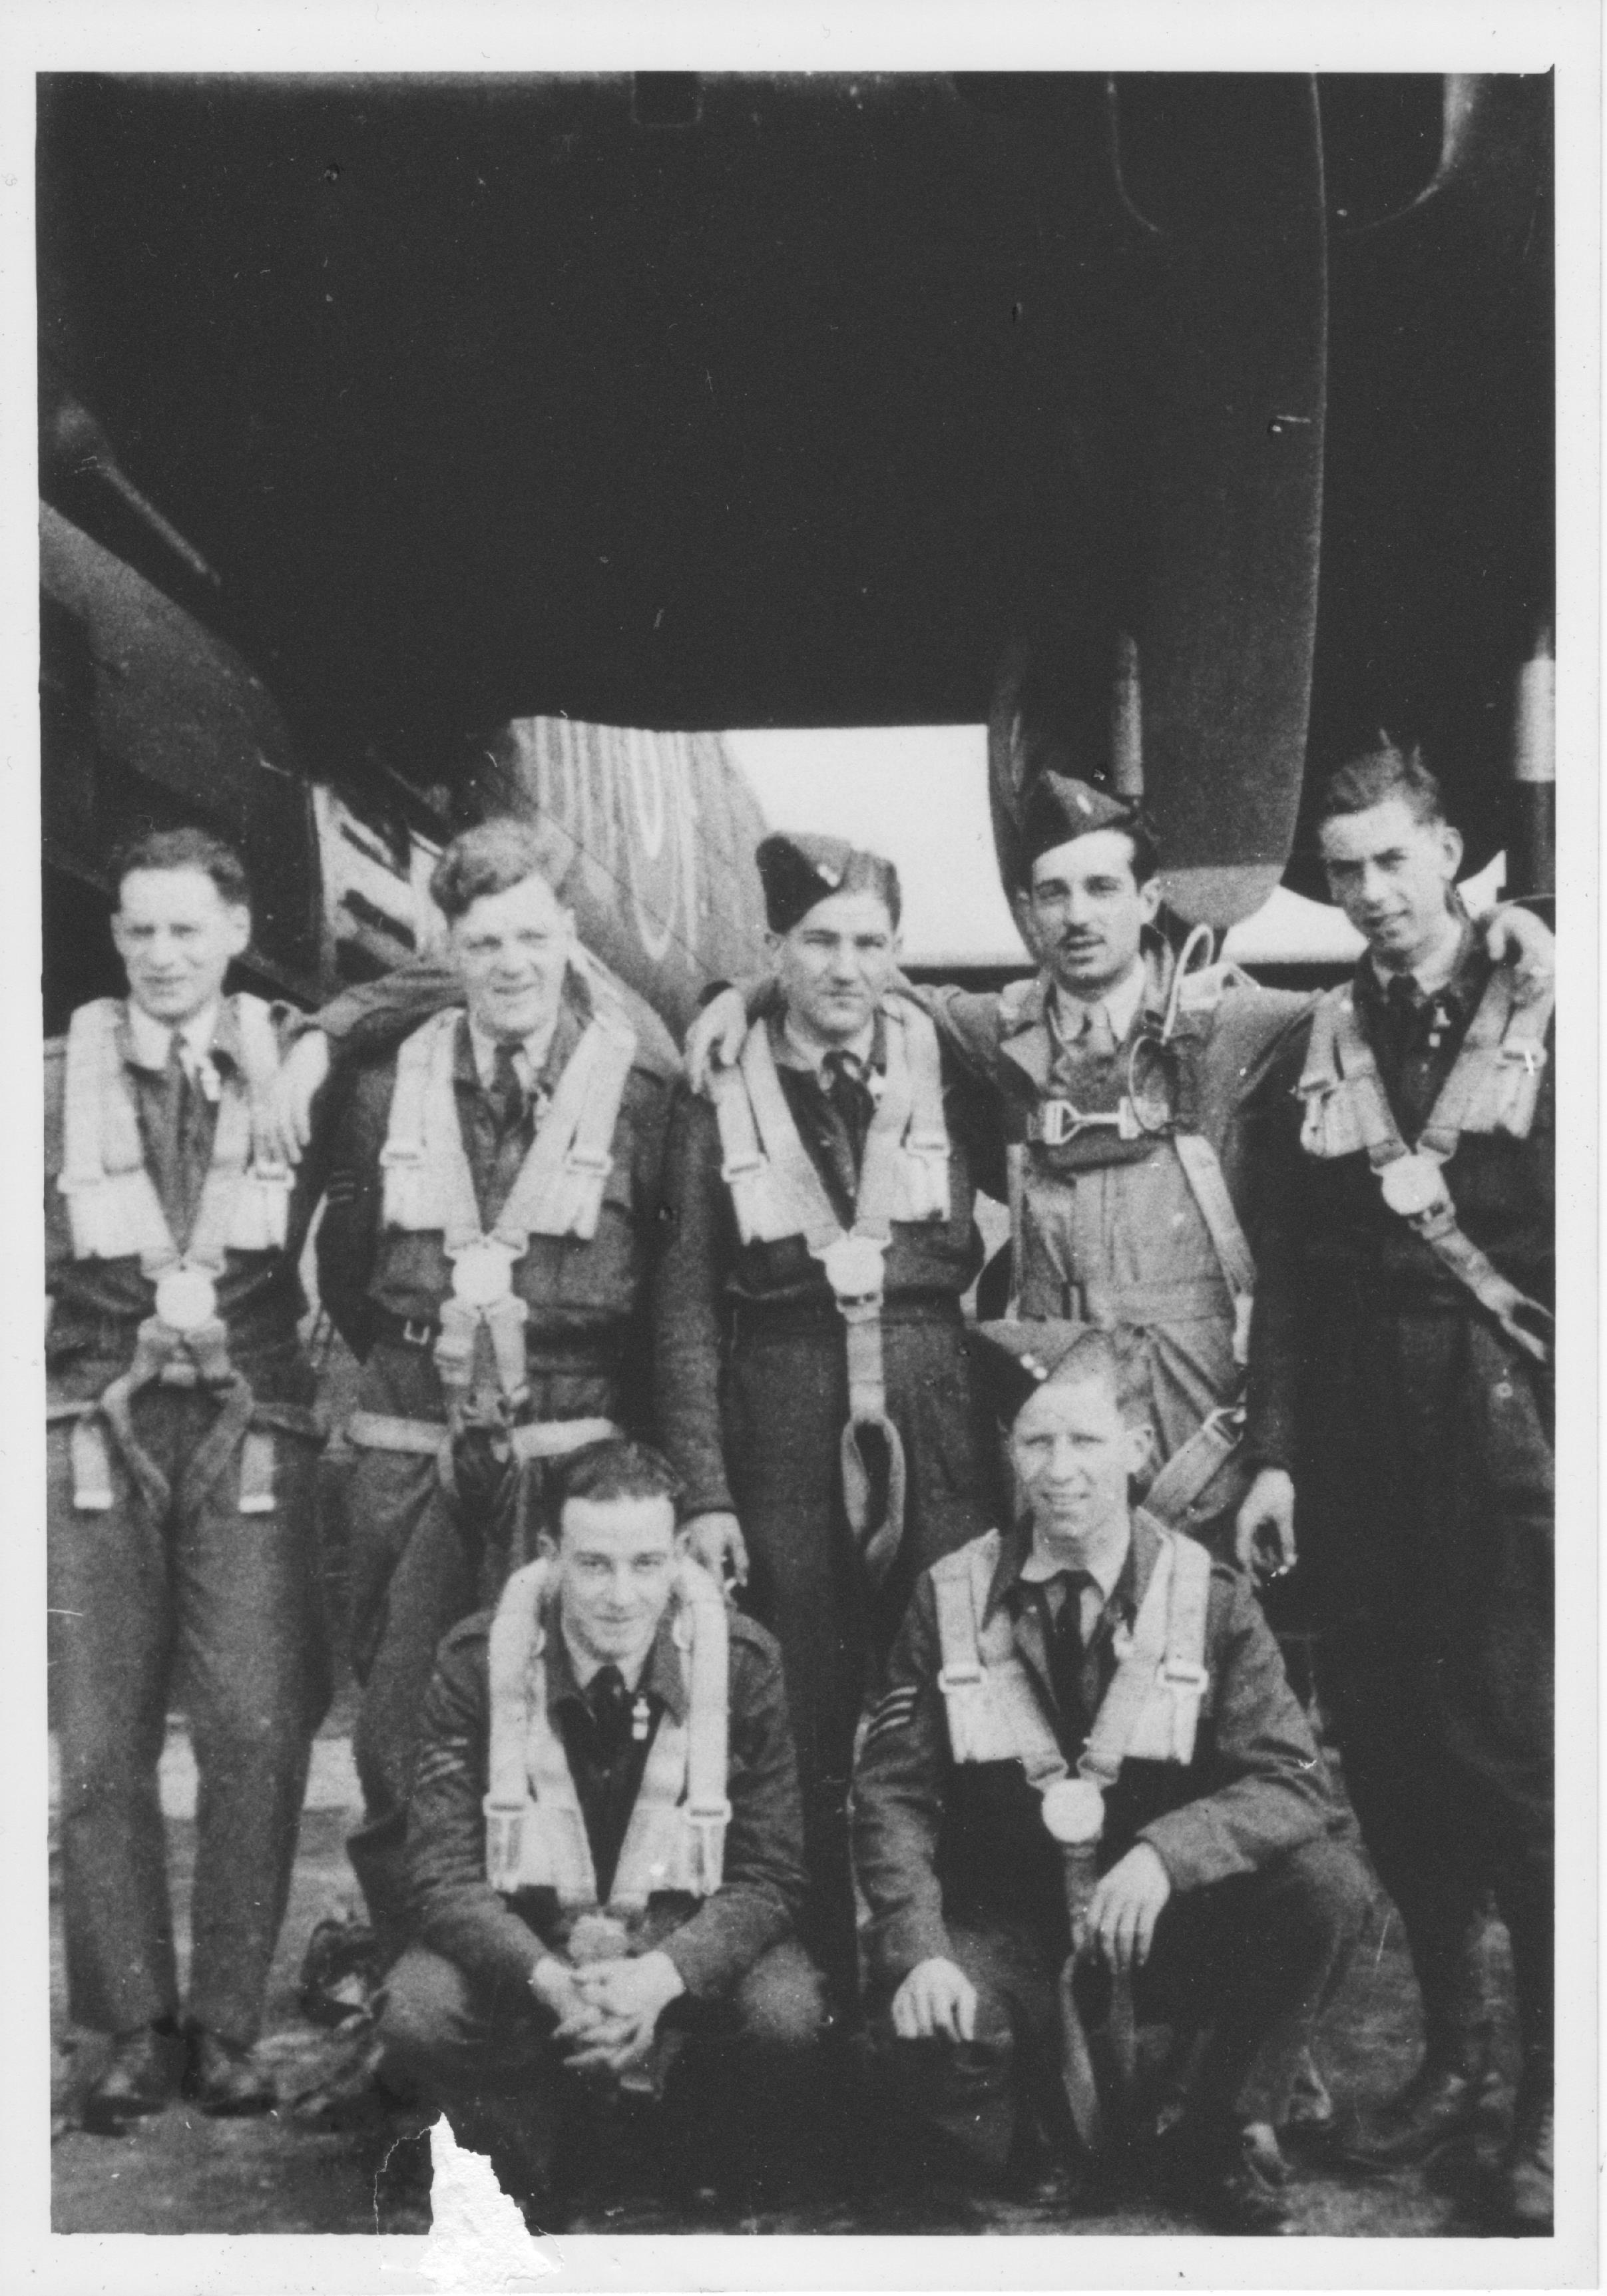
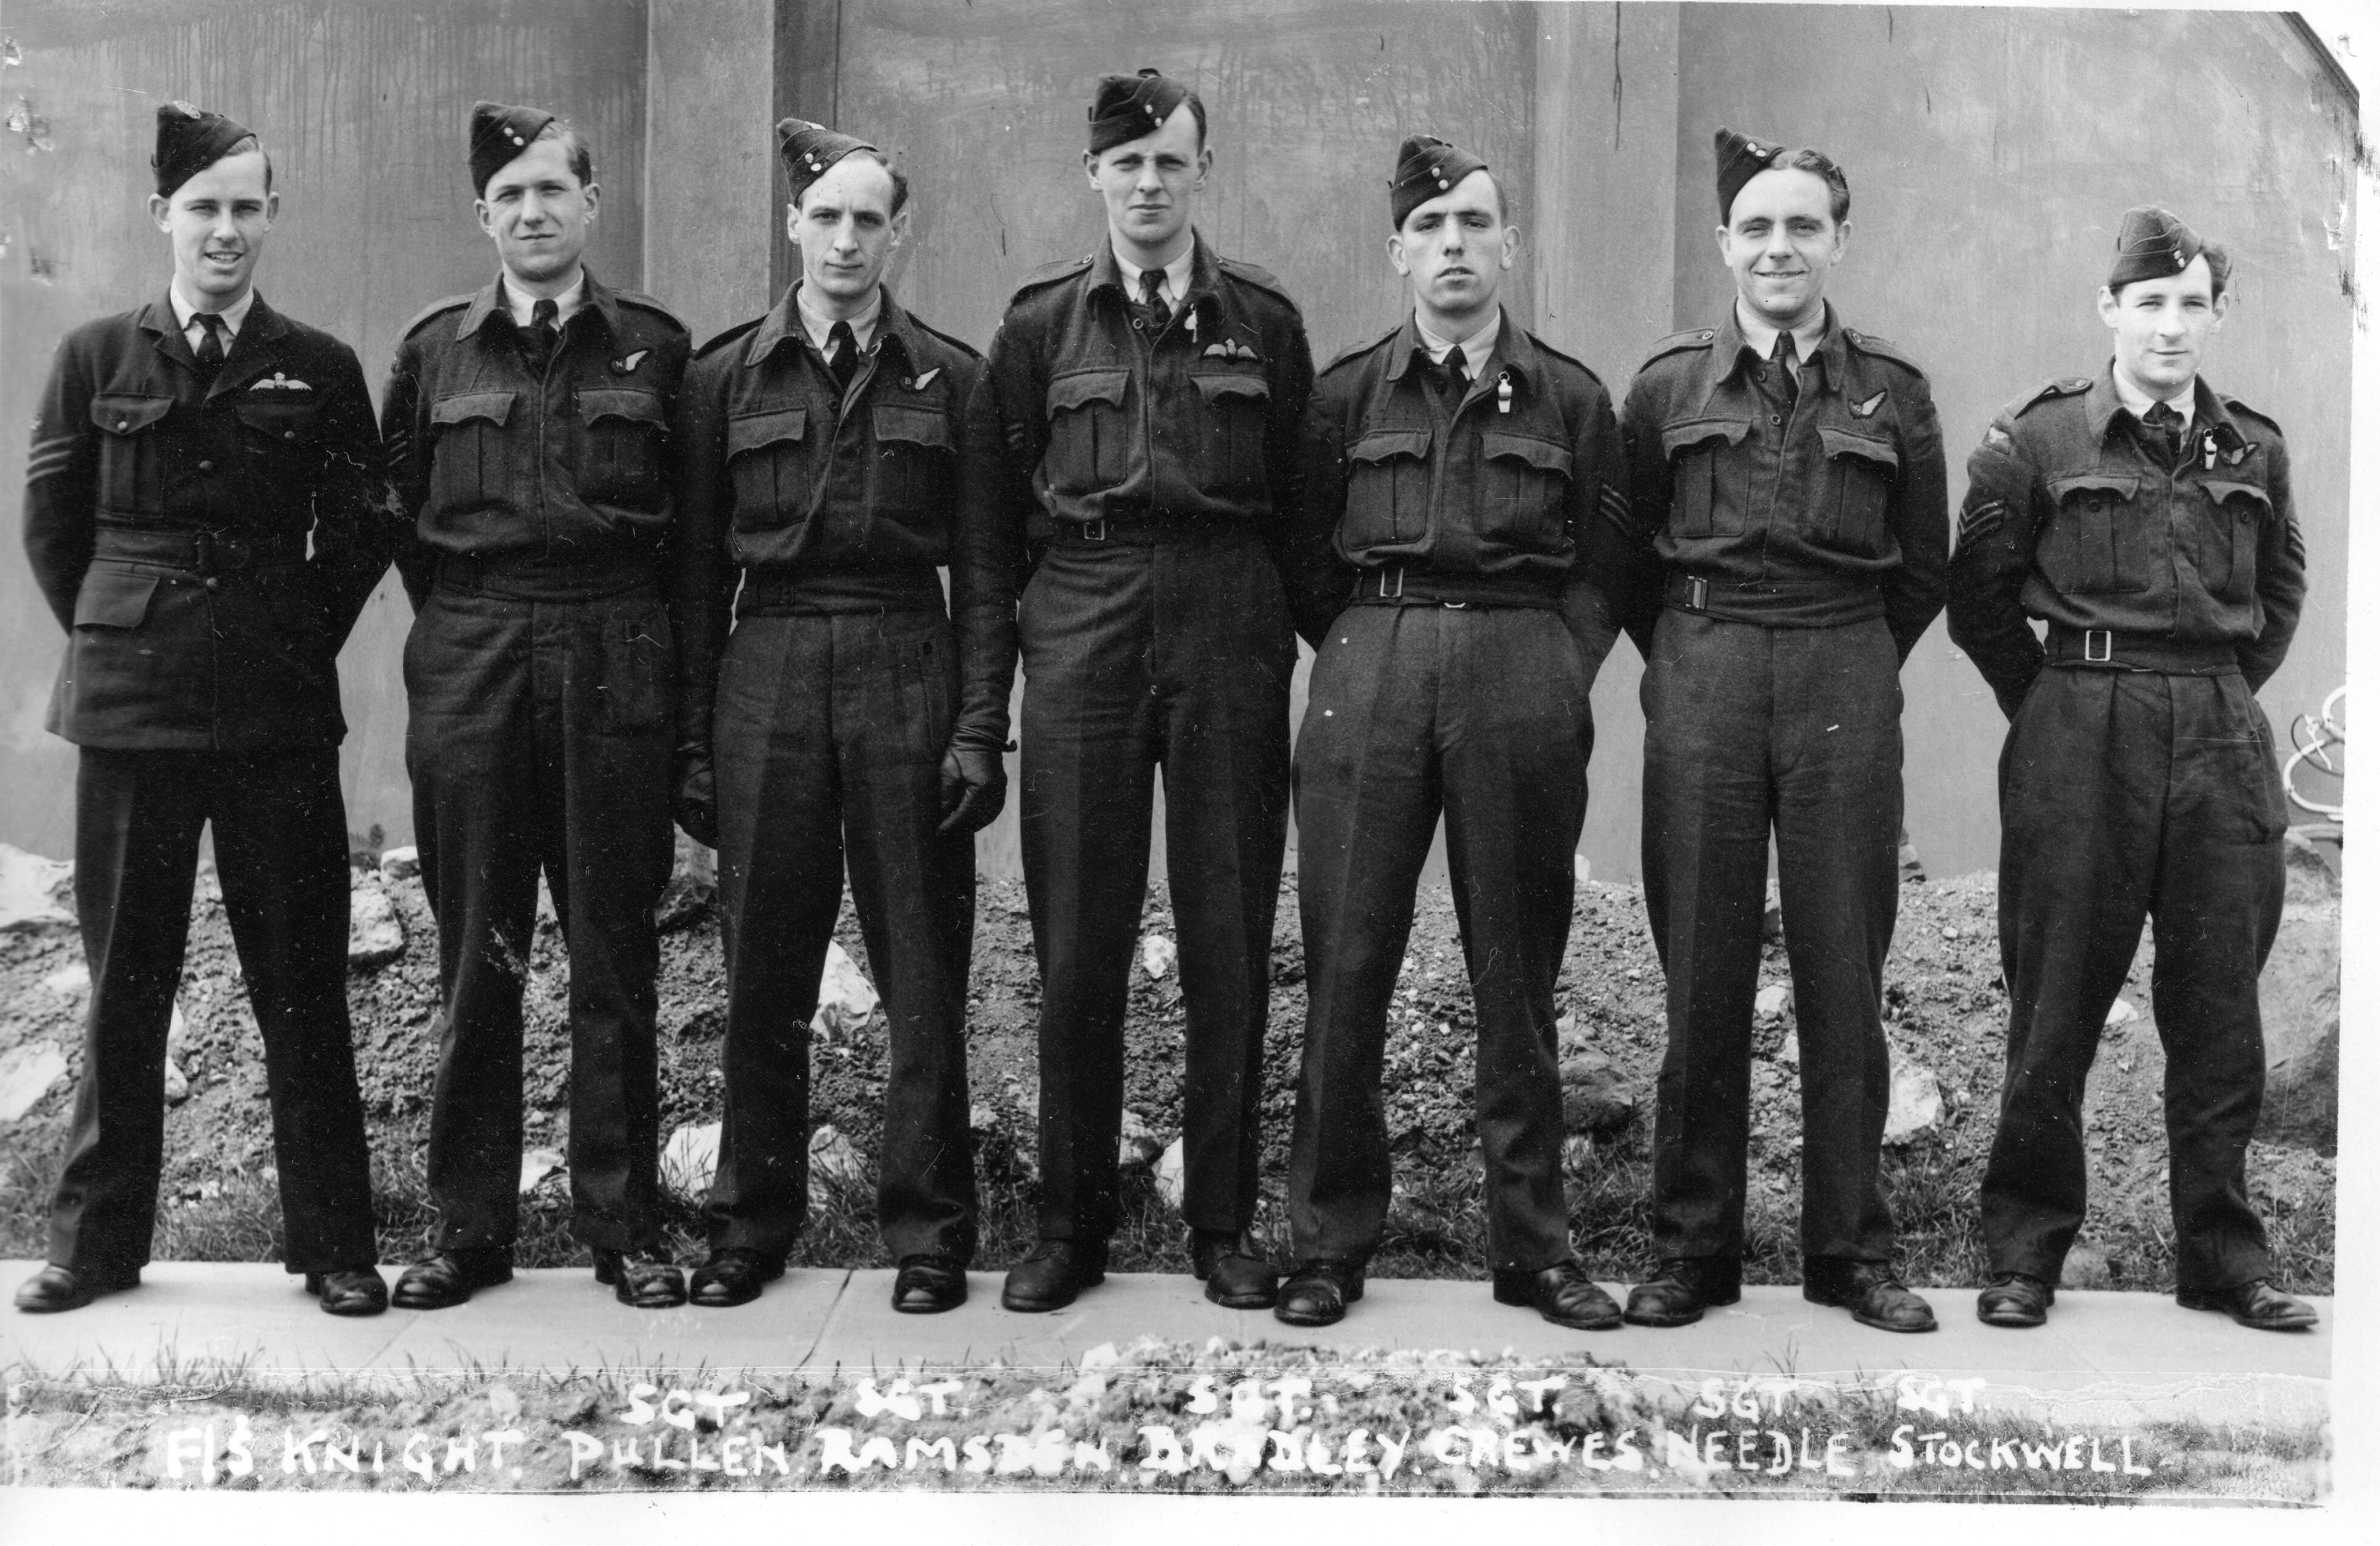
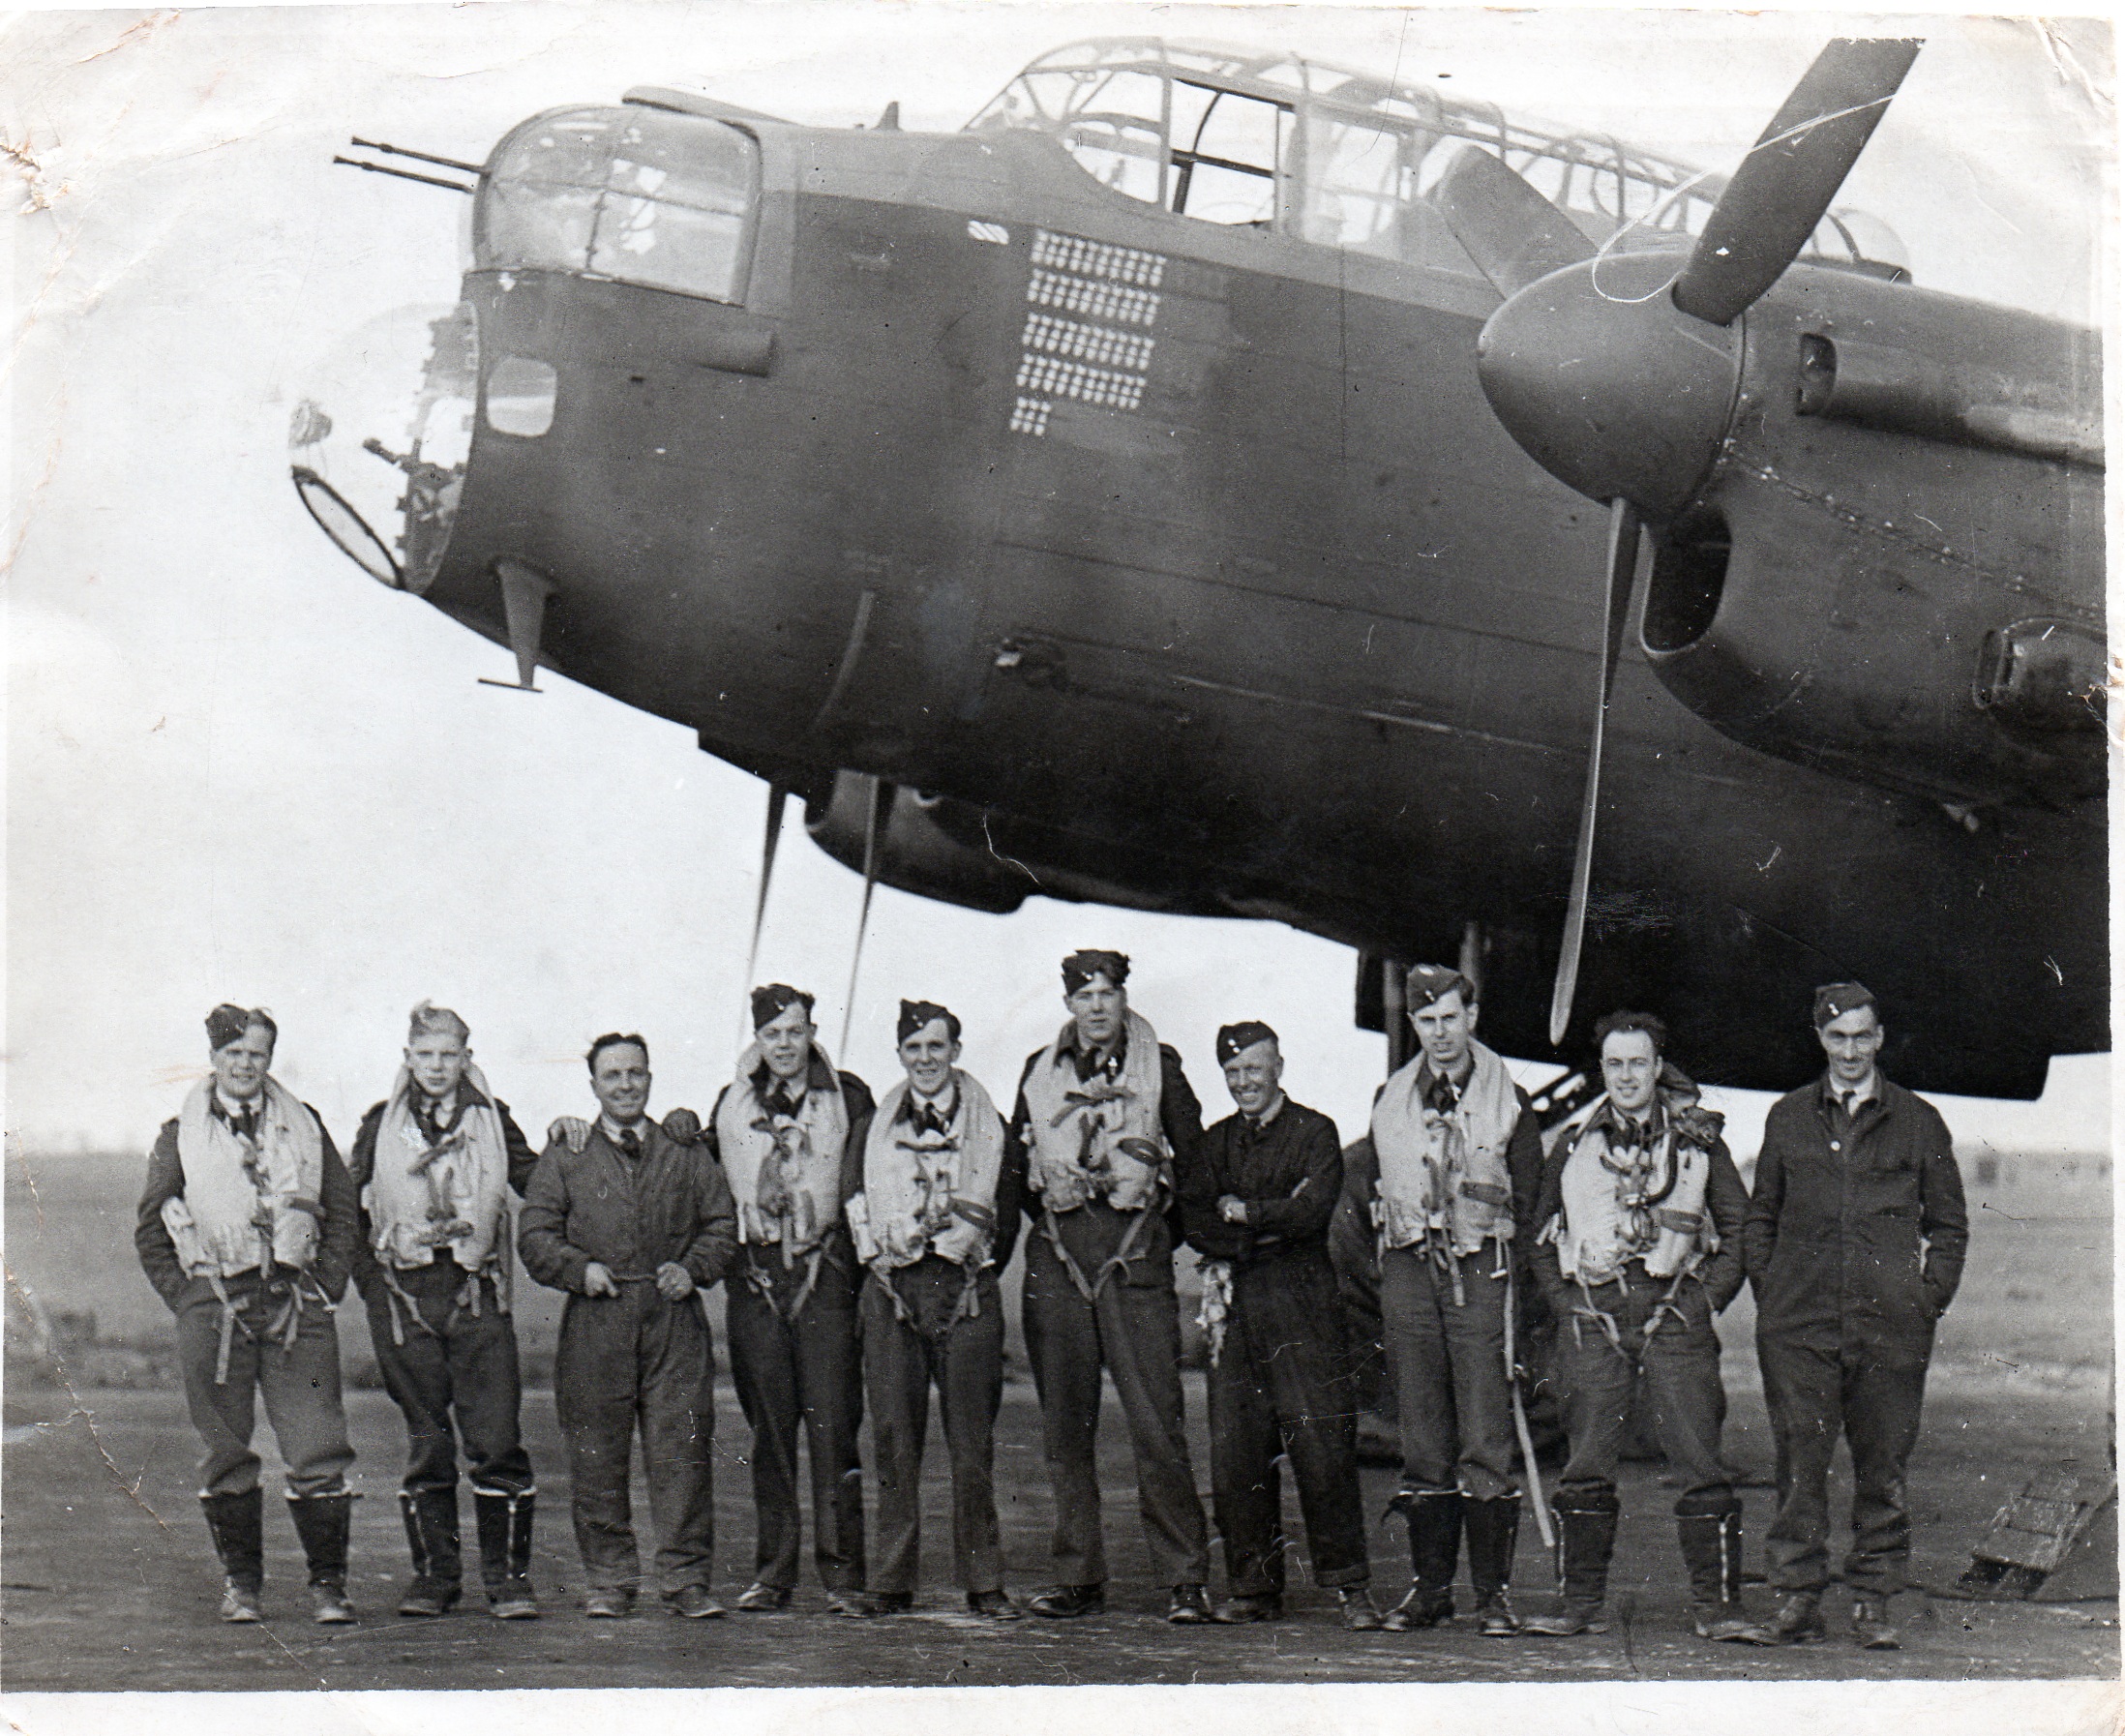
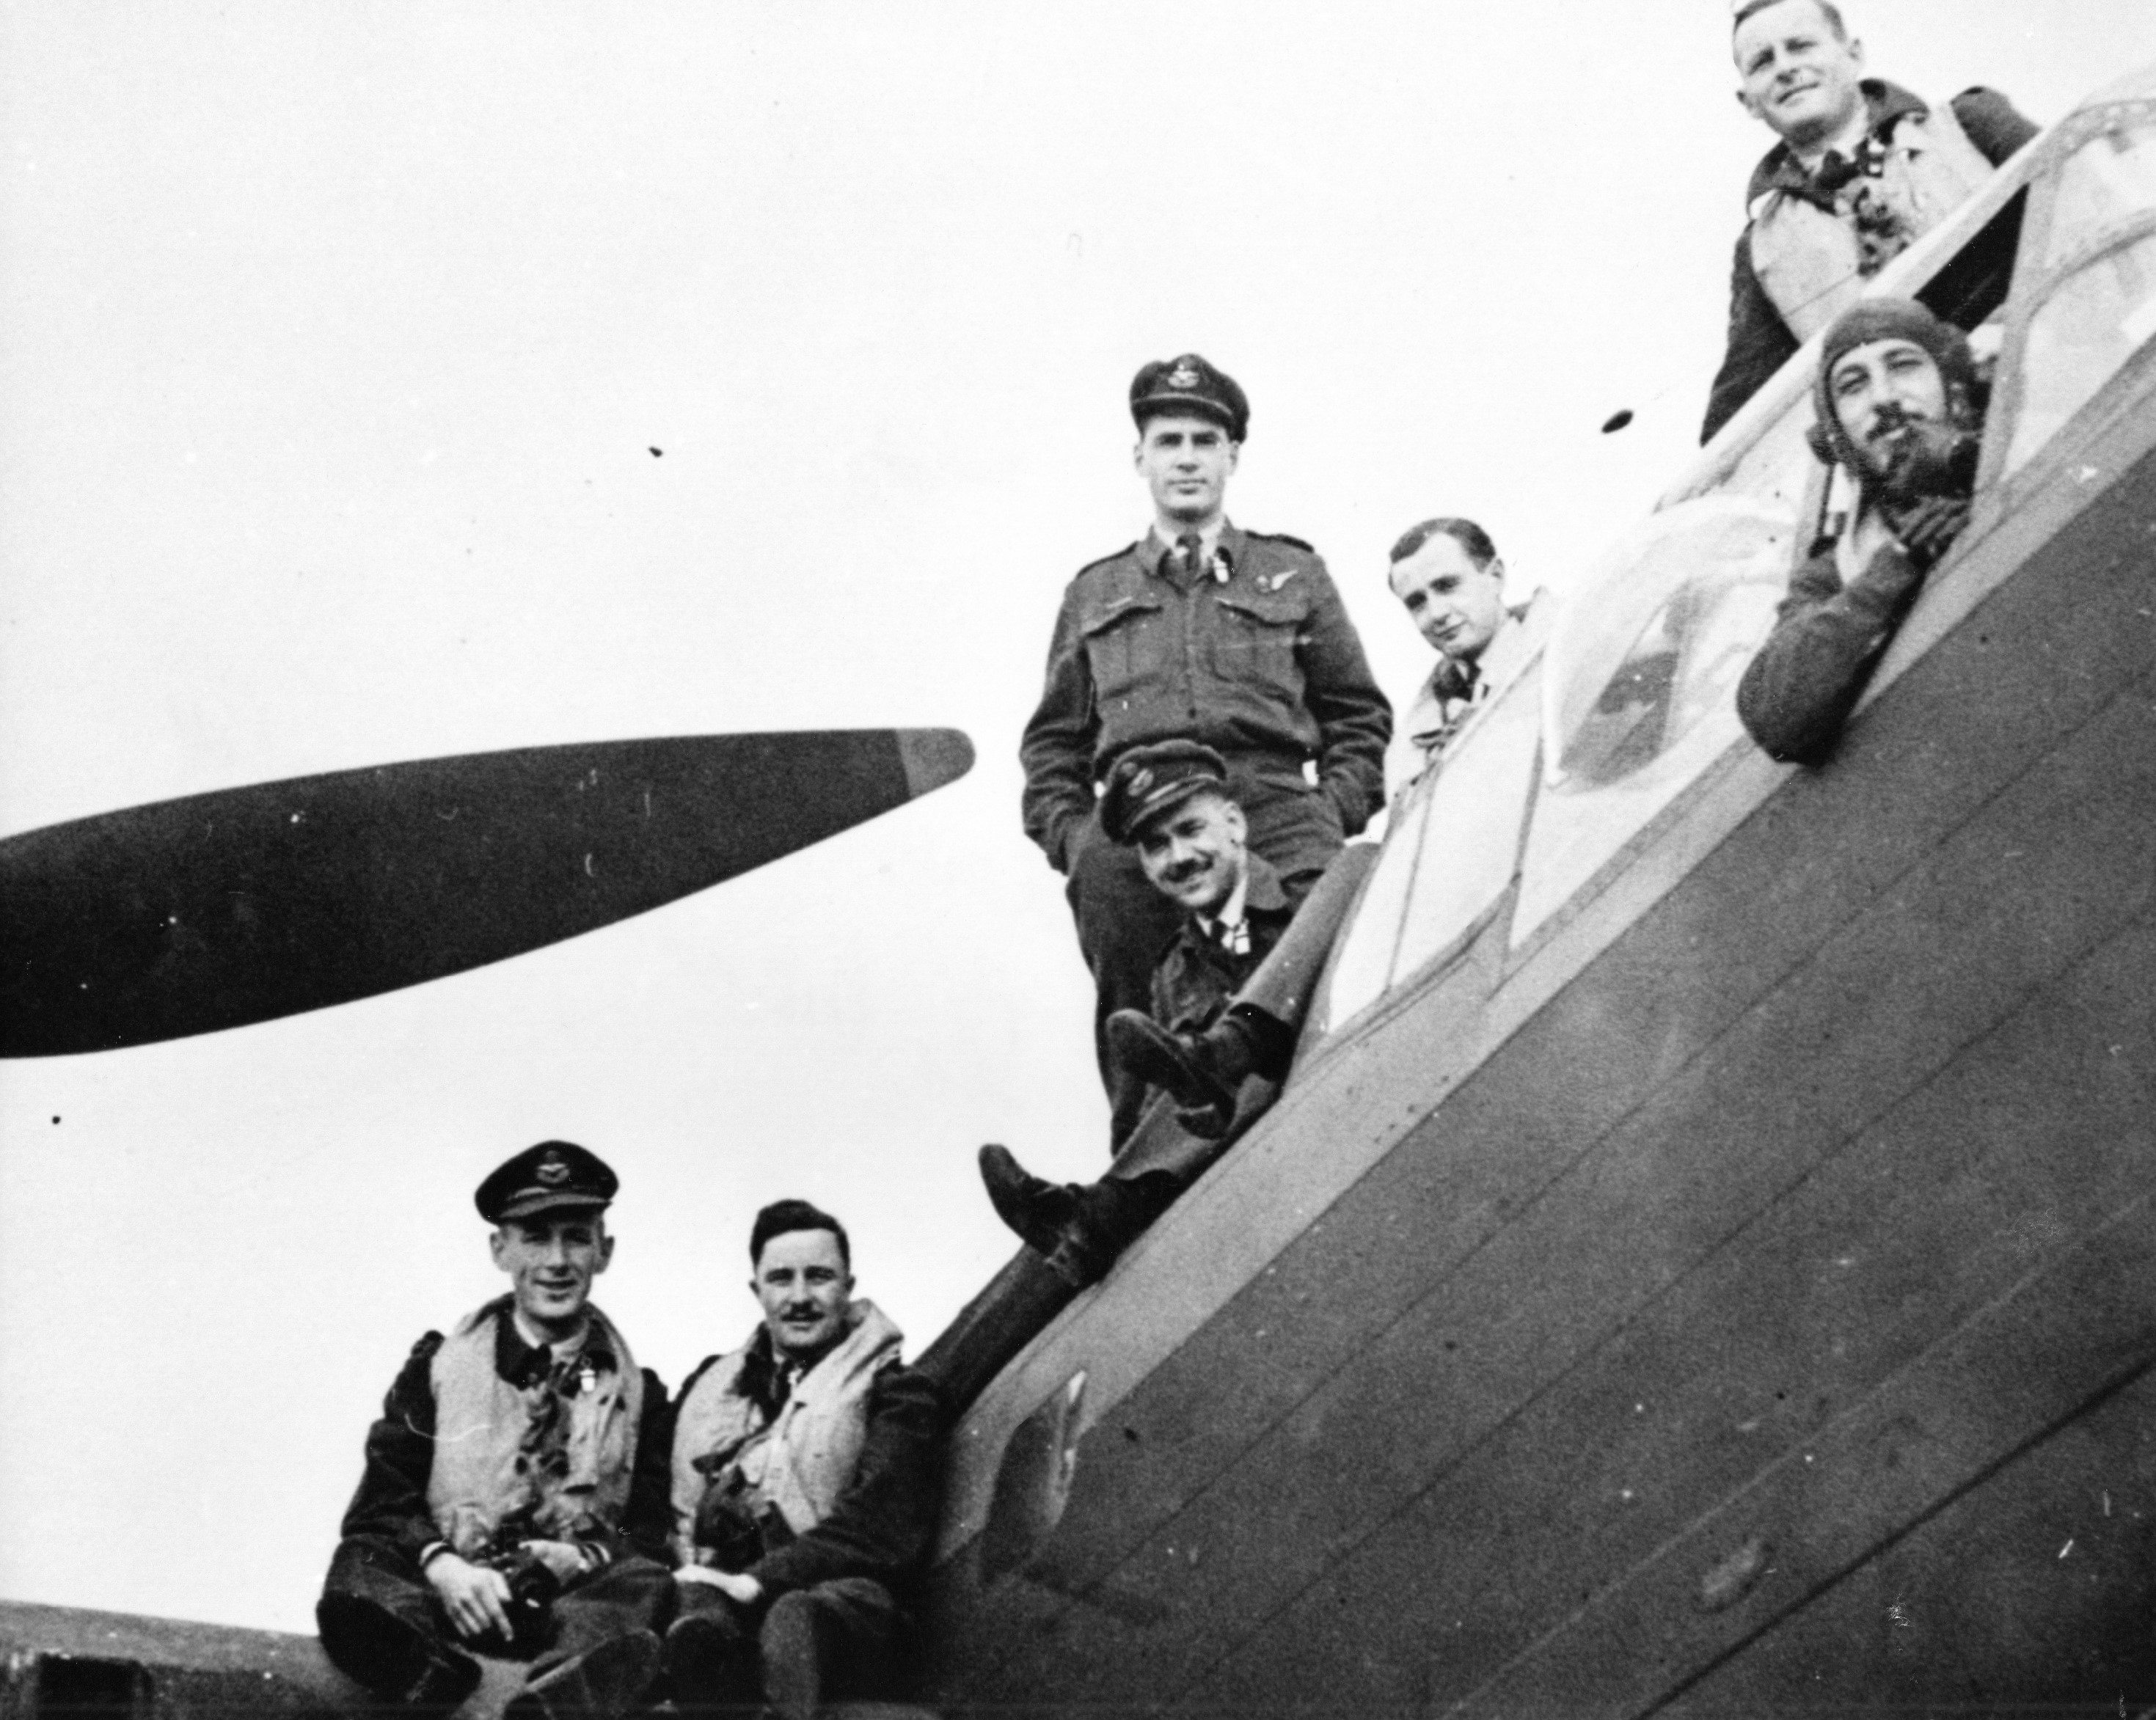
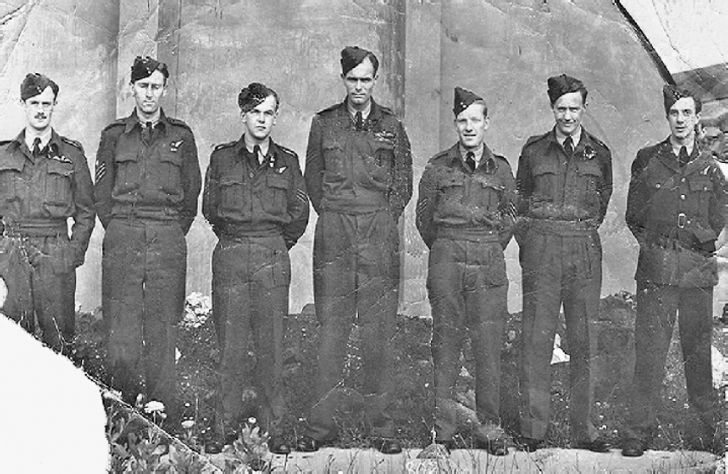
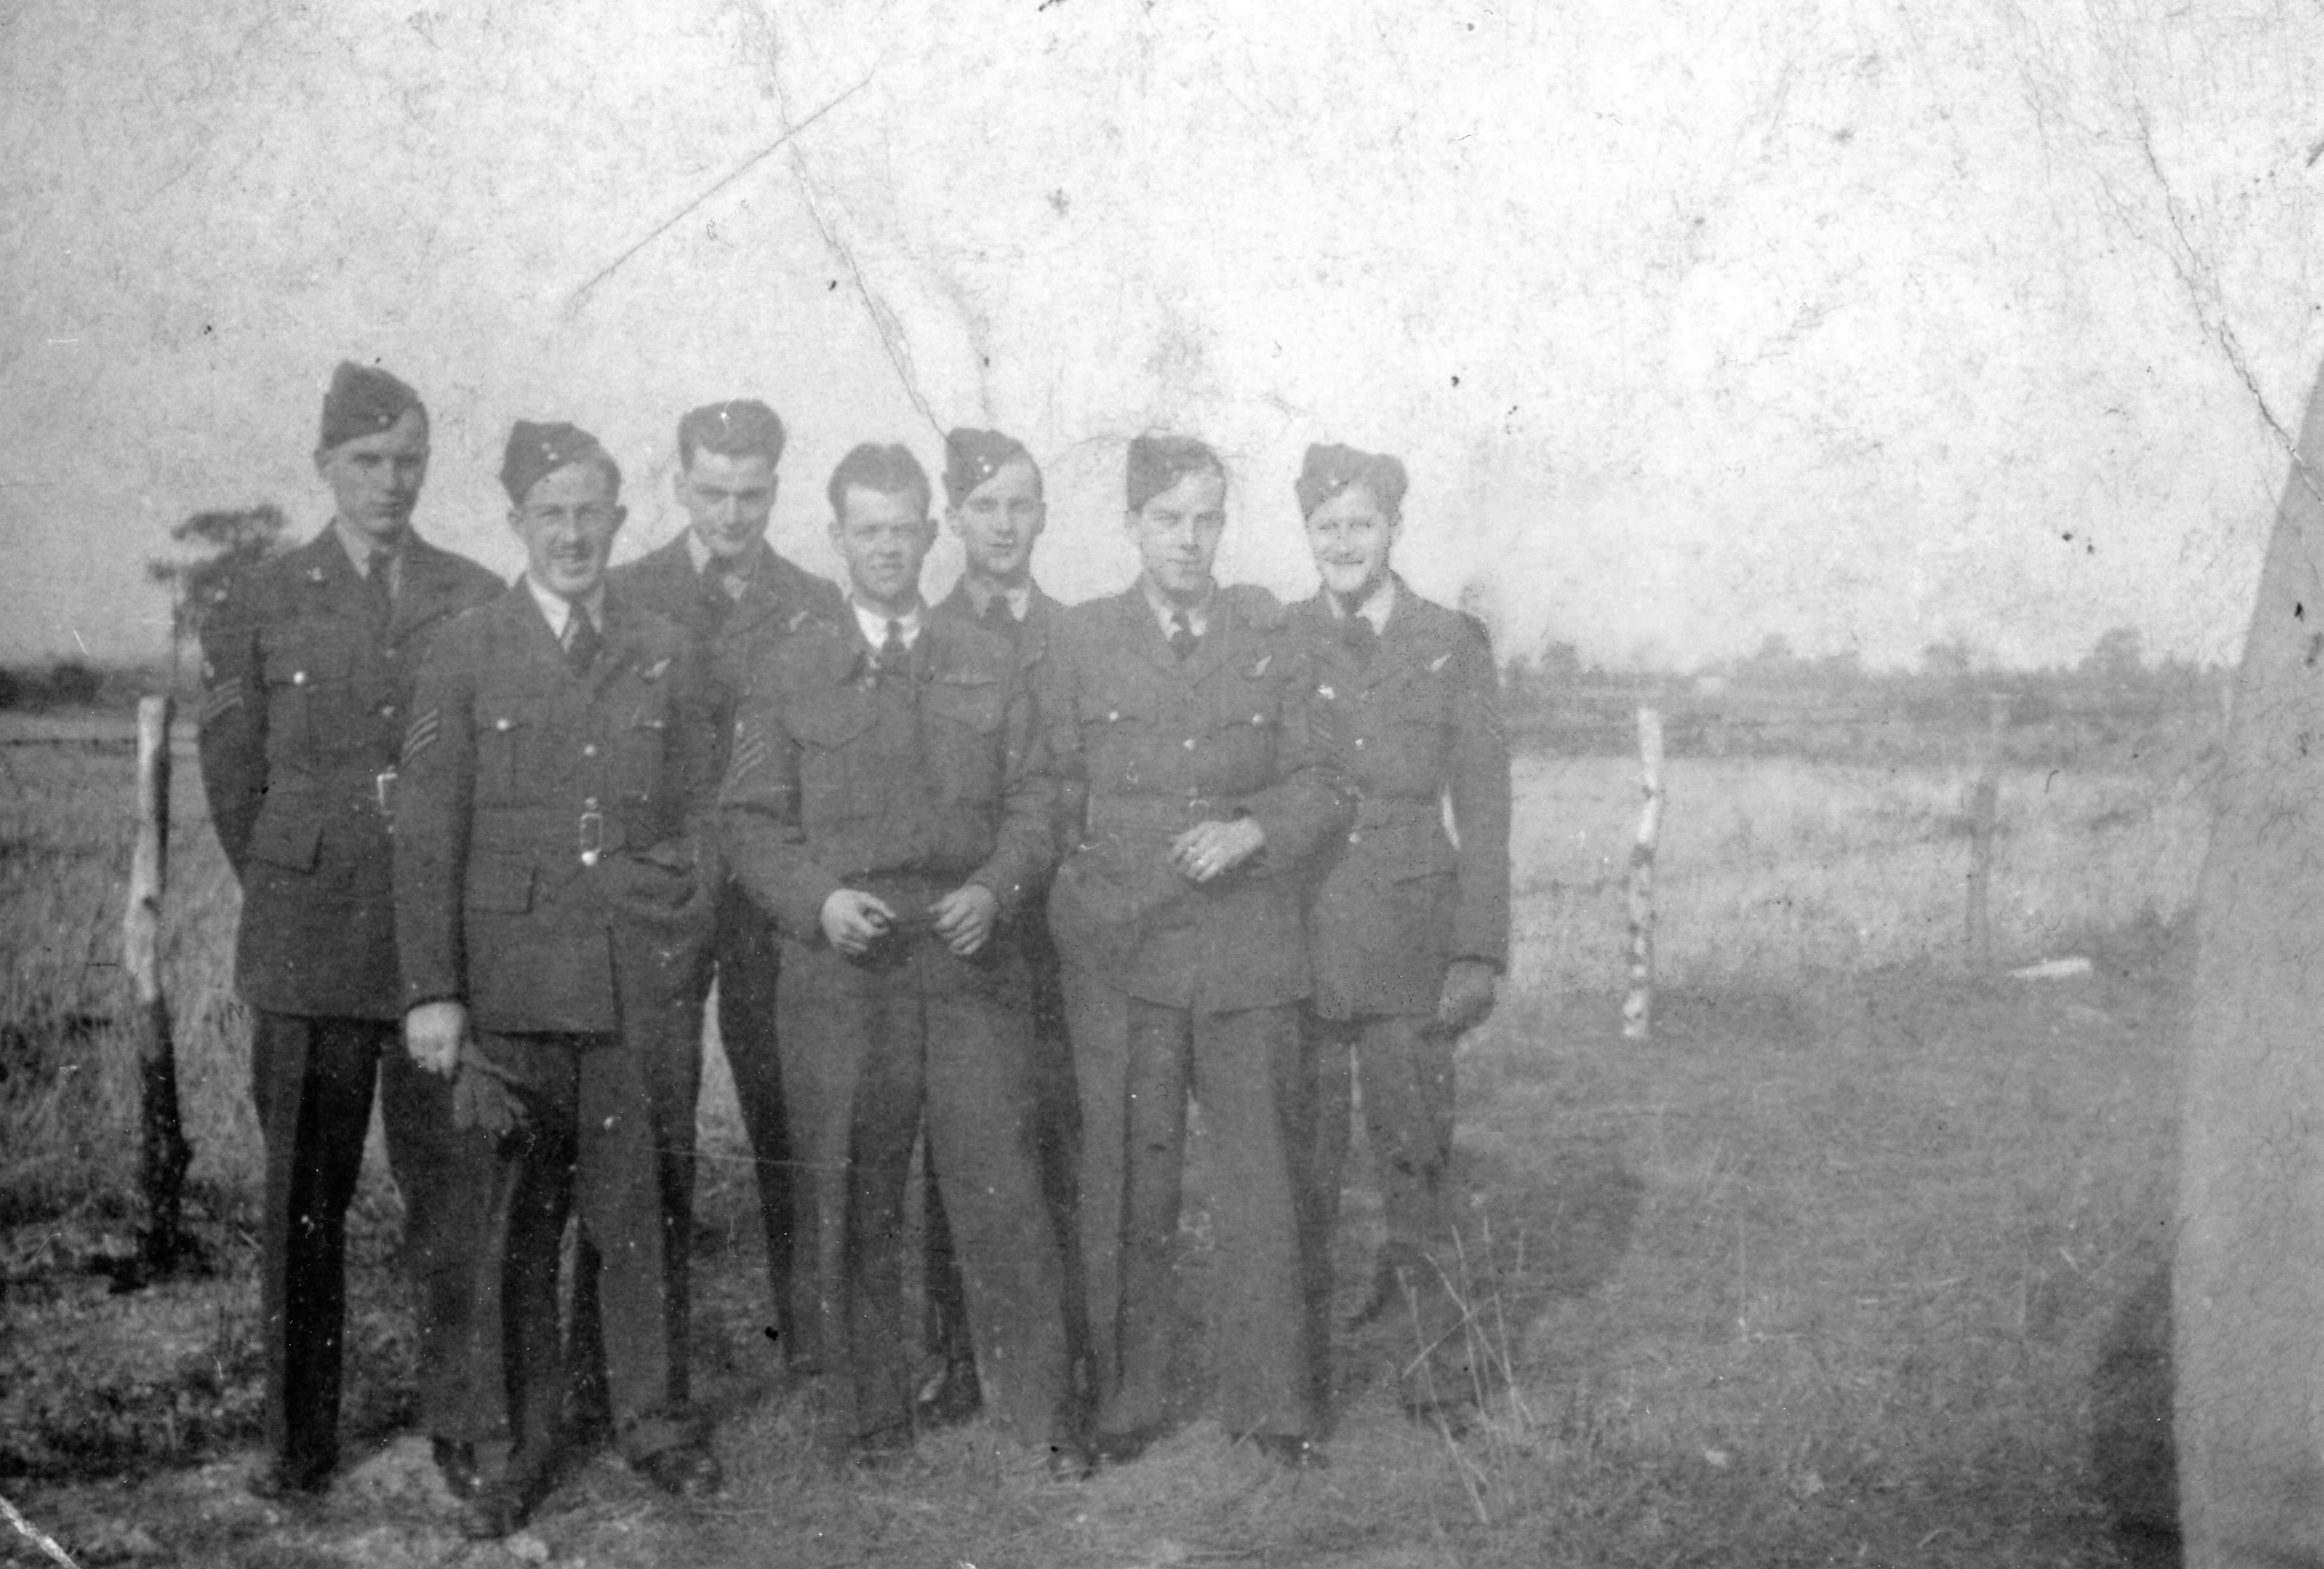
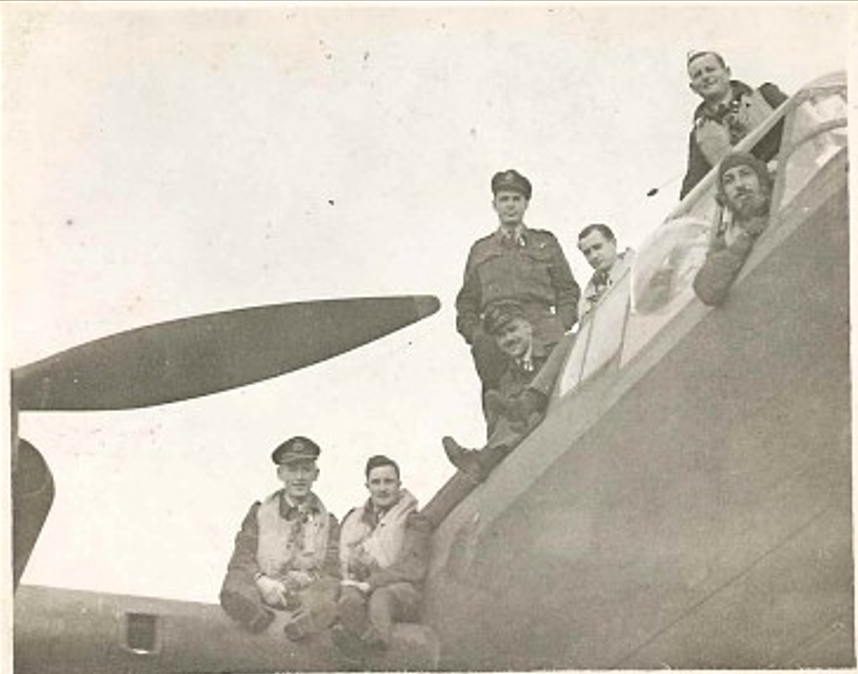
F/Lt D A Shaw DFC and Bar and Crew
 |
F/Lt "Jock" Shaw, crew and ground crew, about August 1944 With ED905/BQ-F ("Fox"), "Press on Regardless" 70 bombs painted on the nose - white bombs indicate daylight raids, dark bombs night raids For further information click here |
 |
F/Lt Shaw with crew and ED905 "Press on Regardless" Identification is difficult due to the blurred photo, but are clearly the members of the F/Lt Shaw crew: Back, L-to-R: -, -, -, F/Lt DA Shaw (P) Front seated, L-to-R: "Ginger" Harris, -, - |
F/Lt E G Fleming and Crew
| Photo | Comment |
|---|---|
 |
F/Lt E G Fleming and crew, May 1945
To find out more about F/Lt Fleming and crew click here Photo courtesy of Tony Fleming |
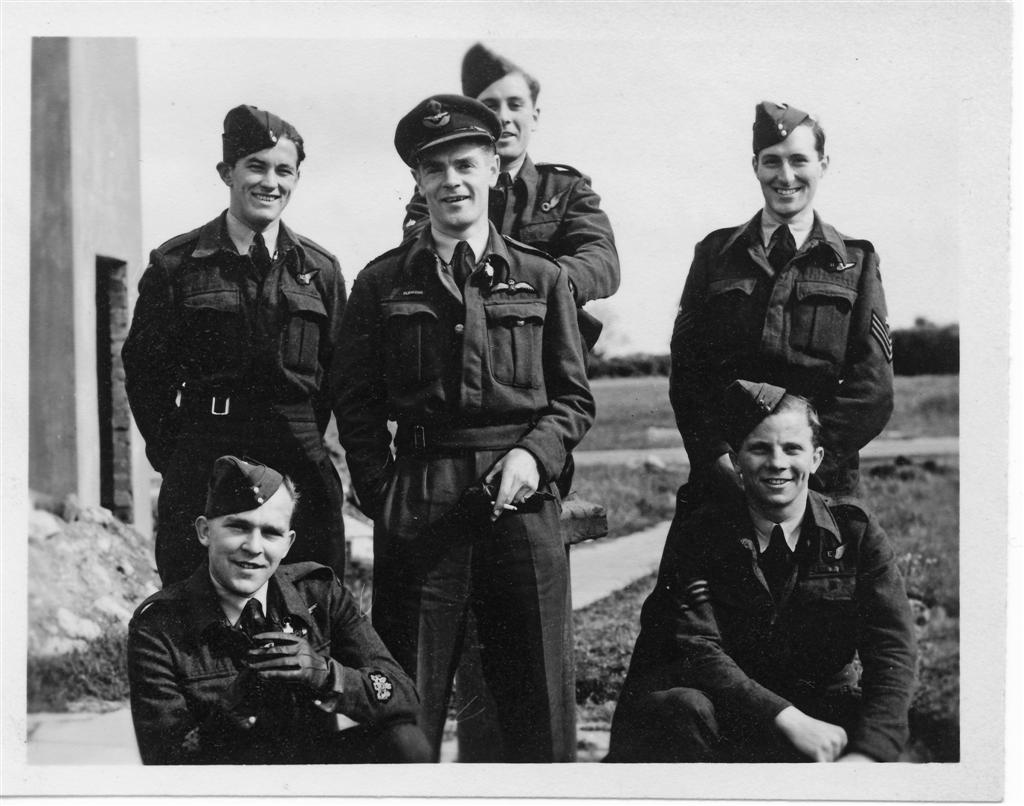
S/Ldr Caldow and Crew
| Photo | Comment |
|---|---|
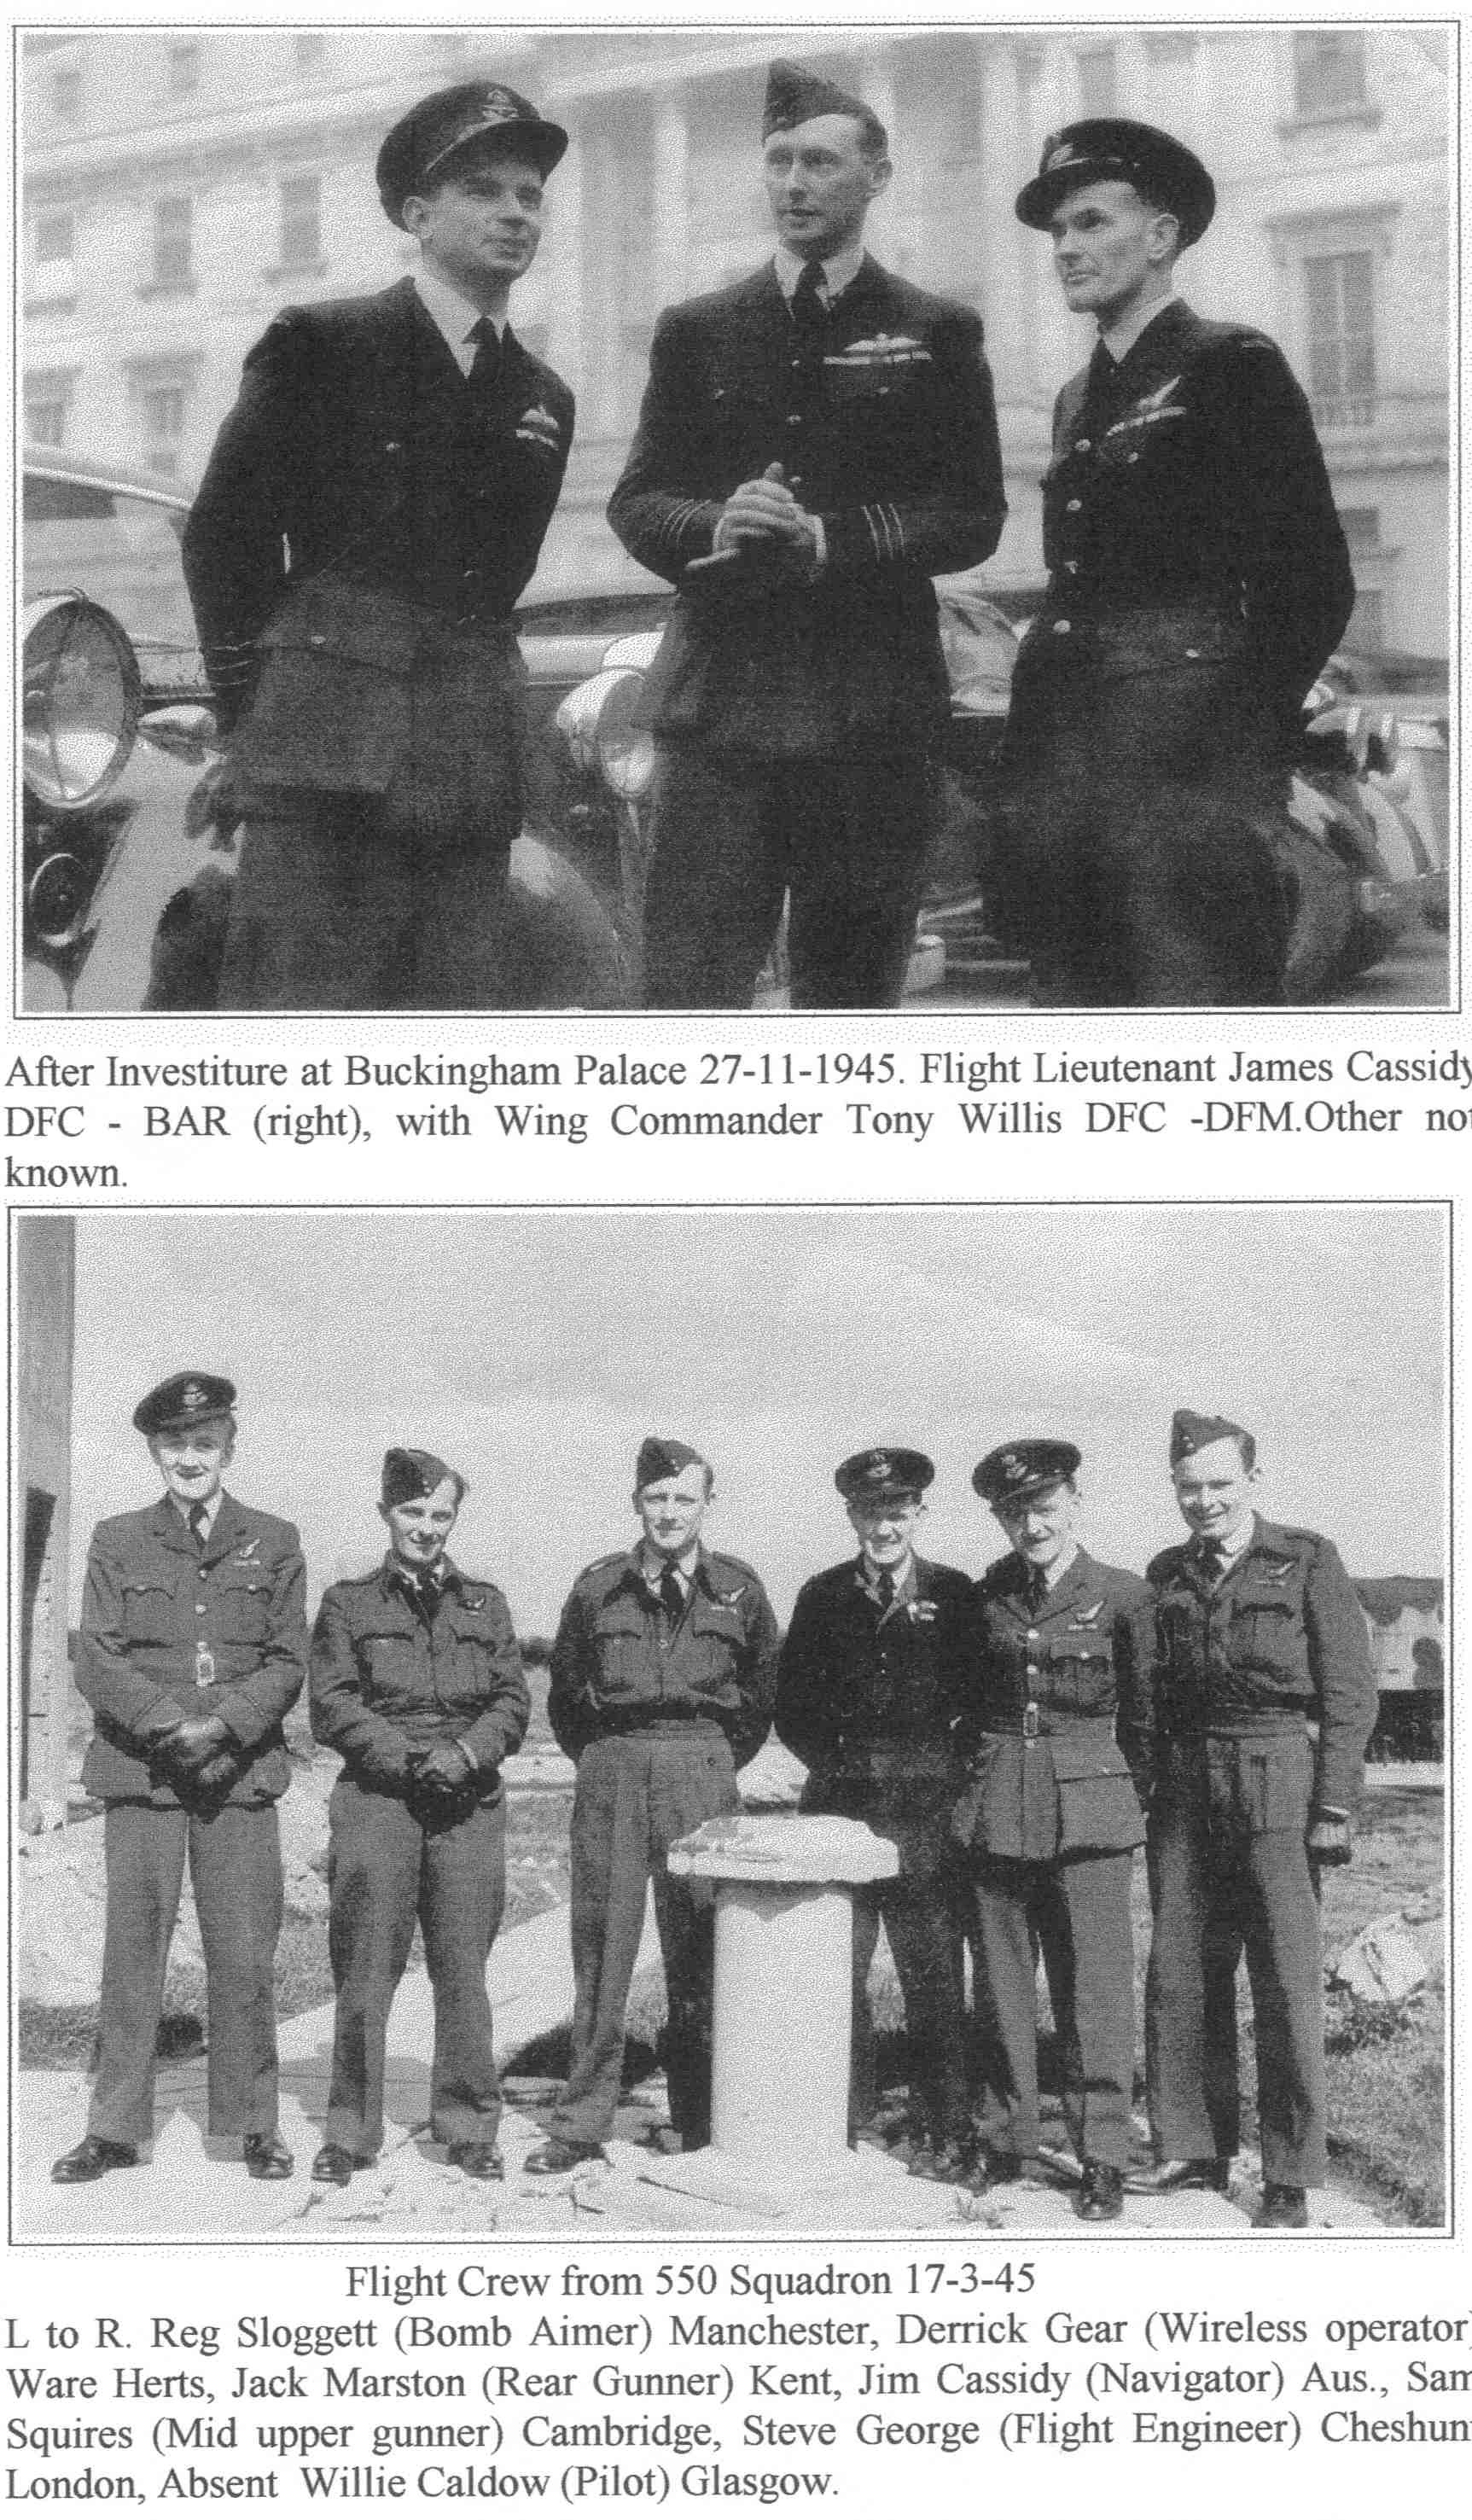 |
F/Lt Cassidy with S/Ldr Caldow and crew, March 1945
To find out more about S/Ldr Caldow and crew click here F/Lt Cassidy carried out a second tour of operations with 550 Sqdn, after a first tour with 626 Sqdn. For details click here |
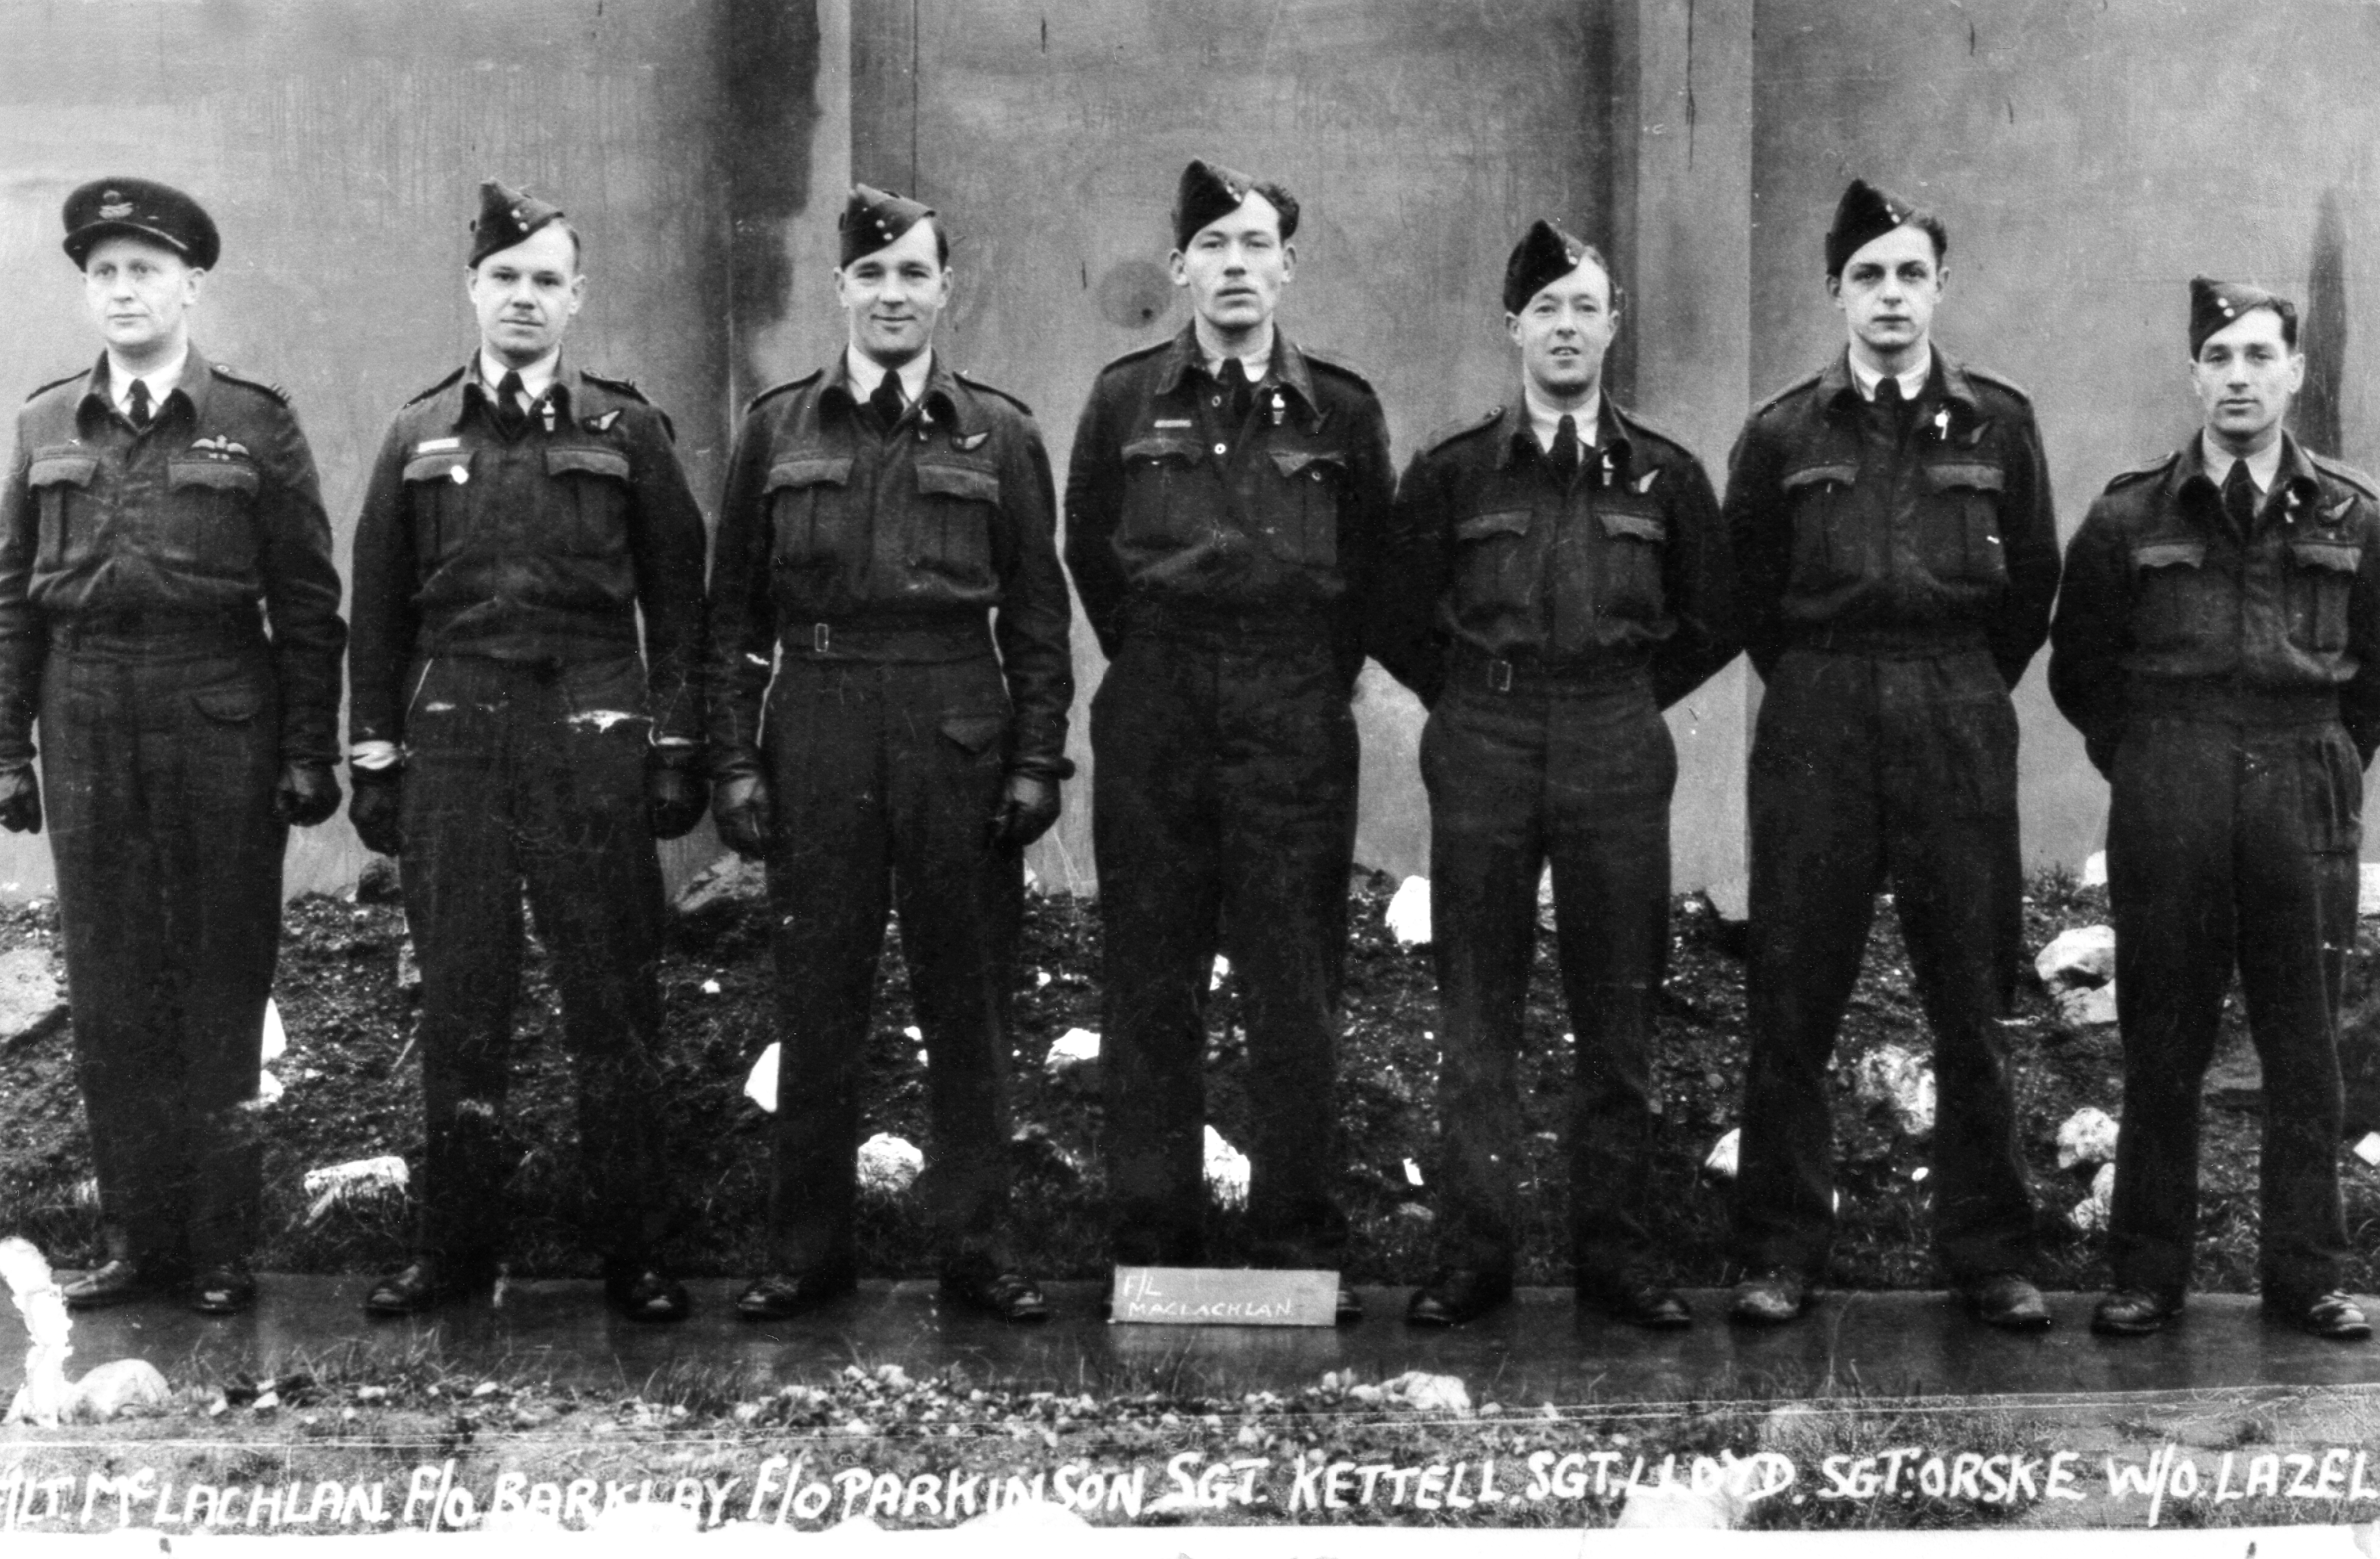
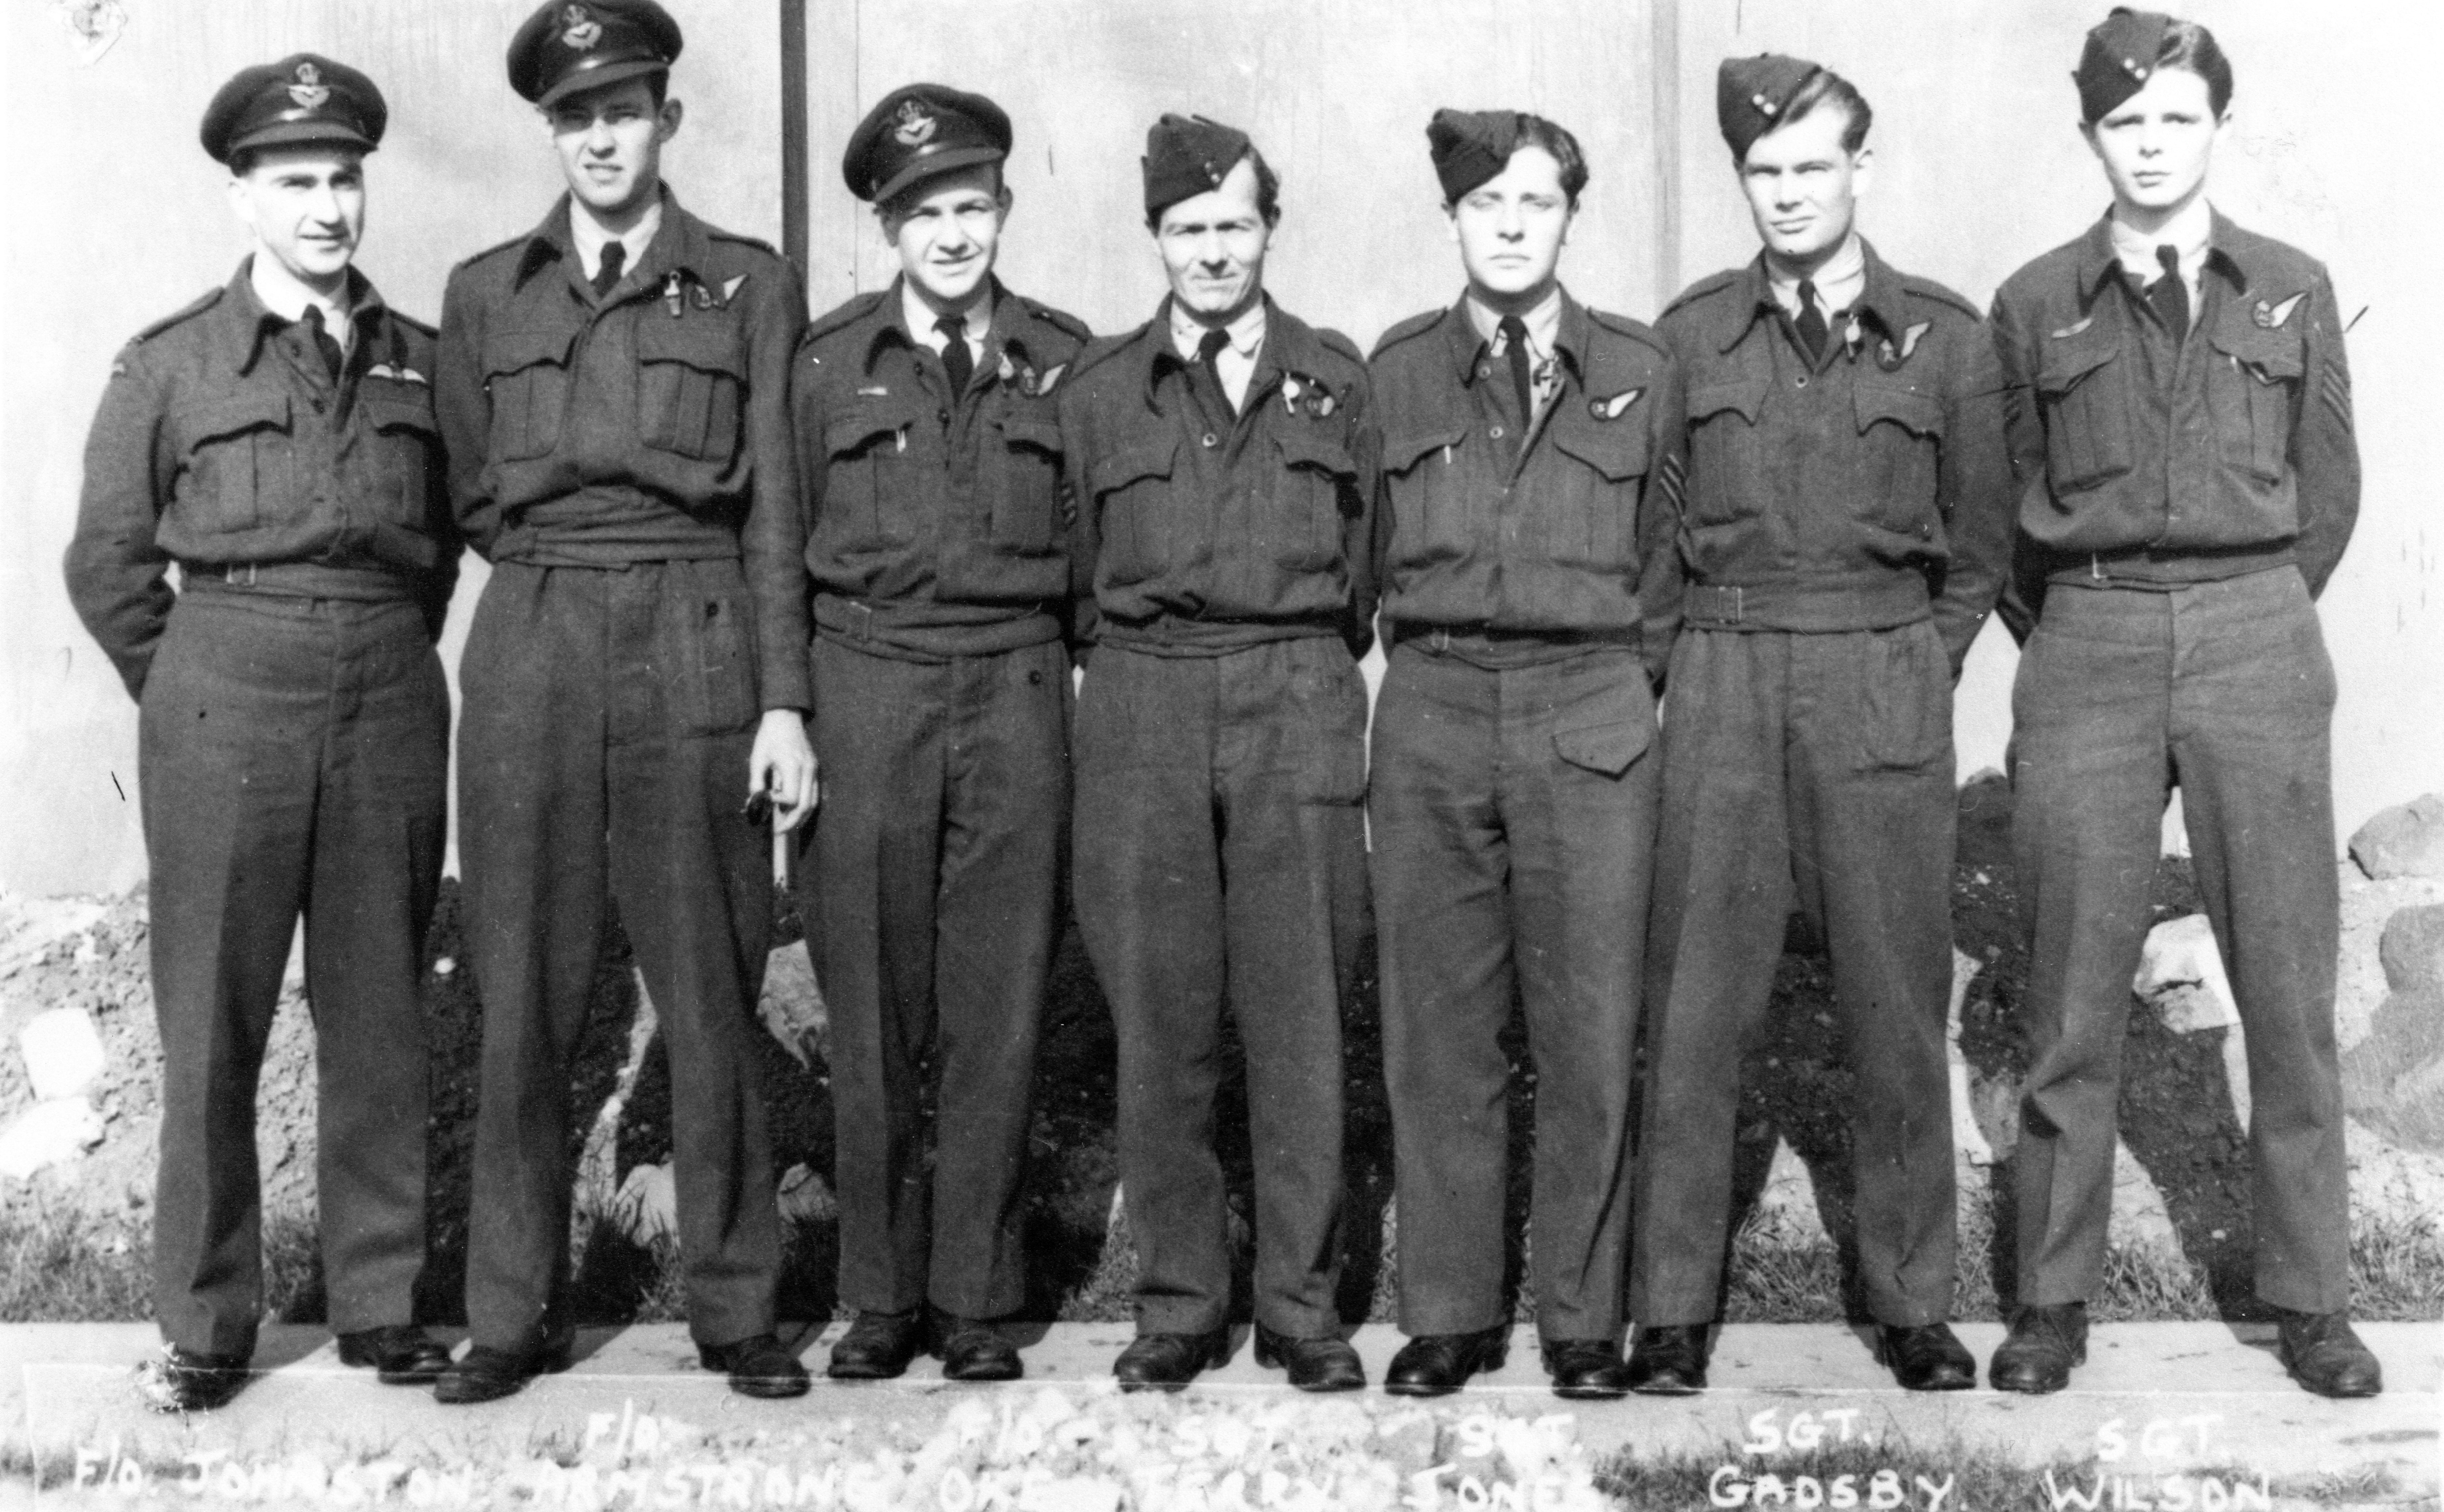
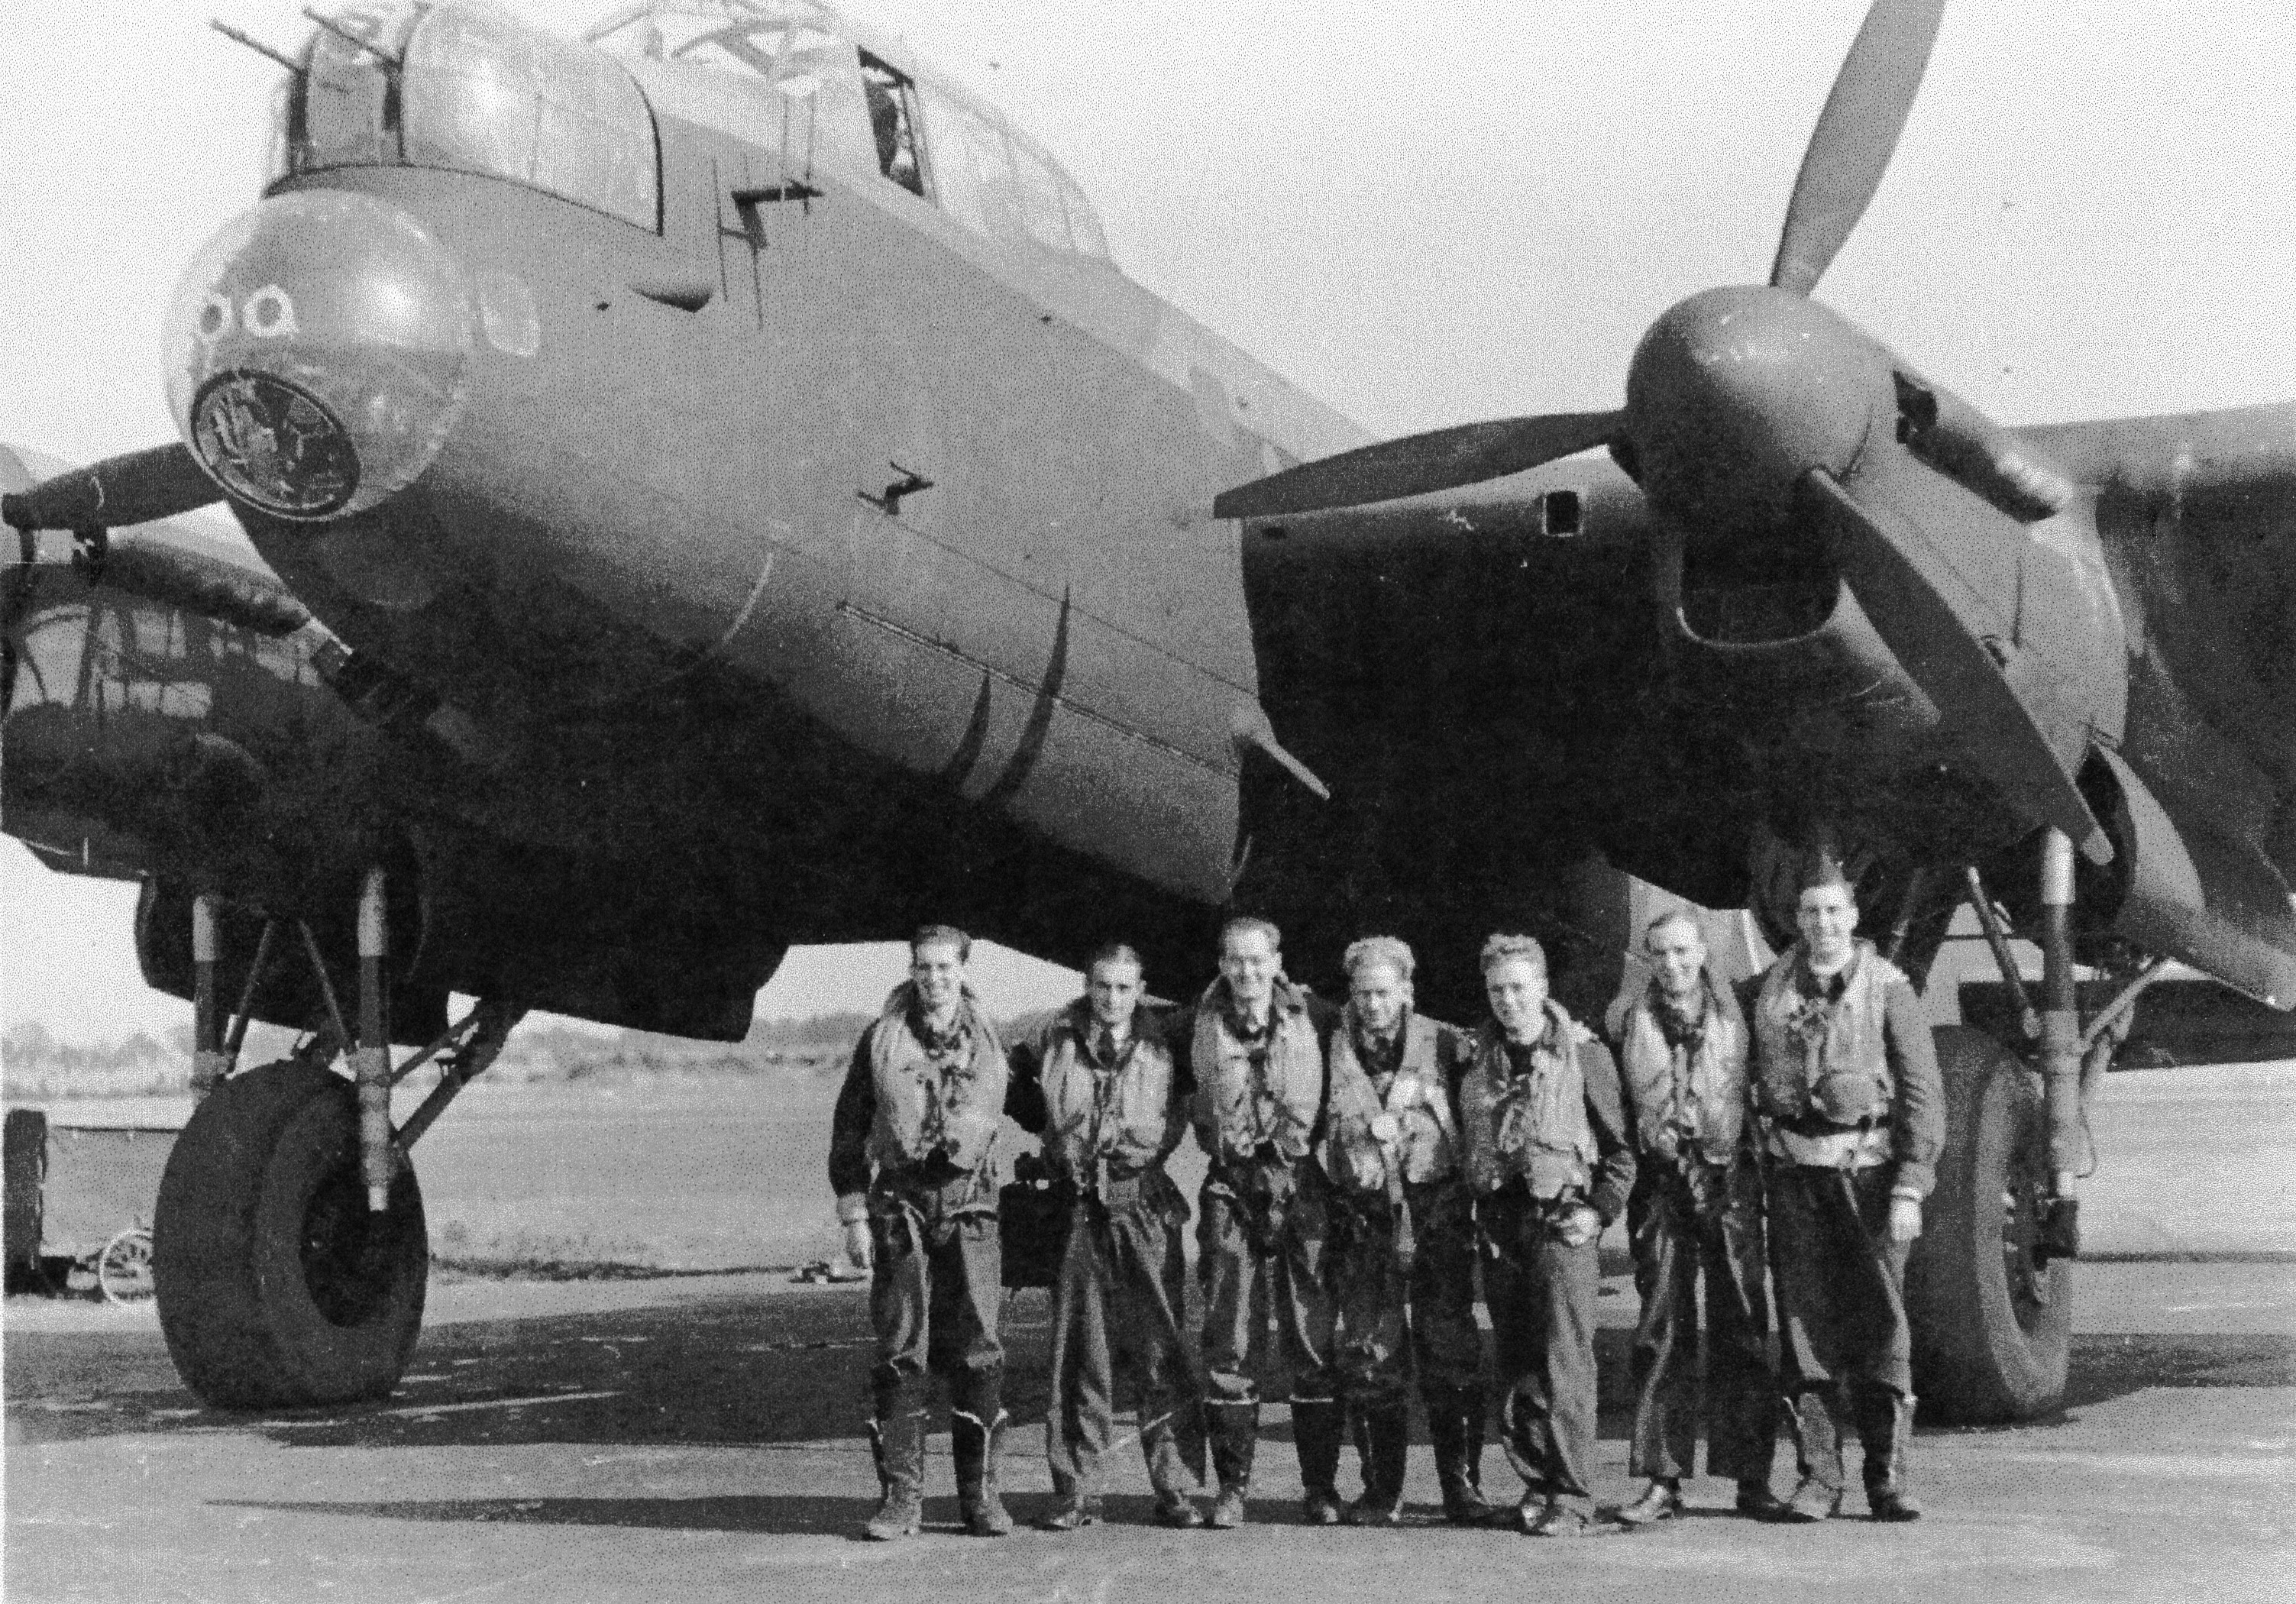
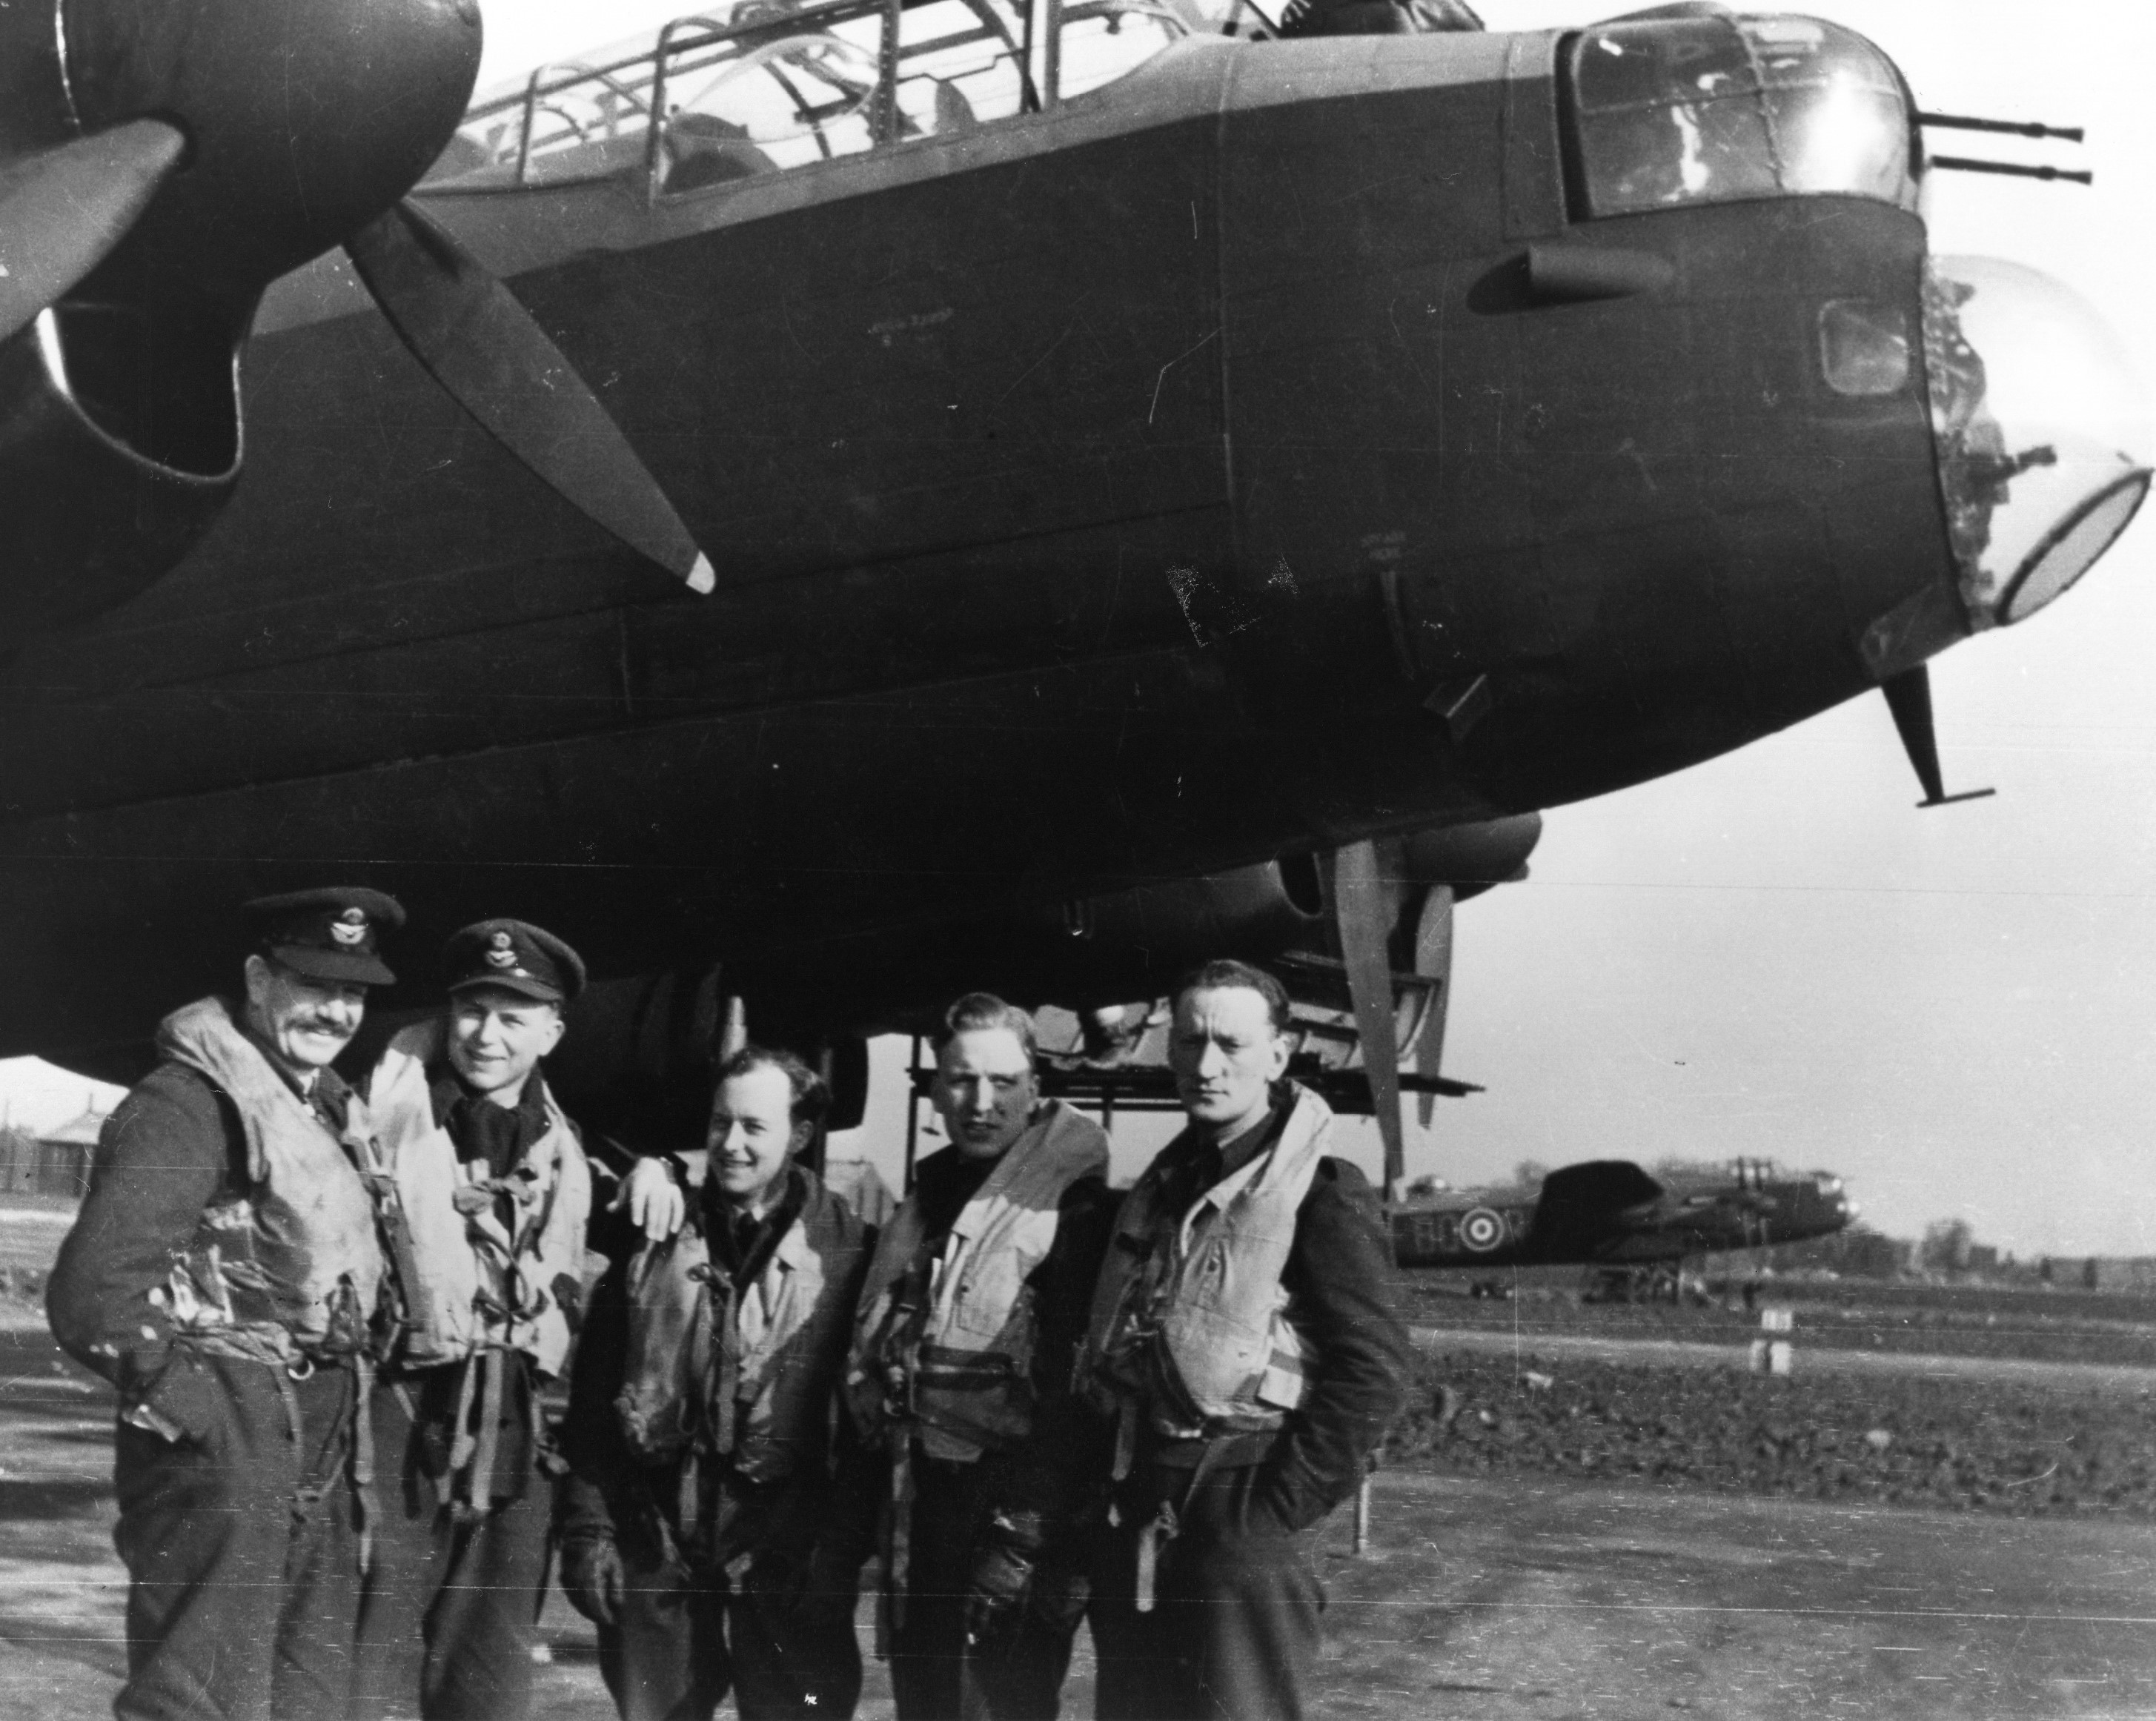
F/Lt A J D MacLachlan Crew
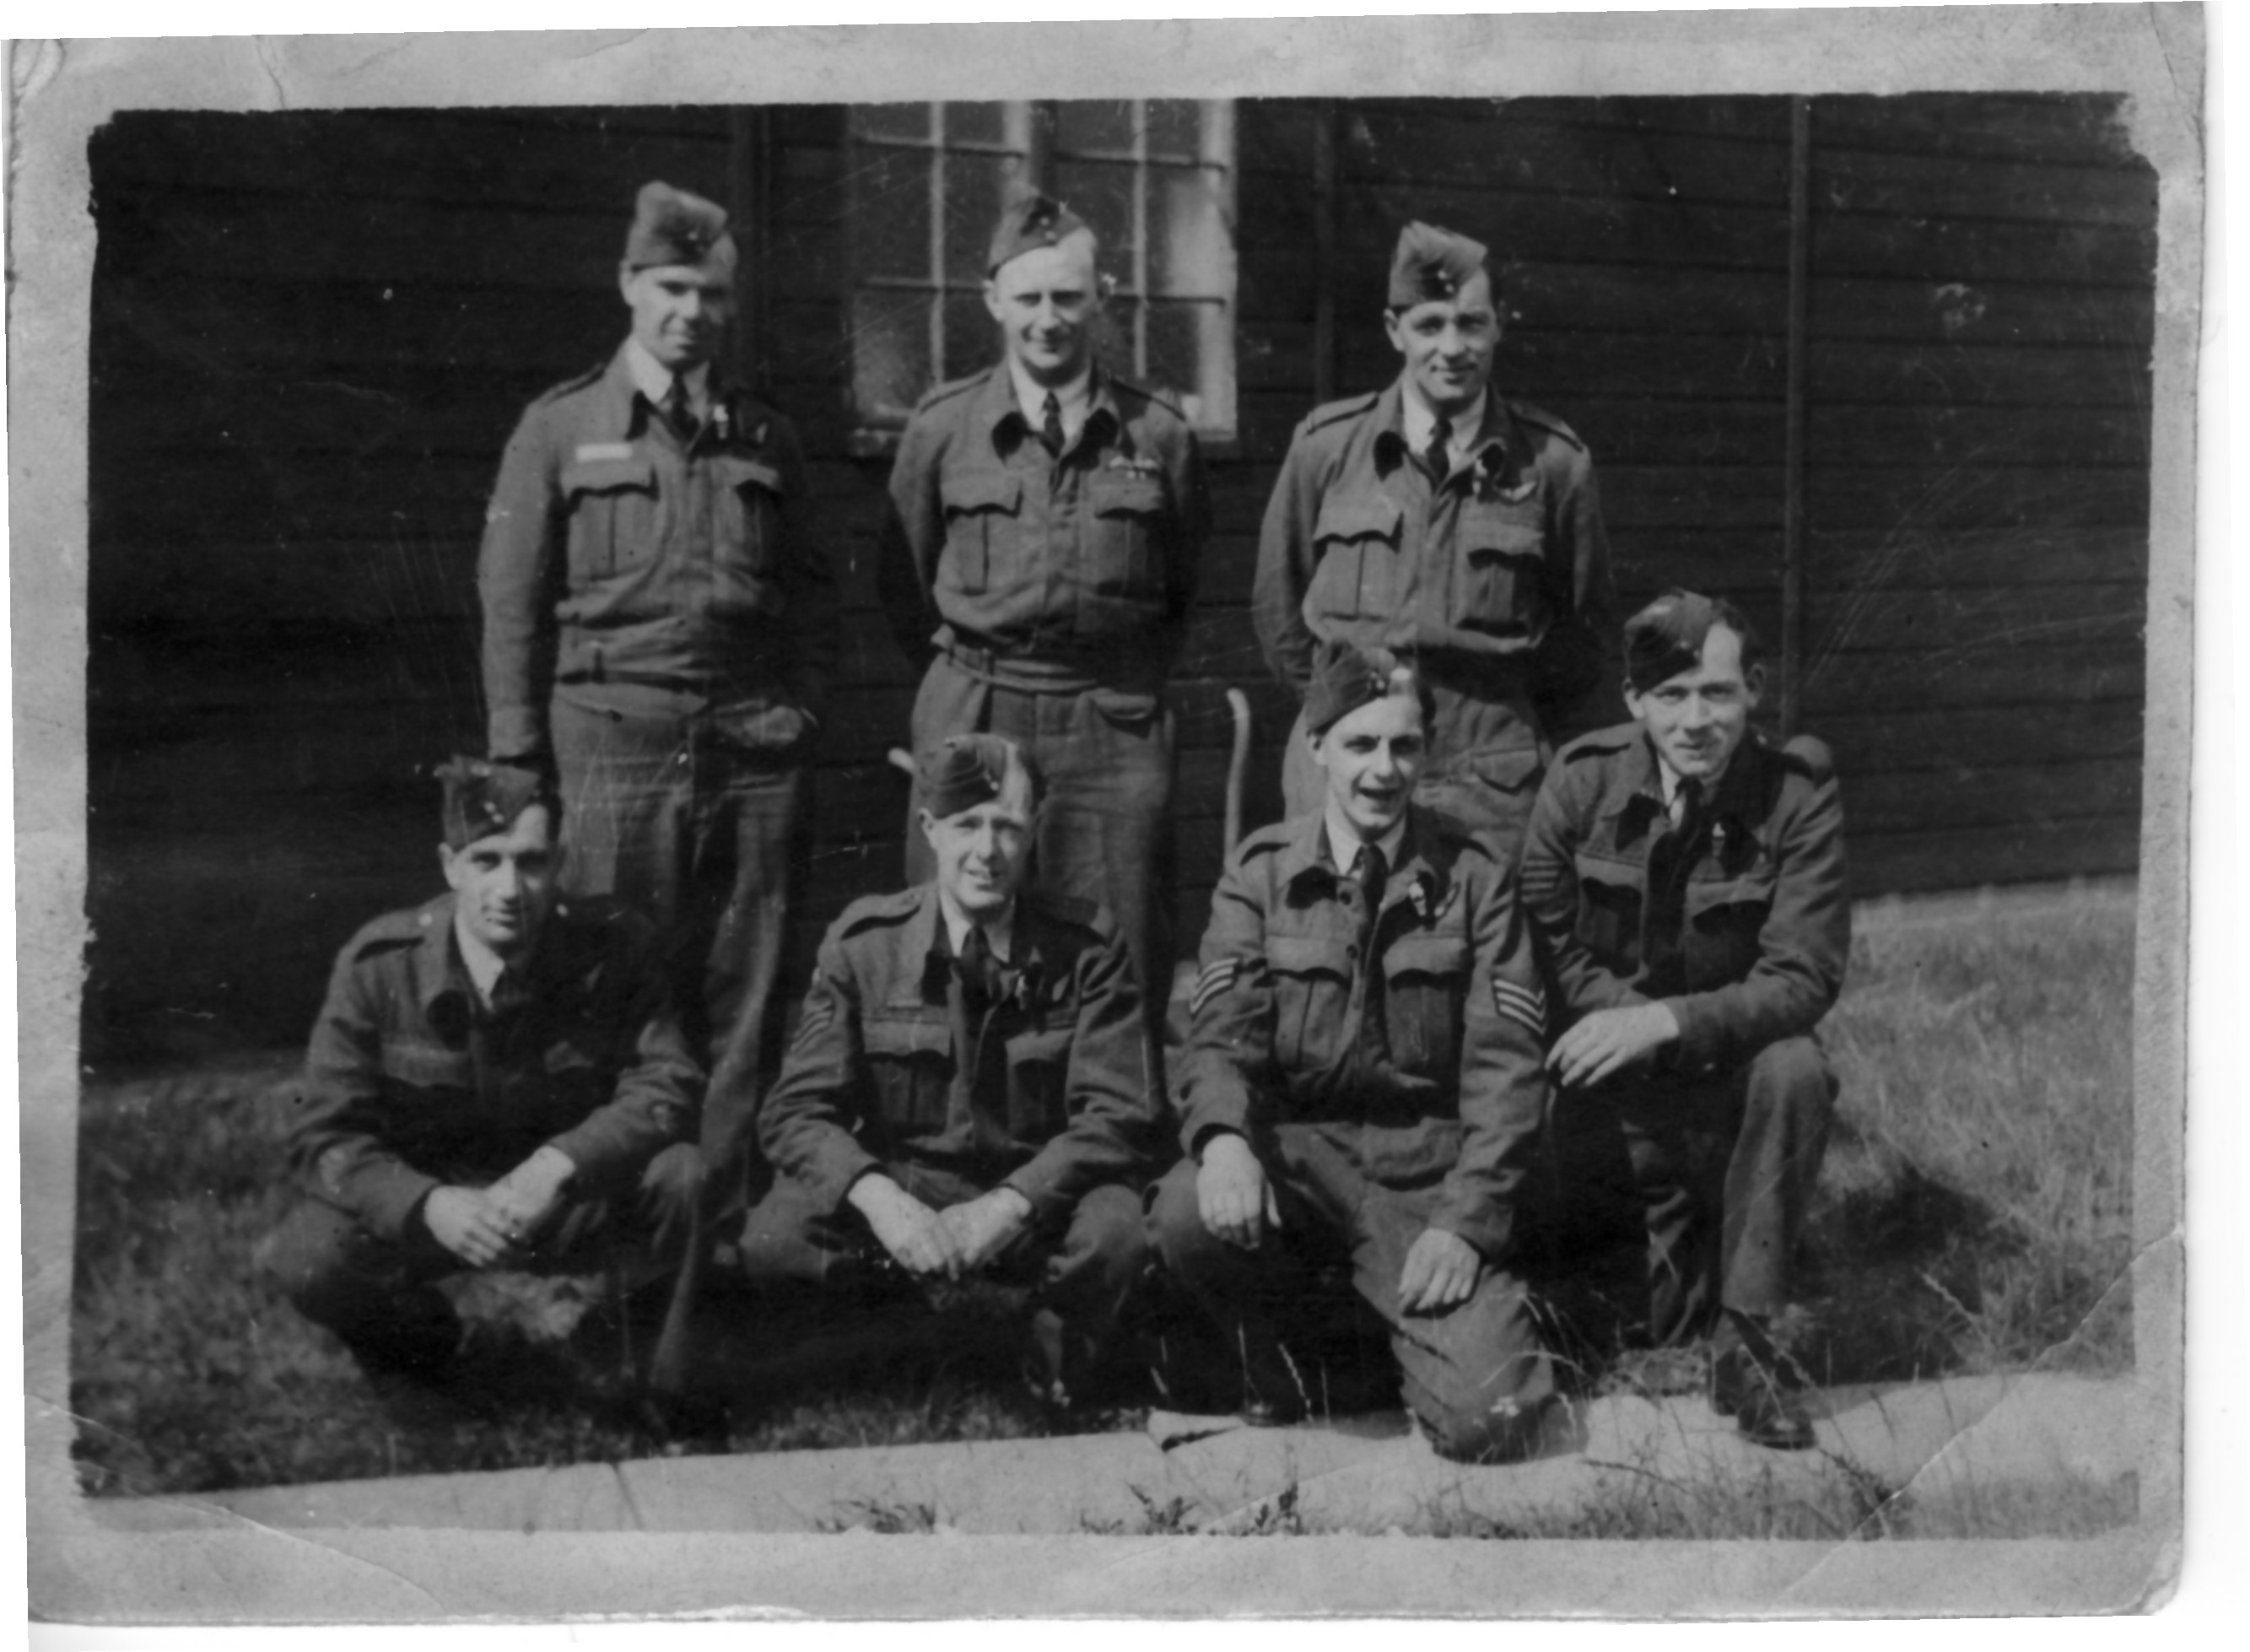 |
F/Lt Donald McLaughlin and Crew after completing tour of 35 ops at North Killingholme
Back row. L-to-R: F/O J Barkley (Nav), F/Lt D MacLoughlan (P), J Parkinson (B/A) Front row. L-to-R: W/O R Lazzell, D Lloyd (W/Op), D Drake (MU/AG), D Kettell (F/Eng) Picture courtesy of Don Drake Don comments: (ca. Aug 2010) We all attended the dedication of the commemorative stone in 1982 but sadly I am the only one now left. |
 |
For further information and photos click here |
P/O R G Screen DFC and Crew
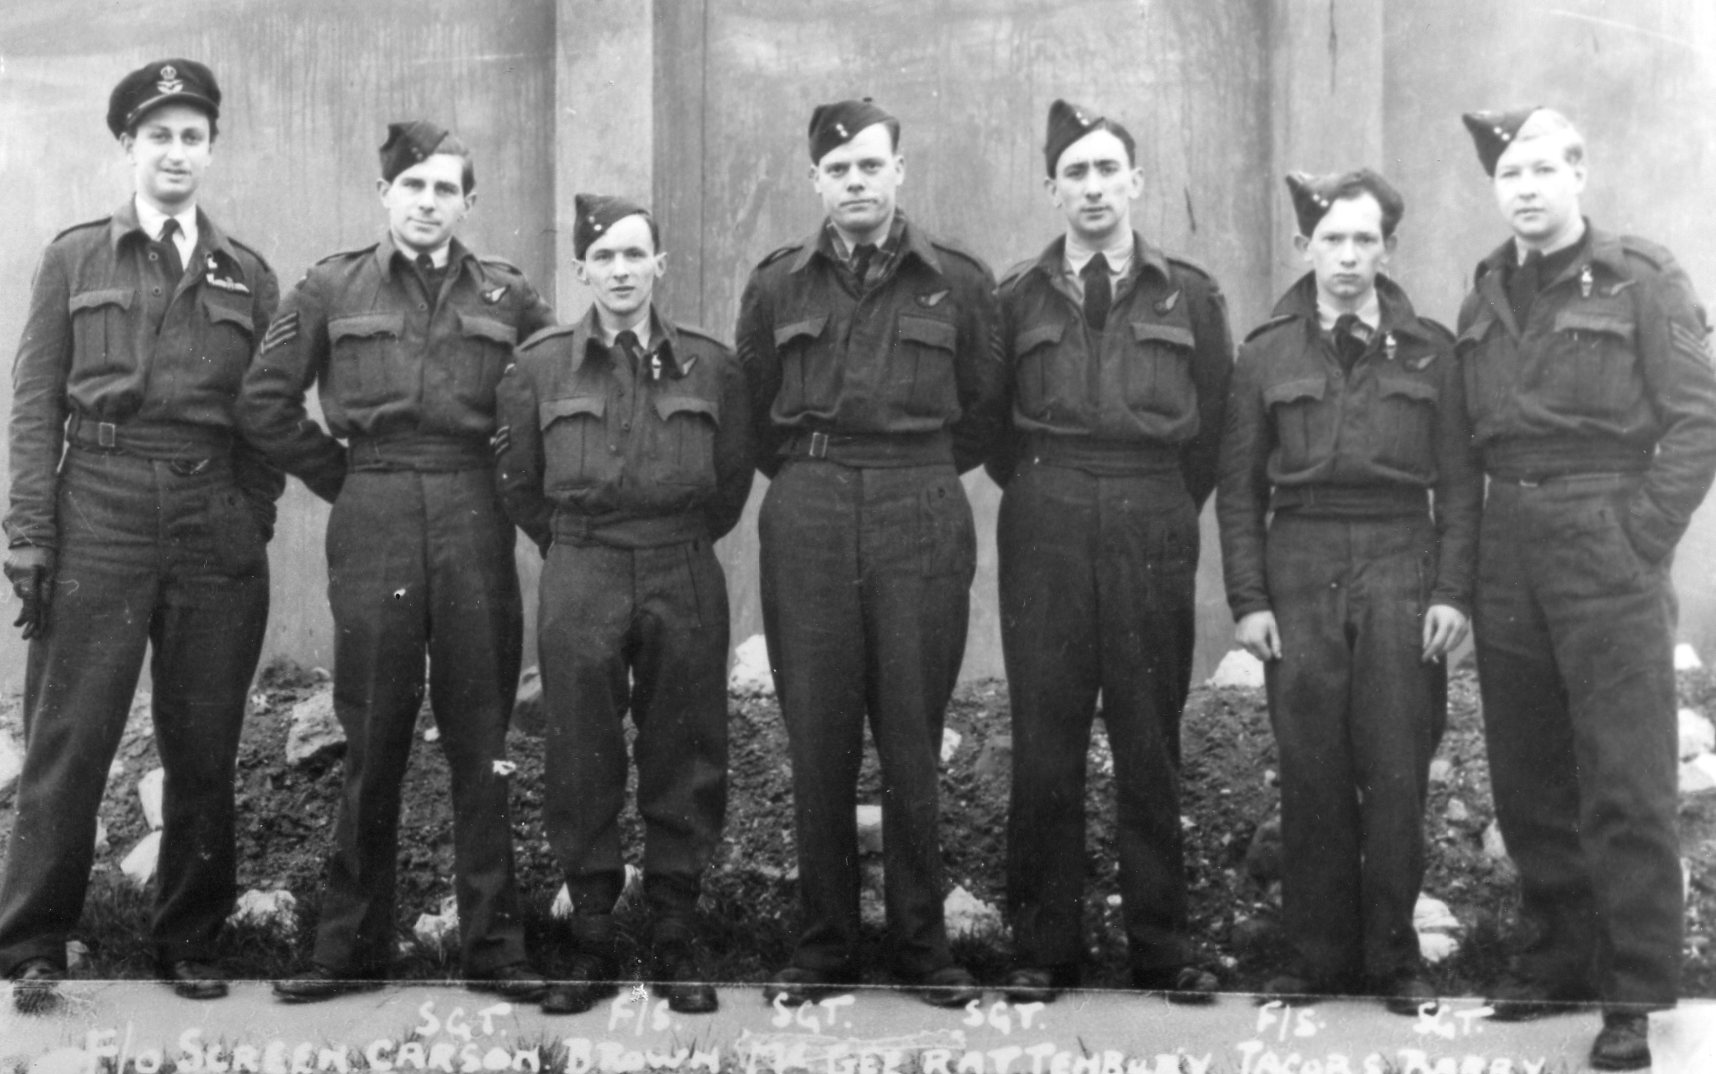 |
For further information and photos click here Picture courtesy of Mark Simpson |
P/O J Beale DFC and Crew
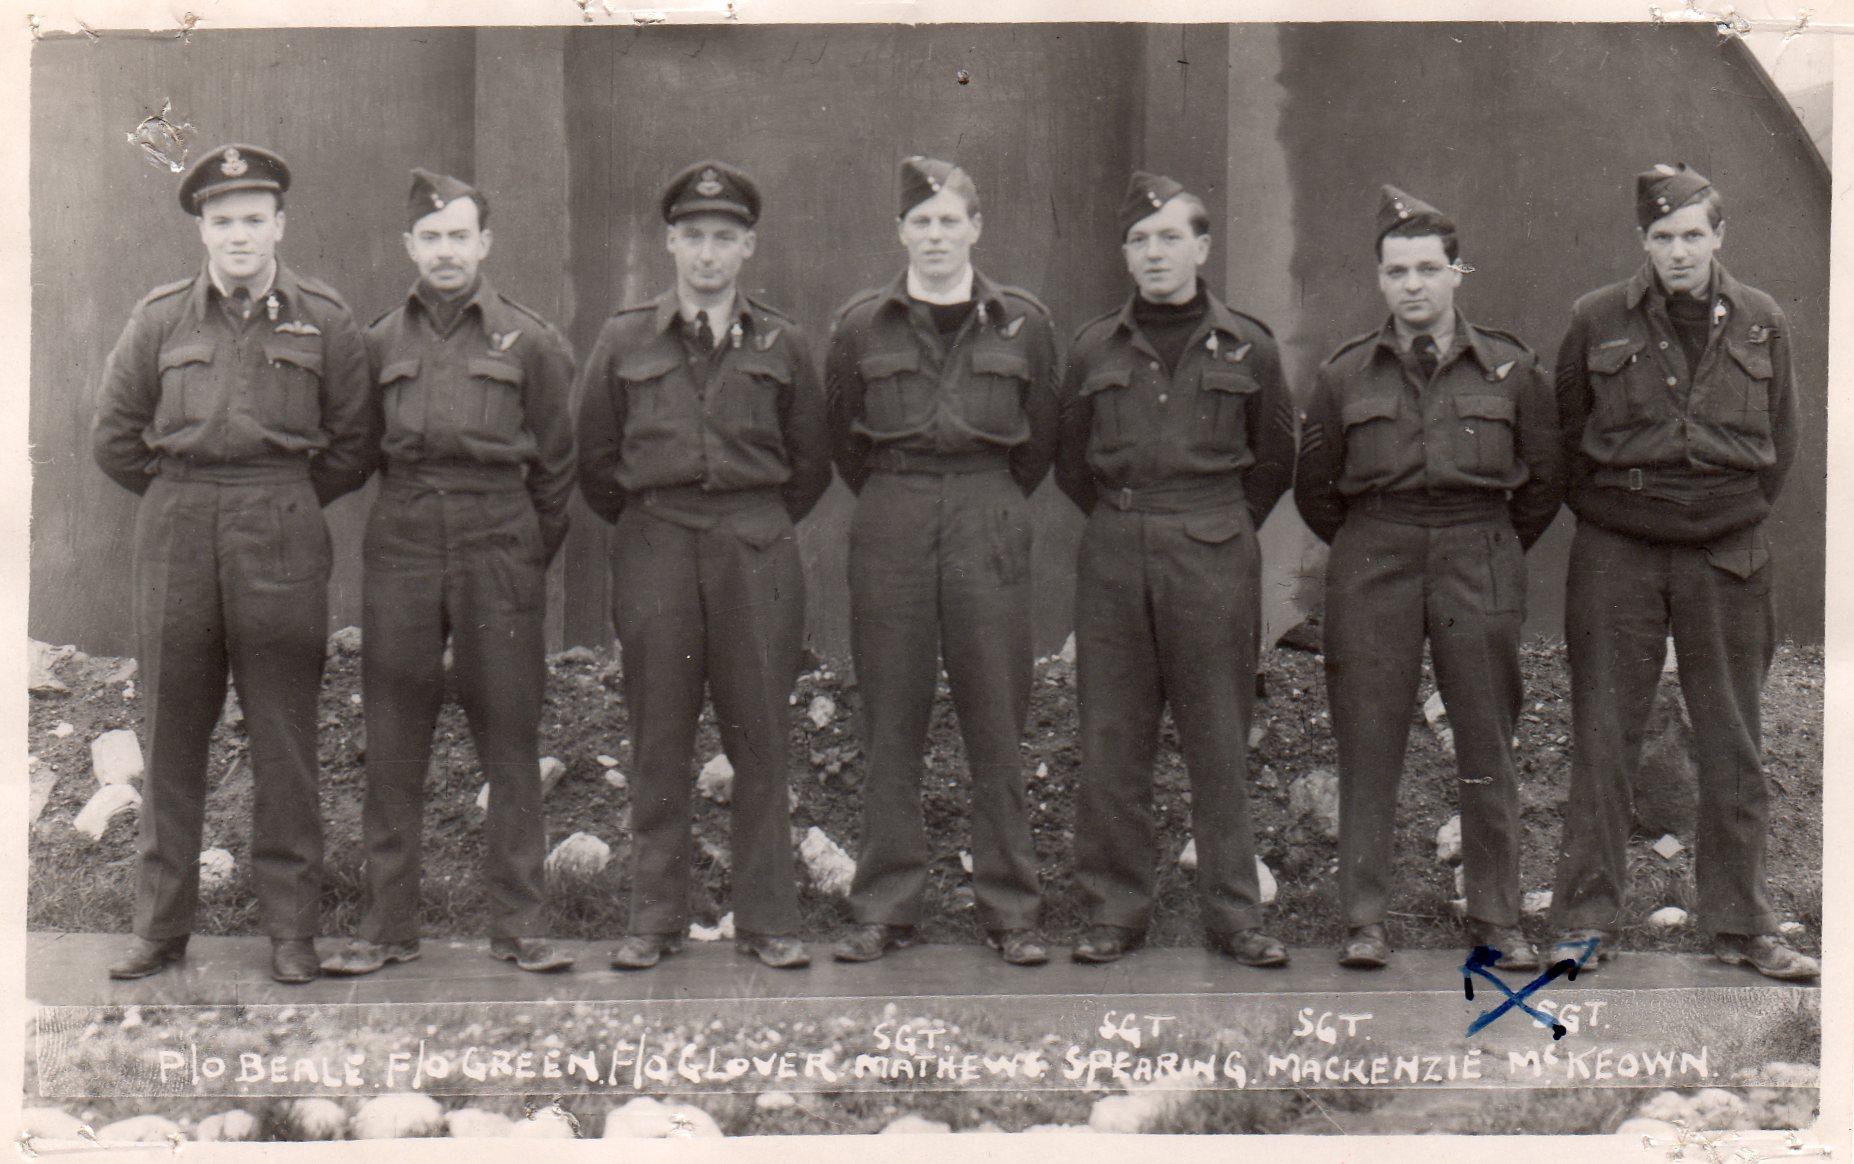 |
Note: Jim Beale has reported that F/O Green is incorrectly named in the photo and that
it should be F/O Geen who flew in this crew
For further information and photos click here Picture courtesy of Mark Simpson |
F/Lt A W Browne DFC and Crew
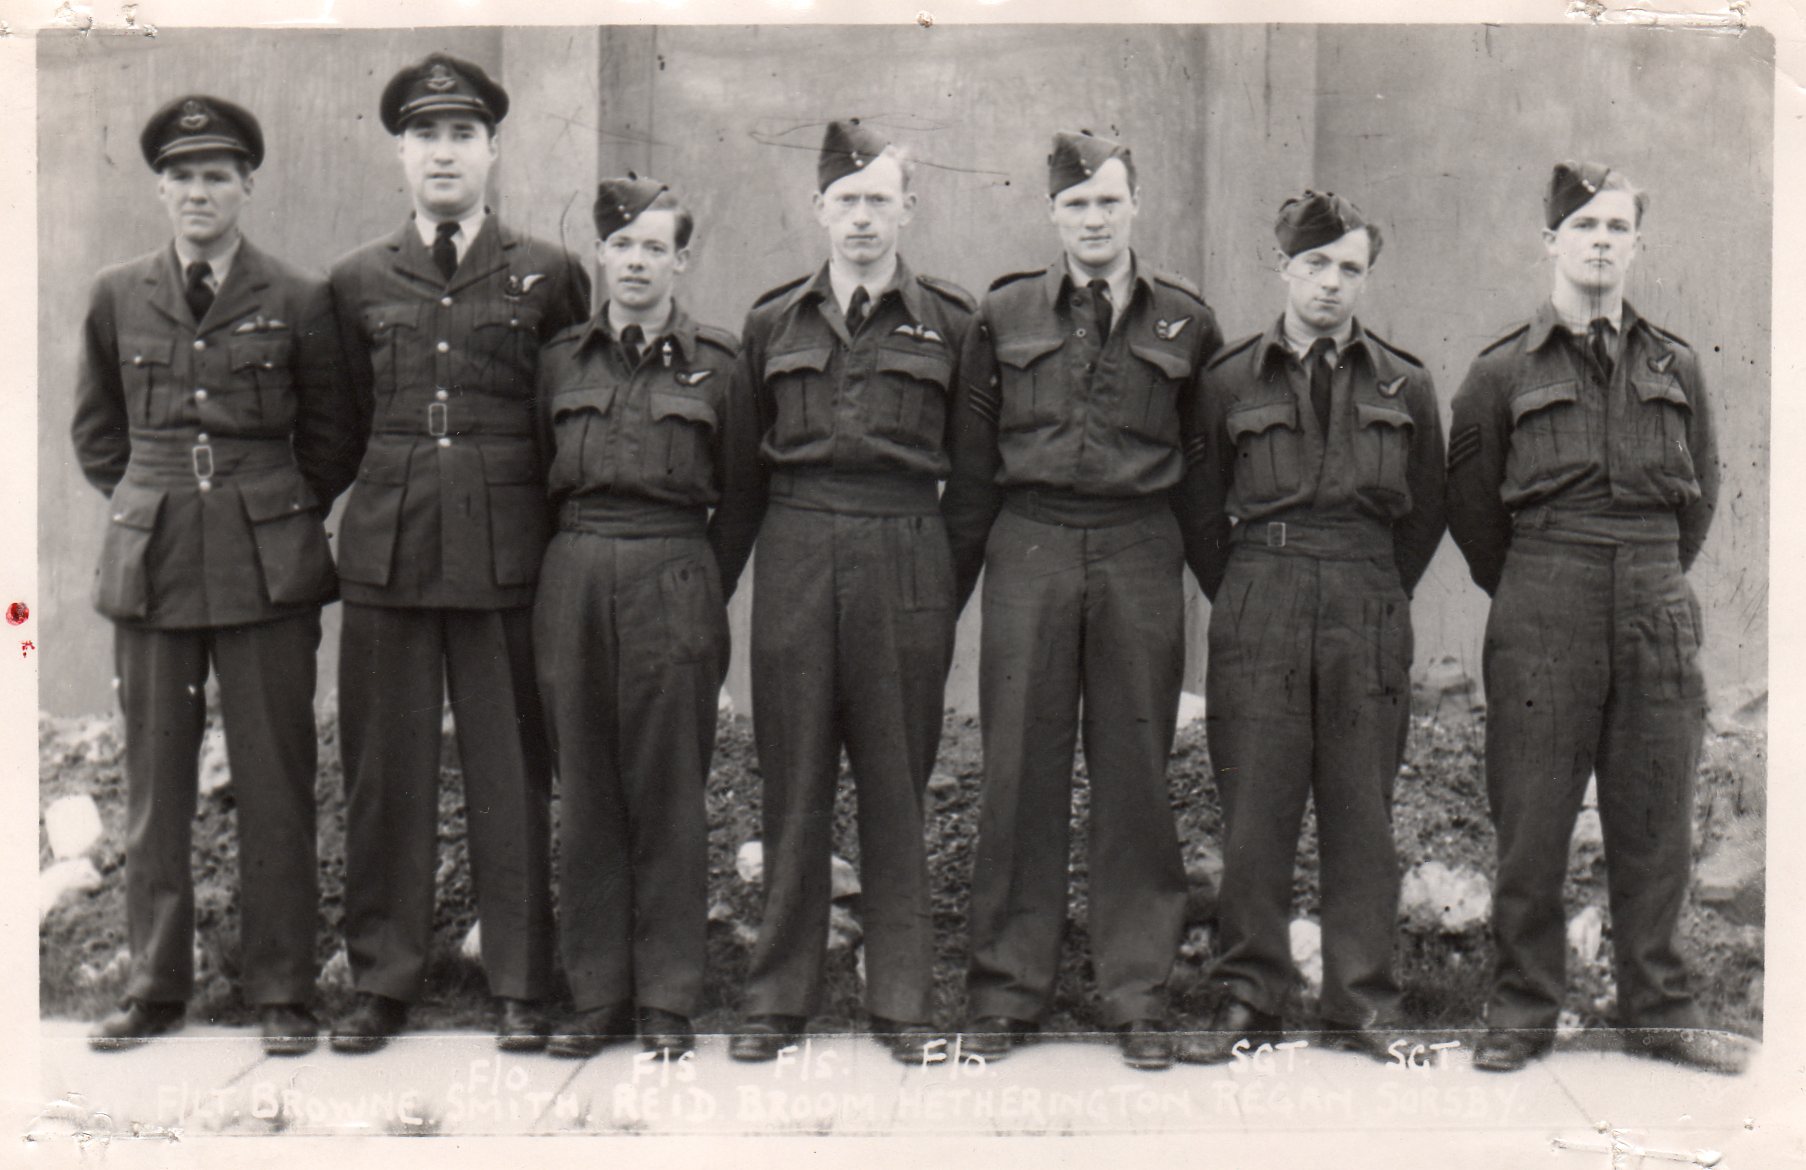 |
For further information and photos click here Picture courtesy of Mark Simpson |
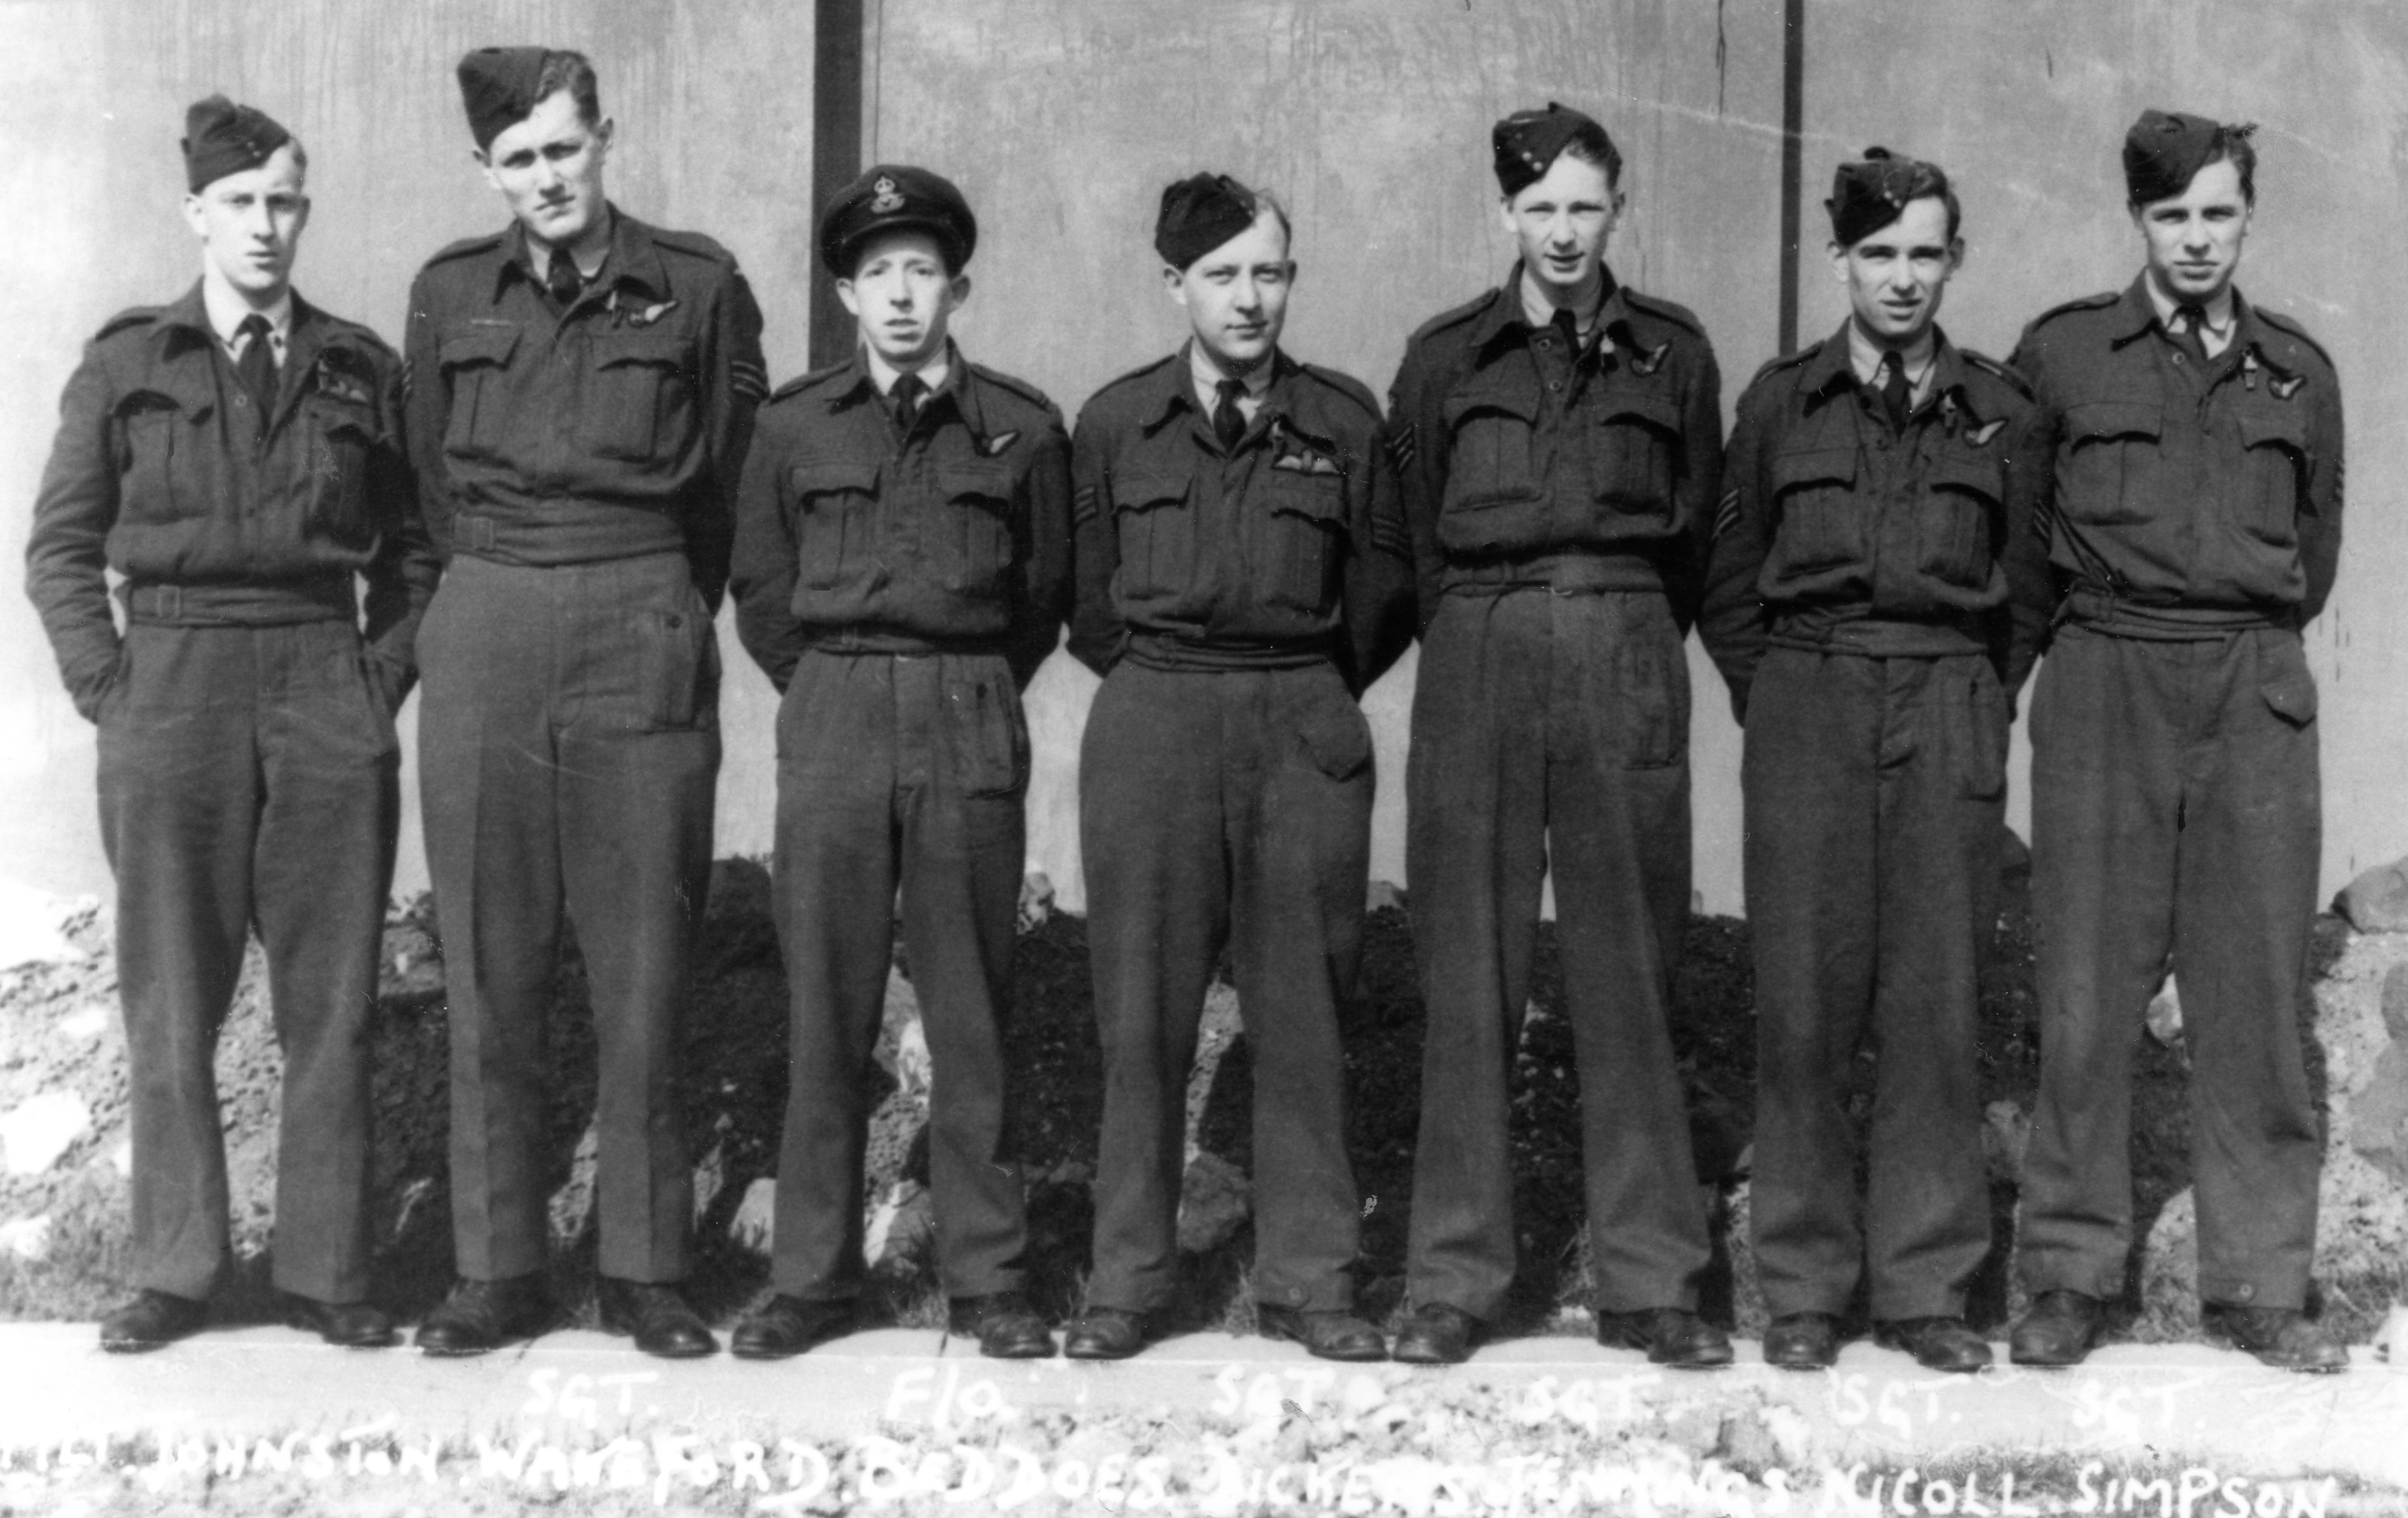
F/Lt Johnston and Crew
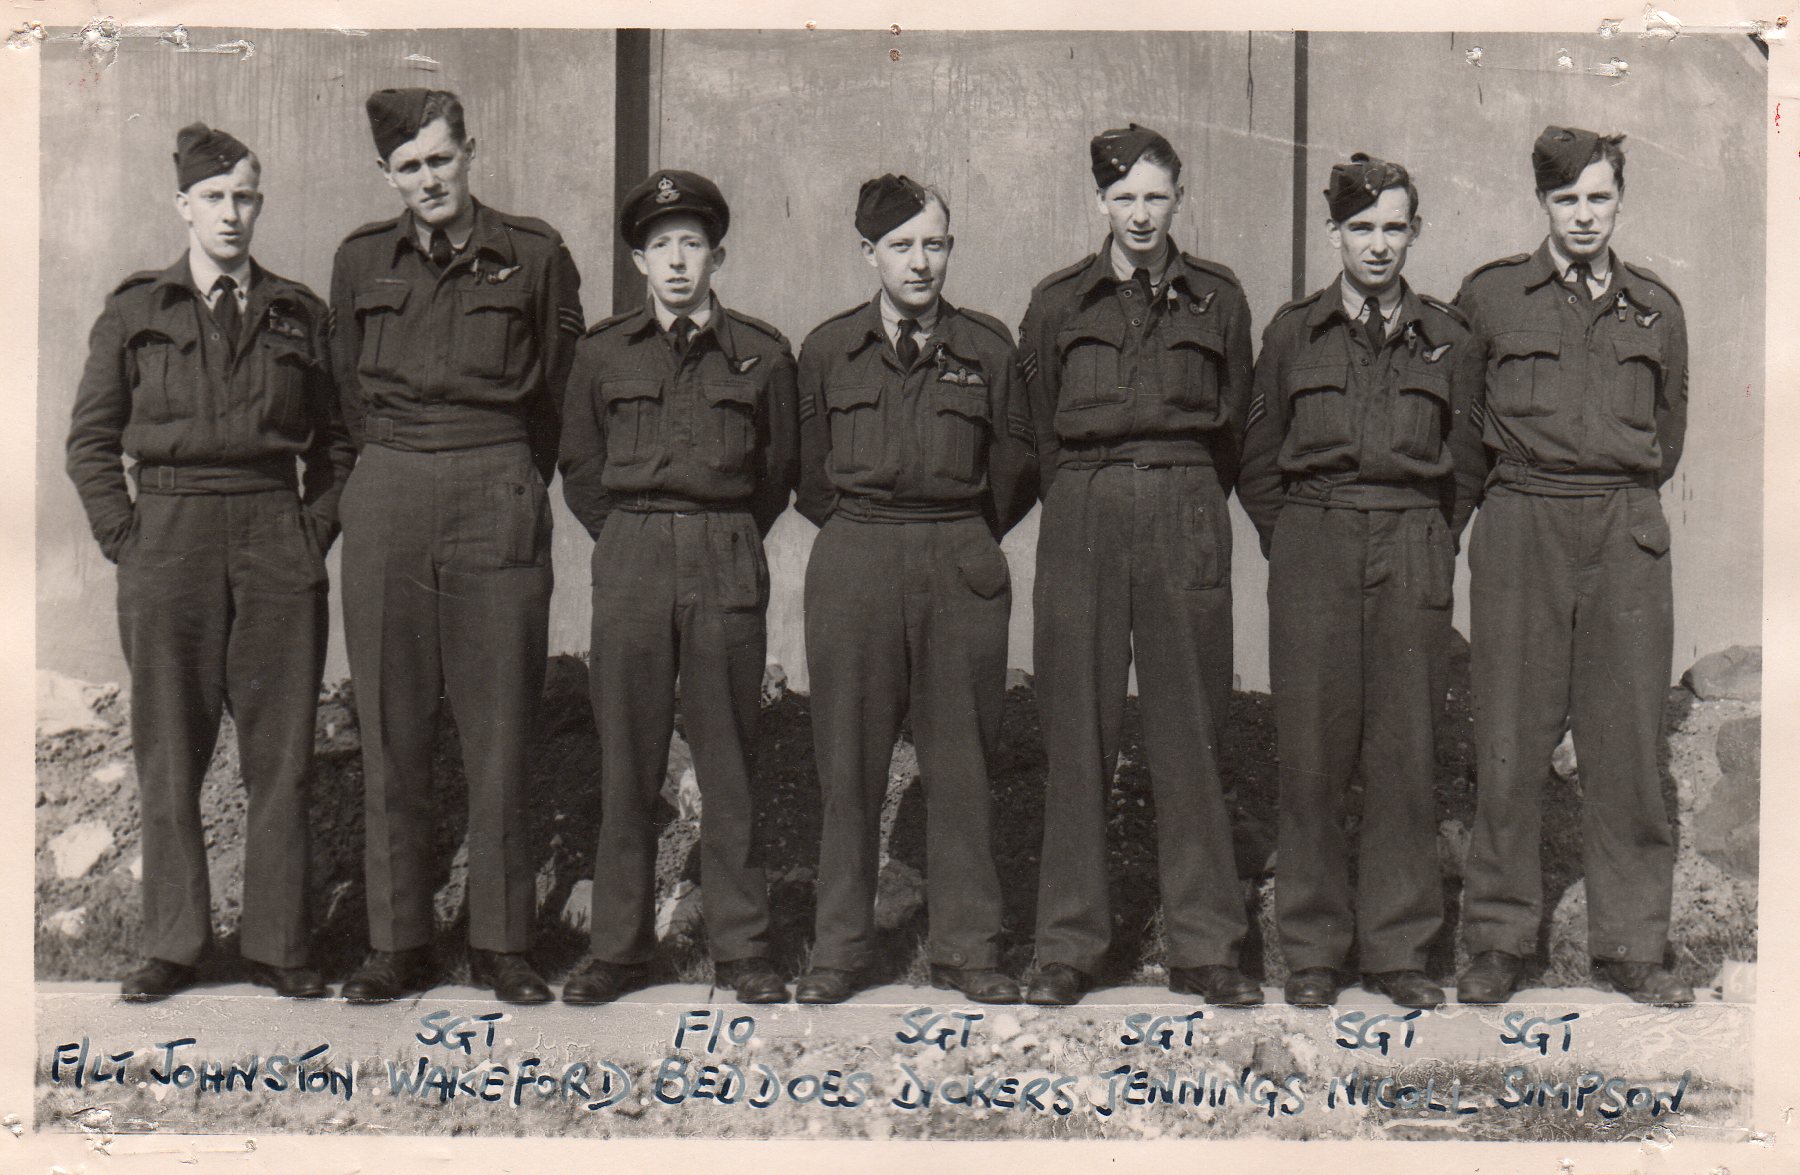 |
Picture courtesy of Mark Simpson |
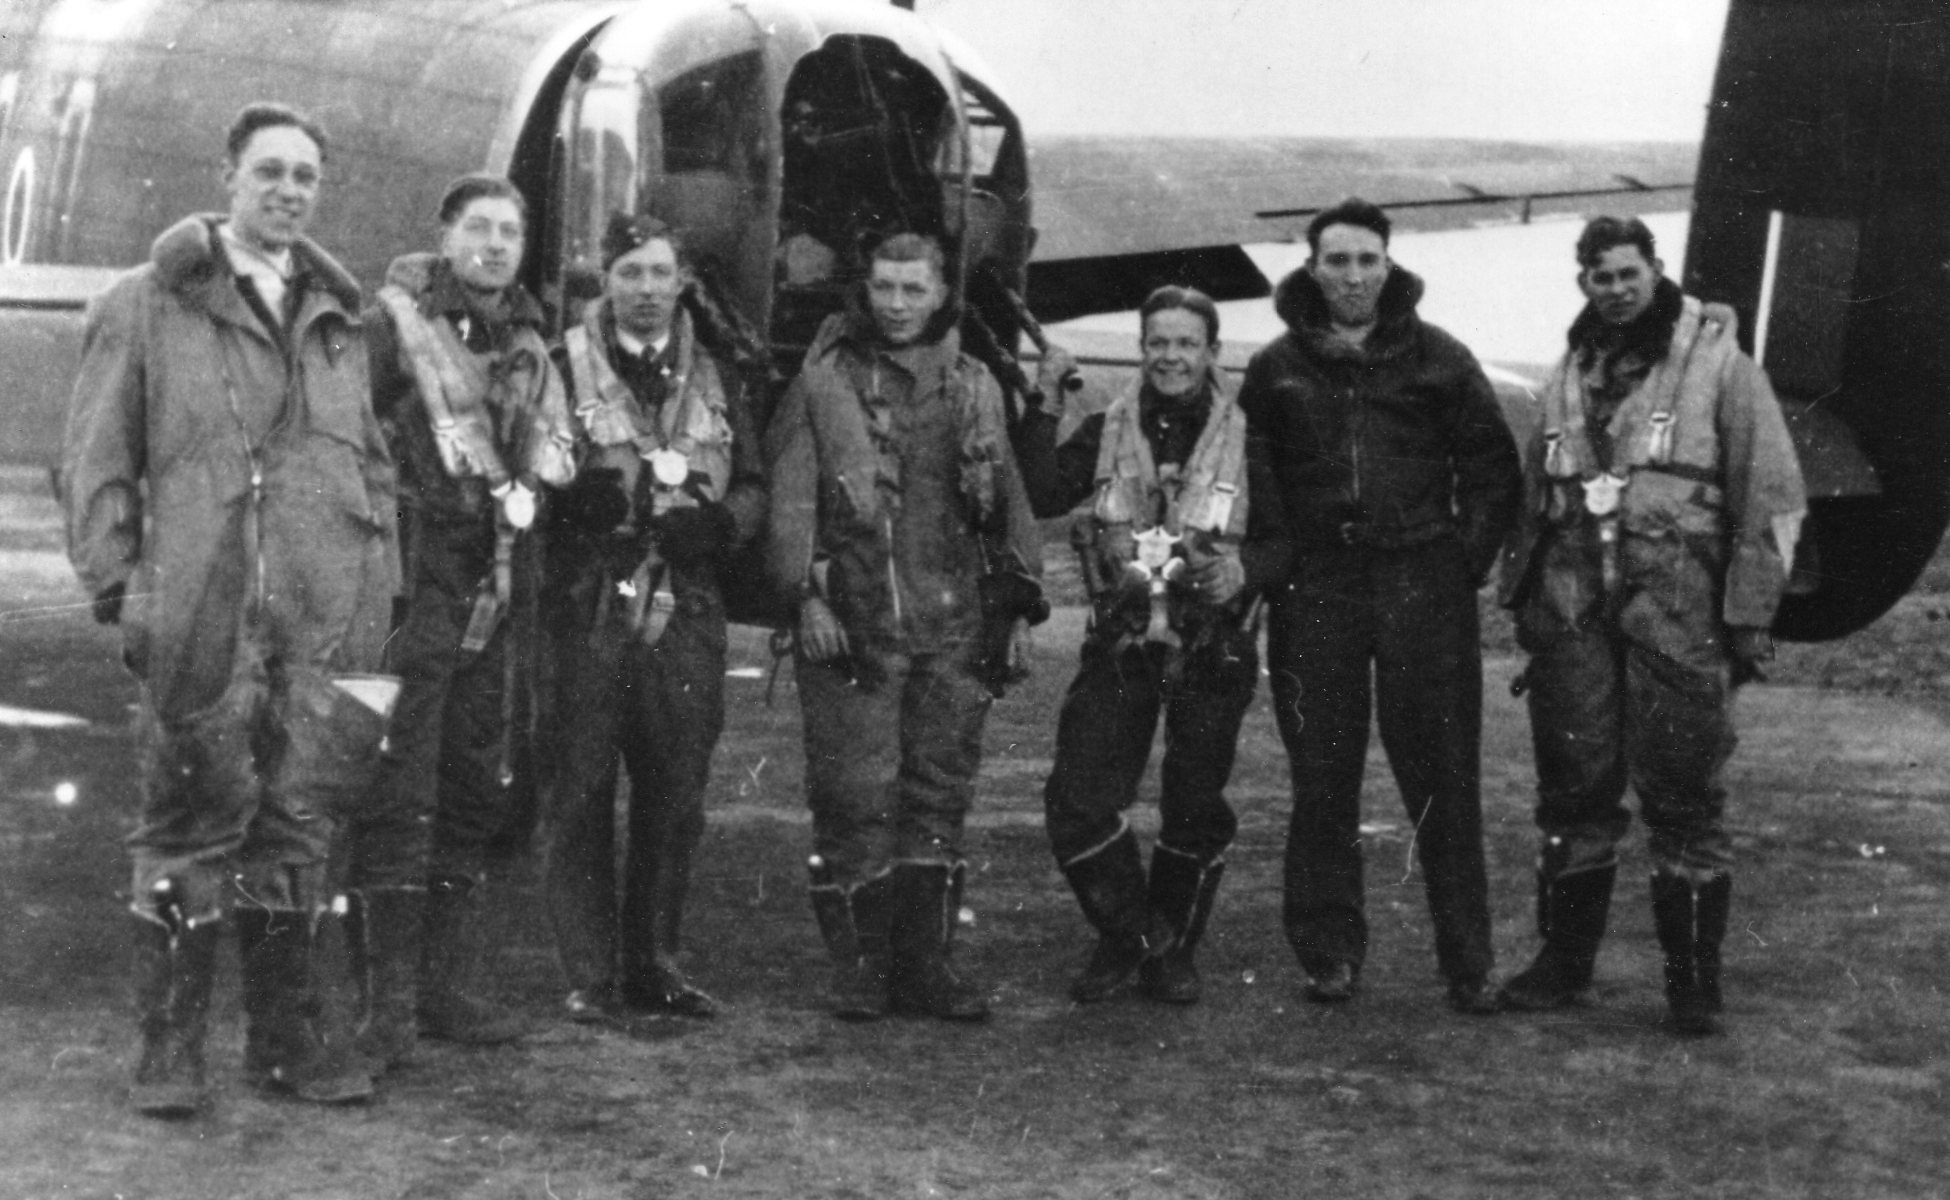
P/O G Mearns DFC and Crew
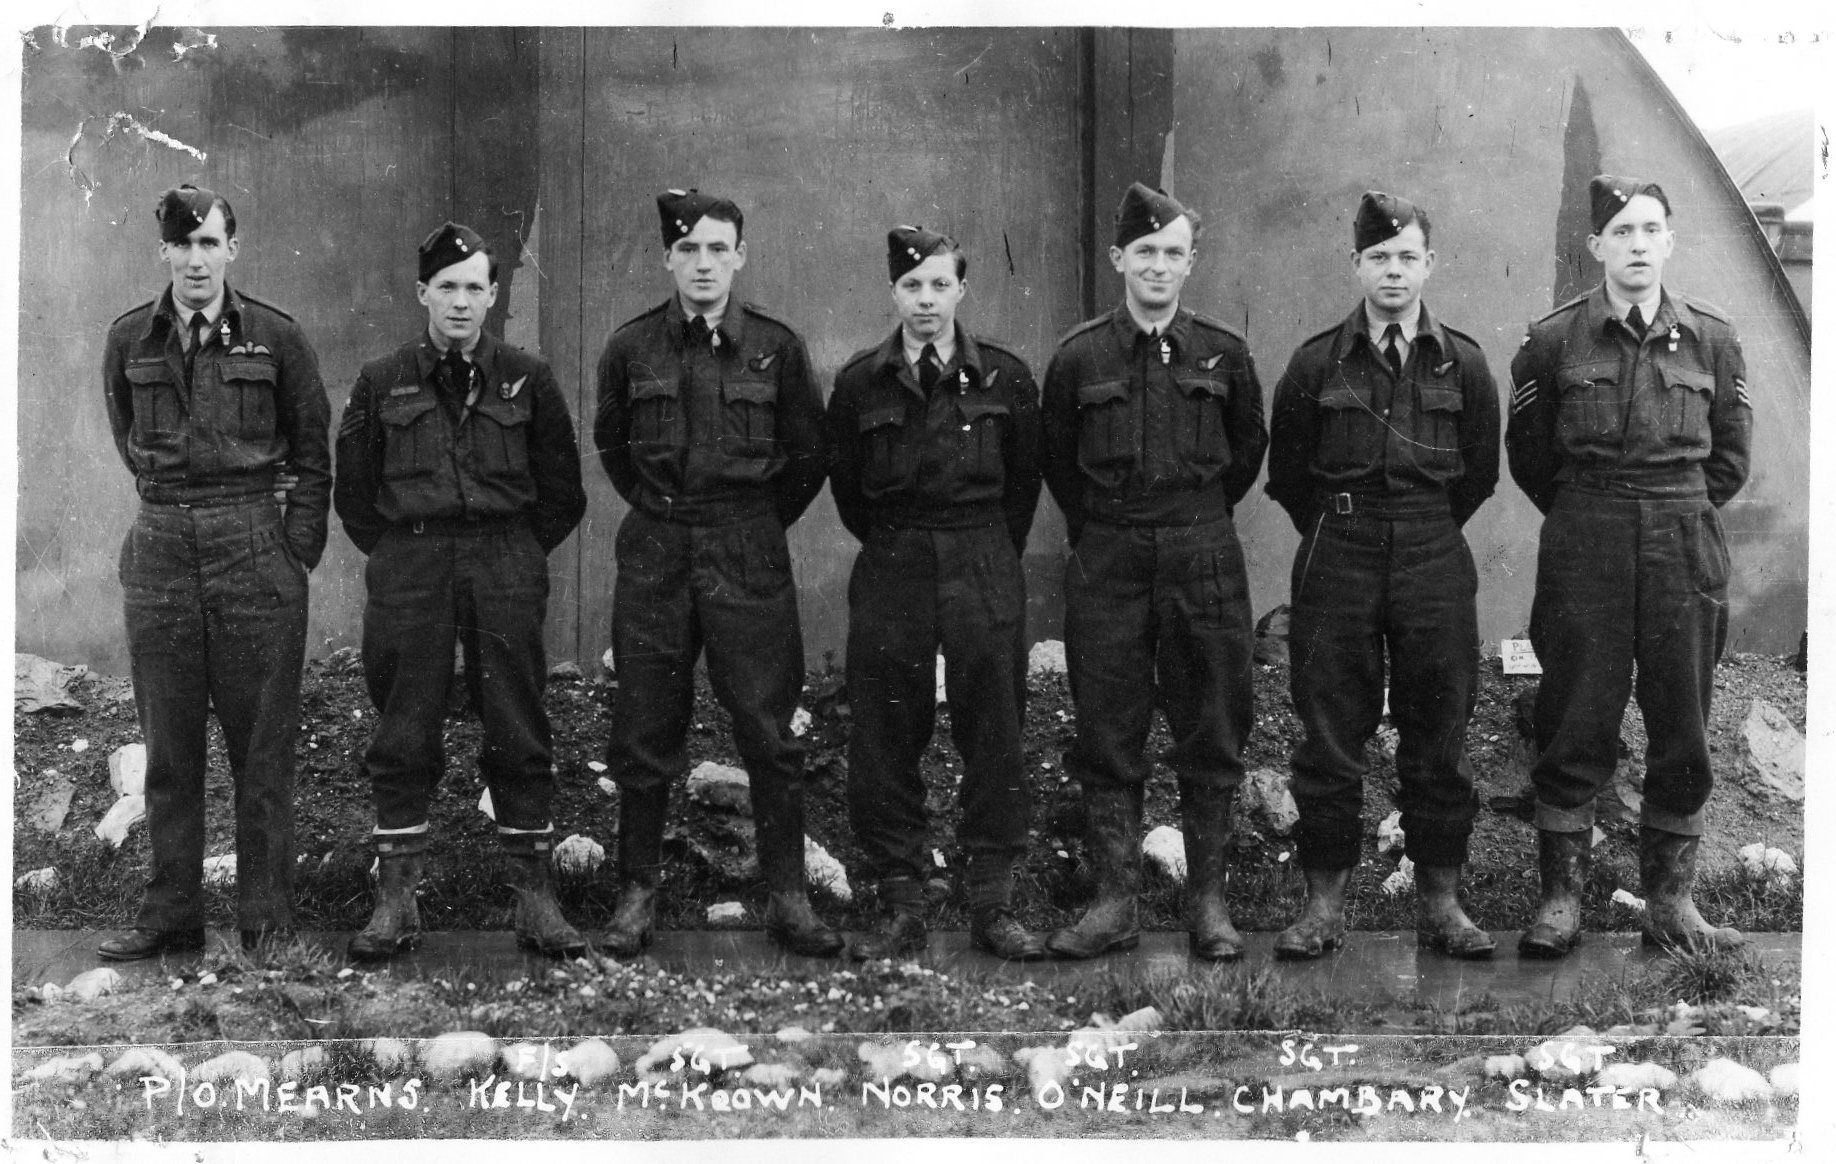 |
For further information and photos click here Picture courtesy of Mark Simpson |
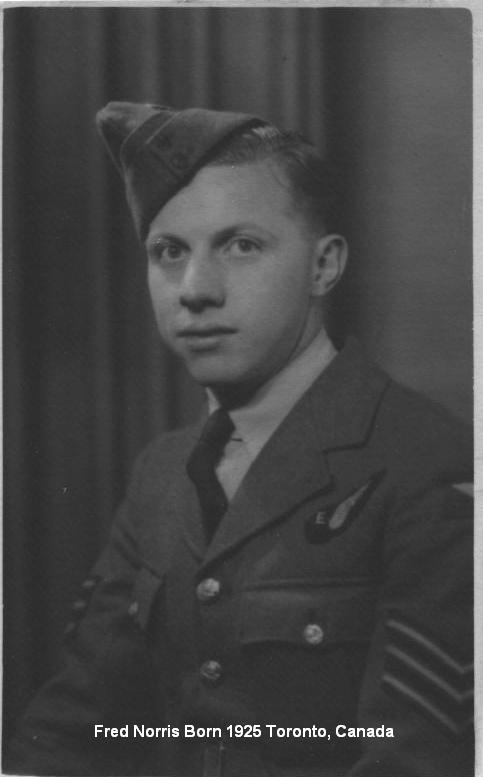 |
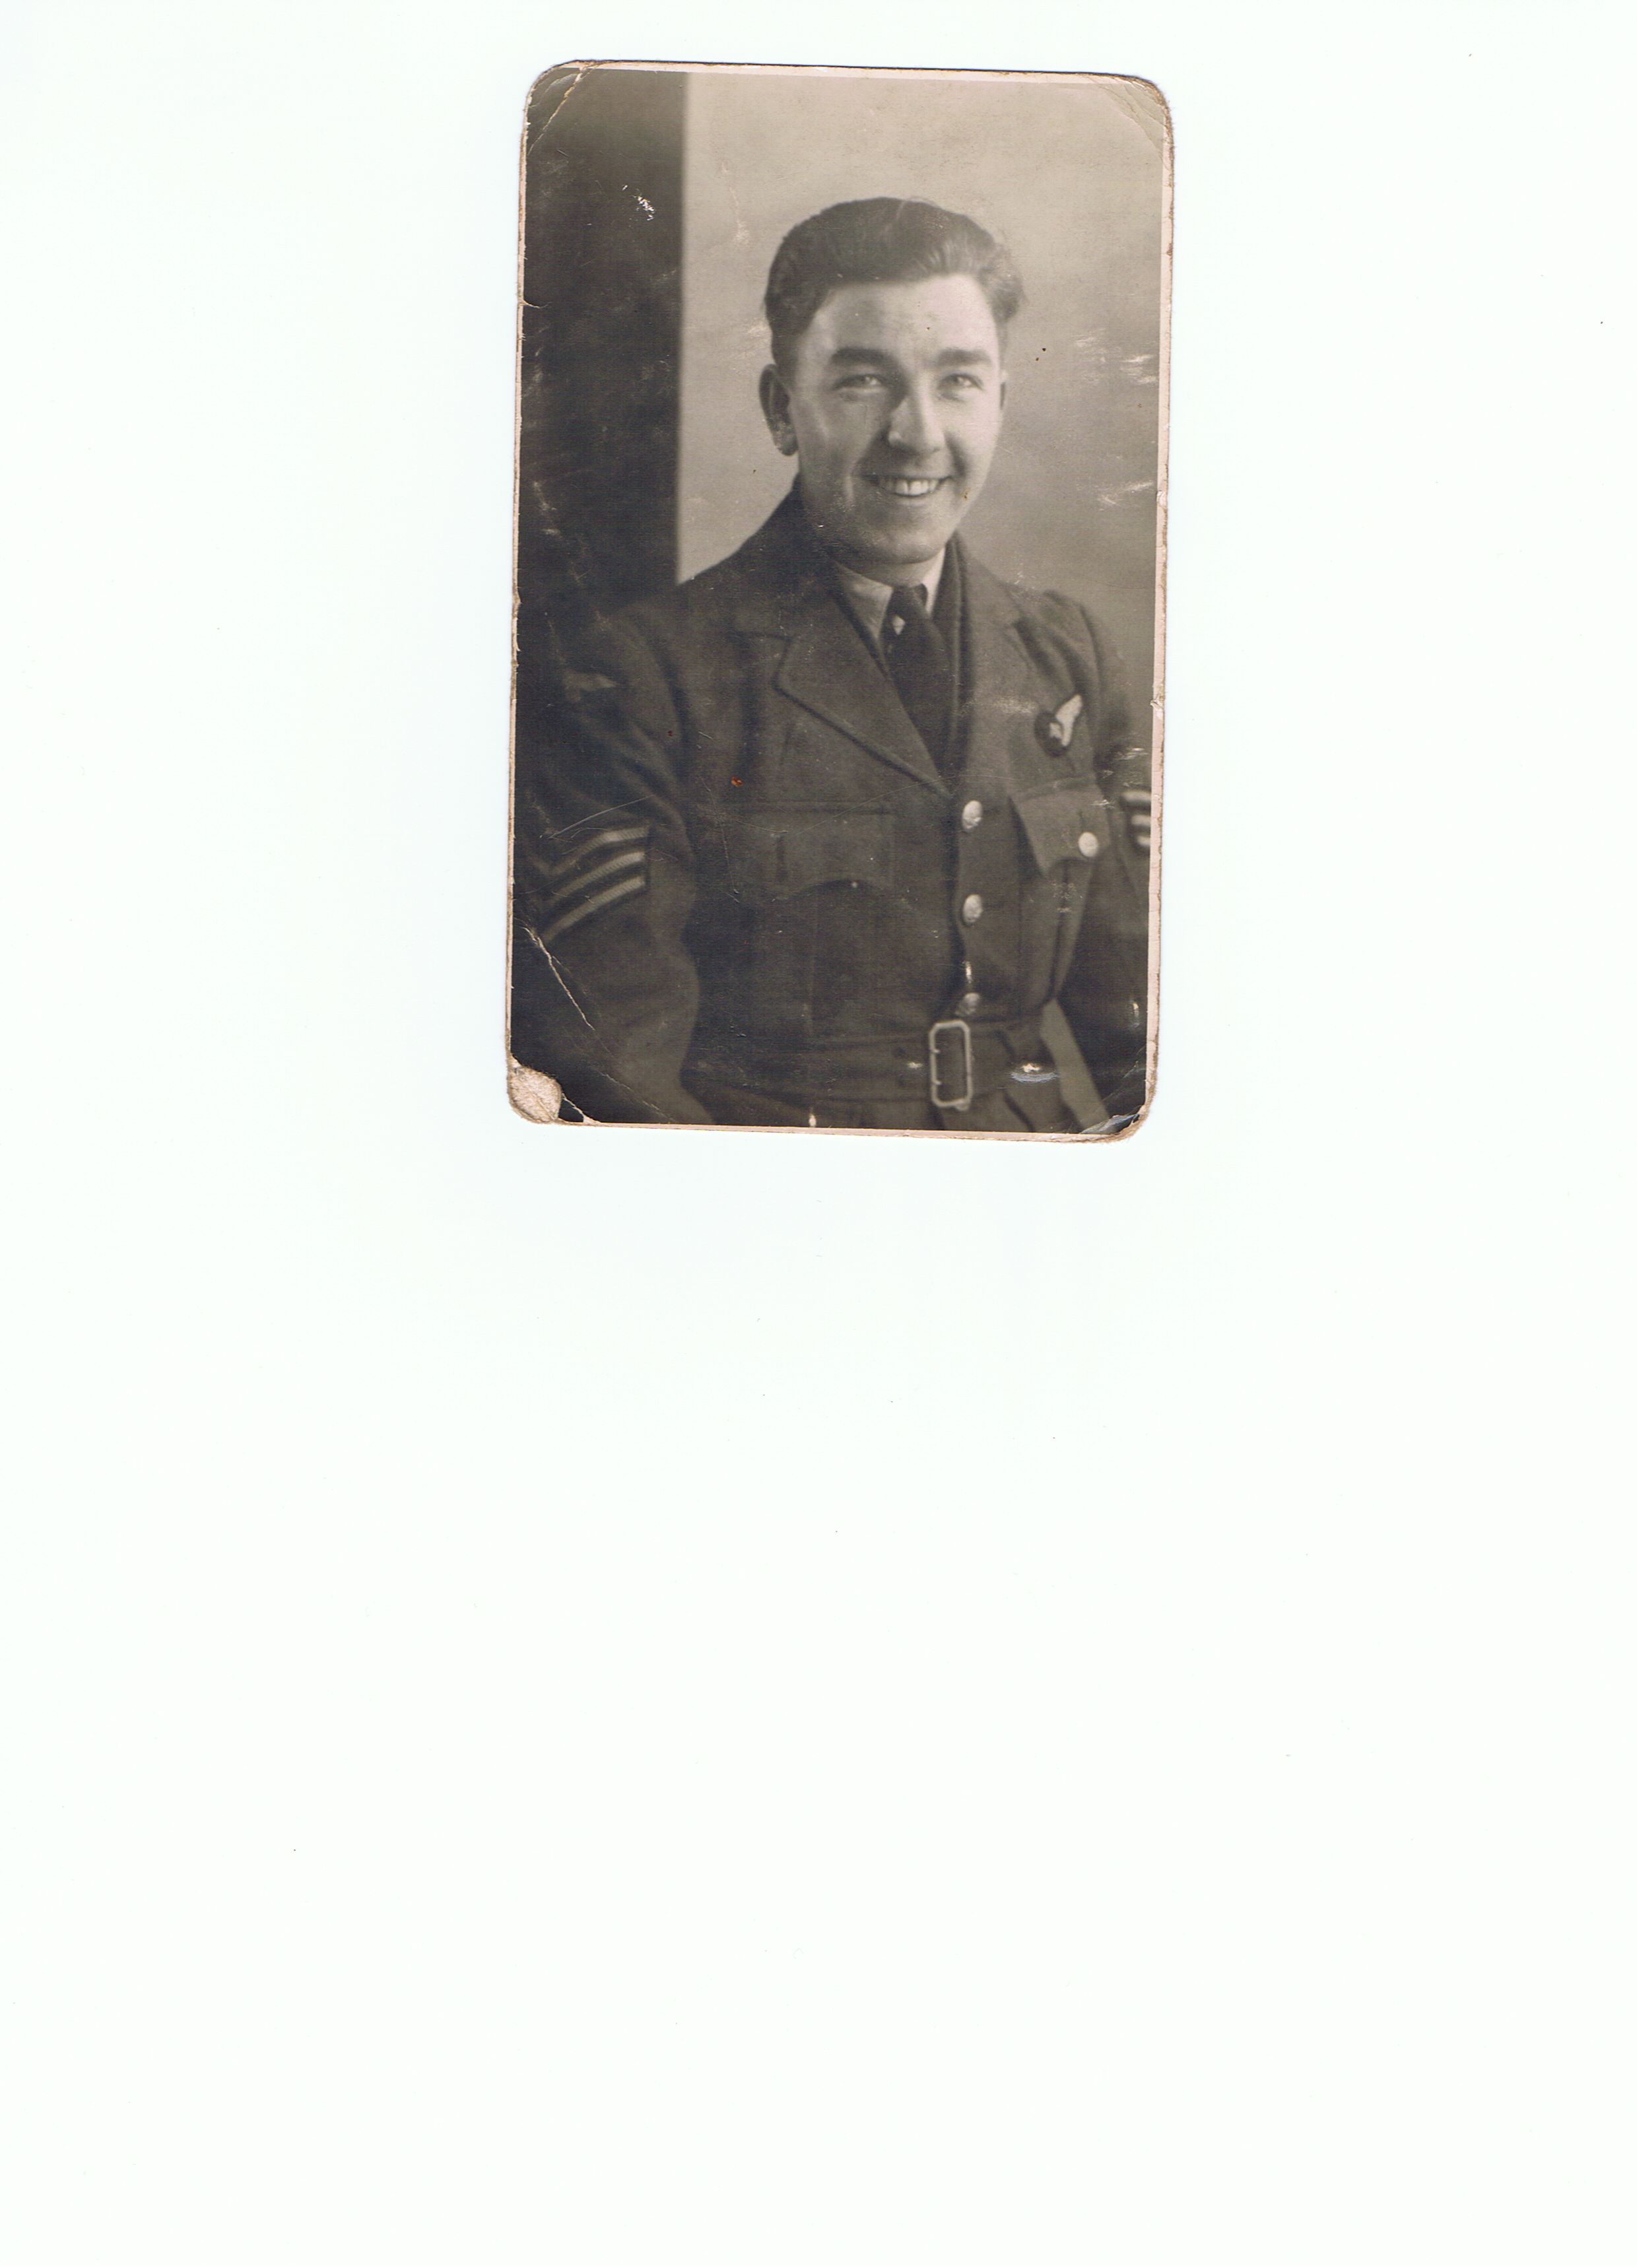
Sgt Fred Norris flew with the P/O Mearns Crew For photos of Fred Norris and others in the crew and to read Fred's notes and memories of operations click here Picture courtesy of Sheri Cooper |
P/O N S Rogers and Crew
 |
For further information and photos click here |
F/O H Dodds and Crew
F/O H Dodds, along with the rest of the crew of PD319 / BQ-G, was killed on 14 October 1944 when his Lancaster bomber was shot down on the raid to Duisburg.
 |
Sgt Albert Laidlaw flew as a rear gunner with 550 Squadron
For further information and photos click here Picture courtesy of Evelyn Miller |
At the Remembrance Sunday services in November 2012 a fragment of PD319 finally returned to North Killingholme, after 68 years (follow the information link above).
F/Sgt C G Foster and Crew
 |
The crew of ND425 was killed on 30/31 March 1944 when their Lancaster bomber was shot down by a night-fighter on the raid to Nuremburg
To see further information click here This photo is available from a number of sources this copy courtesy of Norman Reid |
S/Ldr E L Pickles DFC* and Crew
 |
To see further information click here Information courtesy of Gary Brooks |
W/O G K Peasgood and Crew
 |
W/O George Peasgood was only 21 years old when he died
(one member of the crew, Sgt Sykes, survived as a PoW) For further information click here Picture courtesy of Les Finn |
F/Lt J Harris and Crew
 |
For further information and photos click here |
F/O C G K Edlund and Crew
 |
To see further information click here |
F/O G G H Cowper and Crew
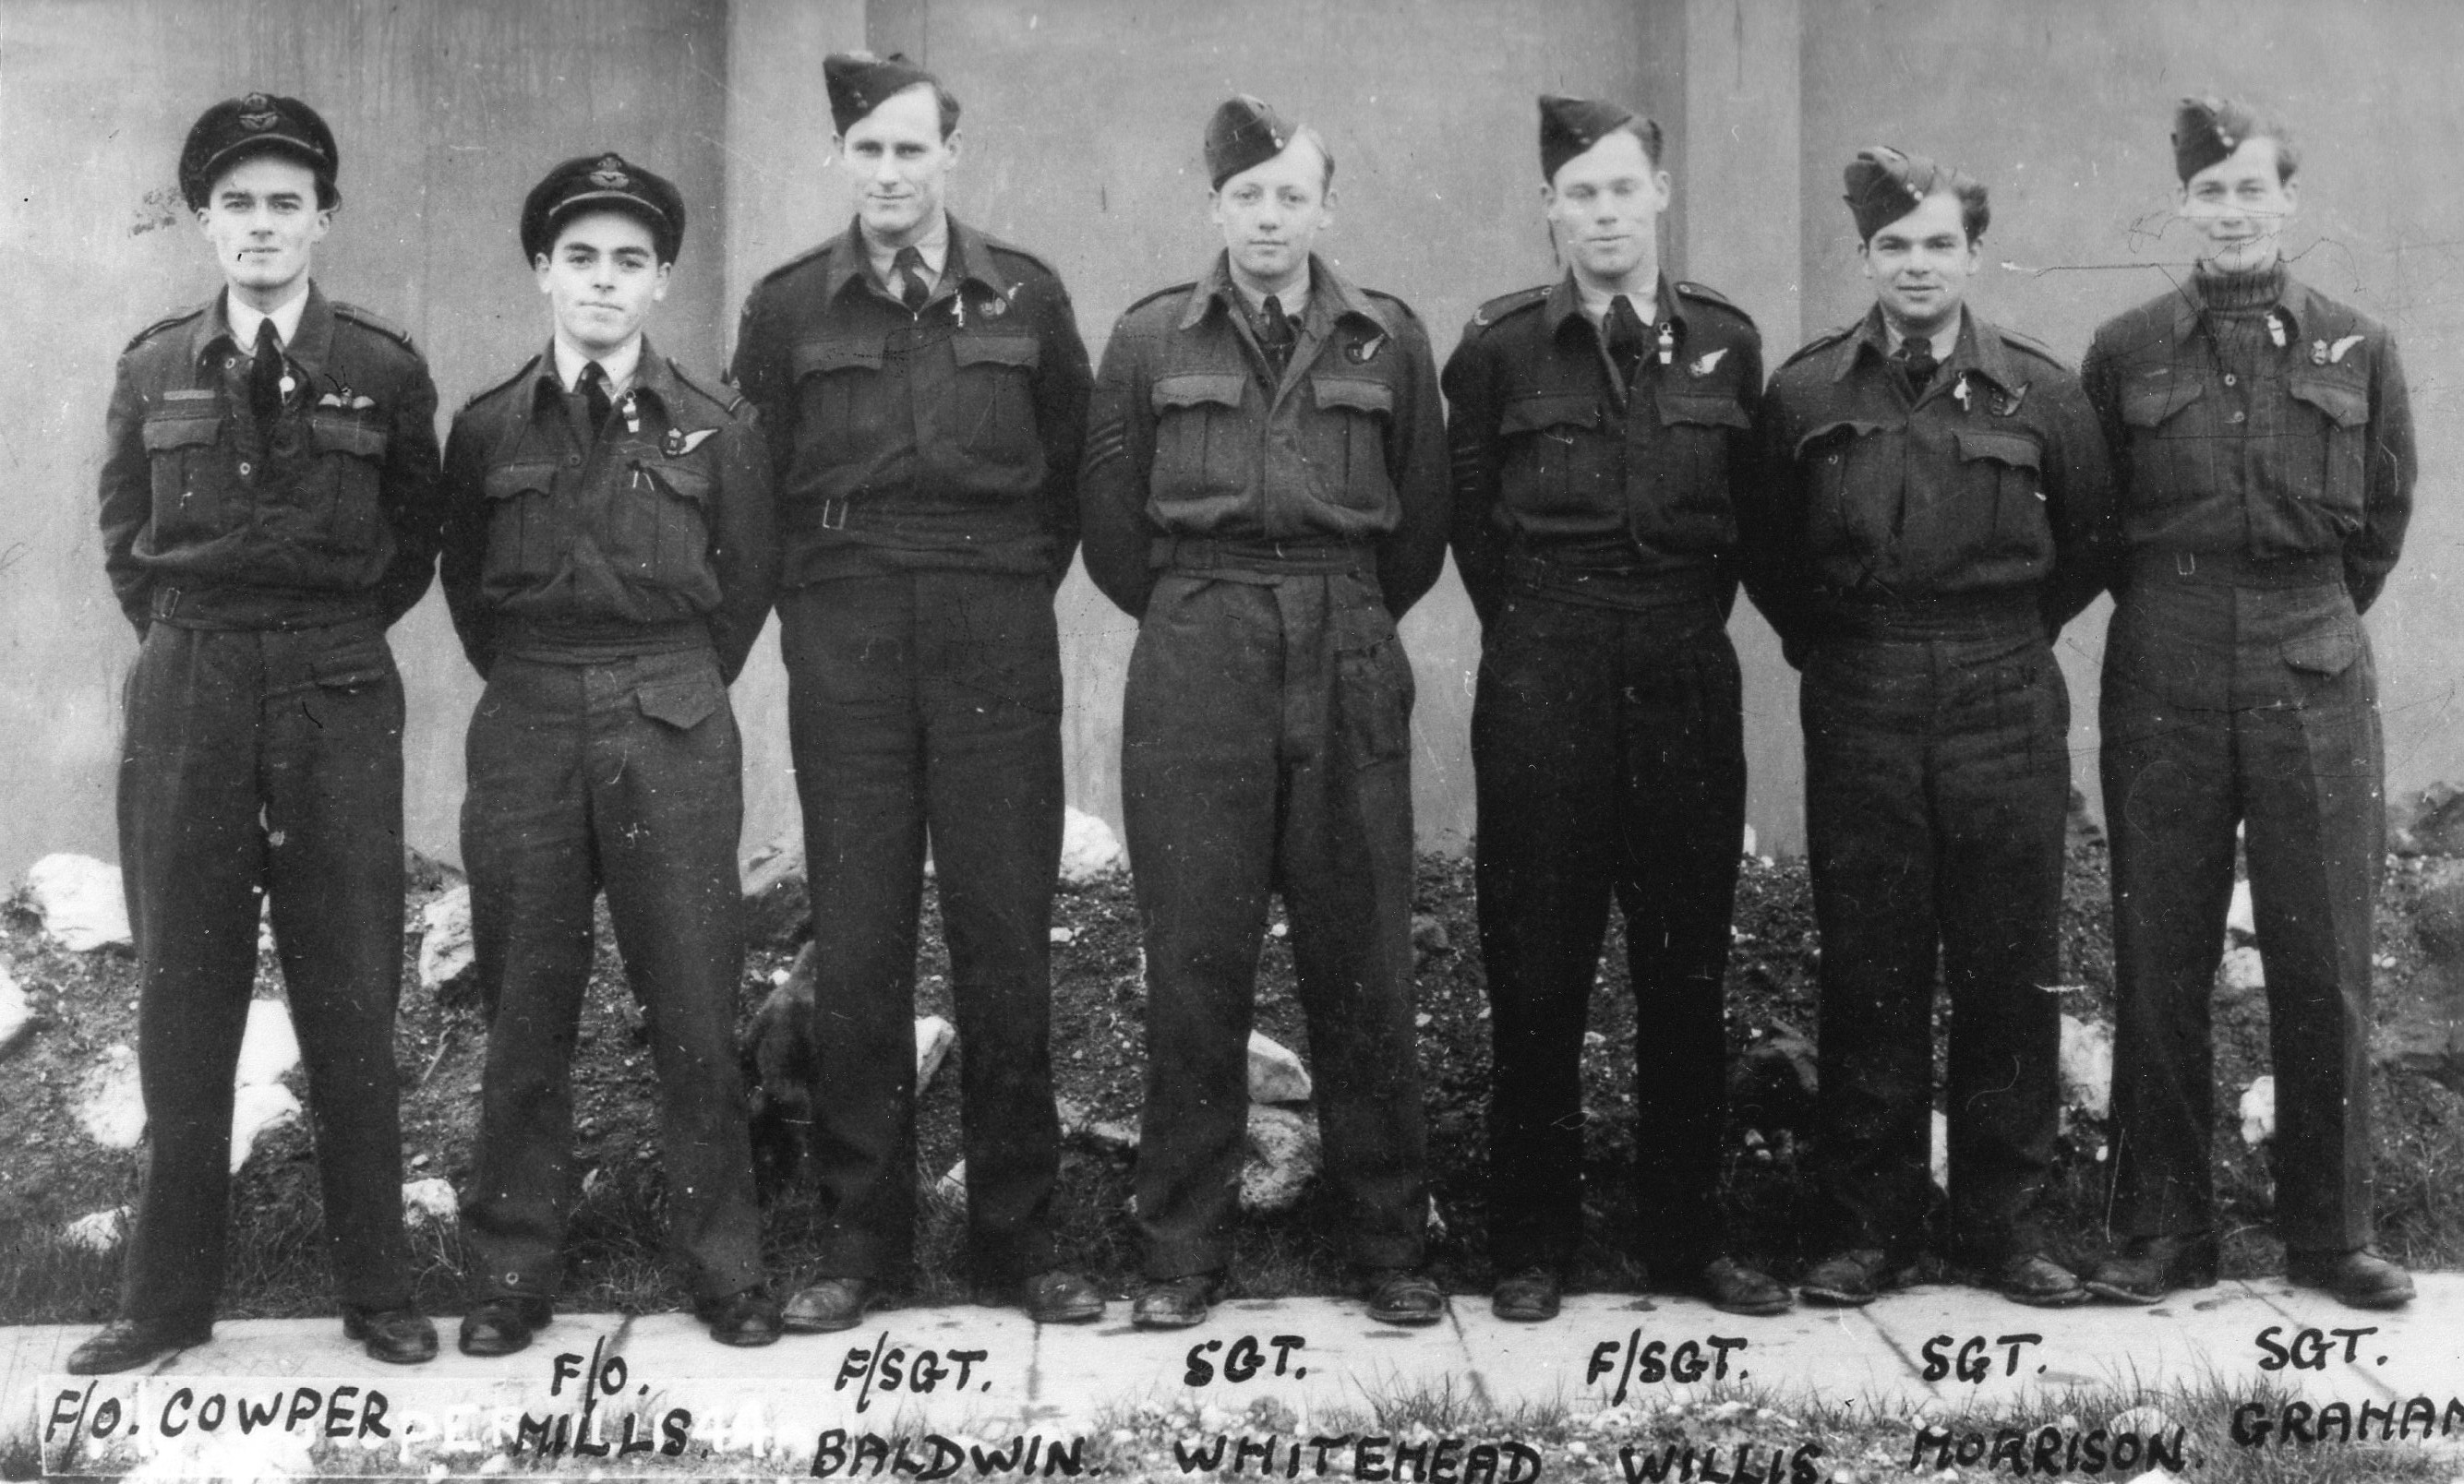 |
To see further information click here Picture courtesy of Jim Cameron |
F/O E S Allen and Crew
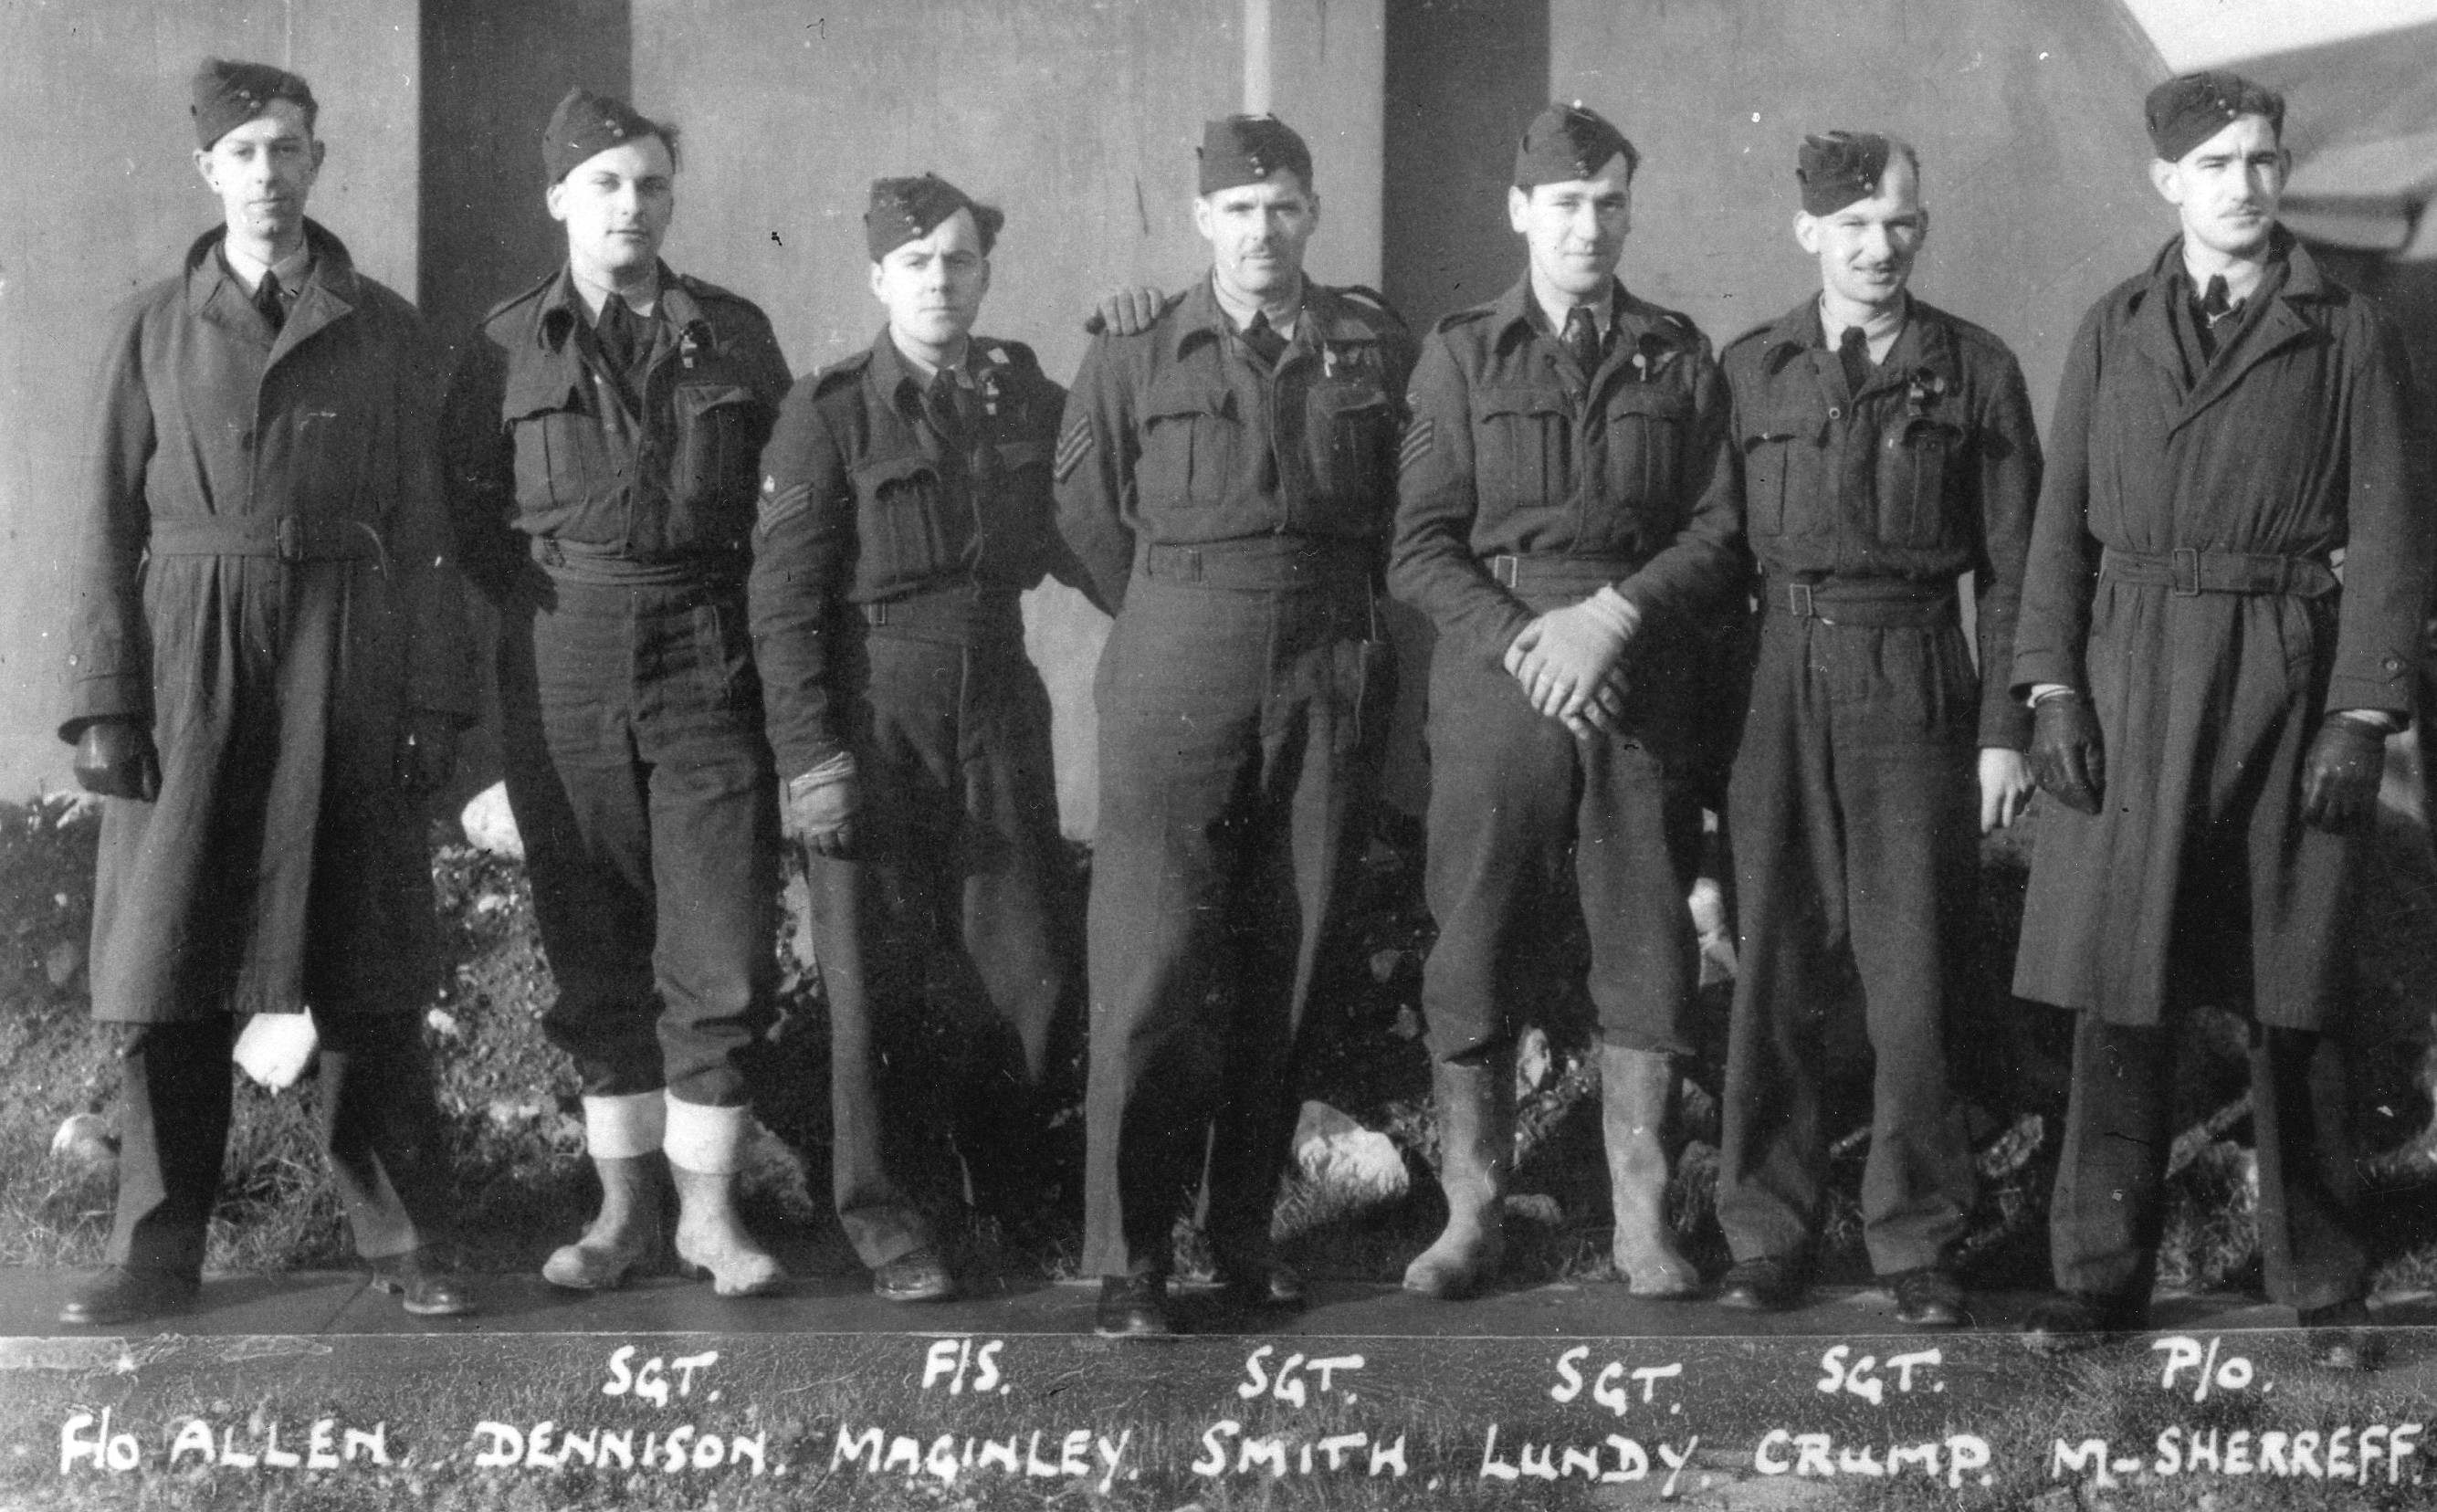 |
To see further information click here Picture courtesy of Jim Cameron |
 |
This photo was received of a crew labelled as a "550" crew. The picture was initially listed as an unidentified crew (see: unknown crew). However, it has now been established that the crew is in fact the E S Allen Crew.
To see further information click here Picture courtesy of Dave Wicks. Many thanks to Dave Wicks for sending the photo in and to Don Kentish (a relative of pilot Eric Allen) for solving the mystery |
F/O Alderdice and Crew
 |
To see further information click here Picture courtesy of Jim Cameron |
F/O G E Blackler and Crew
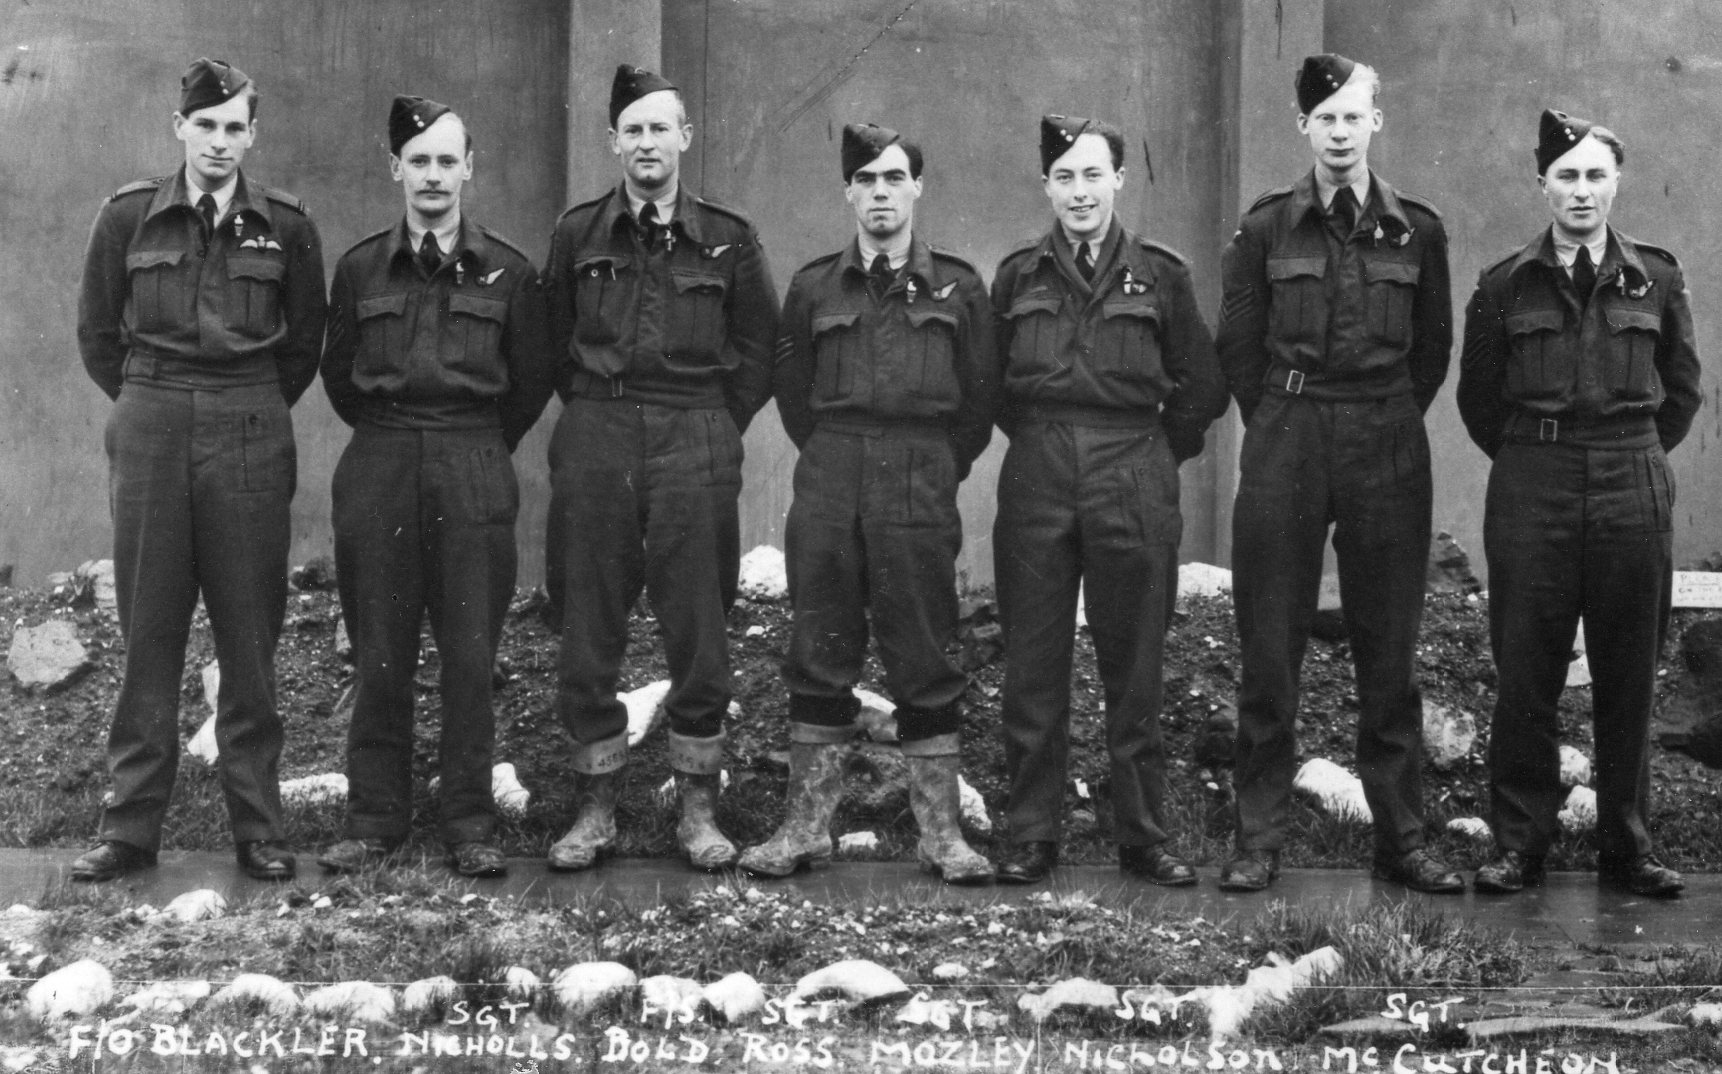 |
To see further information click here Picture courtesy of Mark Simpson |
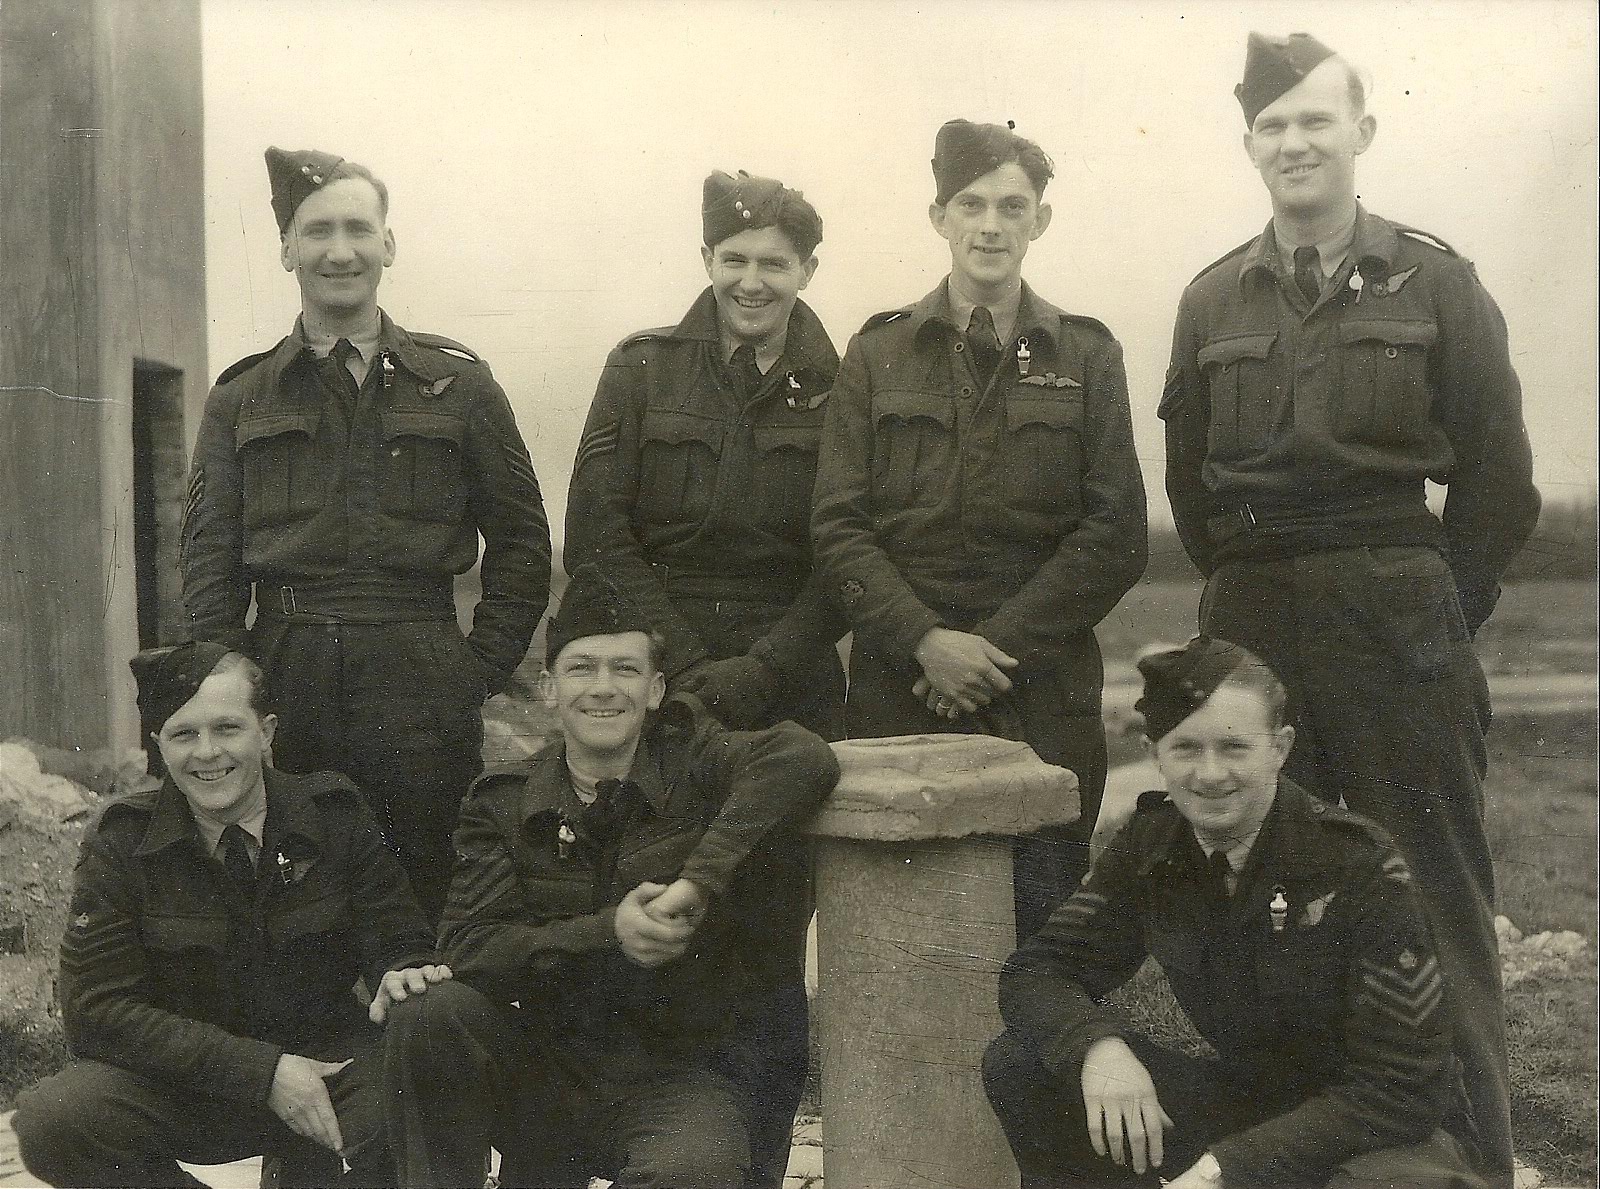
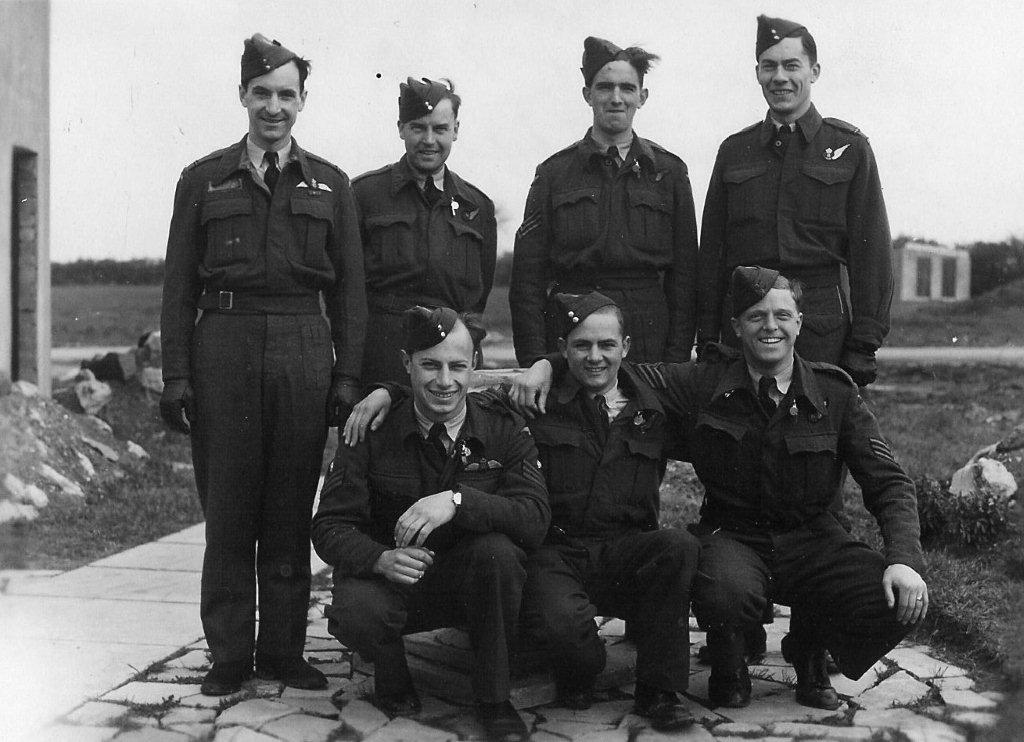
F/Lt R M Newitt DFC and Crew
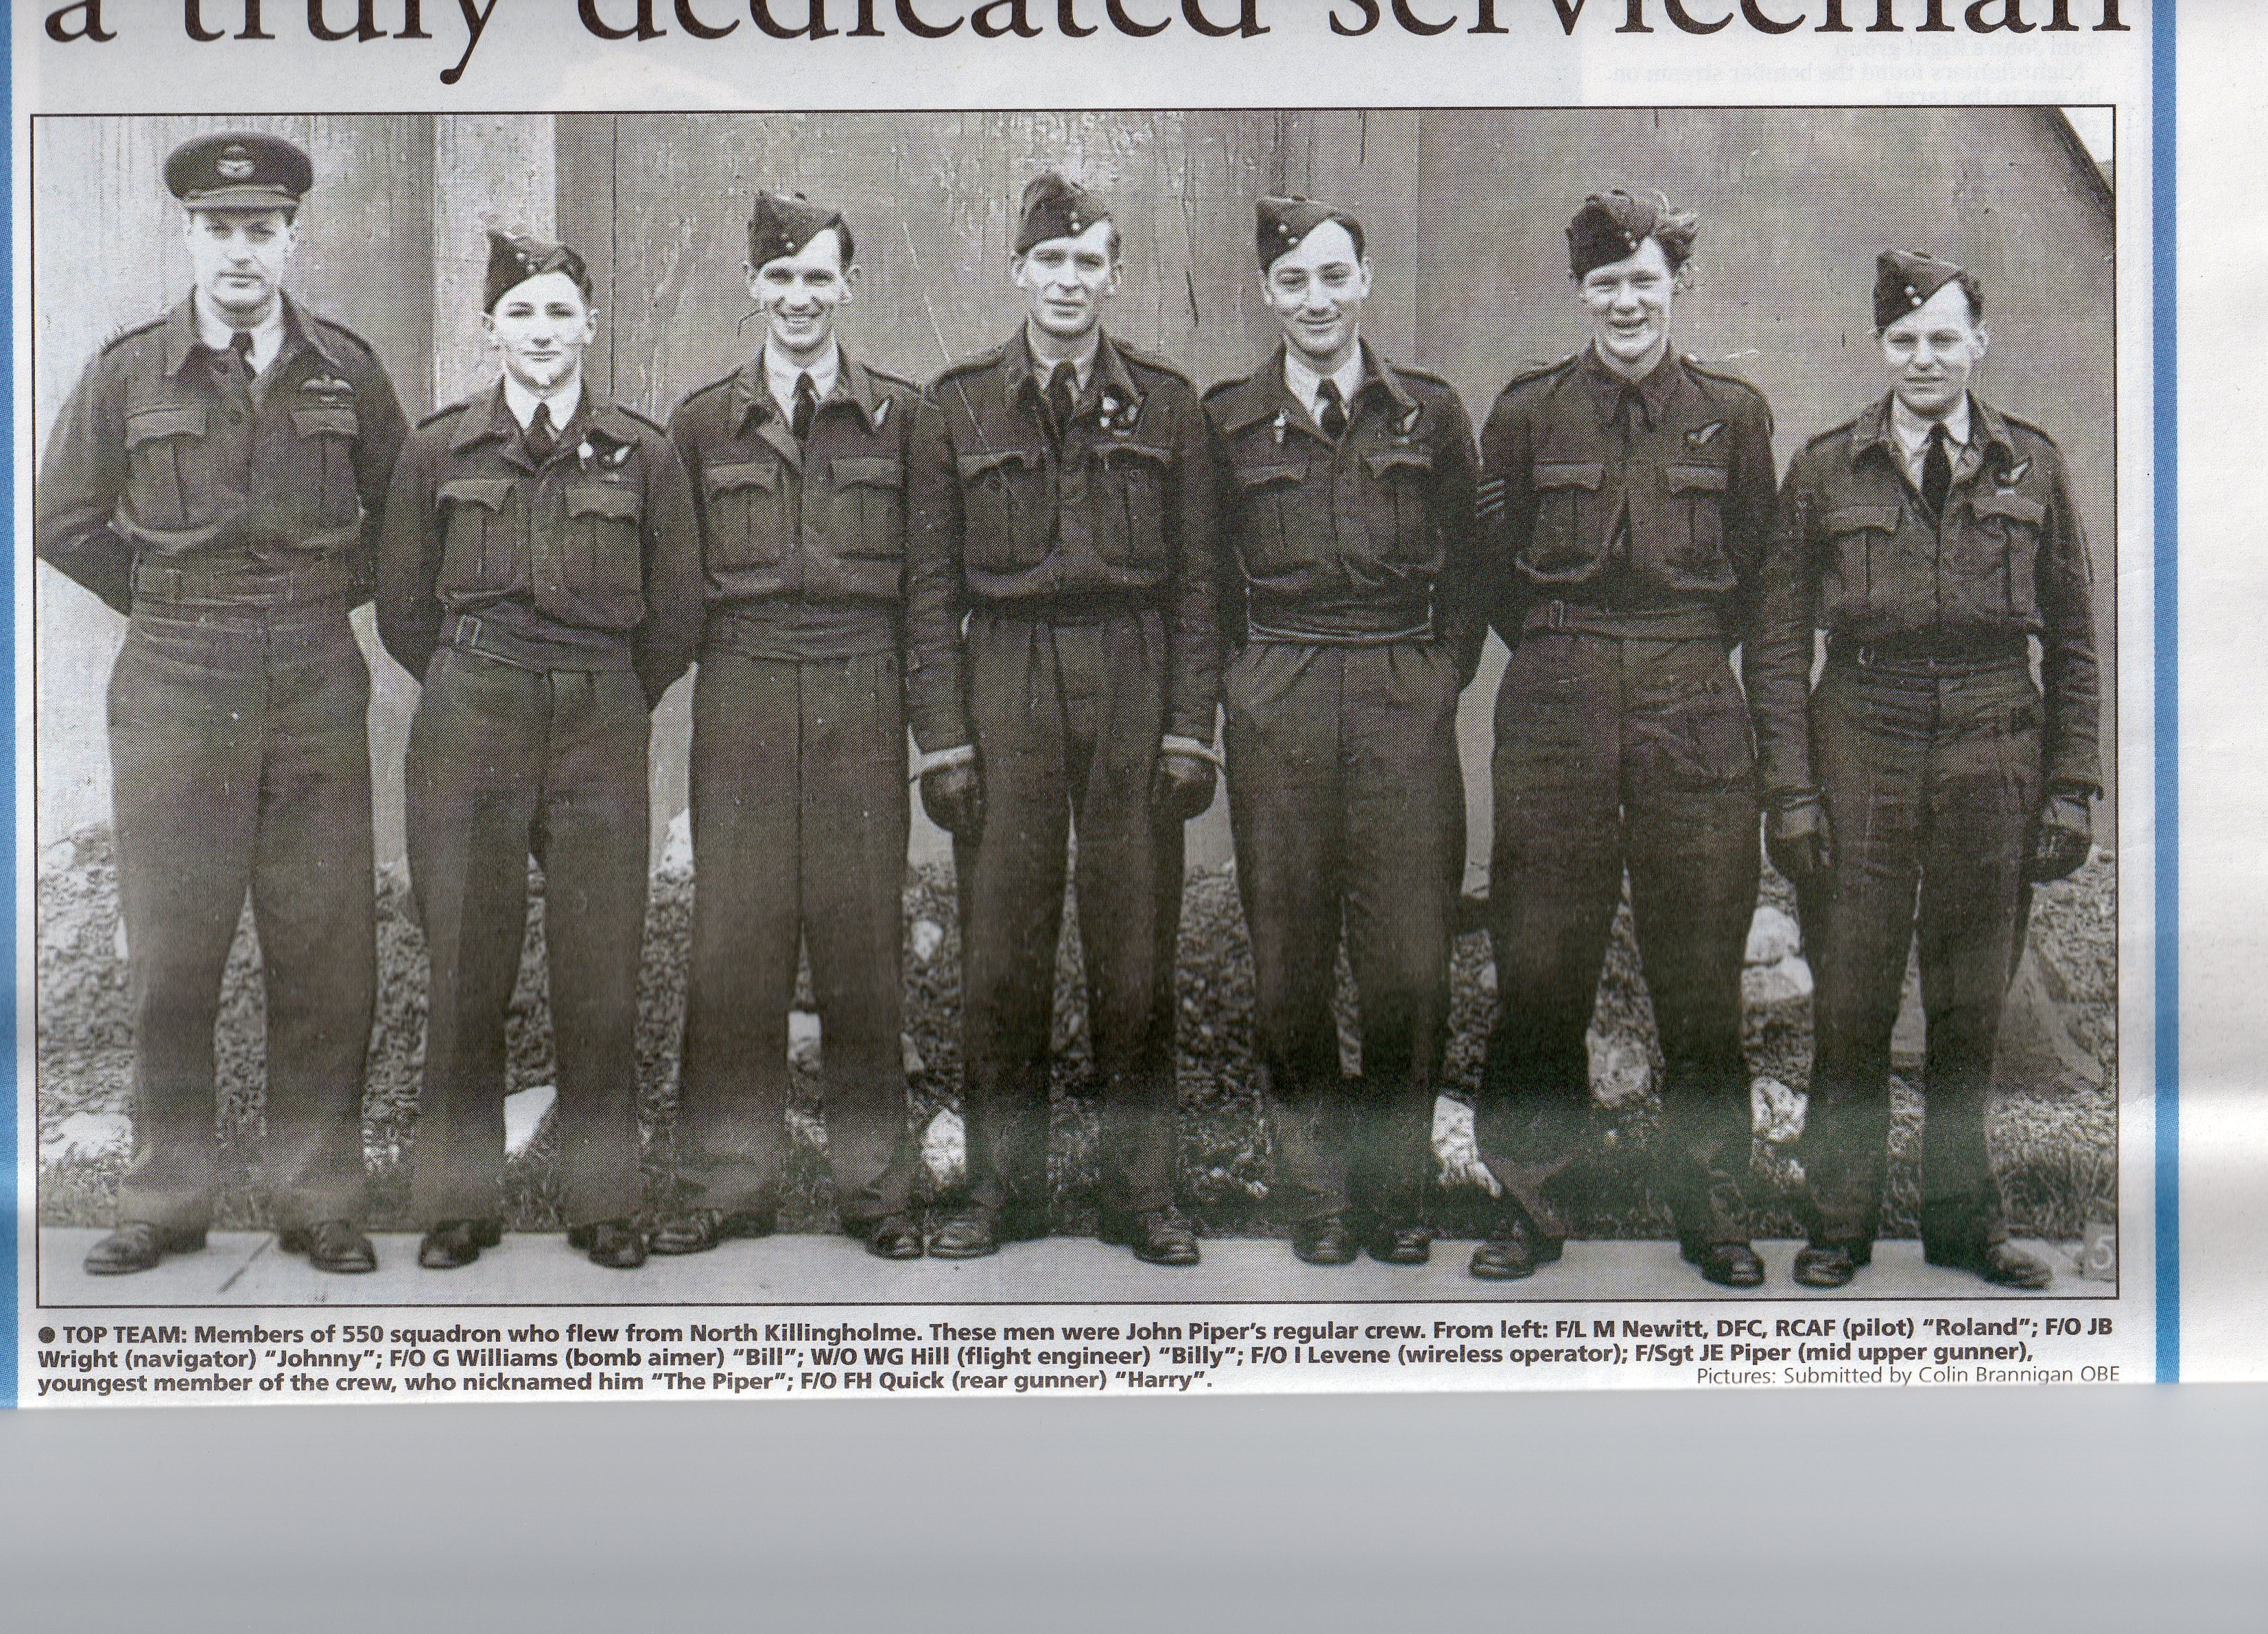 |
F/L Newitt and crew
Left To Right: F/L Roland Newitt, F/O Johny Wright, F/O Bill Williams, W/O Billy Hill, F/O Levene, F/Sgt John Piper, F/O Harry Quick Picture courtesy of Colin Brannigan For more information about this crew and the list of the operations they completed click here |
F/O J Lukies and Crew
 |
F/O Lukies and crew
Left To Right: Back row: W Hoffman (RAF), Sgt J Crane (RAF), P/O J Lukies (RAAF) (Pilot), F/Sgt L Pfitzner (RAAF) Front row: F/Sgt J Foran (RAAF), F/Sgt D Cables (RAAF), P/O J Johnson (RAAF) Photo kindly made available by Gerard Foran (grandson of W/Op J Foran) For more information about this crew click here |
F/Sgt W R Cooper and Crew
550 Squadron Lancaster JB604 was lost during the night of 23/24 December 1943 when it was in collision with 550 Lancaster ED730 (BQ-G) and crashed at Fulston at 00.30hrs. This crew was only on their second operation with 550 Squadron, the squadron only having been formed out of 100 Squadron the previous month.
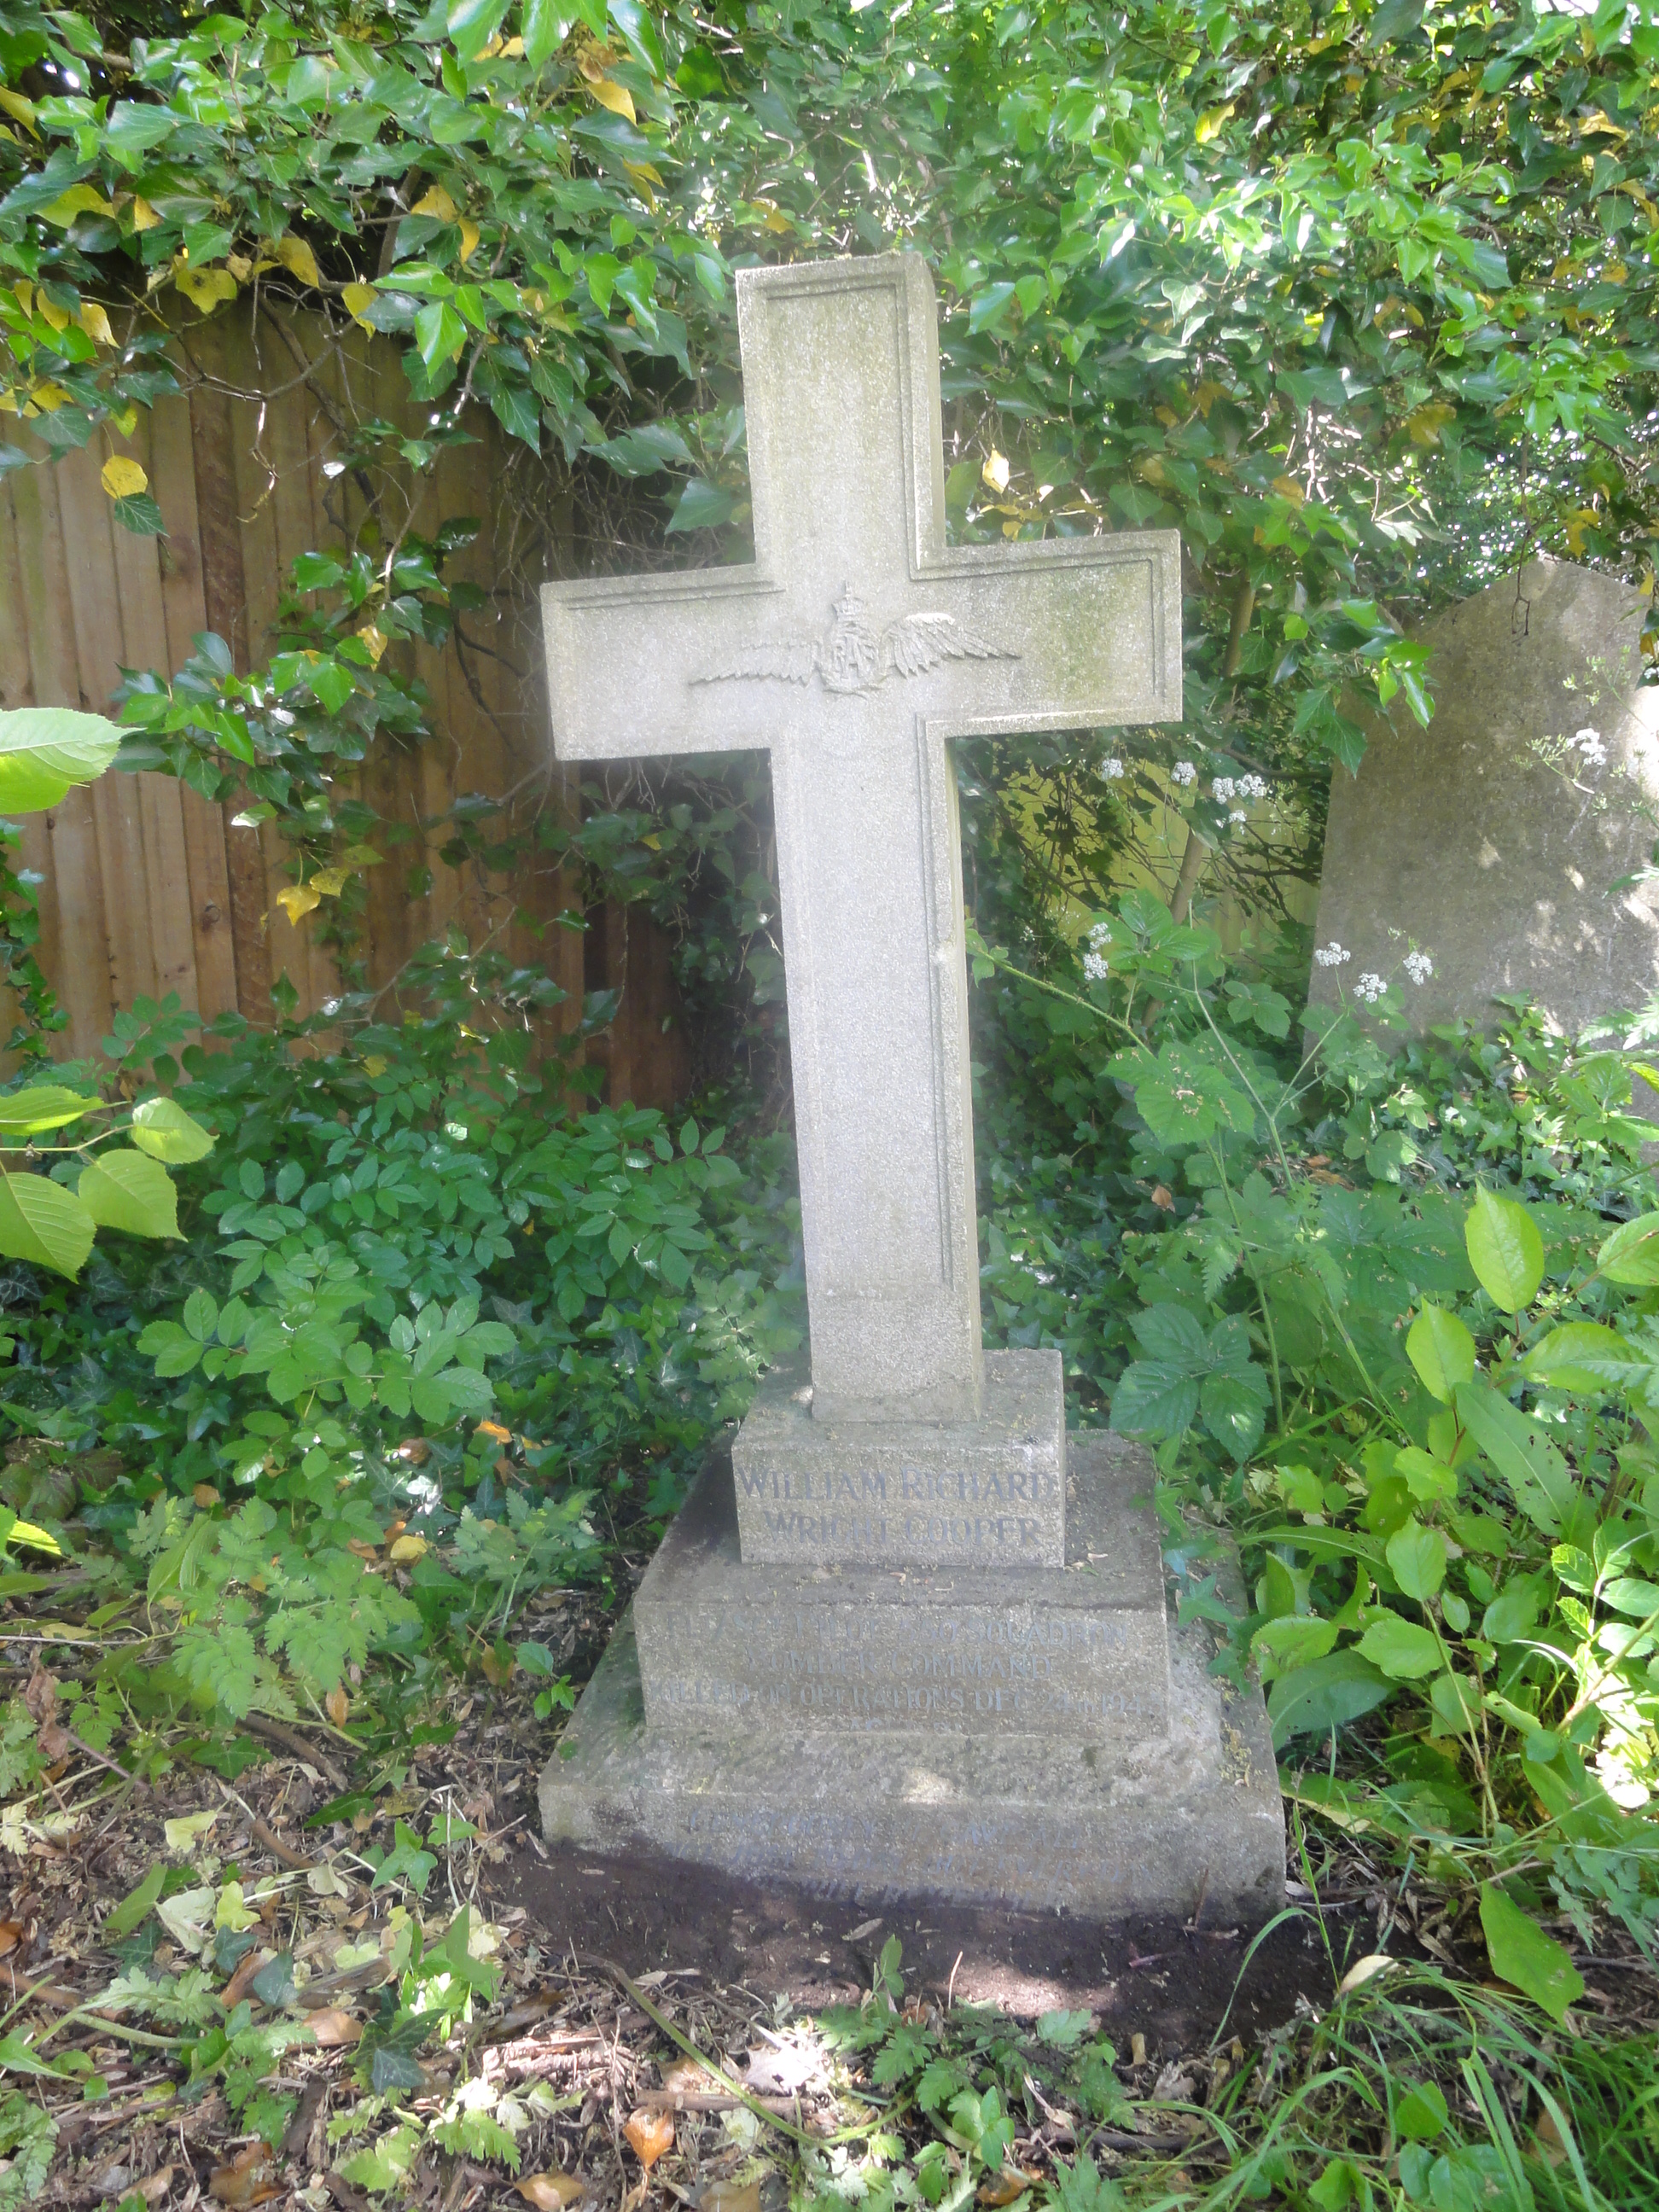 |
F/Sgt William Richard Wright Cooper is buried in the churchyard at St Marys, Harrow on the Hill. Cross and inscription
Picture courtesy of Russell Bates To find out more about JB604 and the crew lost so early after the squadron formation click here |
F/Sgt S Langford and Crew
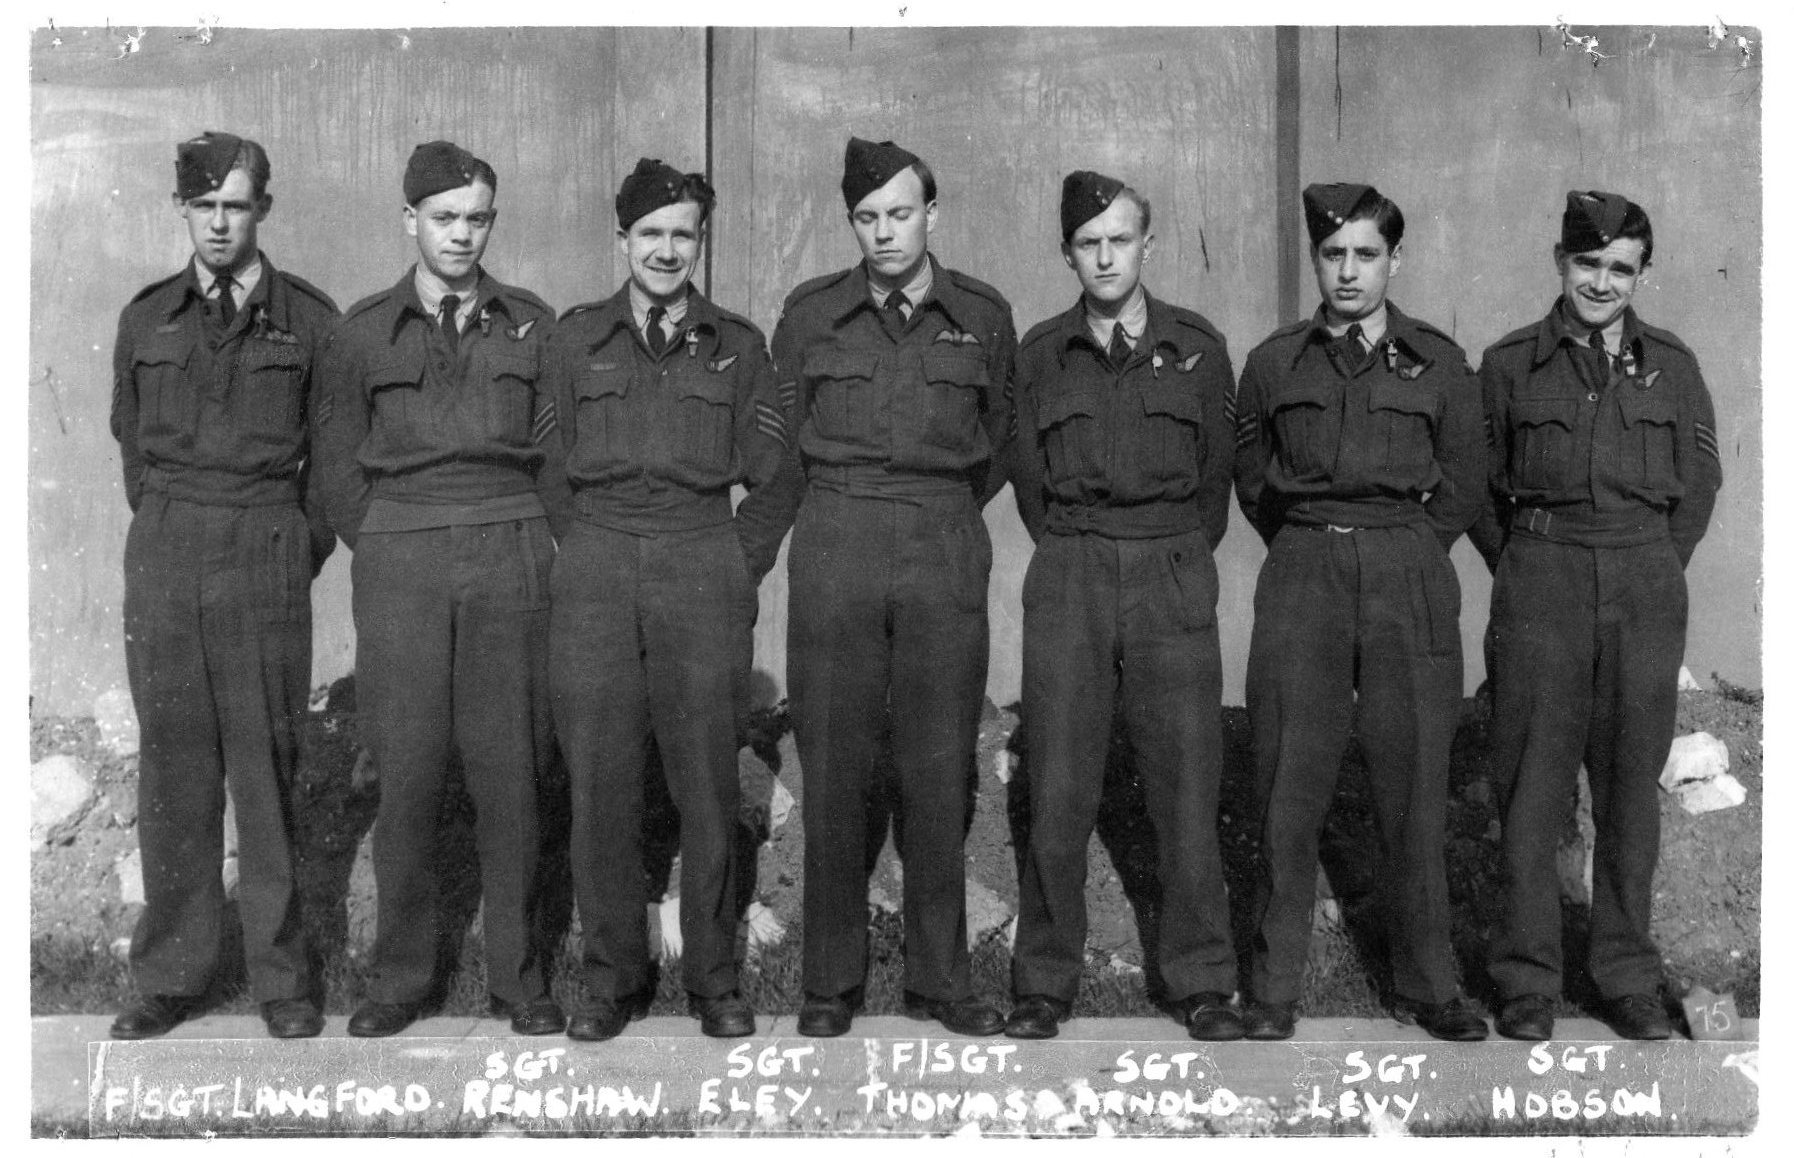 |
To see further information click here
Picture courtesy of Mark Simpson |
P/O K A Smith DFC and Crew
 |
For further information and photos click here
Picture courtesy of Syd Smith-Gauvin (brother of pilot Ken Smith) |
P/O R H Digby and Crew
 |
For further information and photos click here
Picture courtesy of Brian Perrigo (son of James Leon Perrigo (A/G)) |
F/Sgt V R L Johnson and Crew
 |
To see further information click here
Picture courtesy of Mark Simpson |
F/O G G Kennedy and Crew
 |
To see further information click here
Picture courtesy of Rob Luxton |
F/O R D Harris and Crew
 |
ME428/BQ-O was one of three 550 Sqdn Lancasters lost on the Dessau operation on 7/8 March 1945
Crewed on this operation by F/O R D Harris and crew To see further information click here |
F/O F L Hern-Black and Crew
 |
To see further information click here
Picture courtesy of Allan Hurlburt |
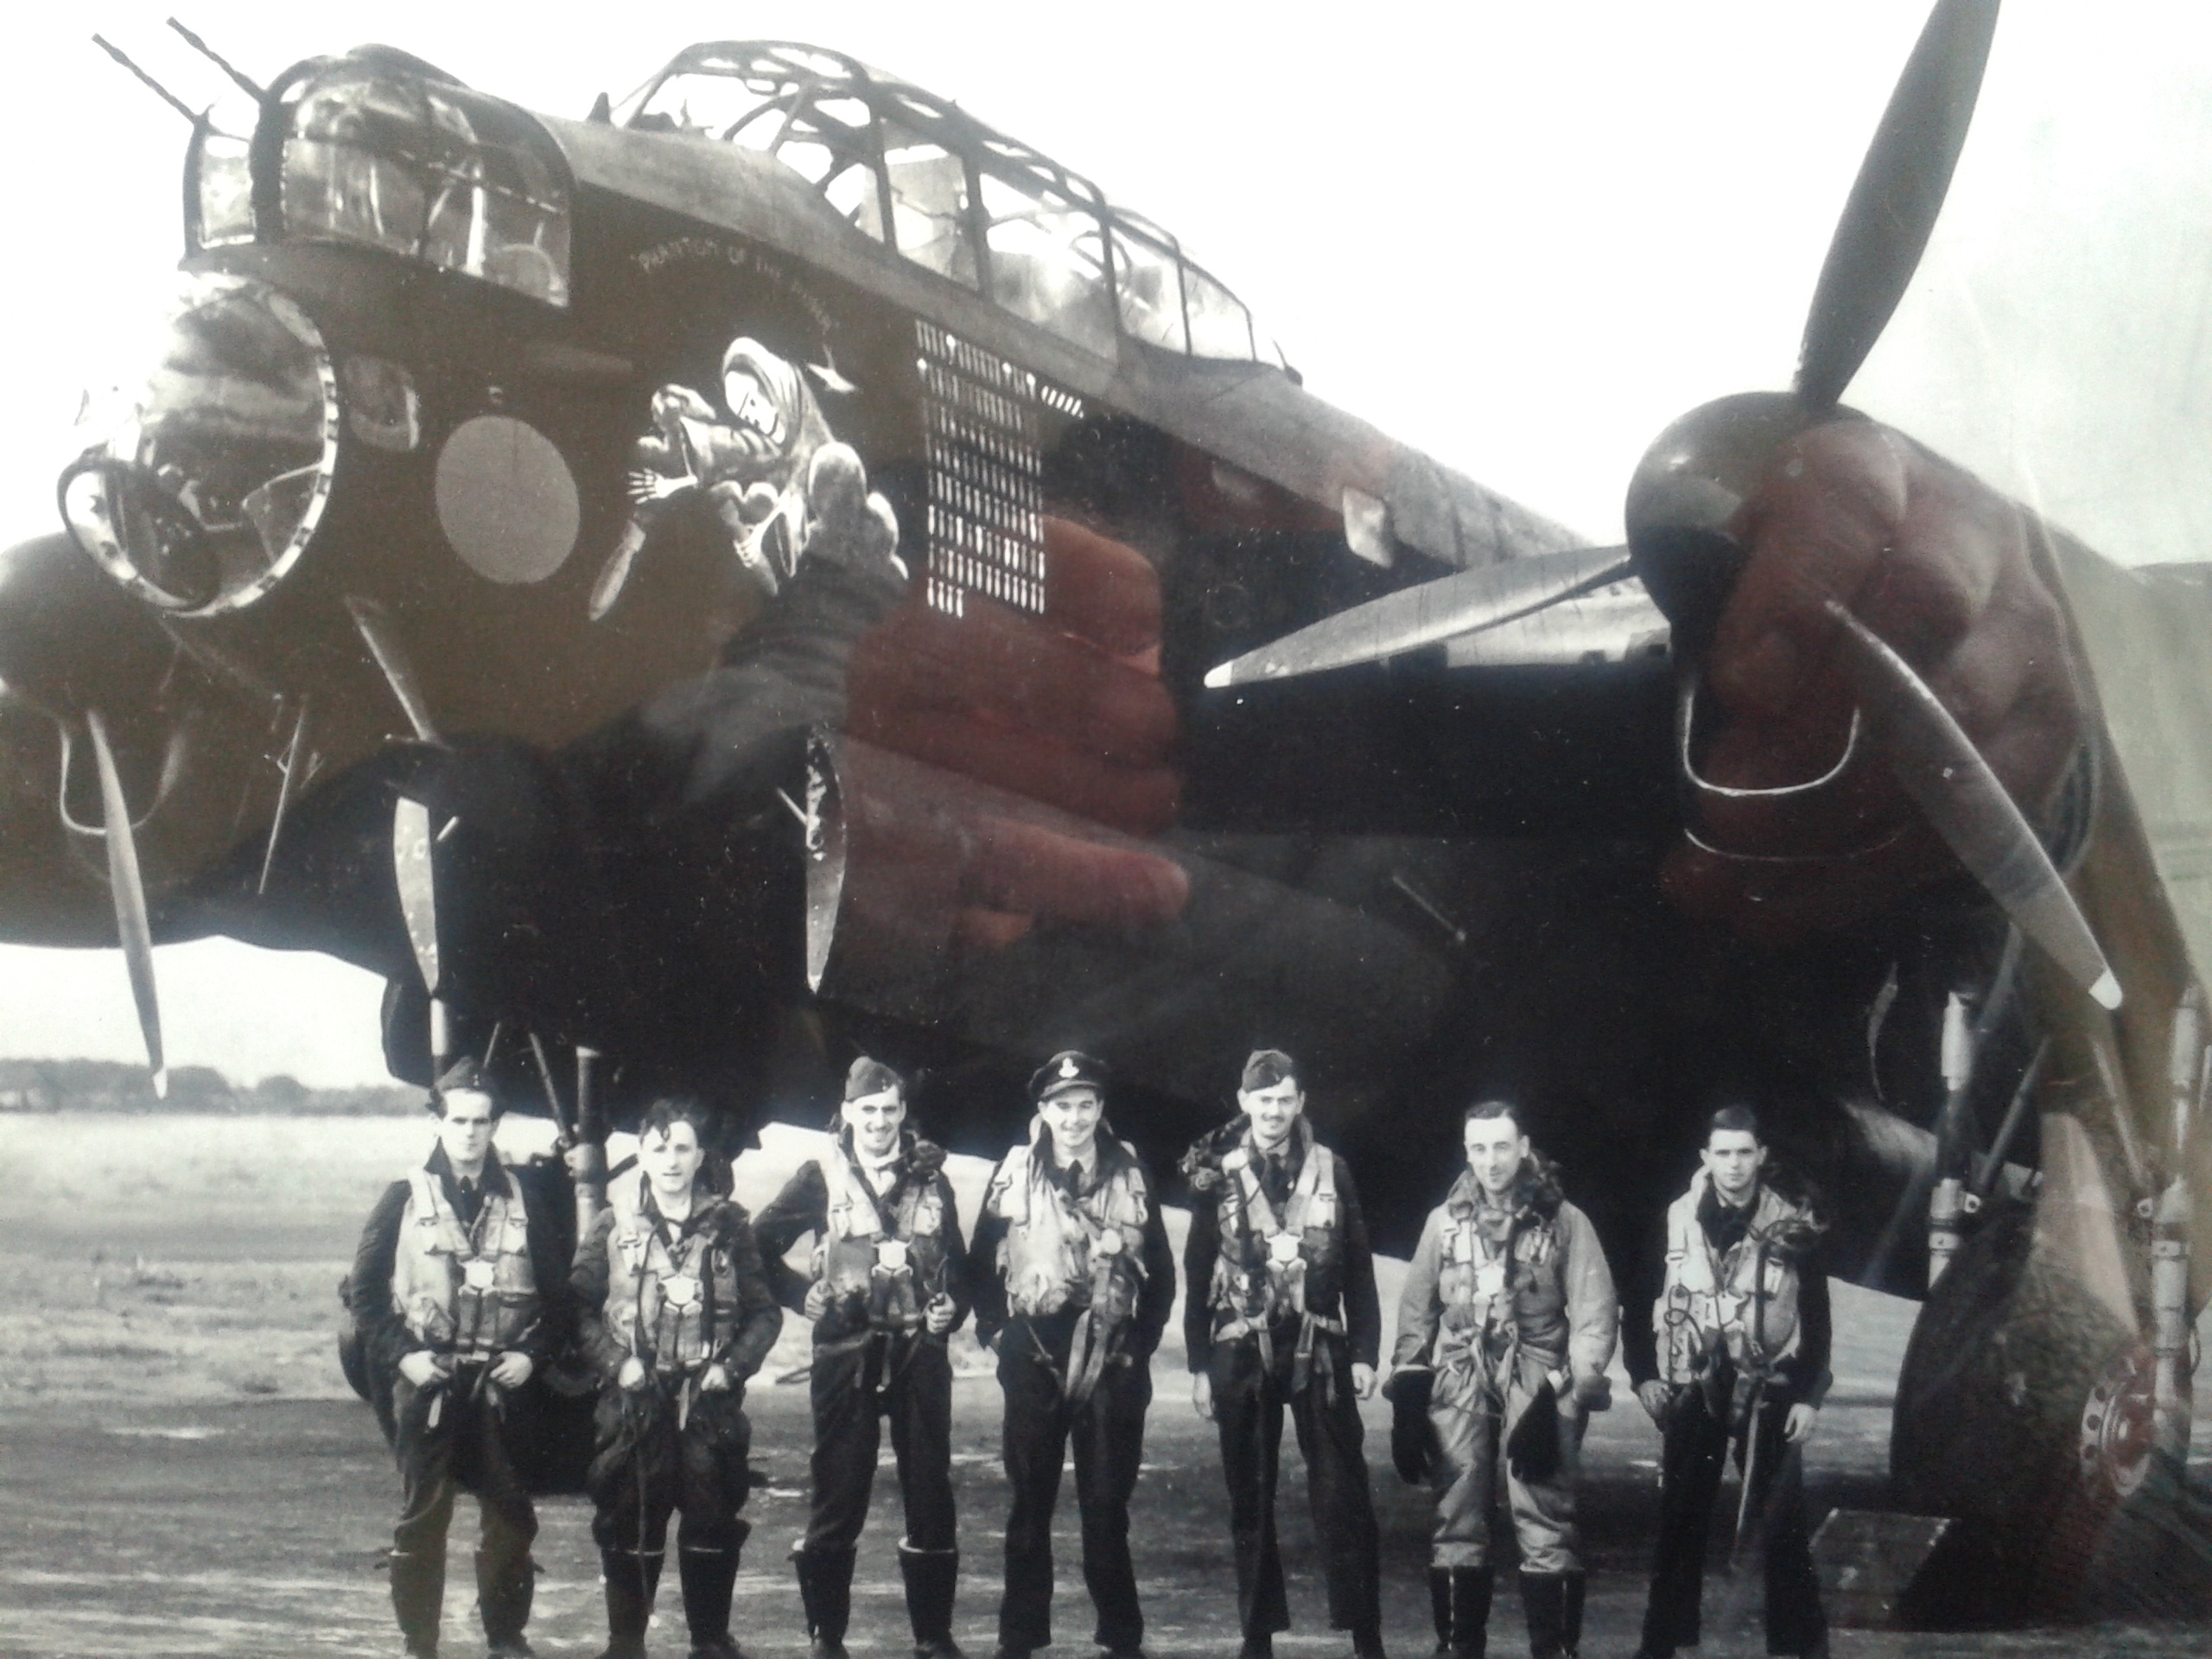
Leading Aircraftsman Phillip Lewis
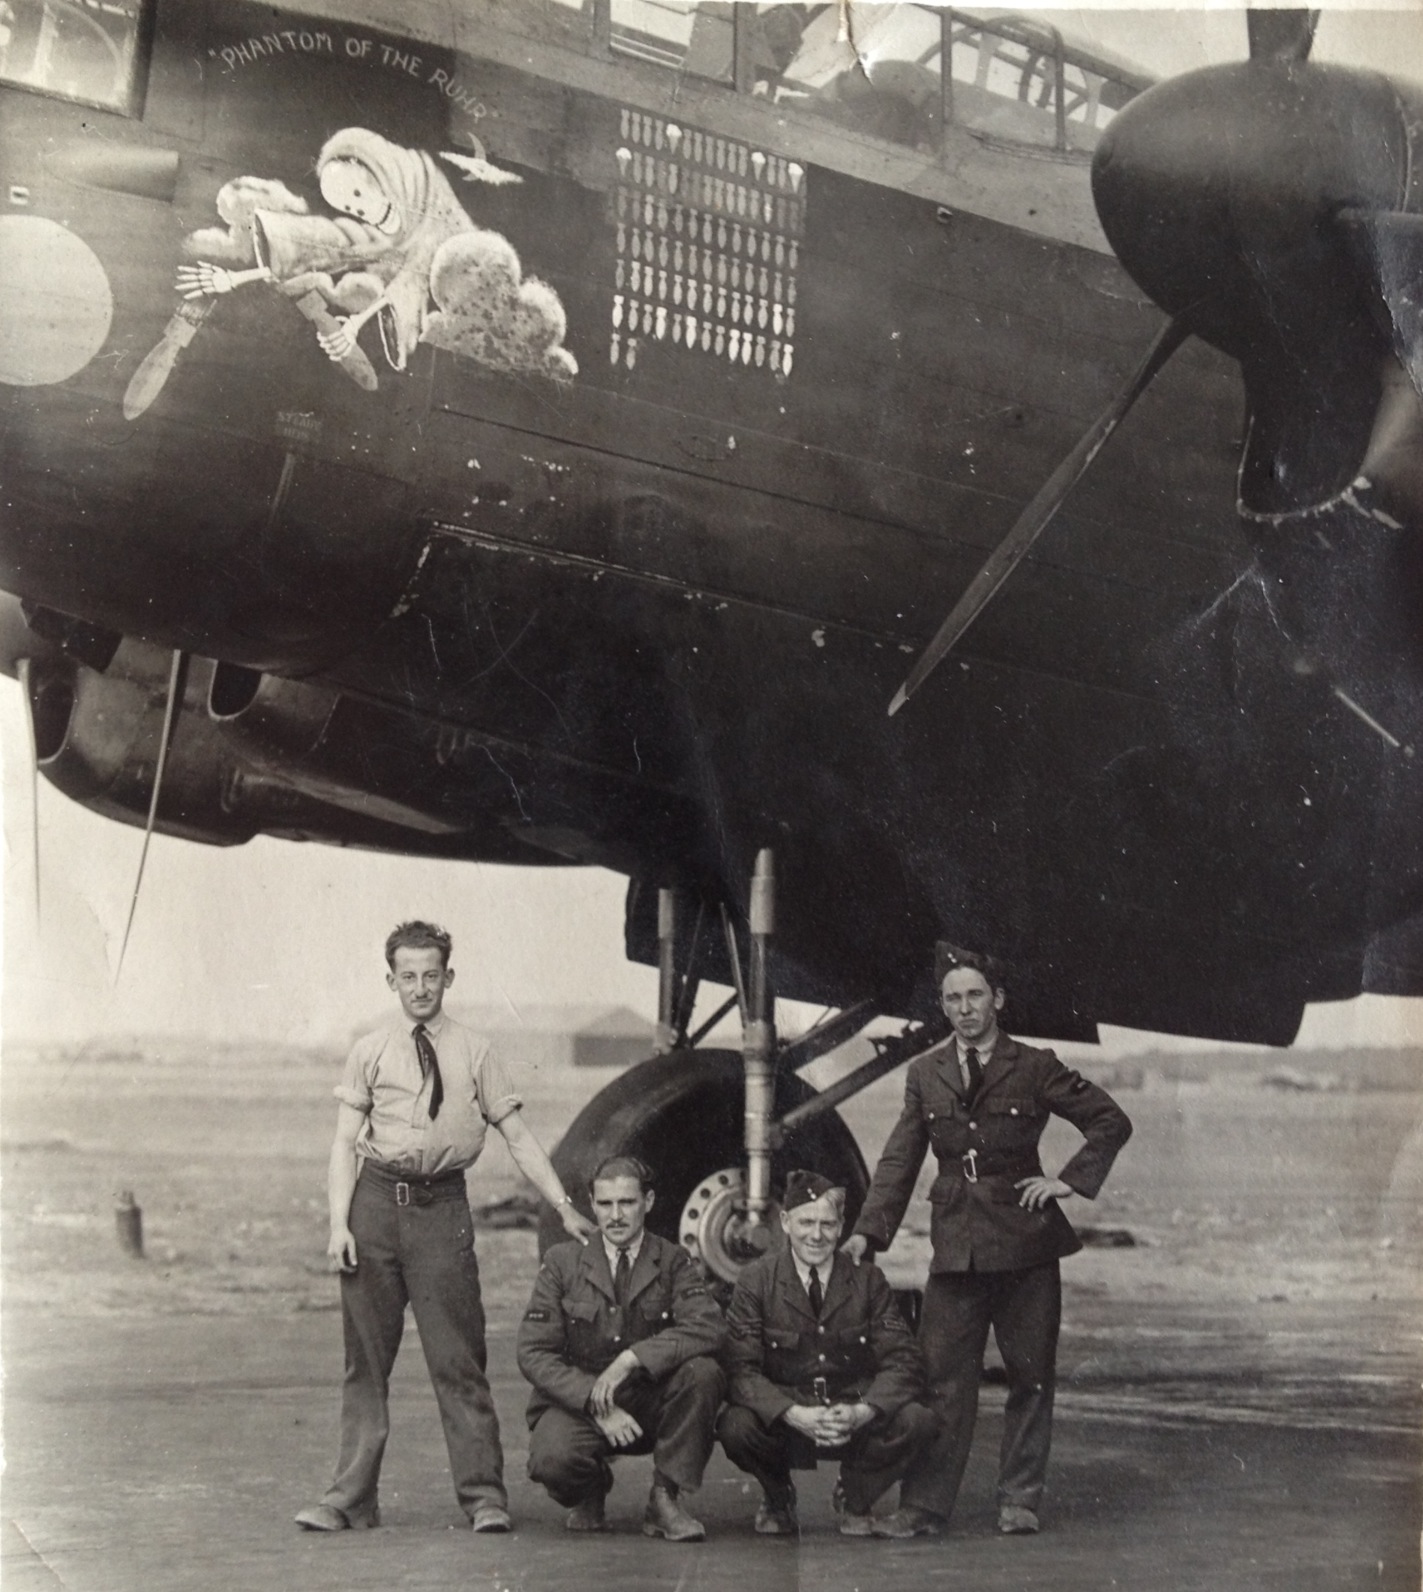 |
Extreme left: leading aircraftsman Phillip Lewis. Others unknown.
Photo courtesy of Hylton Lewis (son of aircraftsman Lewis) |
Hylton Lewis has requested if anyone can put names to the unknown men in the photo which is almost certainly taken in North Killingholme shortly before The Phantom flew her 100th operation.
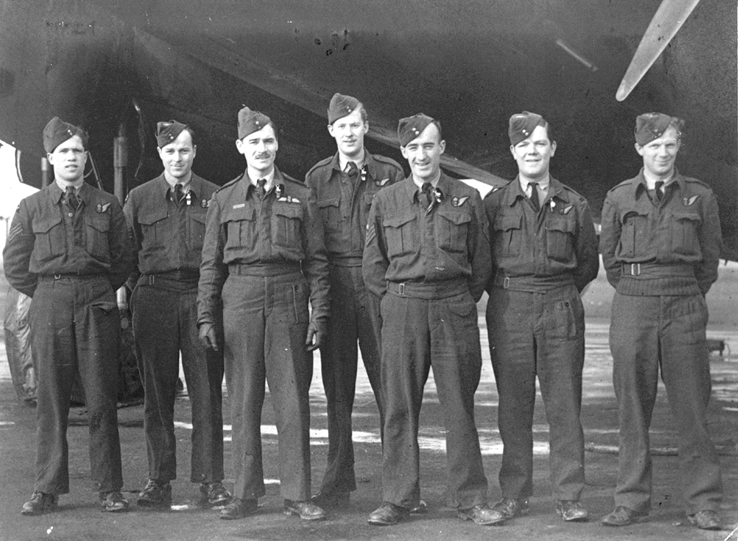
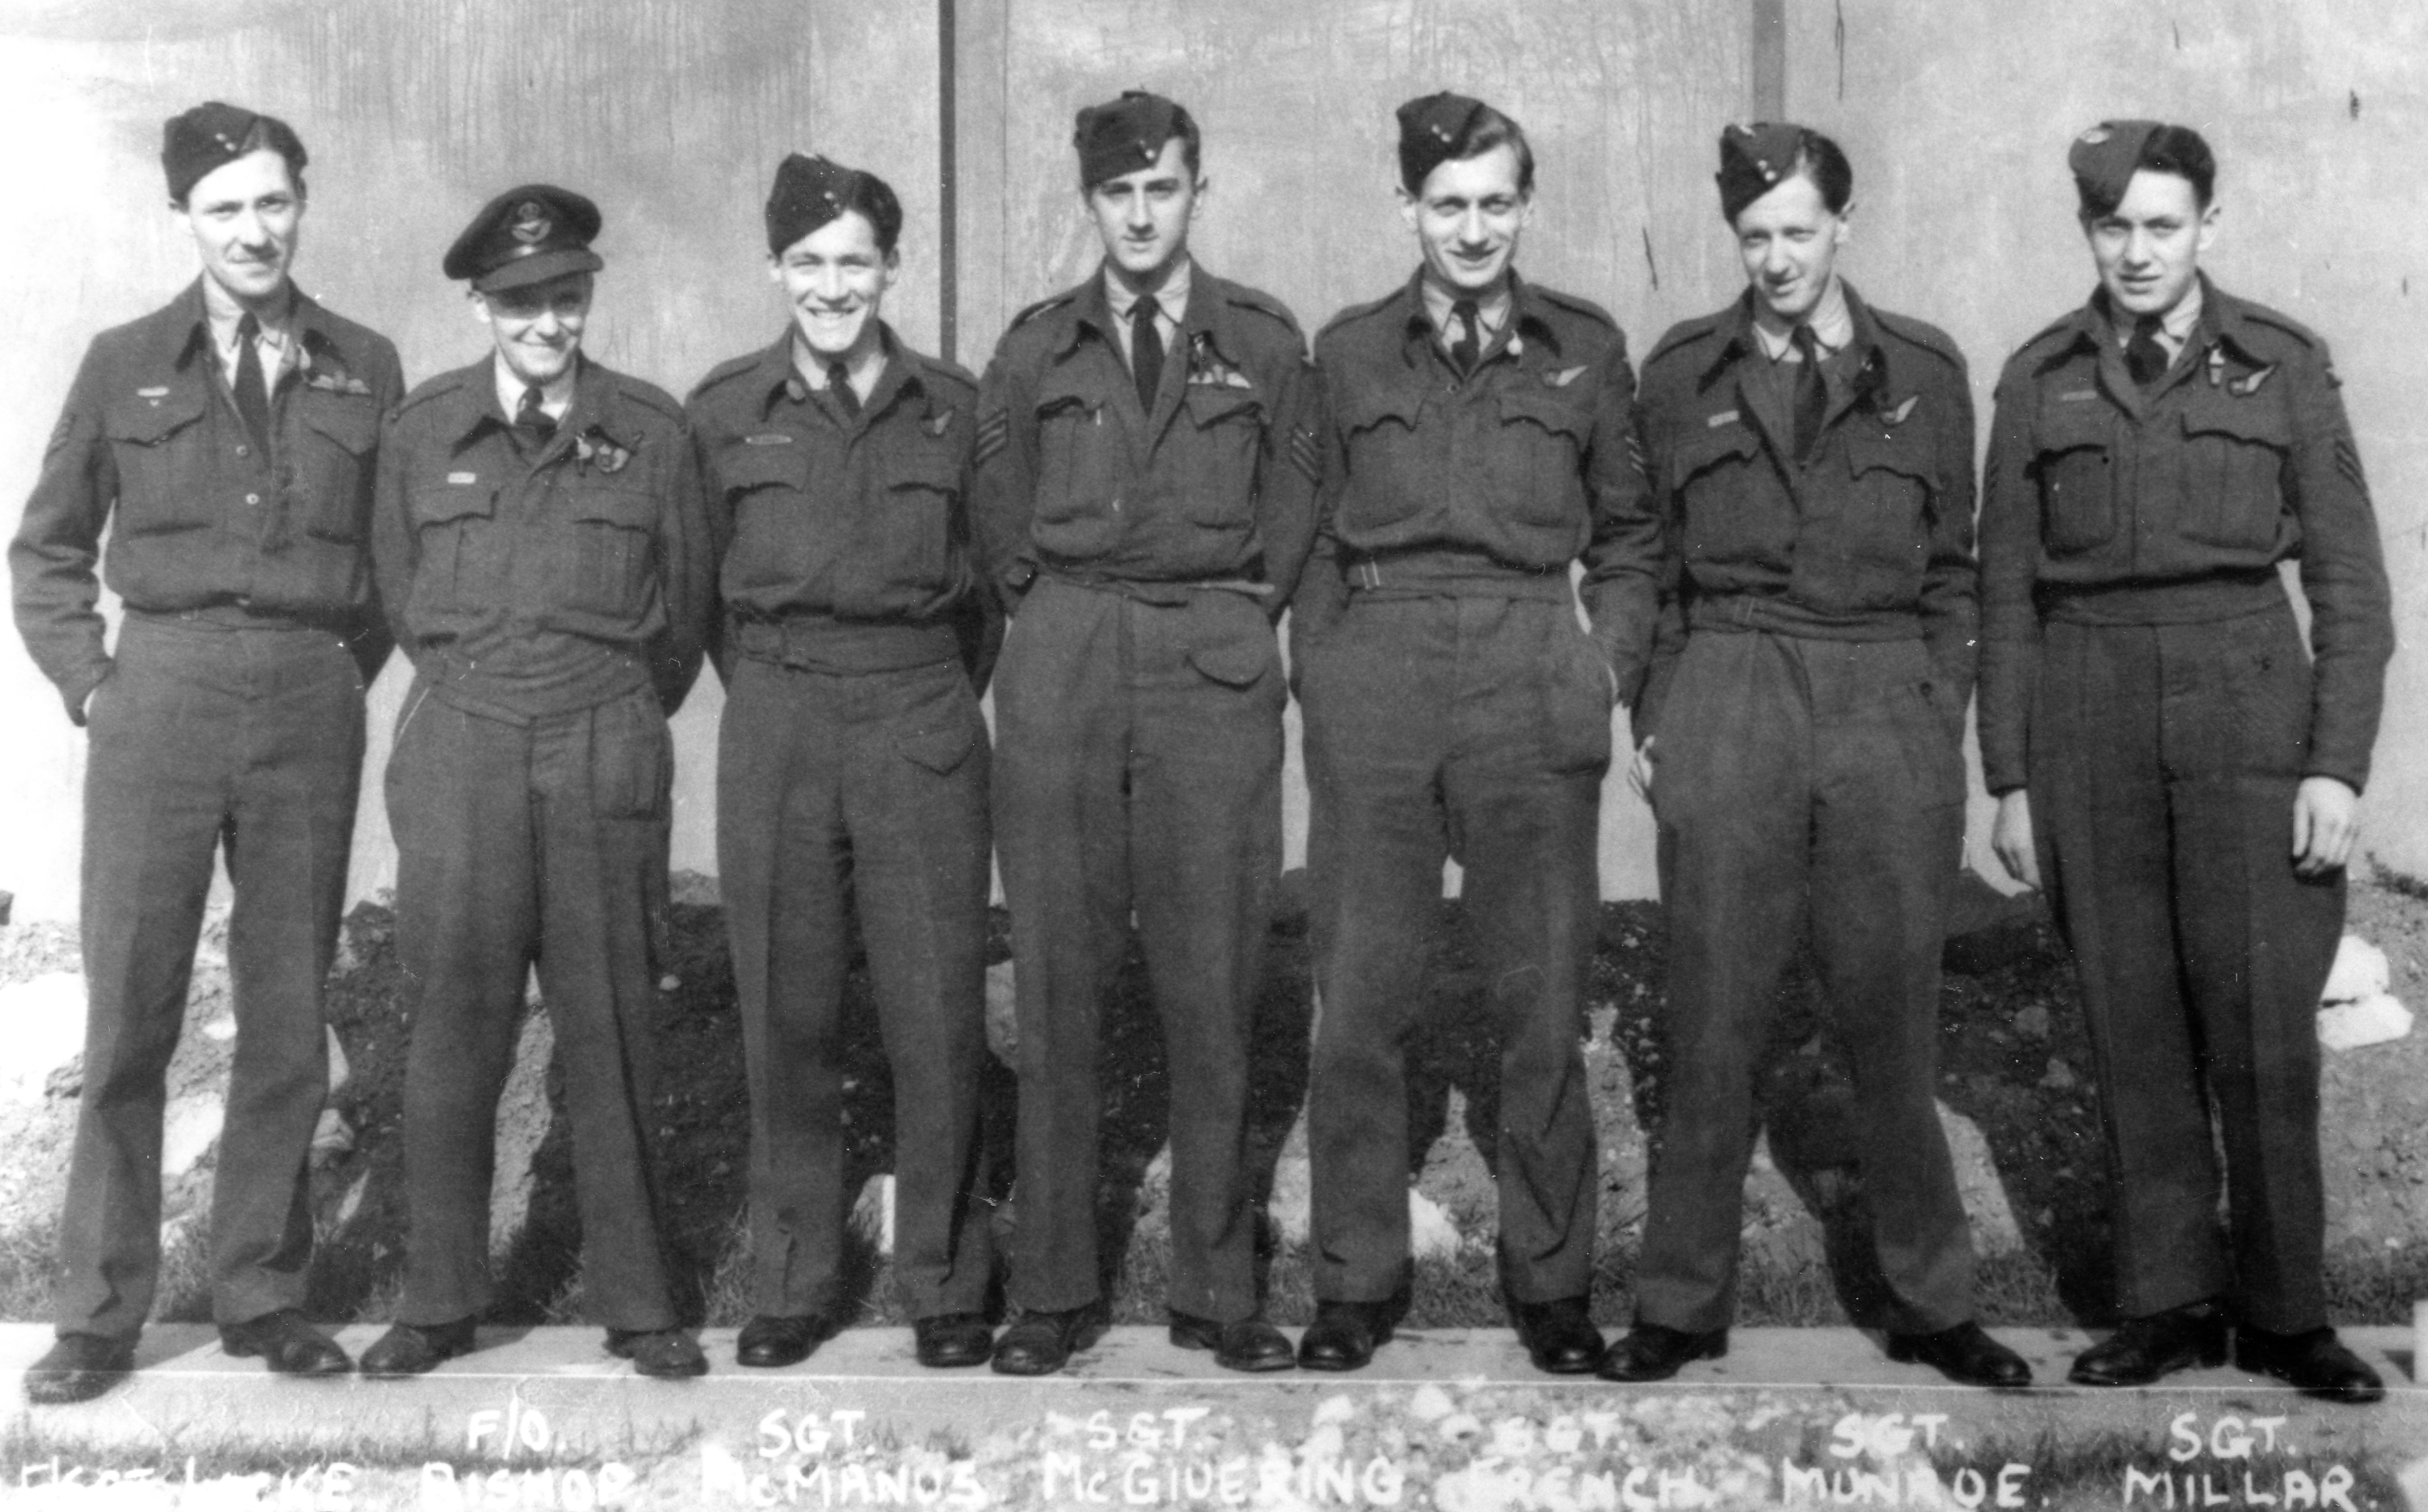
S/Ldr P A Nicholas and Crew
 |
Can you spot the (future) TV comedy actor (mostly known for appearing as a straight man in the sketch shows of Benny Hill and Spike Milligan)?
To see further information click here |
F/O S C Beeson and Crew
 |
For further information and photos click here |
F/Sgt J H Vance and Crew
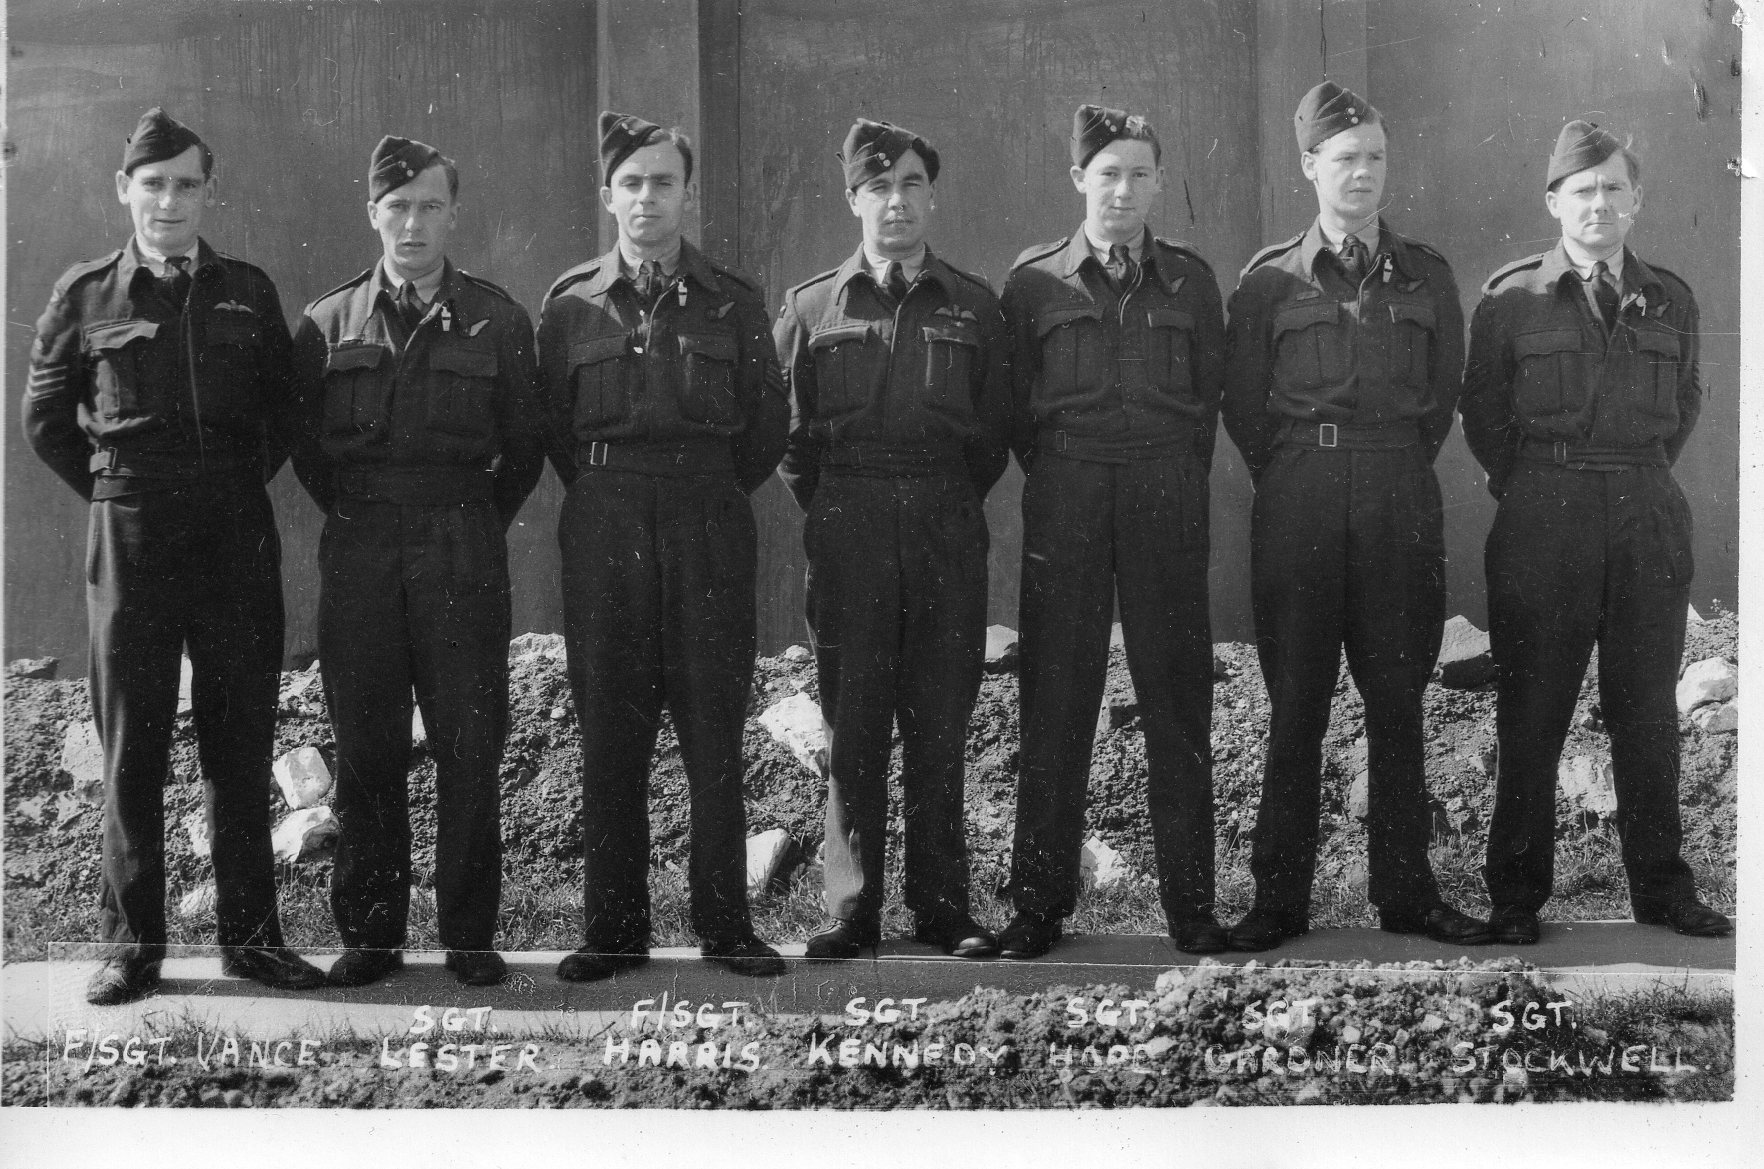 |
For further information and photos click here |
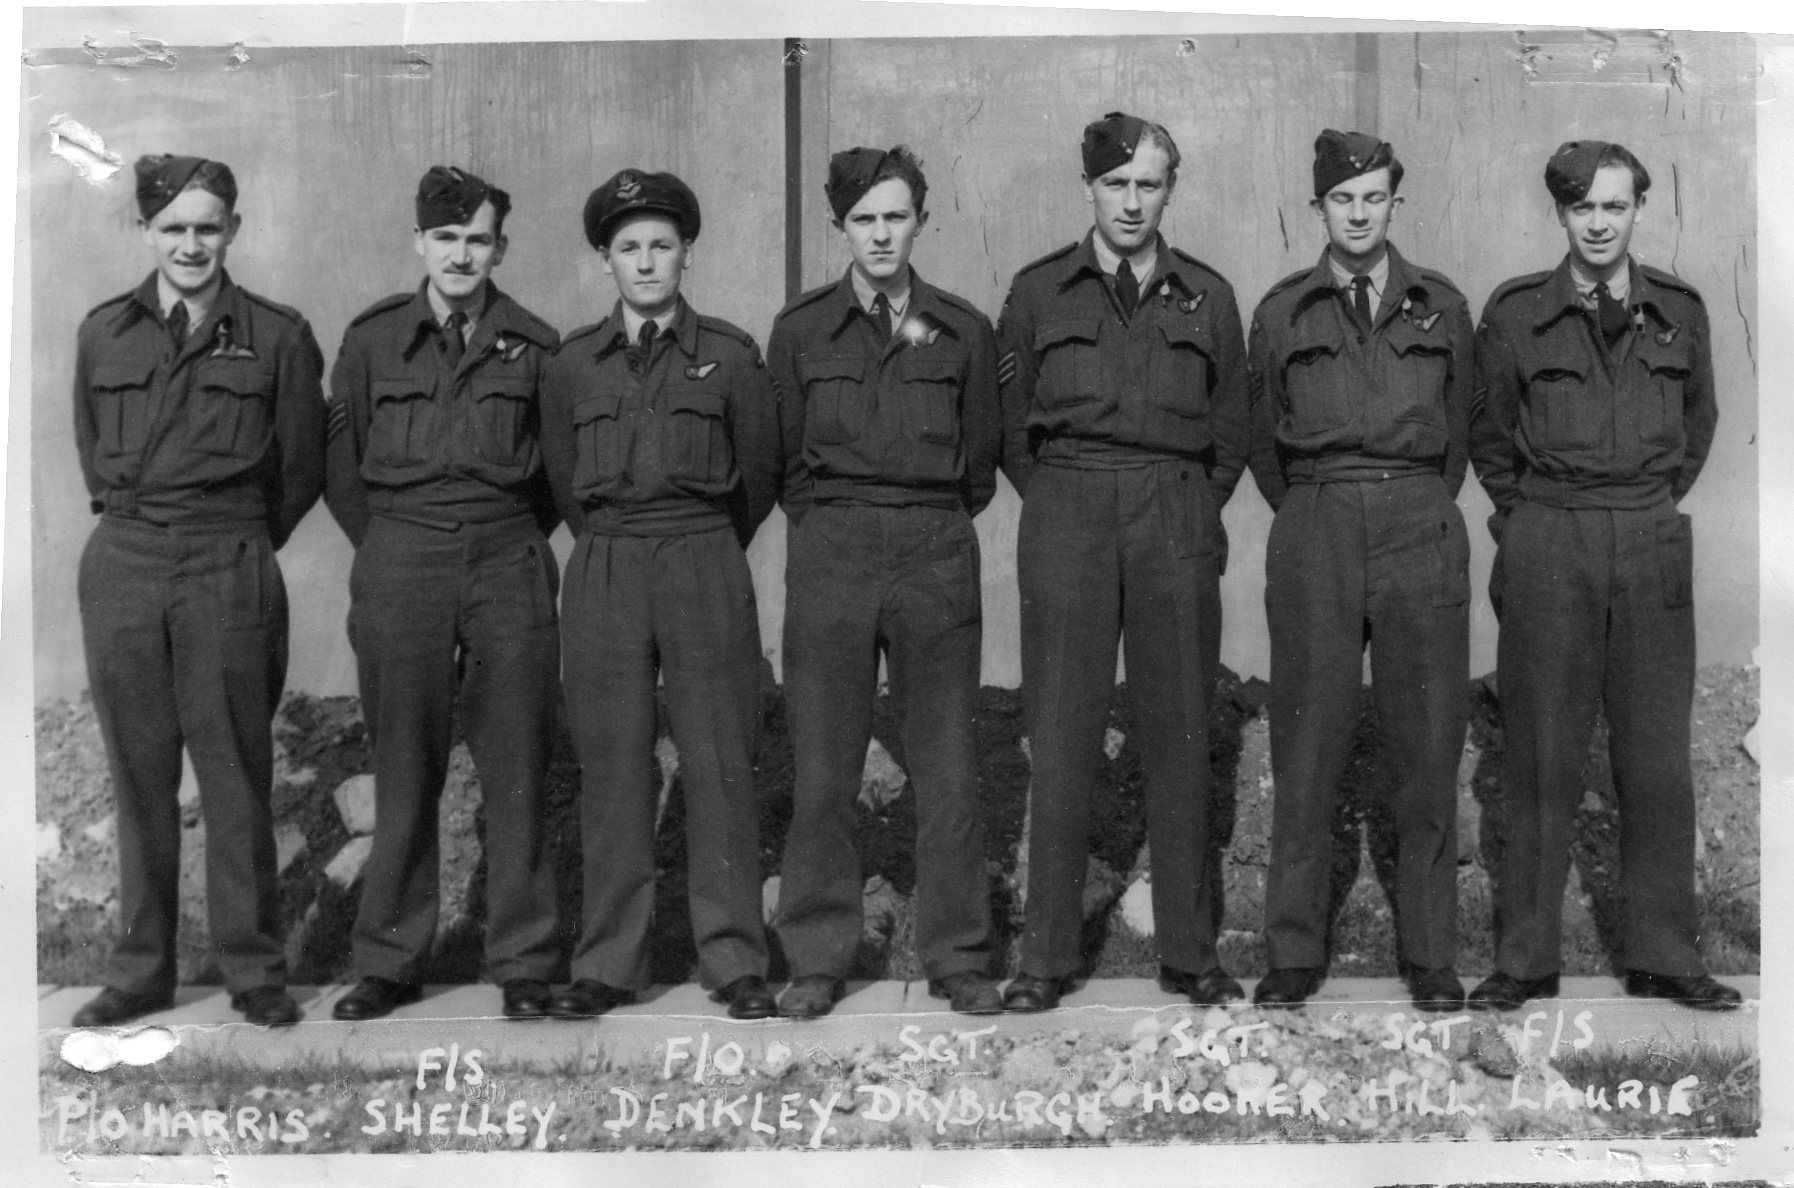
F/O J Harris and Crew
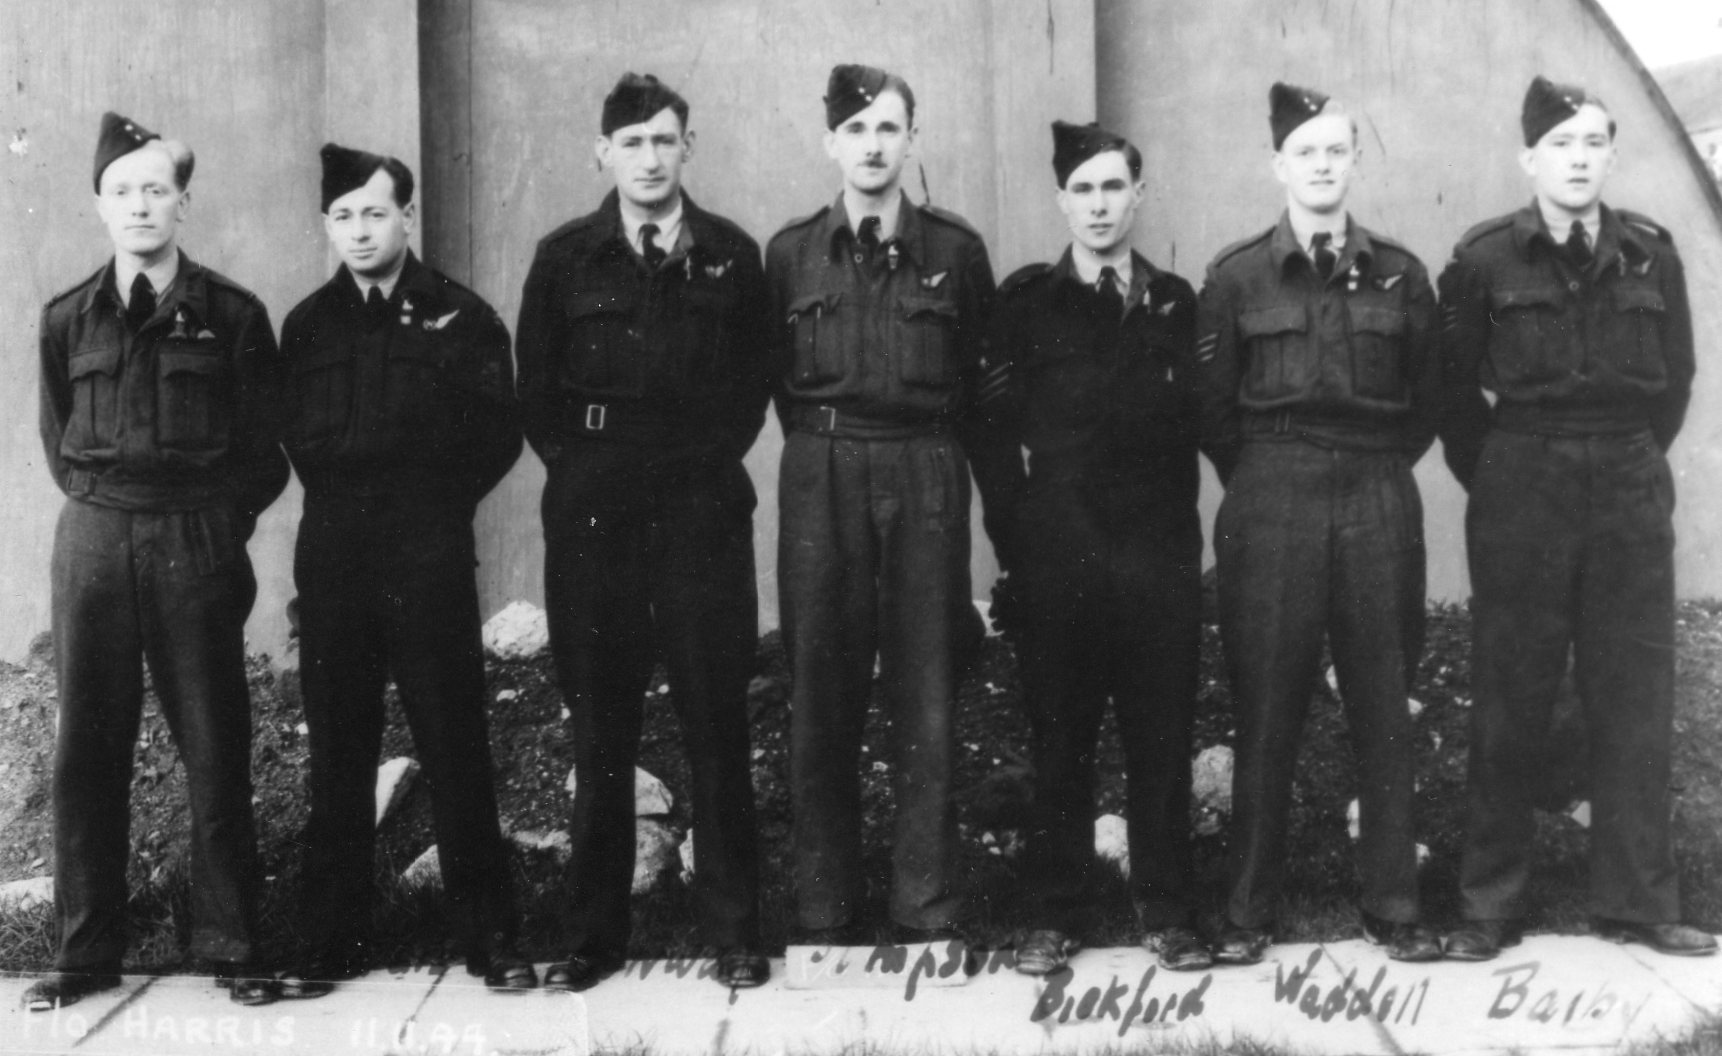 |
To see further information click here |
F/O D W Summons and Crew
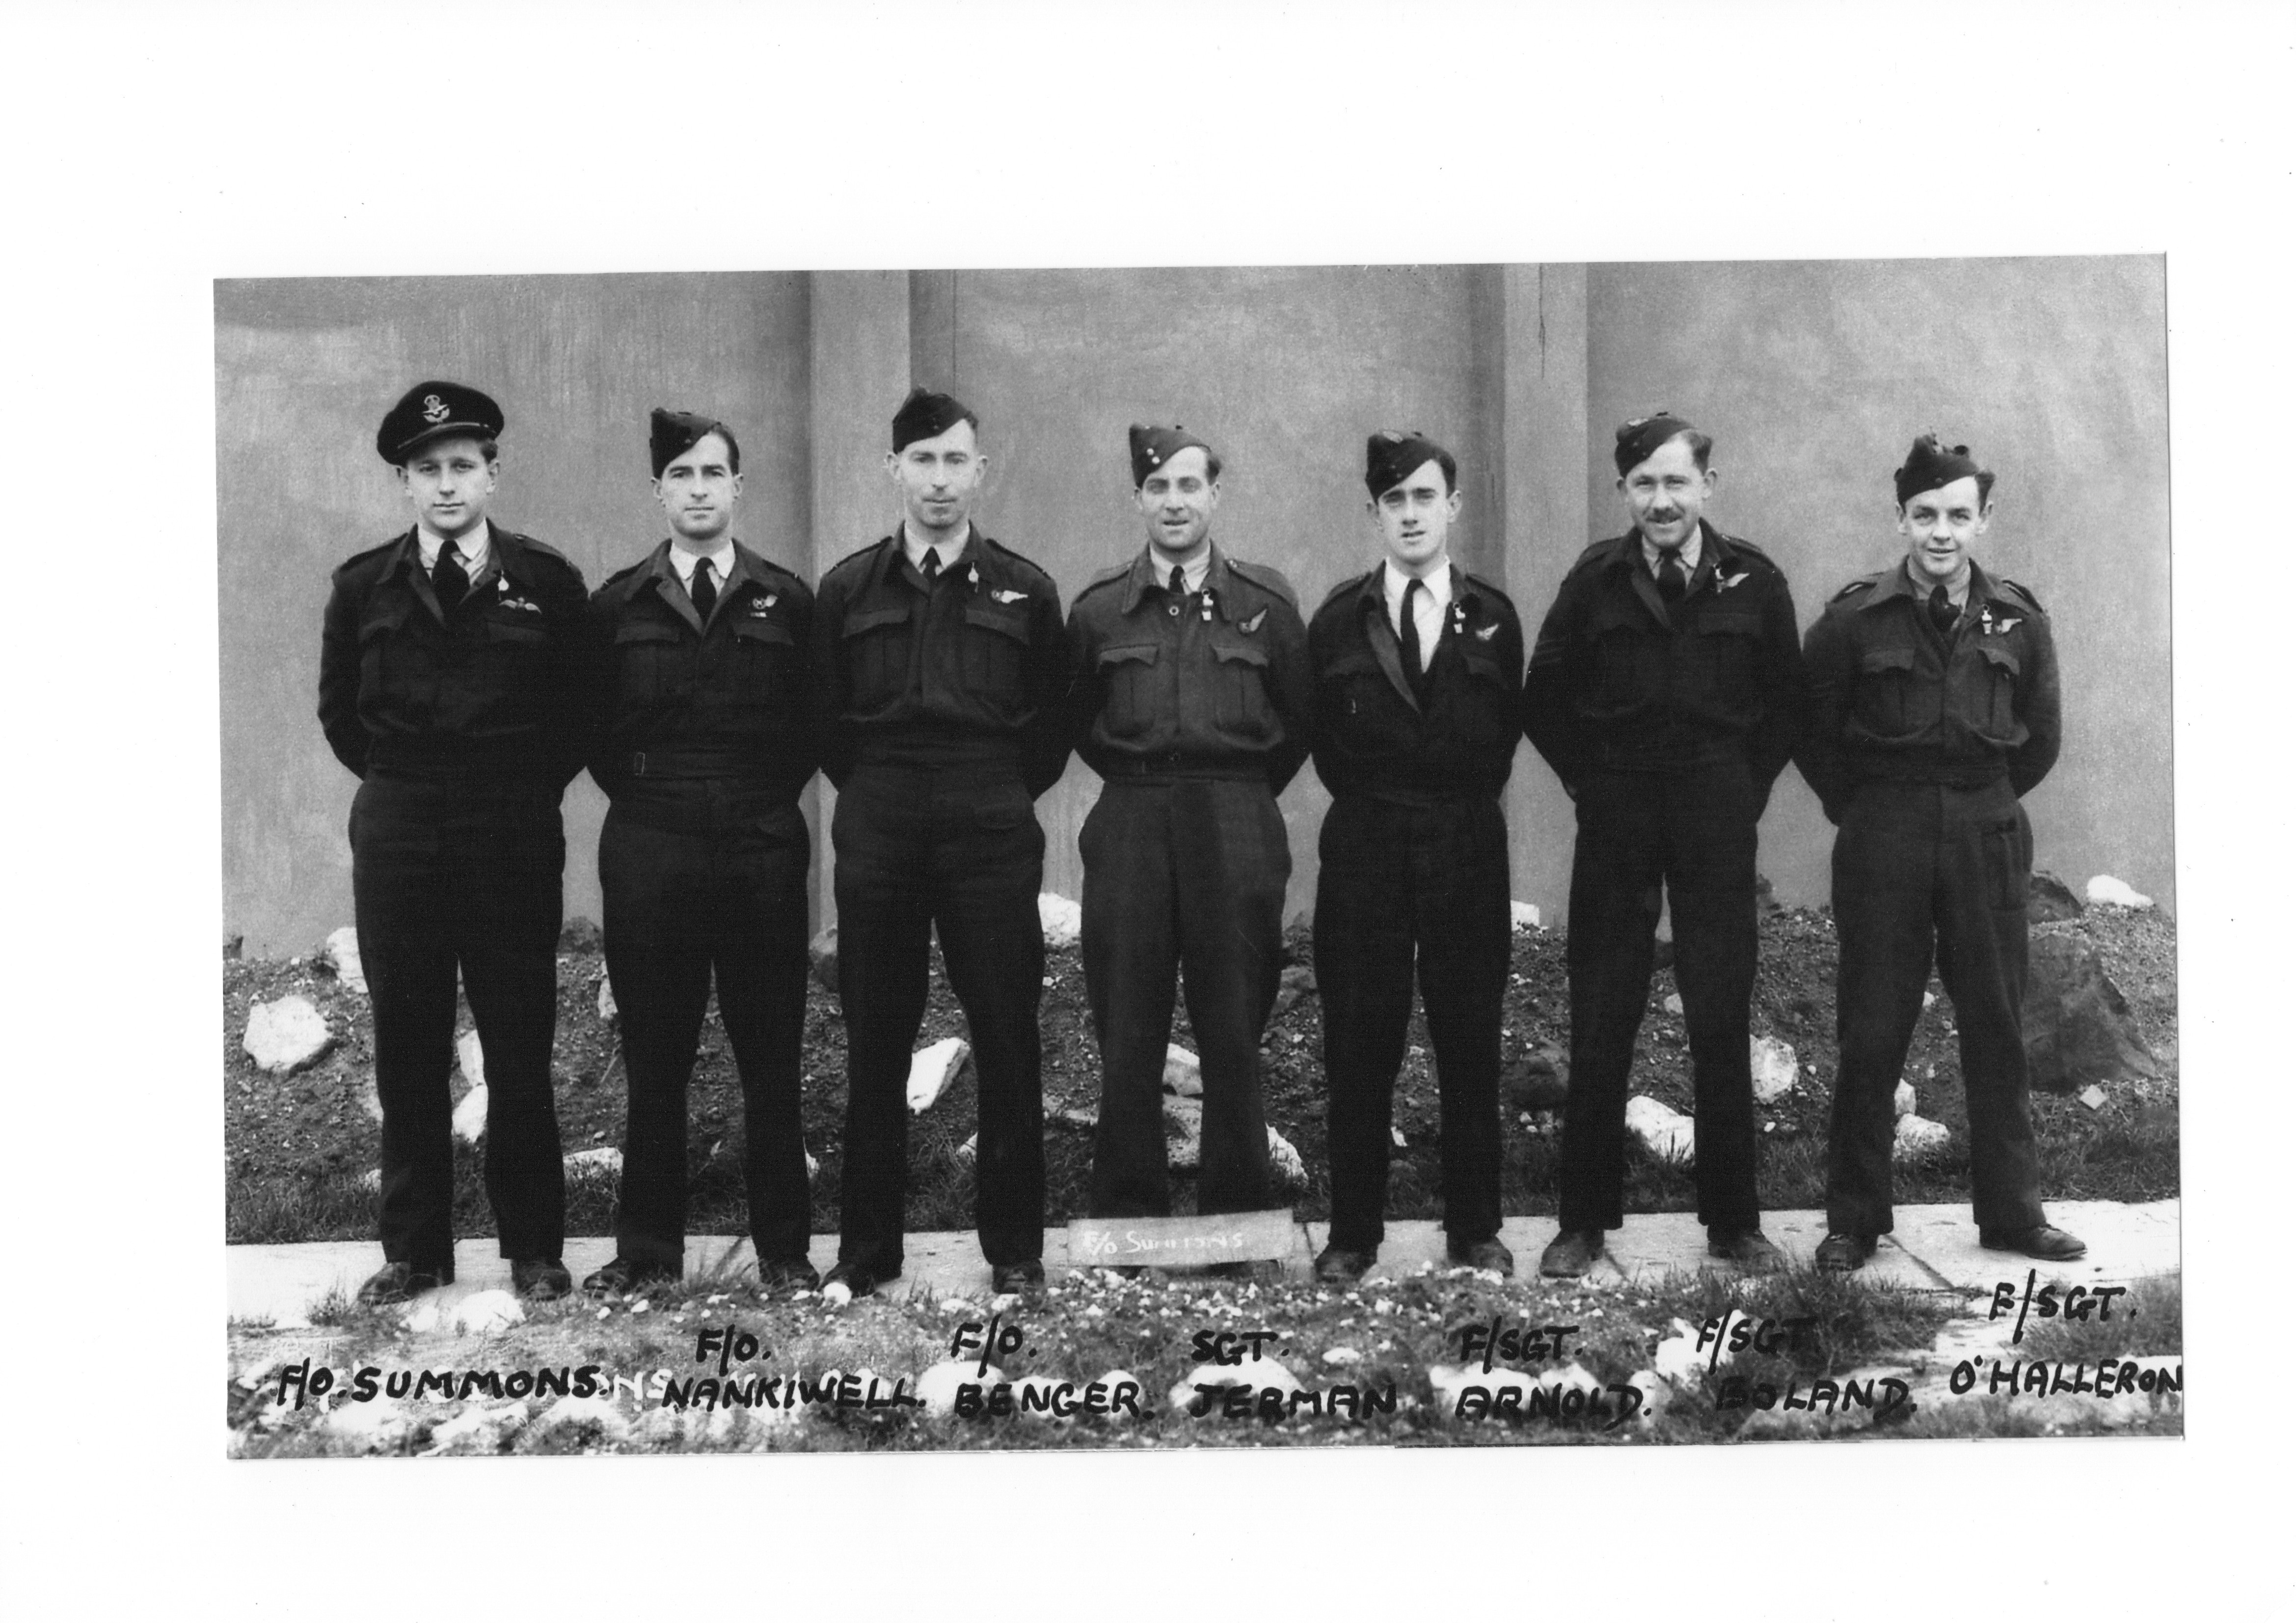 |
For further information and photos click here |
F/O R M Harris RNZAF and Crew
 |
To see further information click here |
F/O A W L Lohrey and Crew
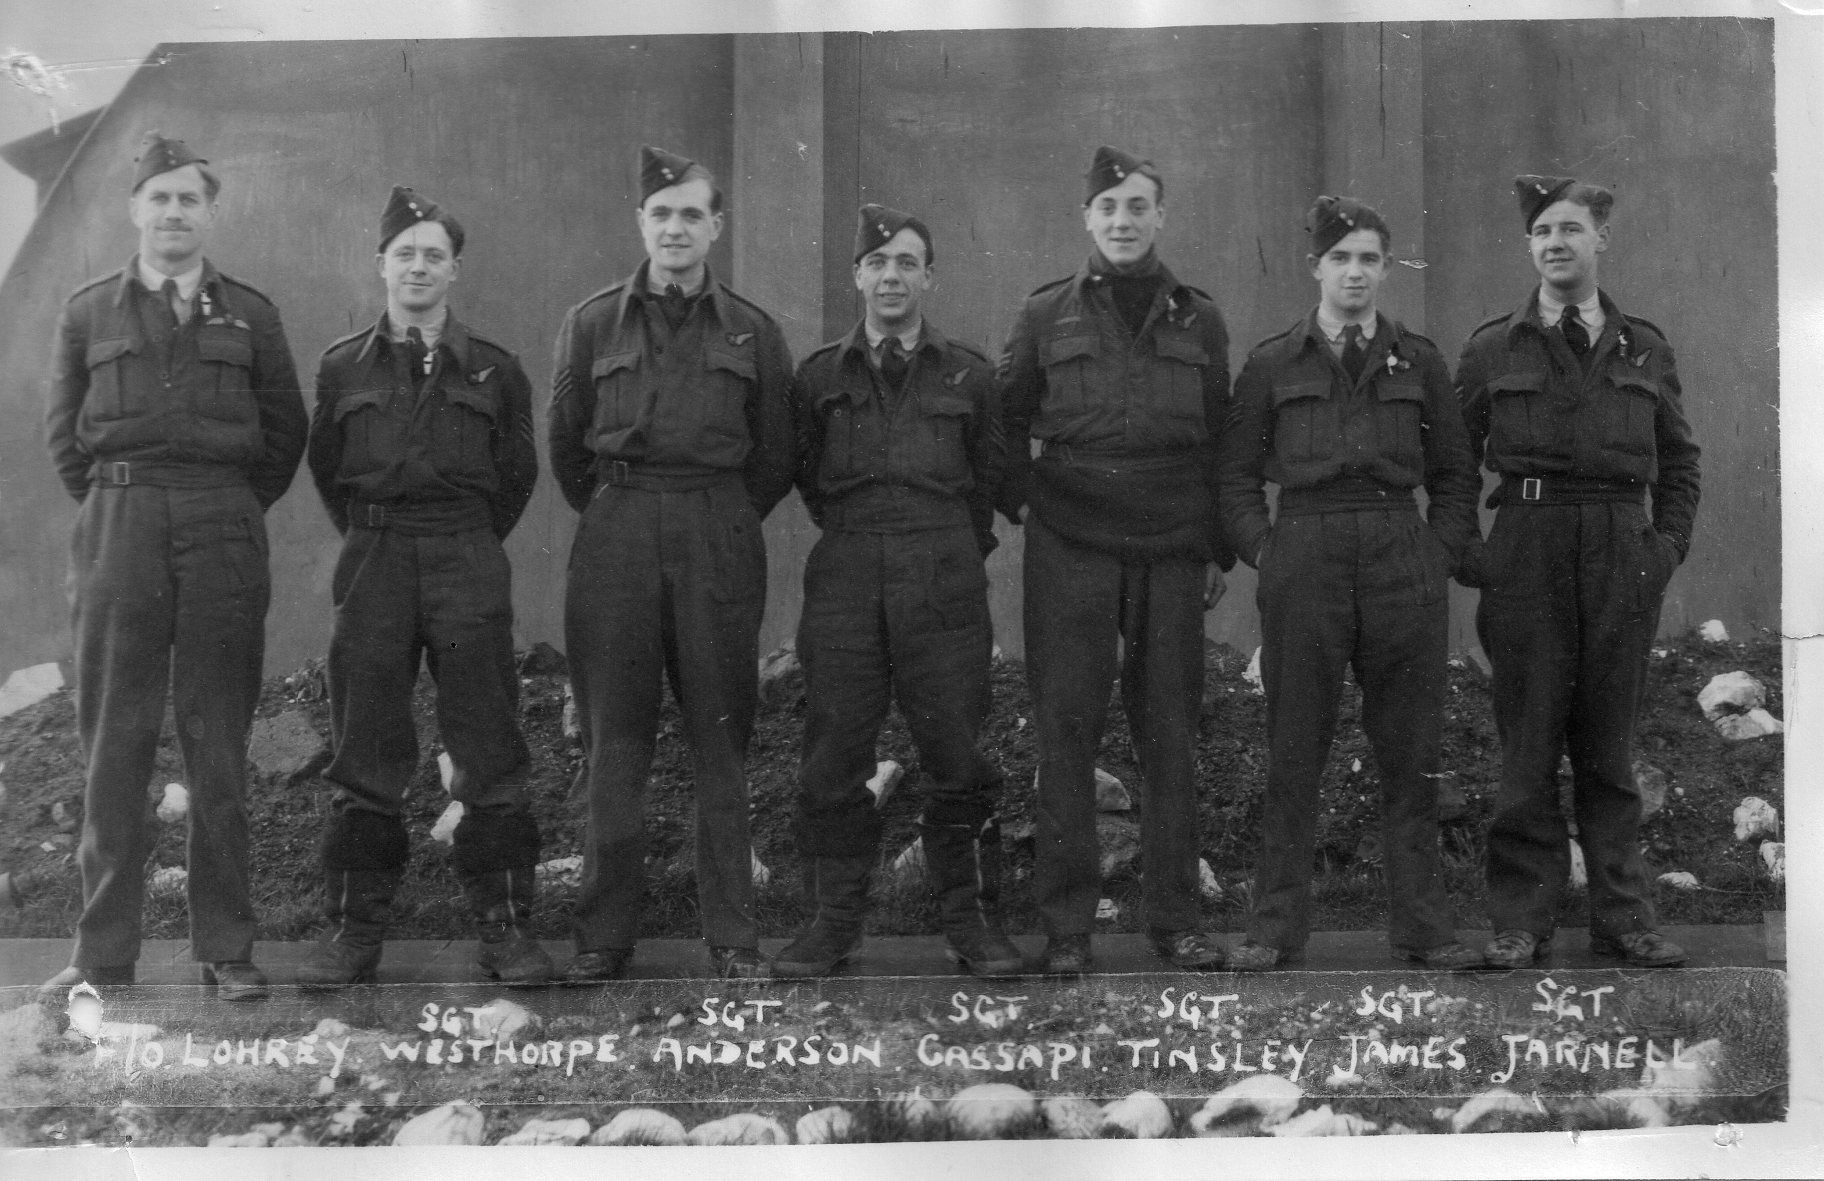 |
To see further information click here |
F/O W E Town and Crew
 |
To see further information click here |
F/O M D Hayes and Crew
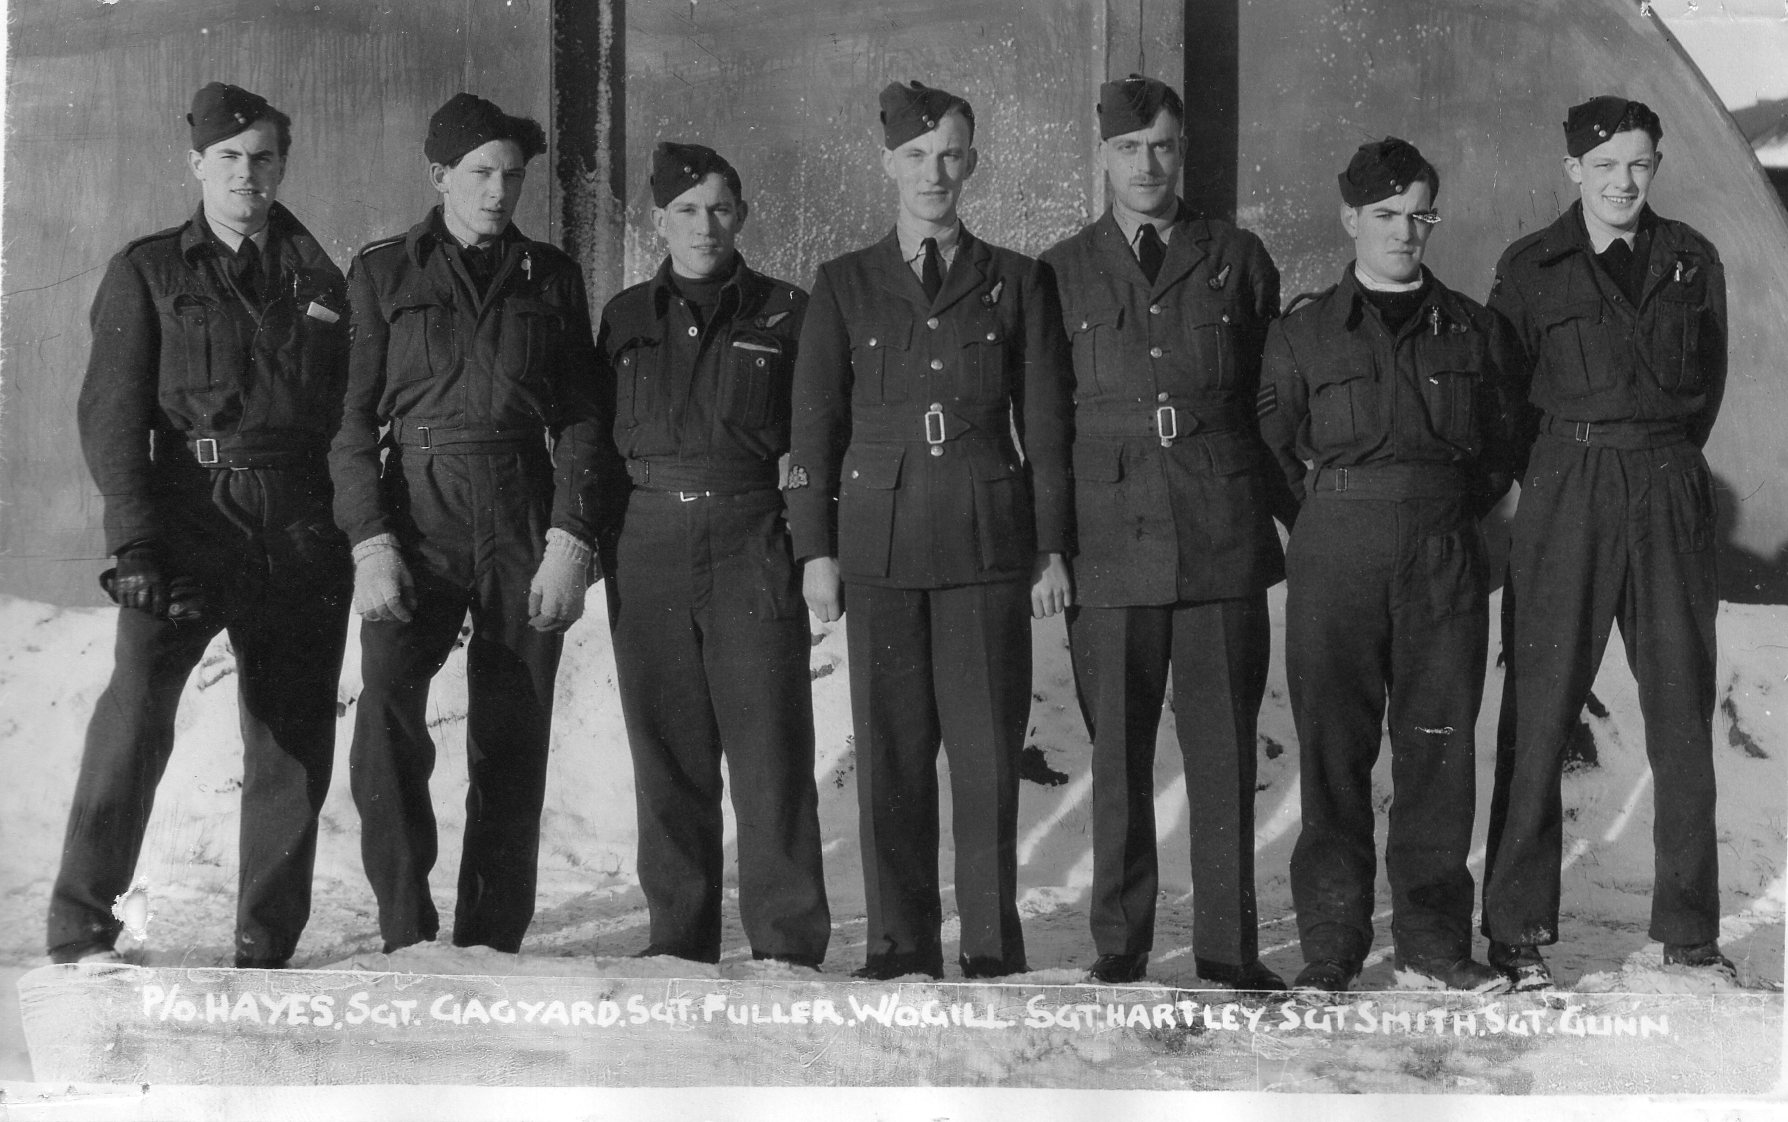 |
To see further information click here |
S/Ldr J C Sarll and Crew
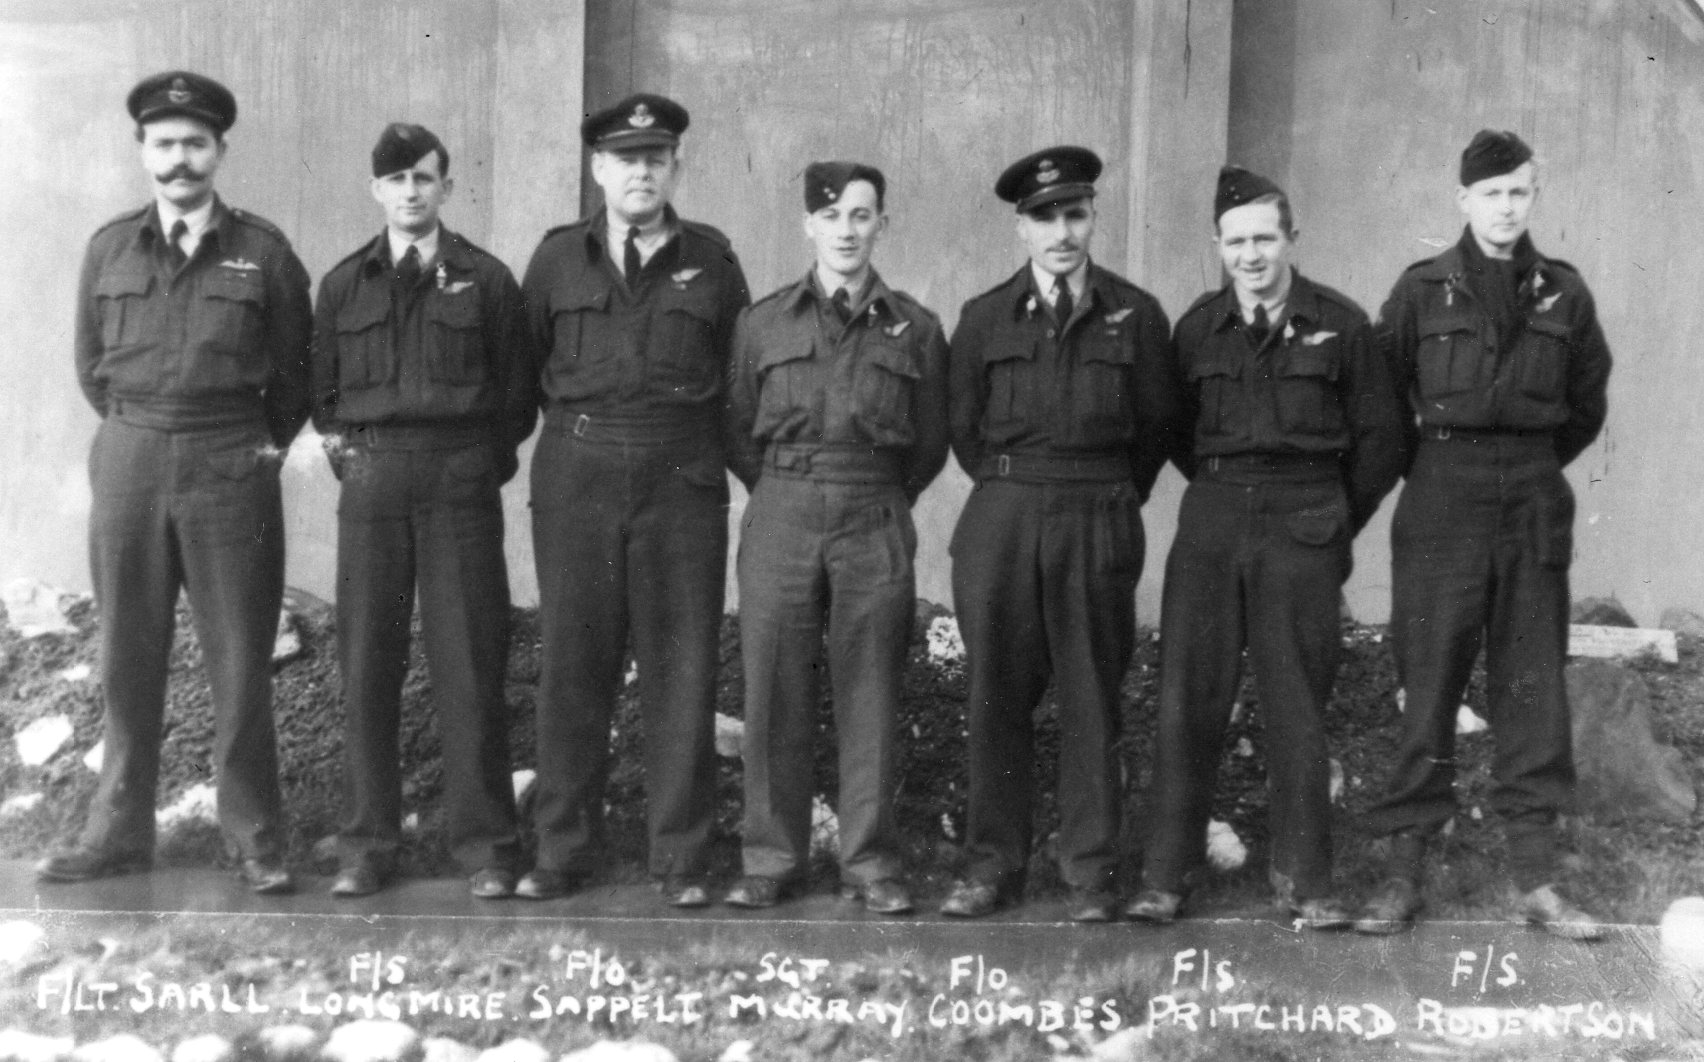 |
For further information and photos click here |
F/O K W Jeans and Crew
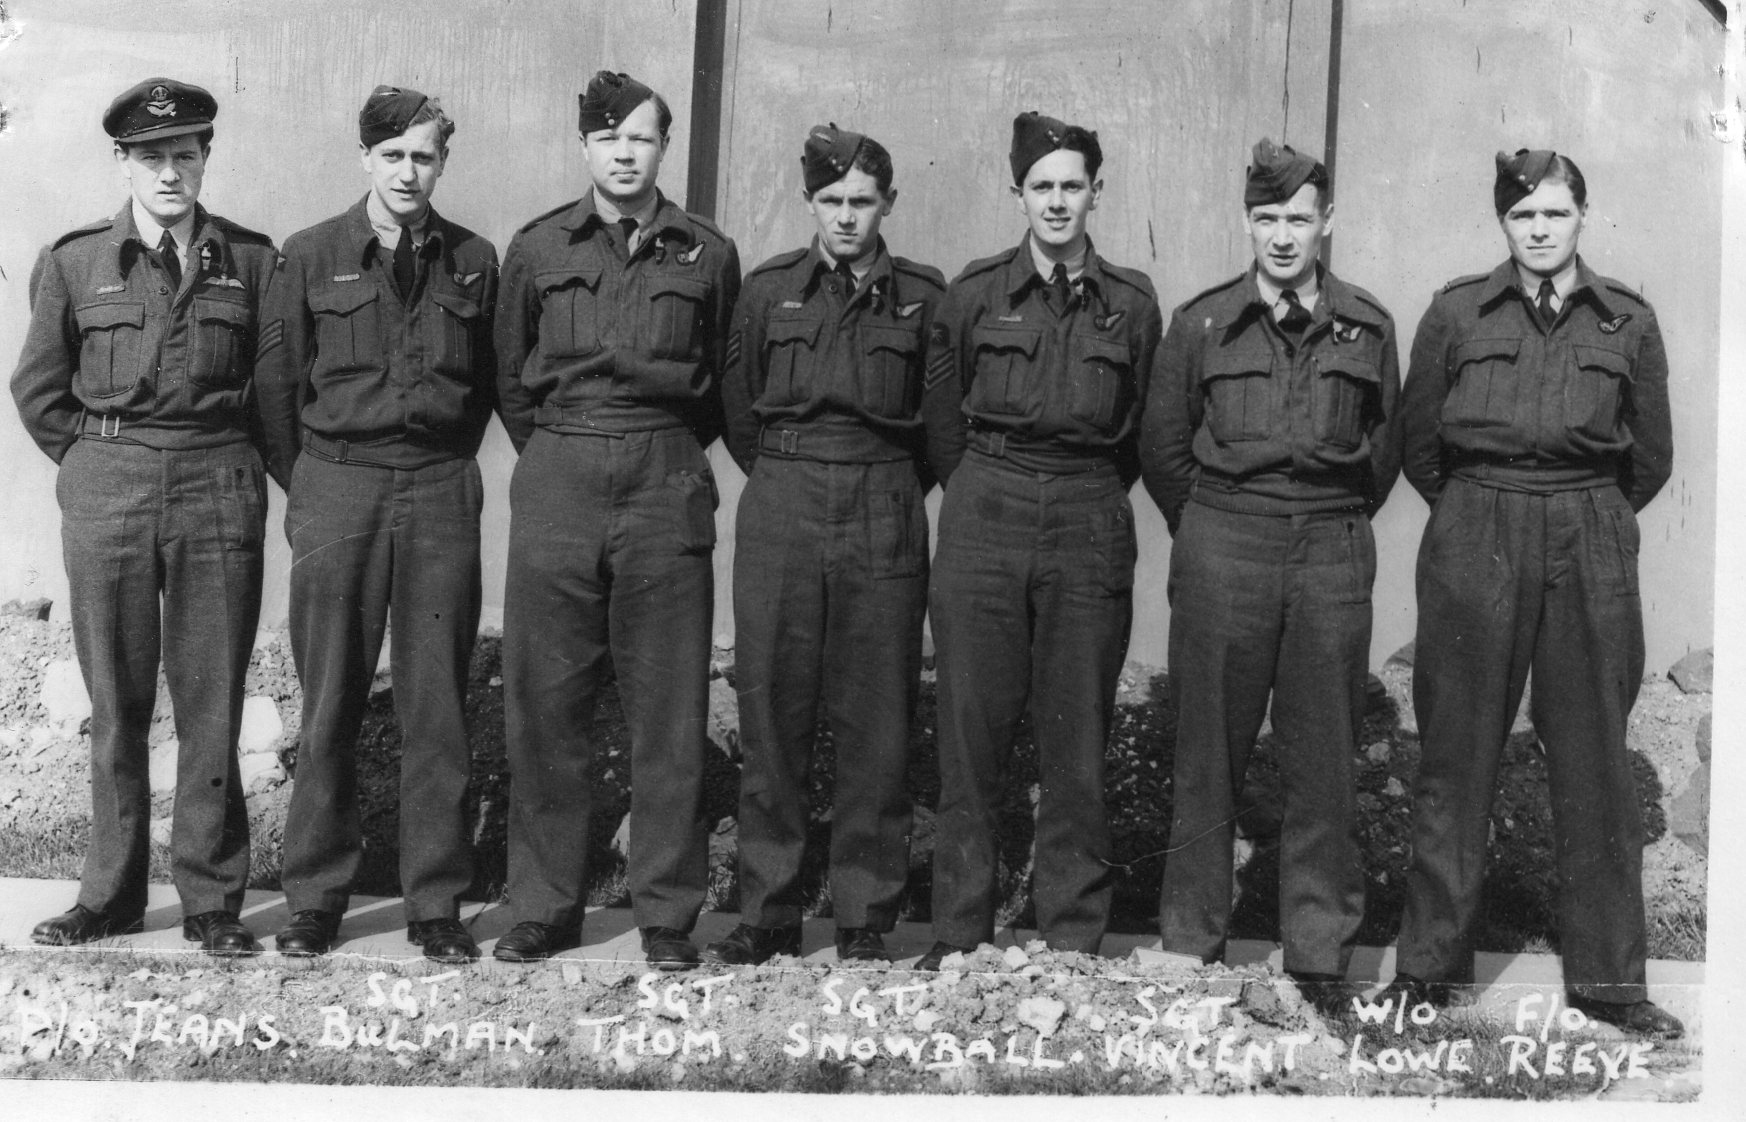 |
To see further information click here |
F/Lt M F A Maltin and Crew
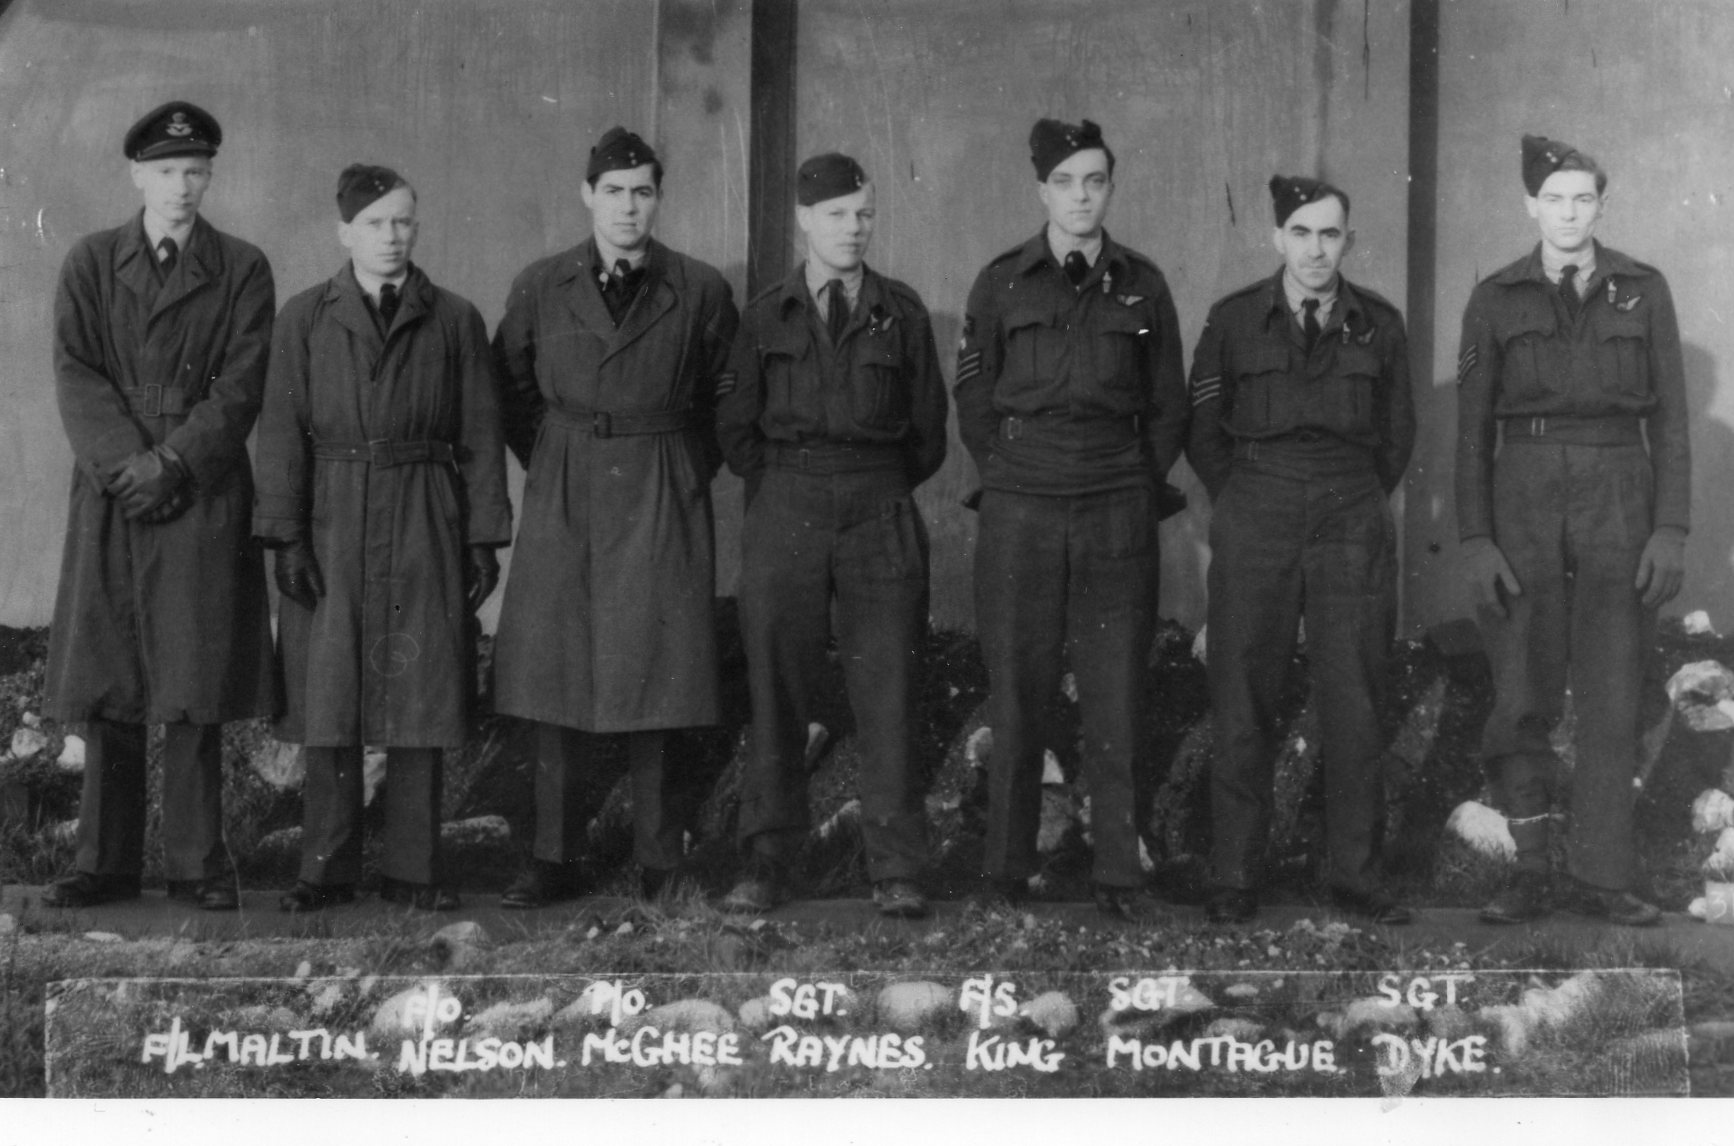 |
To see further information click here |
S/Ldr F Hume and Crew
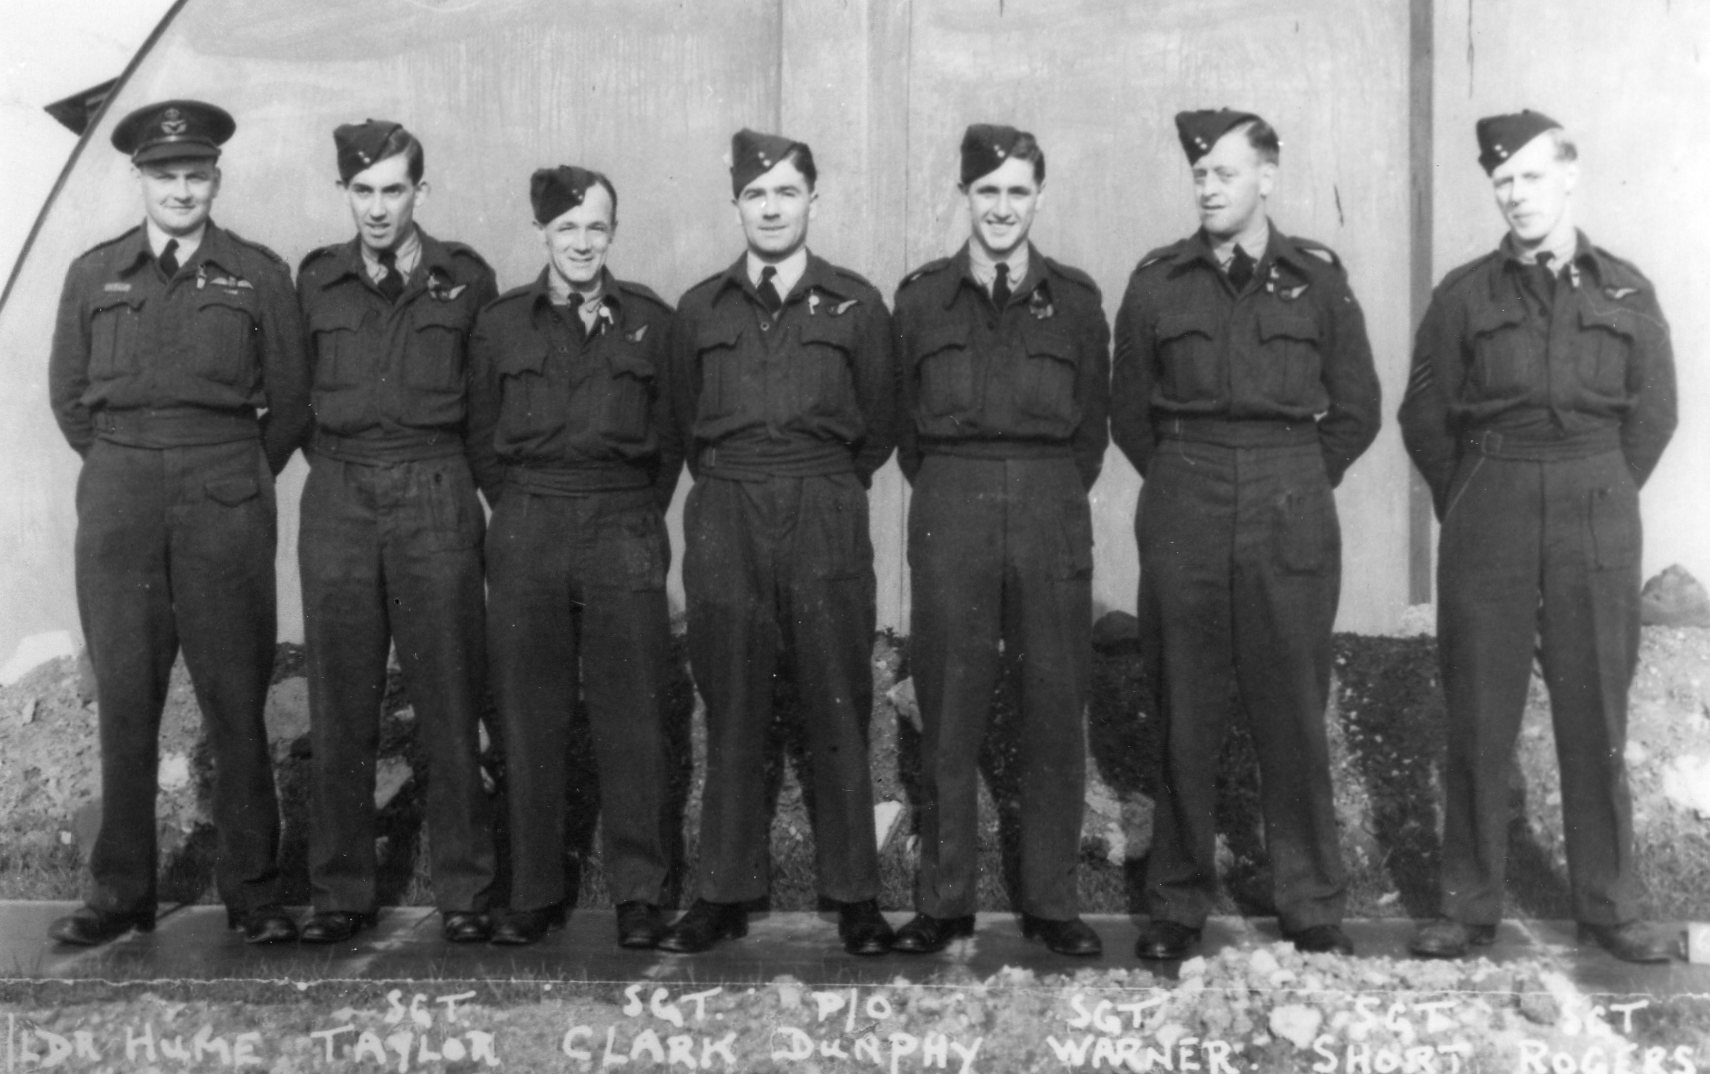 |
For further information and photos click here |
F/O I A Stevenson and Crew
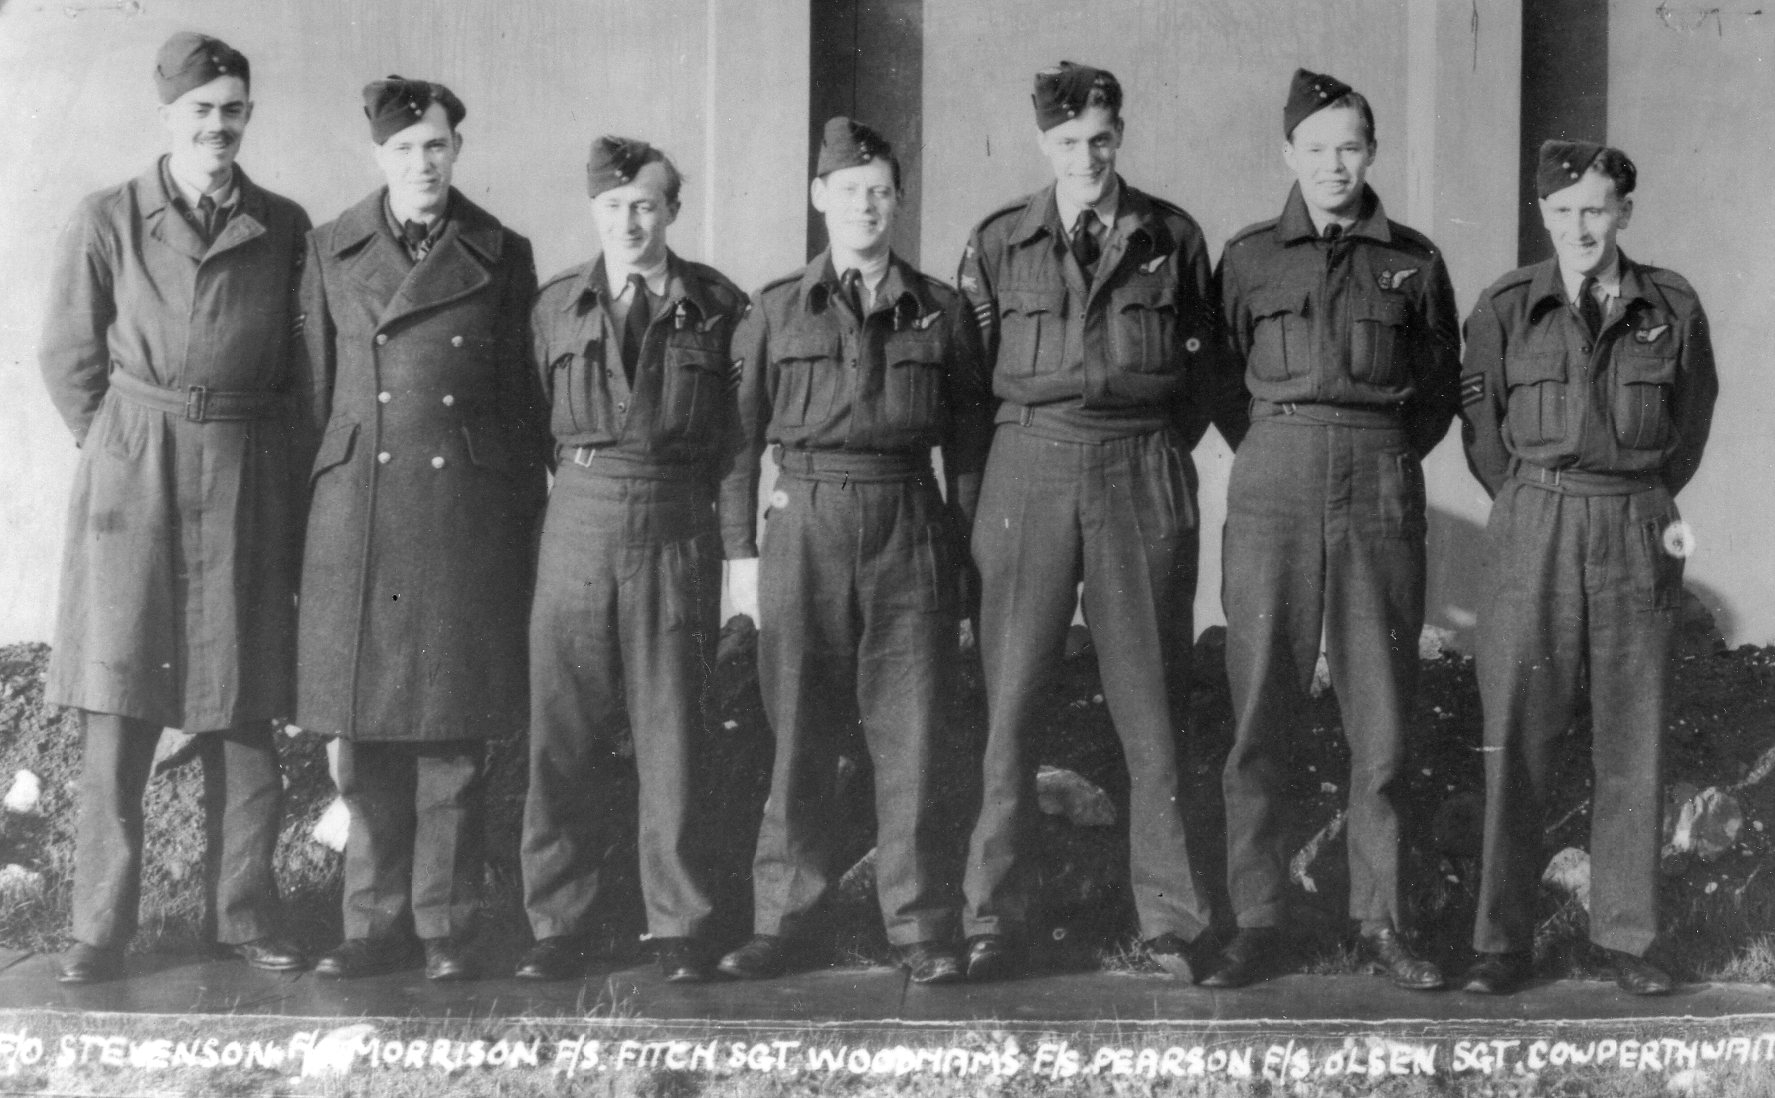 |
For further information and photos click here |
F/O H A Findlay and Crew
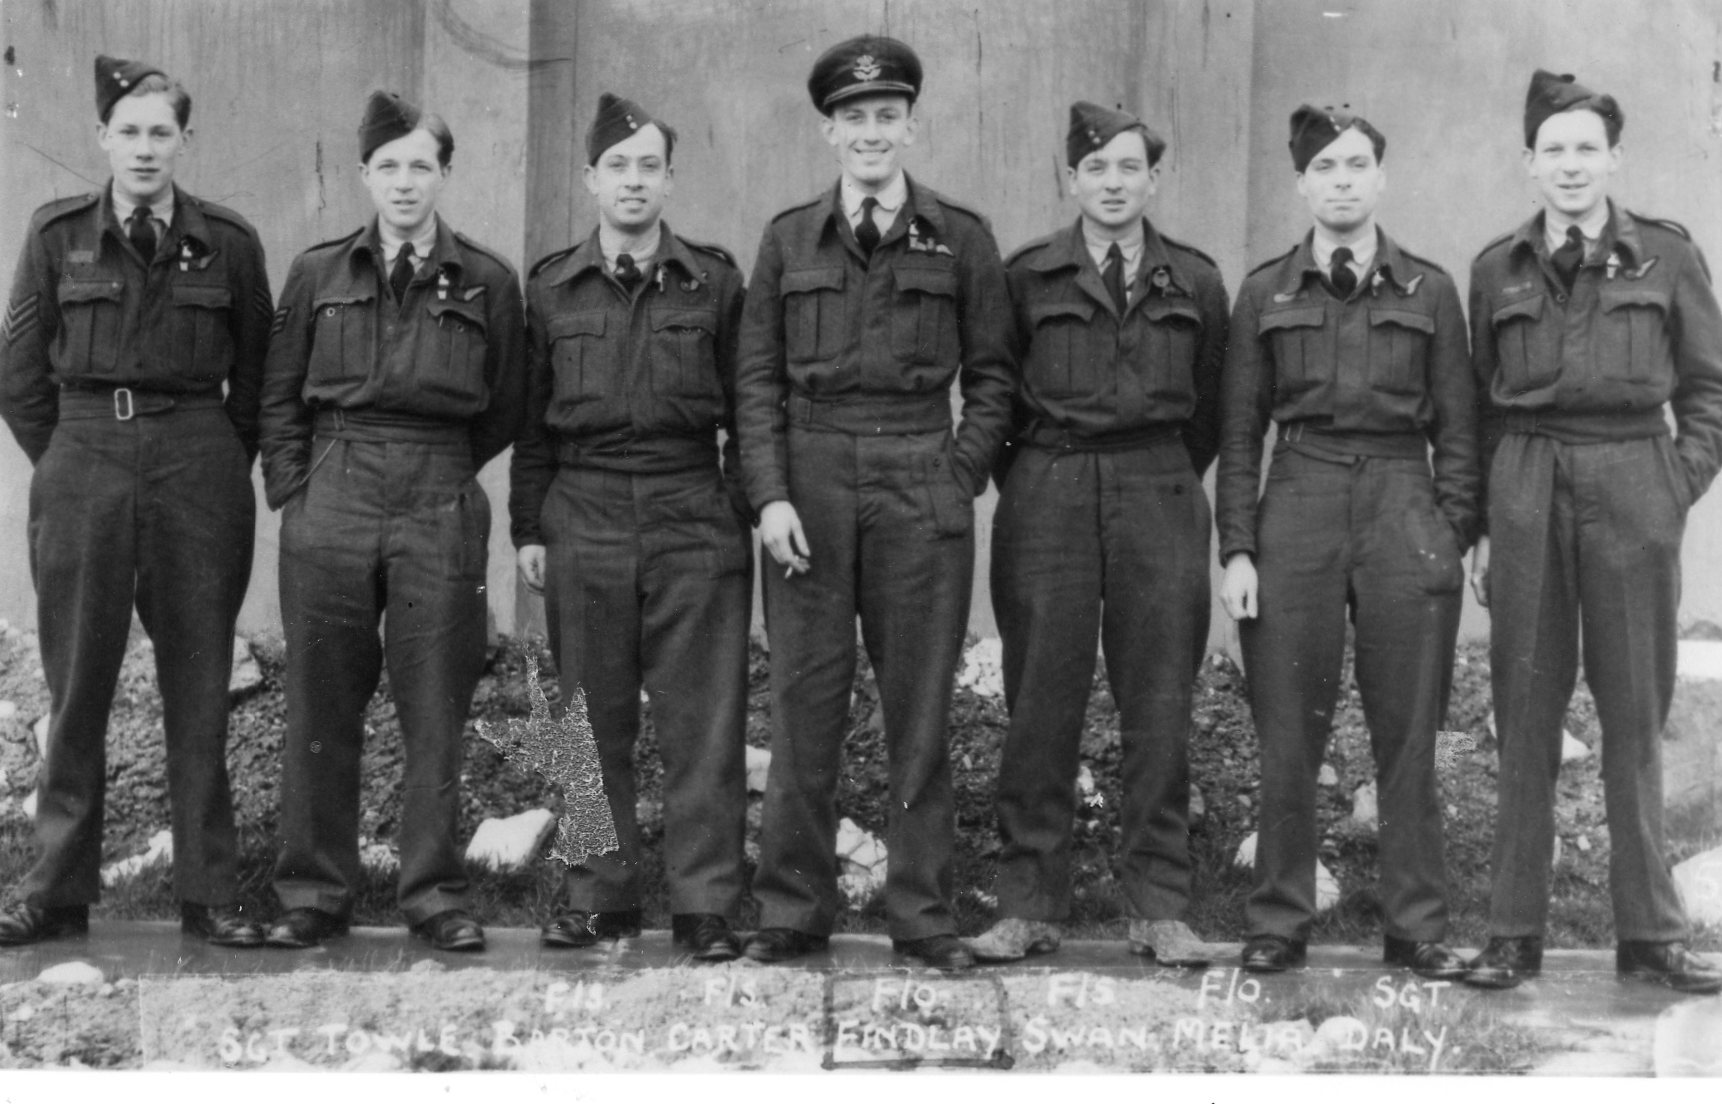 |
For further information and photos click here |
F/O H J Handley and Crew
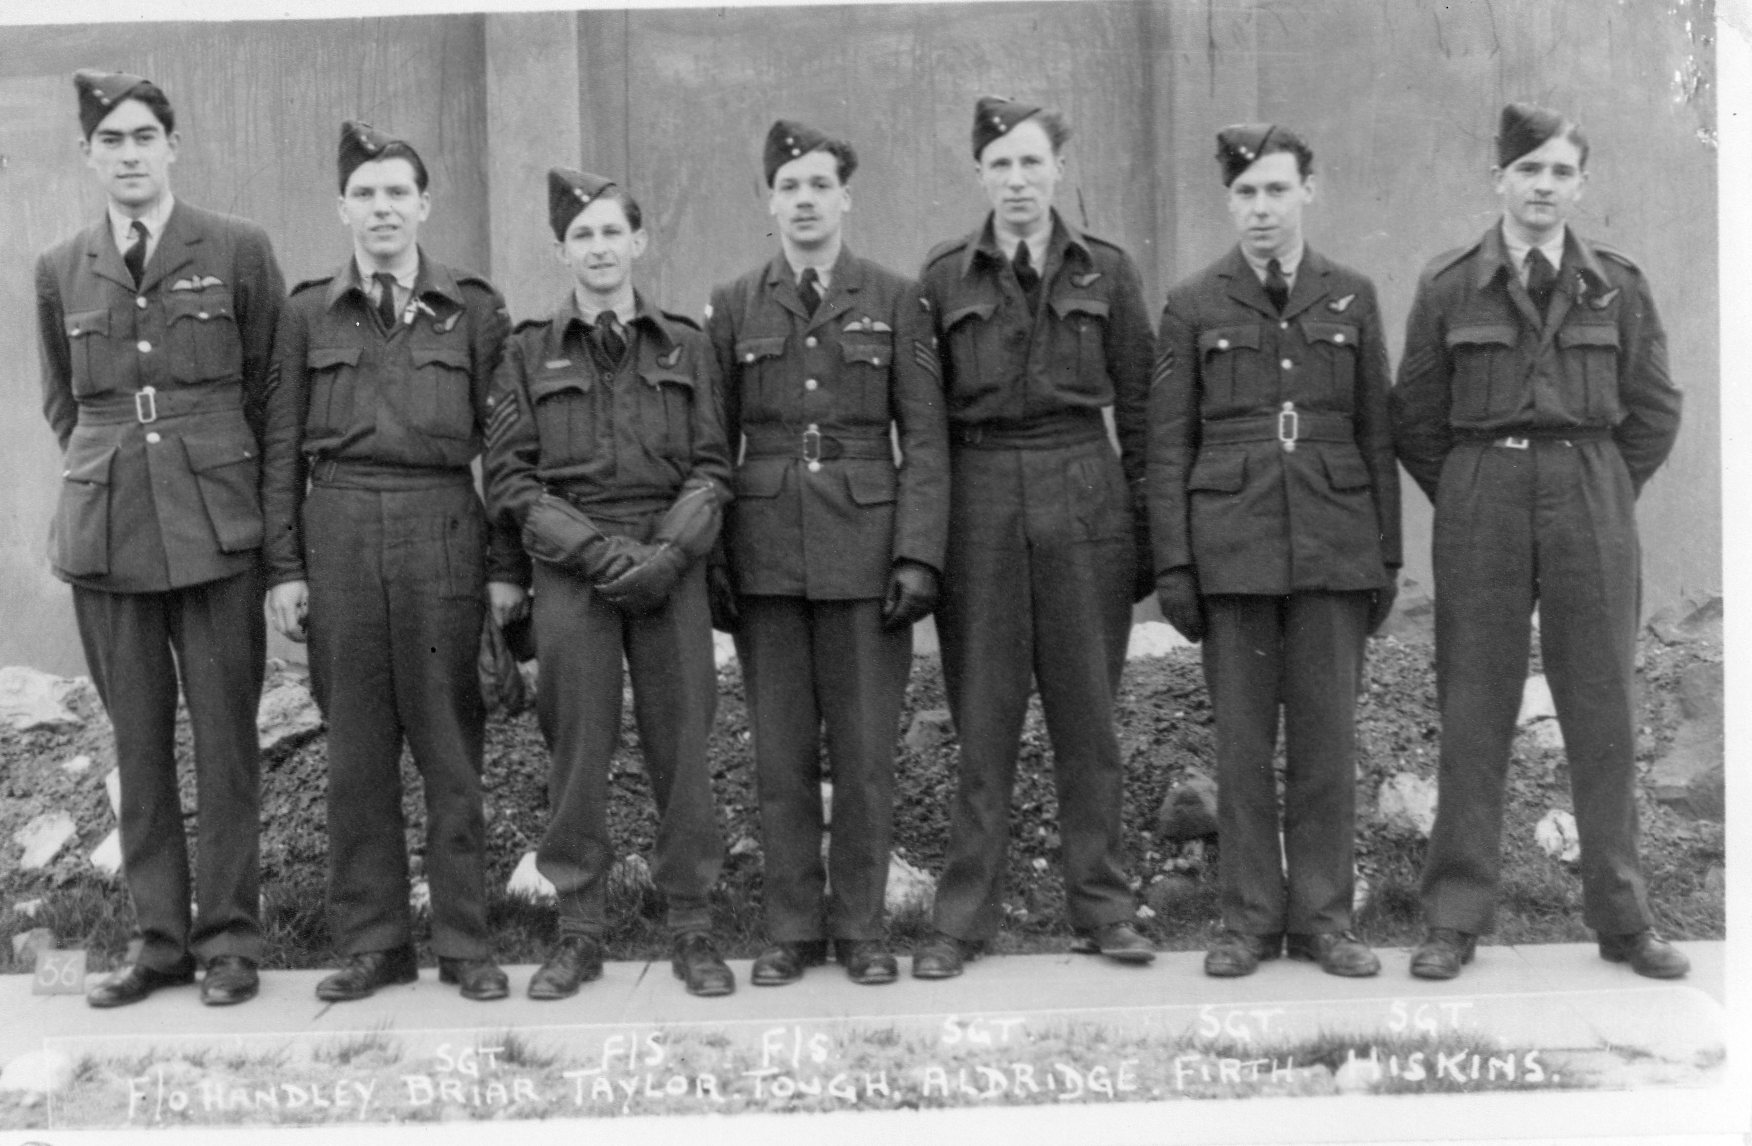 |
For further information and photos click here |
F/O J E Franklyn DFC and Crew
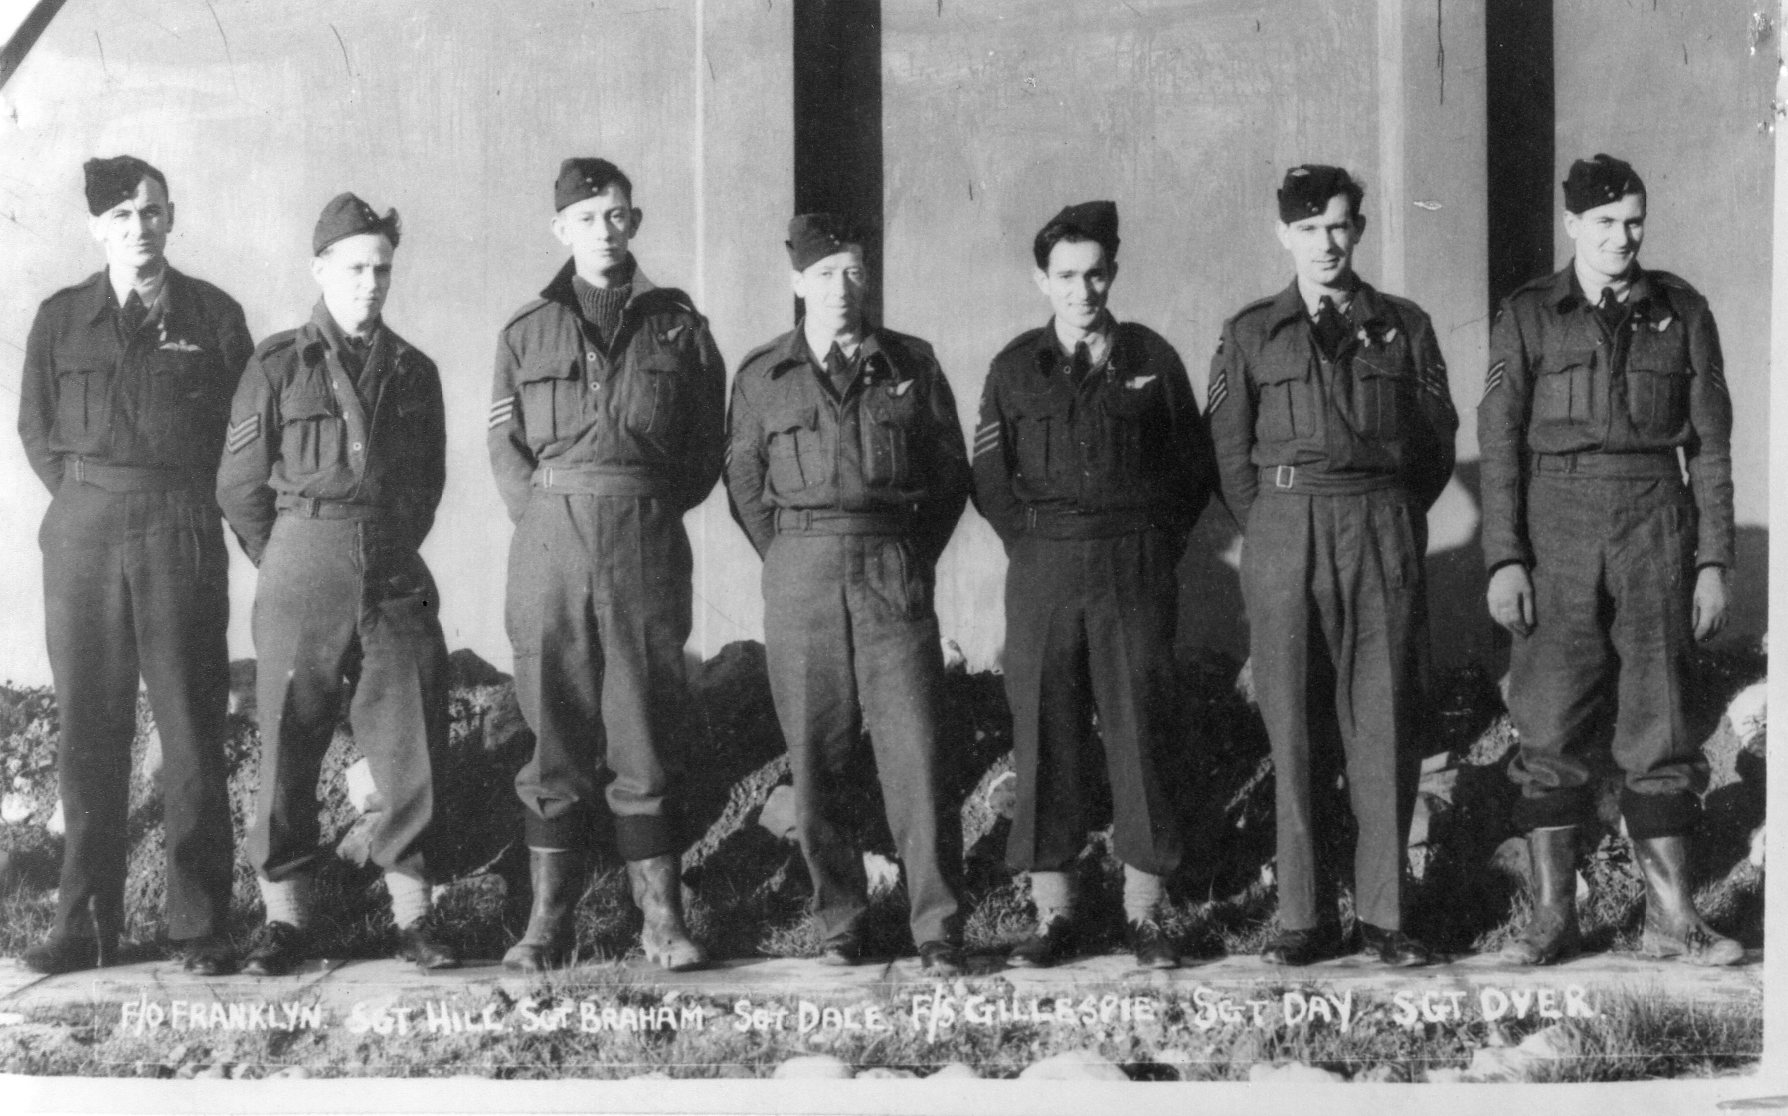 |
Brother of F/O R P Franklyn DFC, also of 550 Sqdn (see below)
For further information and photos click here |
F/O R P Franklyn DFC and Crew
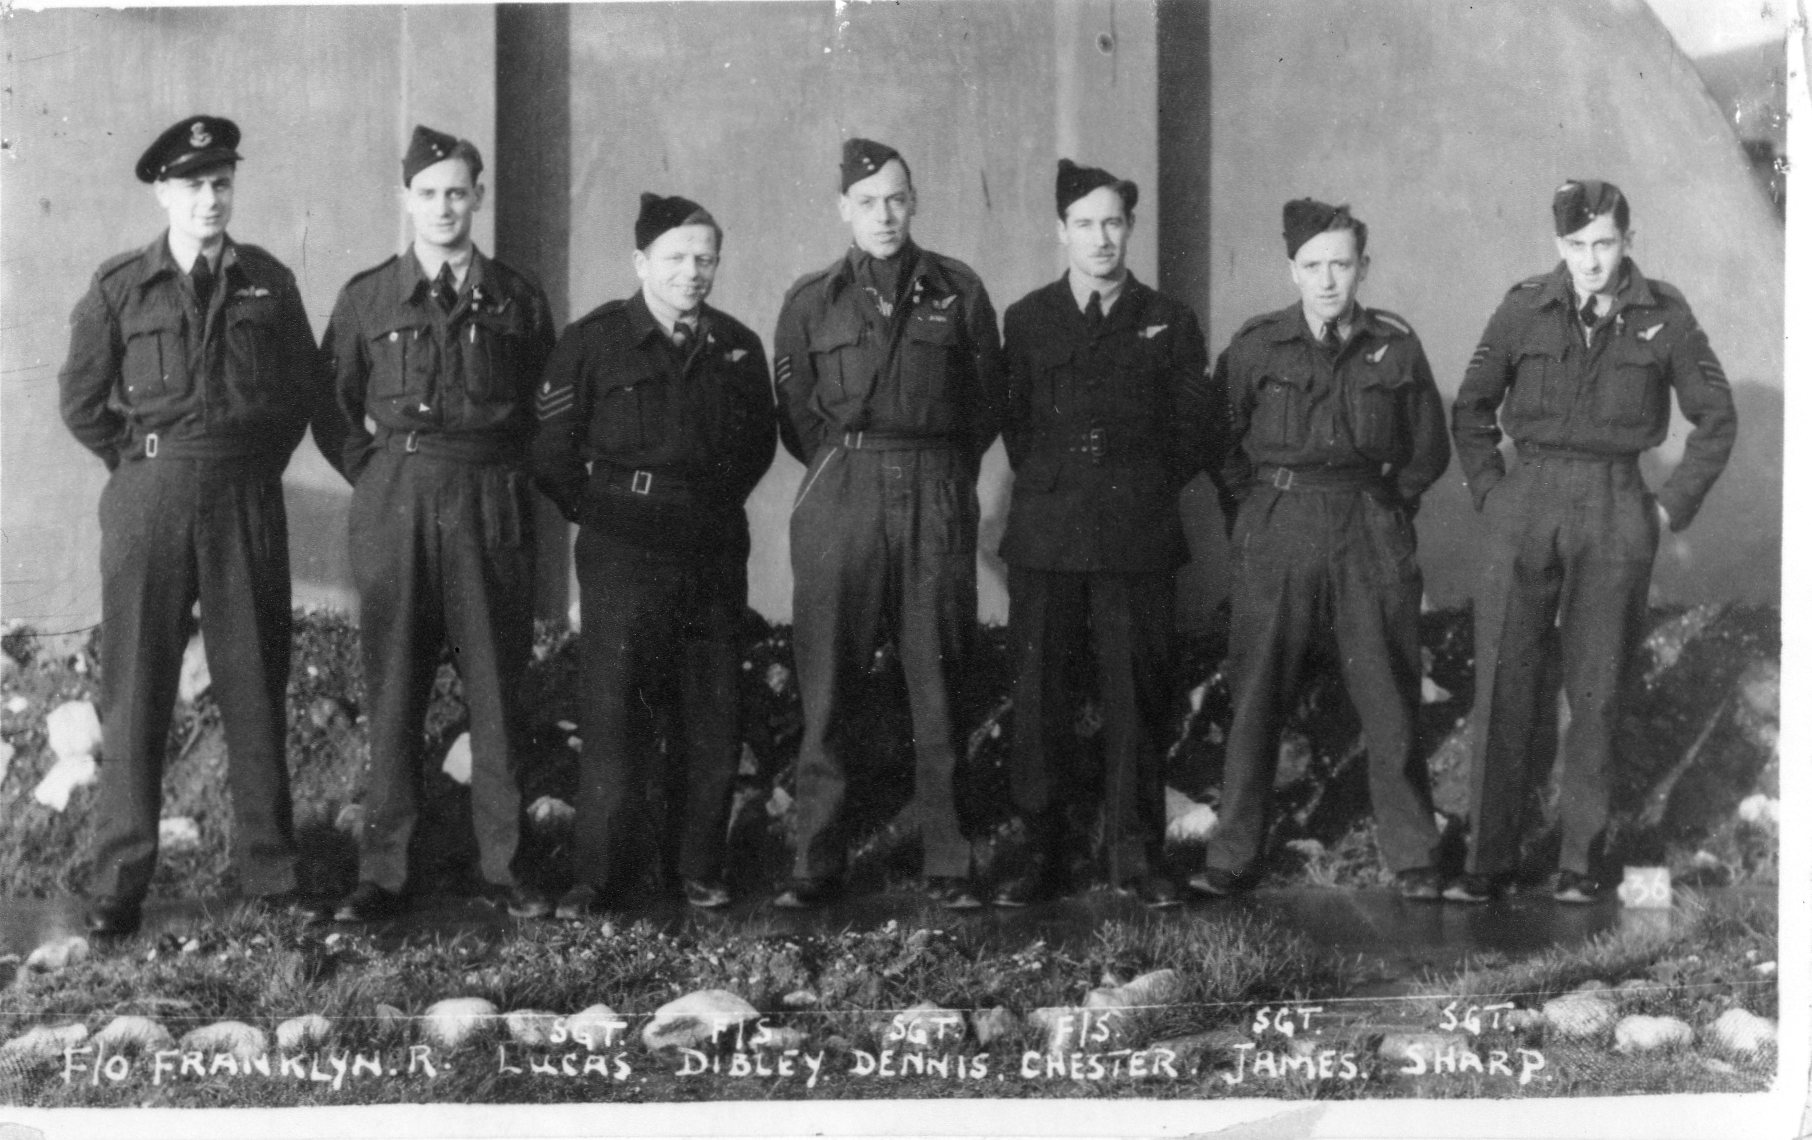 |
Brother of F/O J E Franklyn DFC, also of 550 Sqdn (see above)
For further information and photos click here |
F/Lt L Dale DFC and Crew
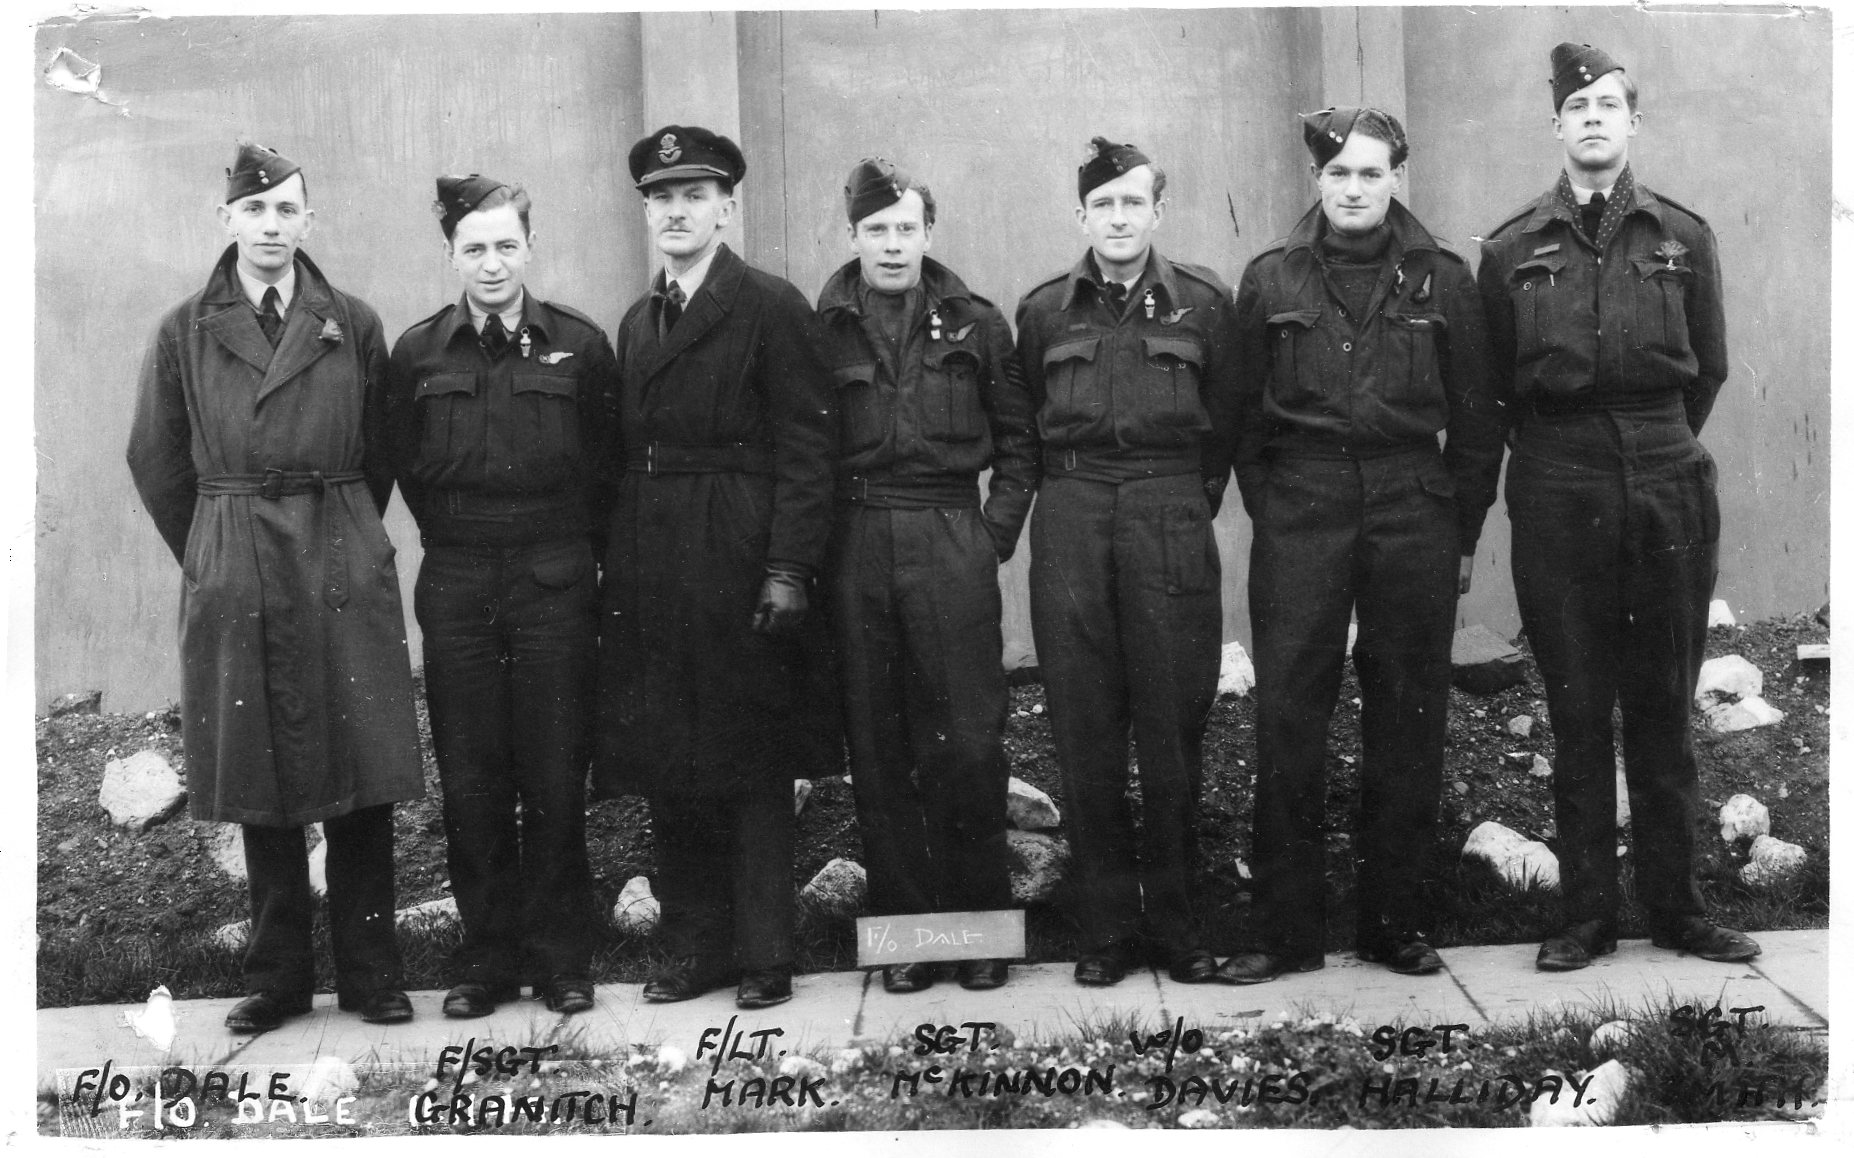 |
For further information and photos click here |
F/O G P Fauman and Crew
 |
For further information and photos click here
Picture courtesy of David Drake |
F/O C J Jones and Crew
 |
For further information and photos click here |
F/Lt R J Liefooghe and Crew
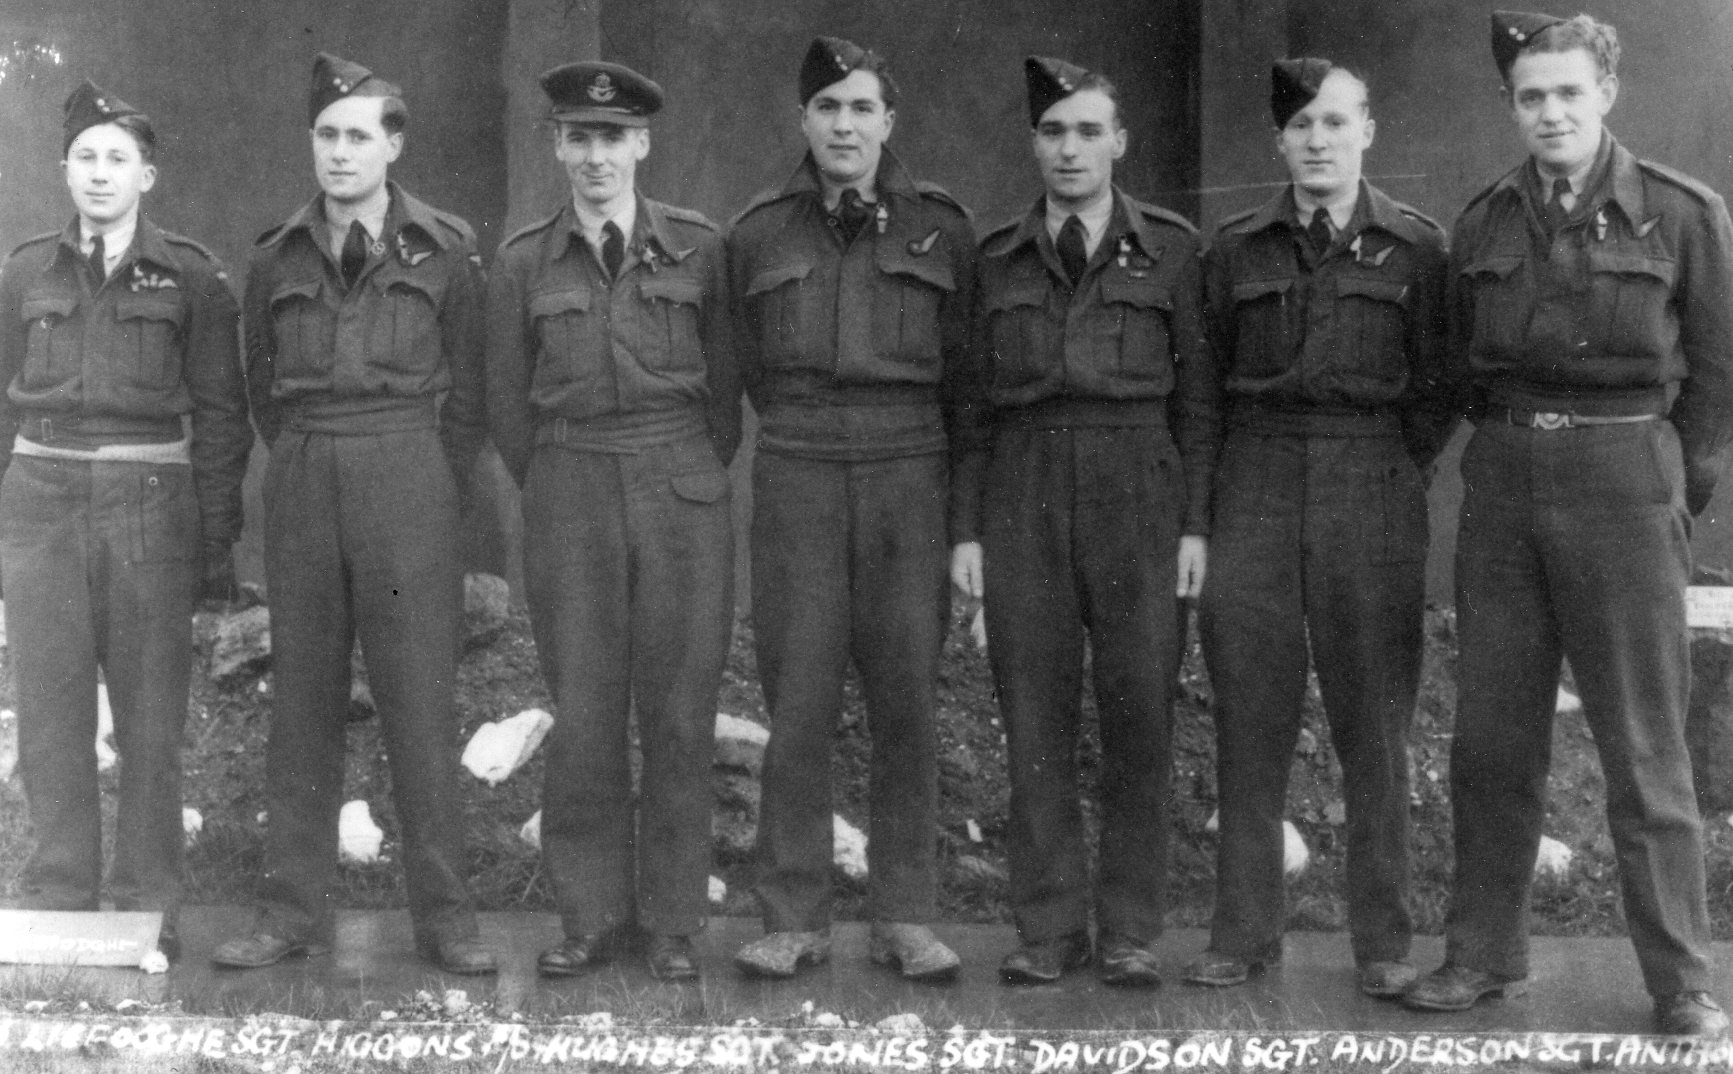 |
For further information and photos click here |
F/Sgt Dexter and Crew
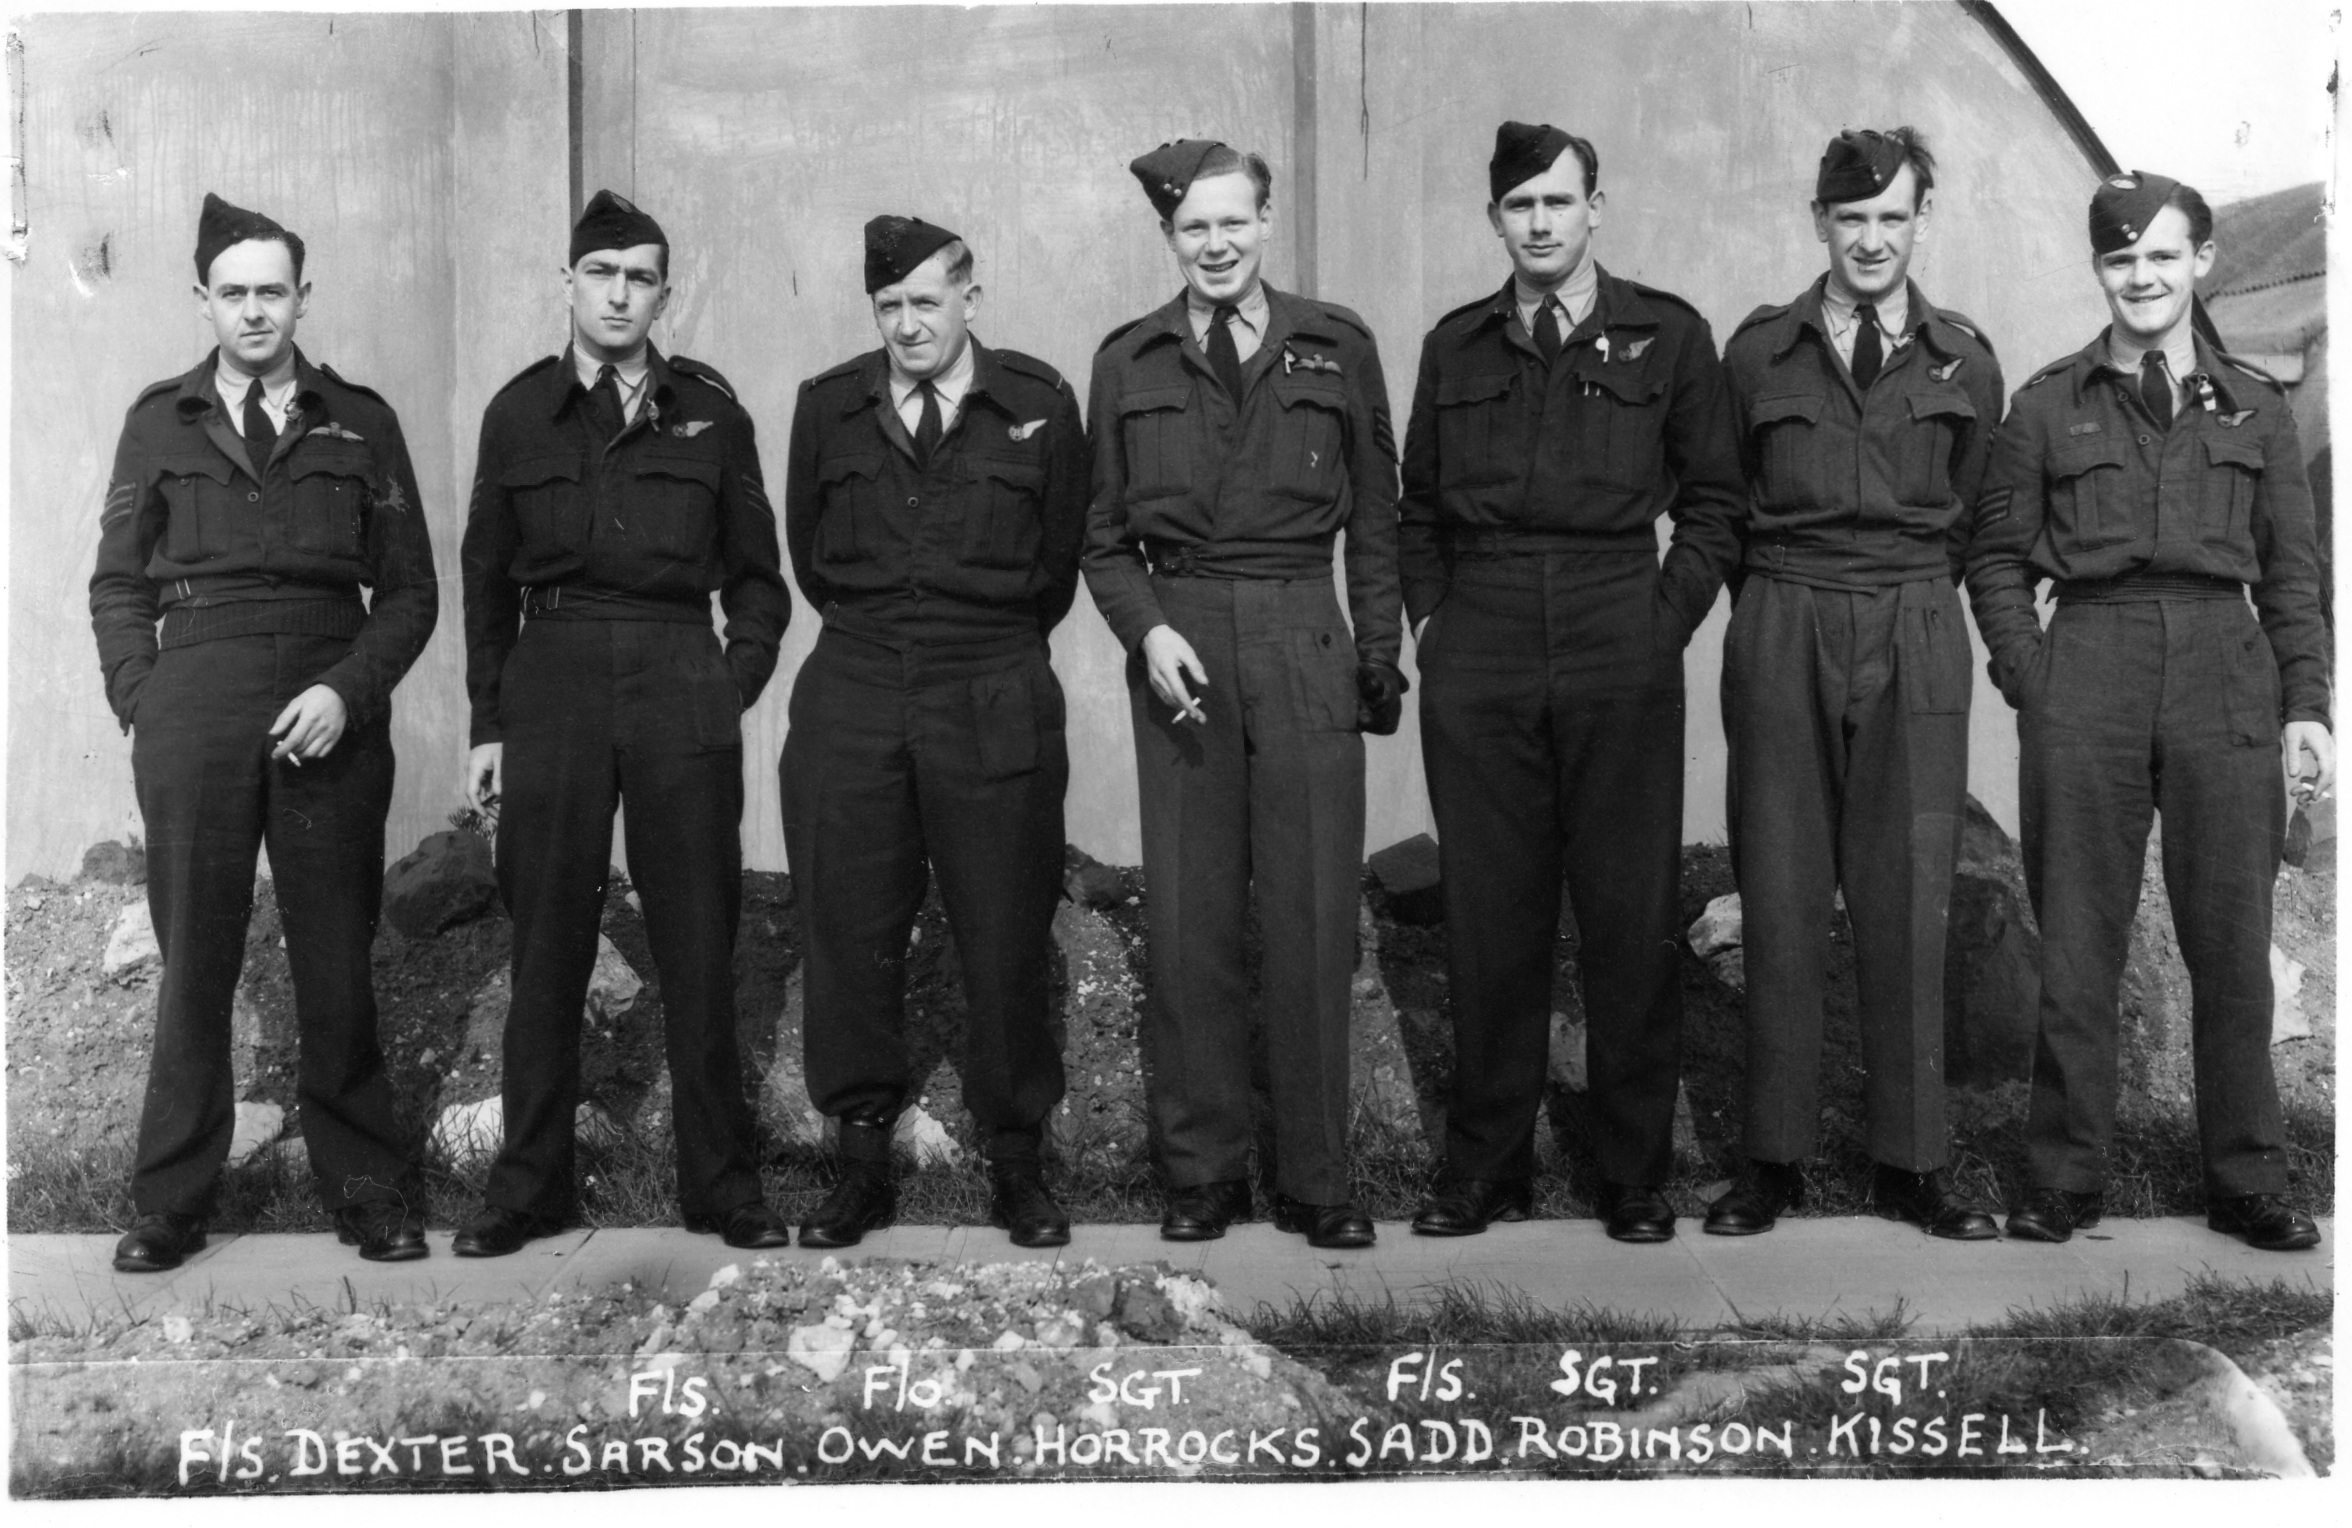 |
For further information and photos click here |
F/Lt H S Grimes and Crew
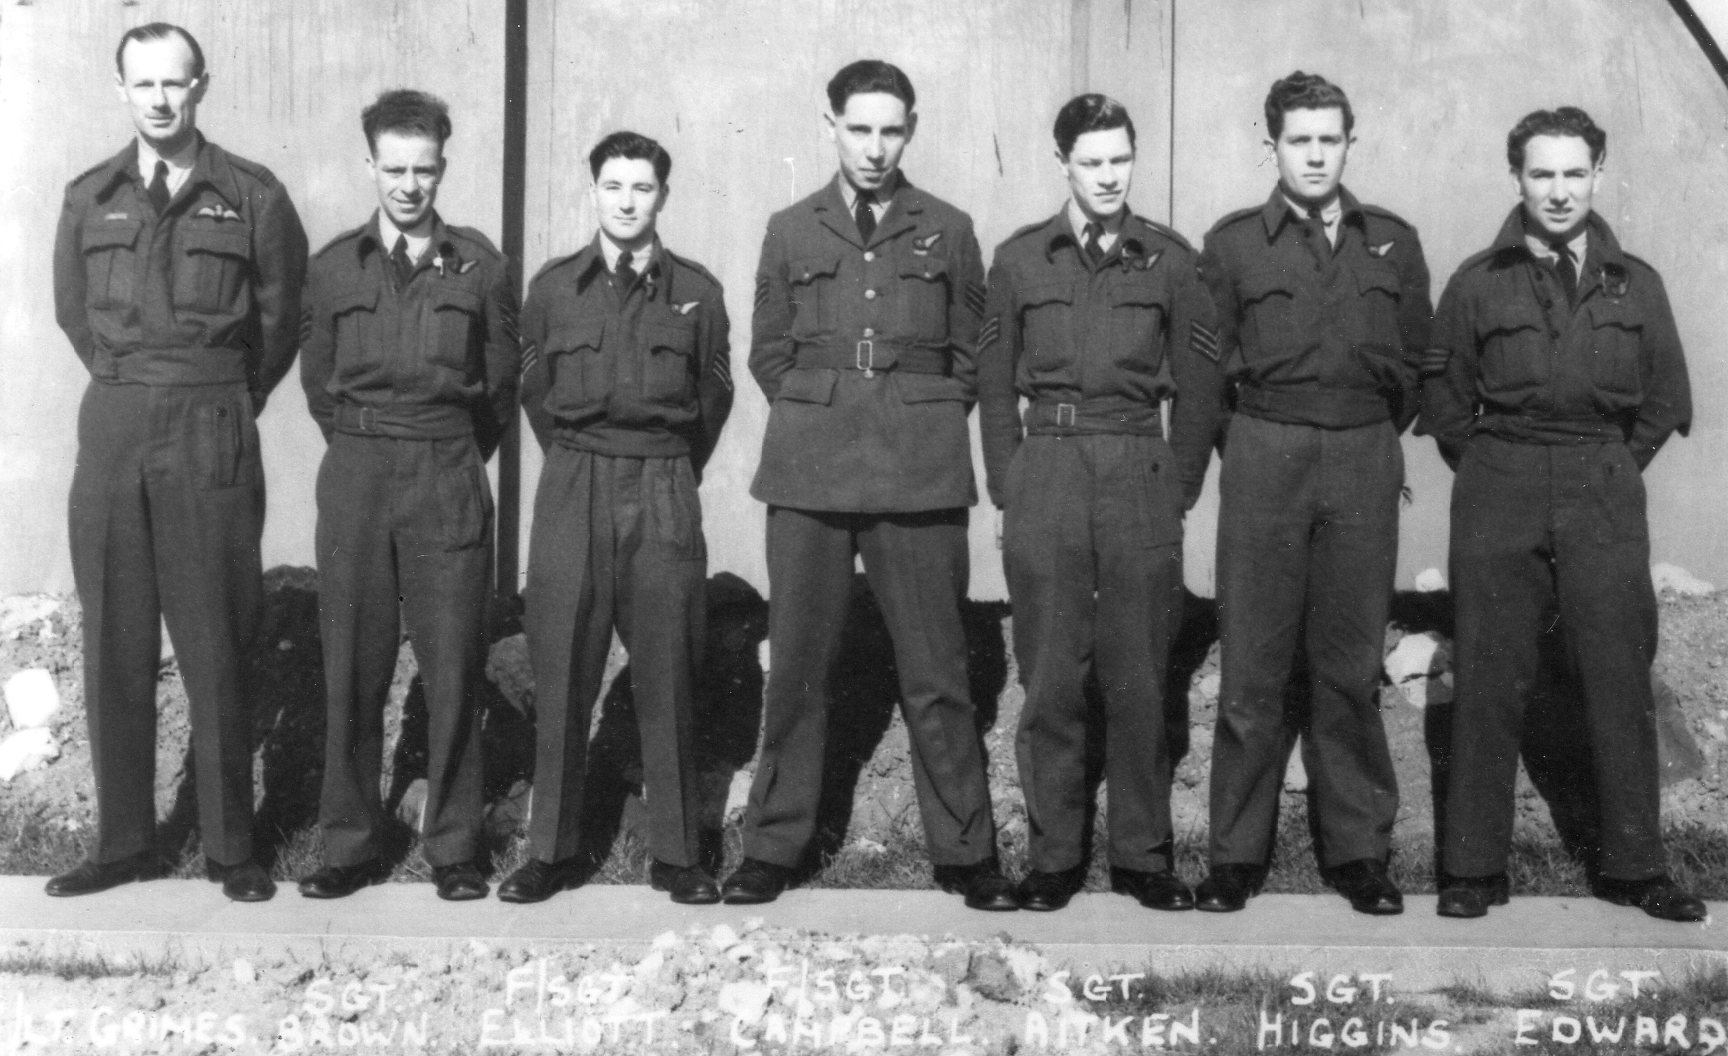 |
For further information and photos click here |
S/Ldr E L Gosling and Crew
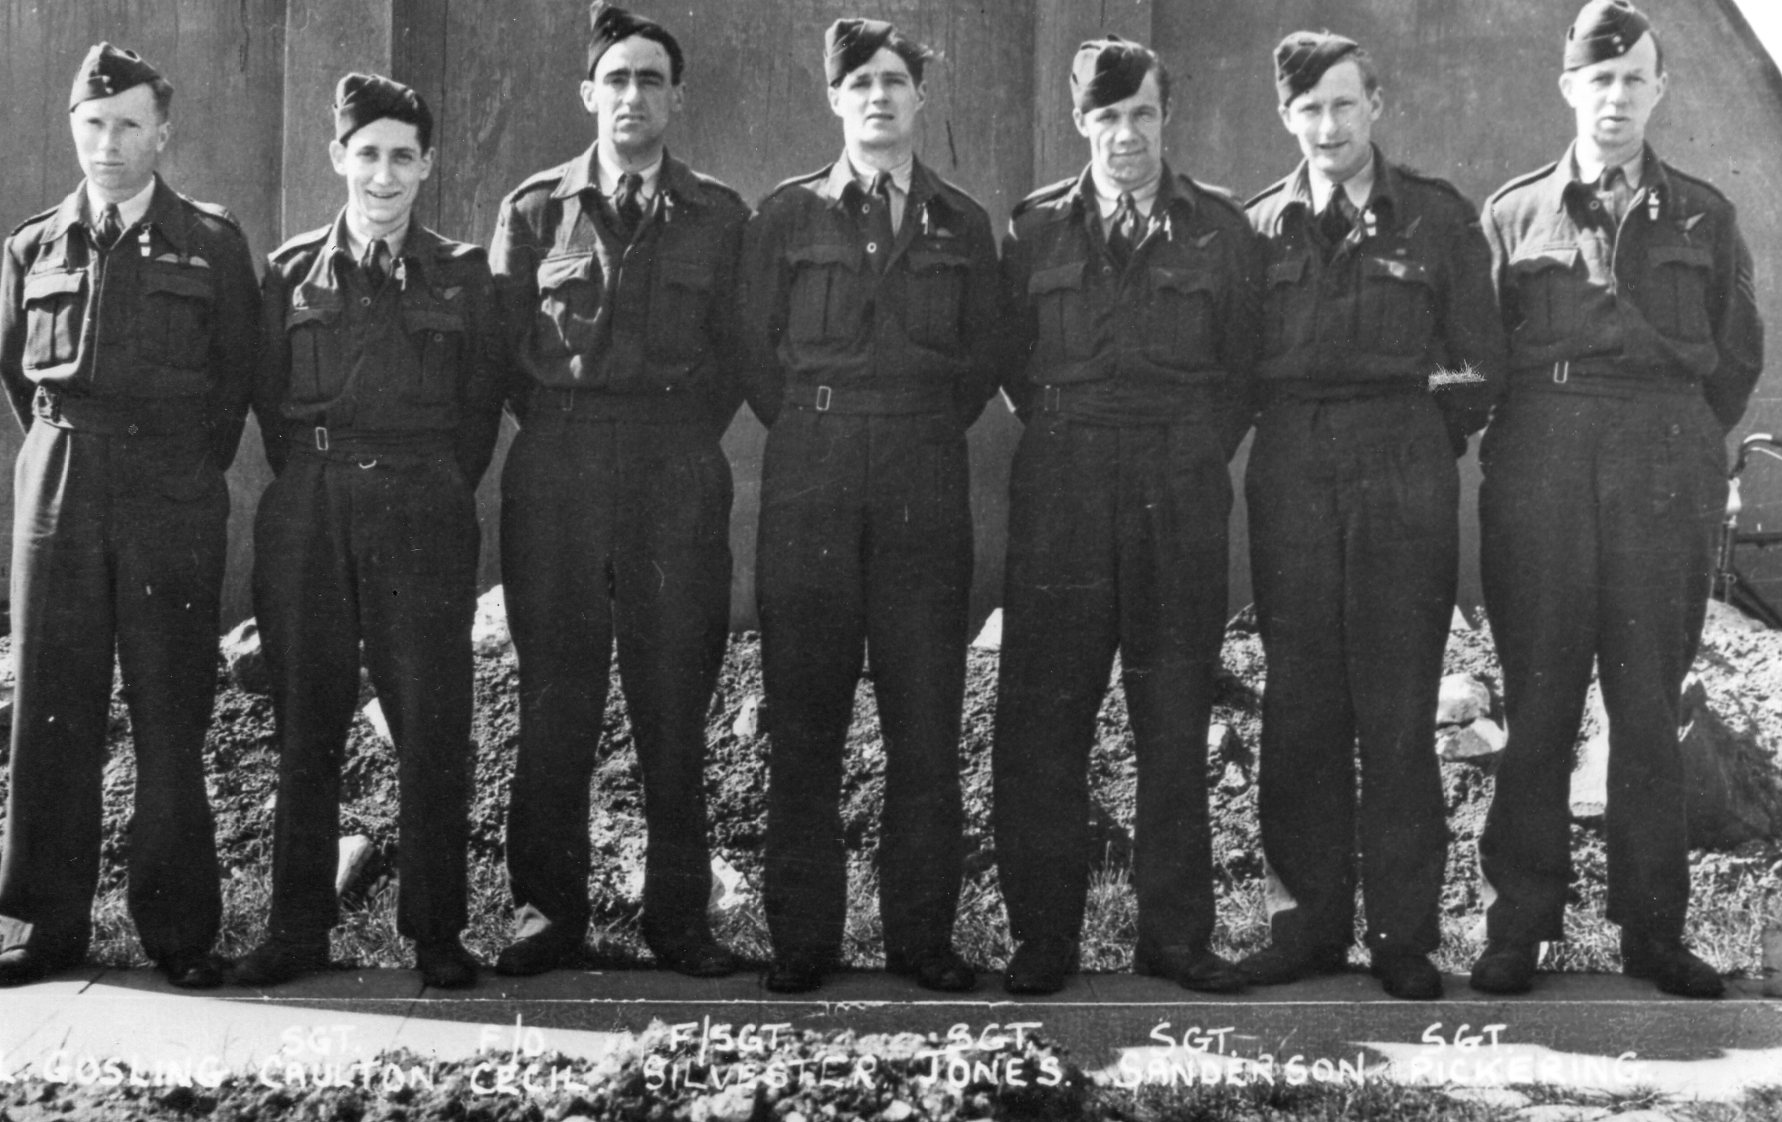 |
For further information and photos click here |
F/Sgt K F Wilson and Crew
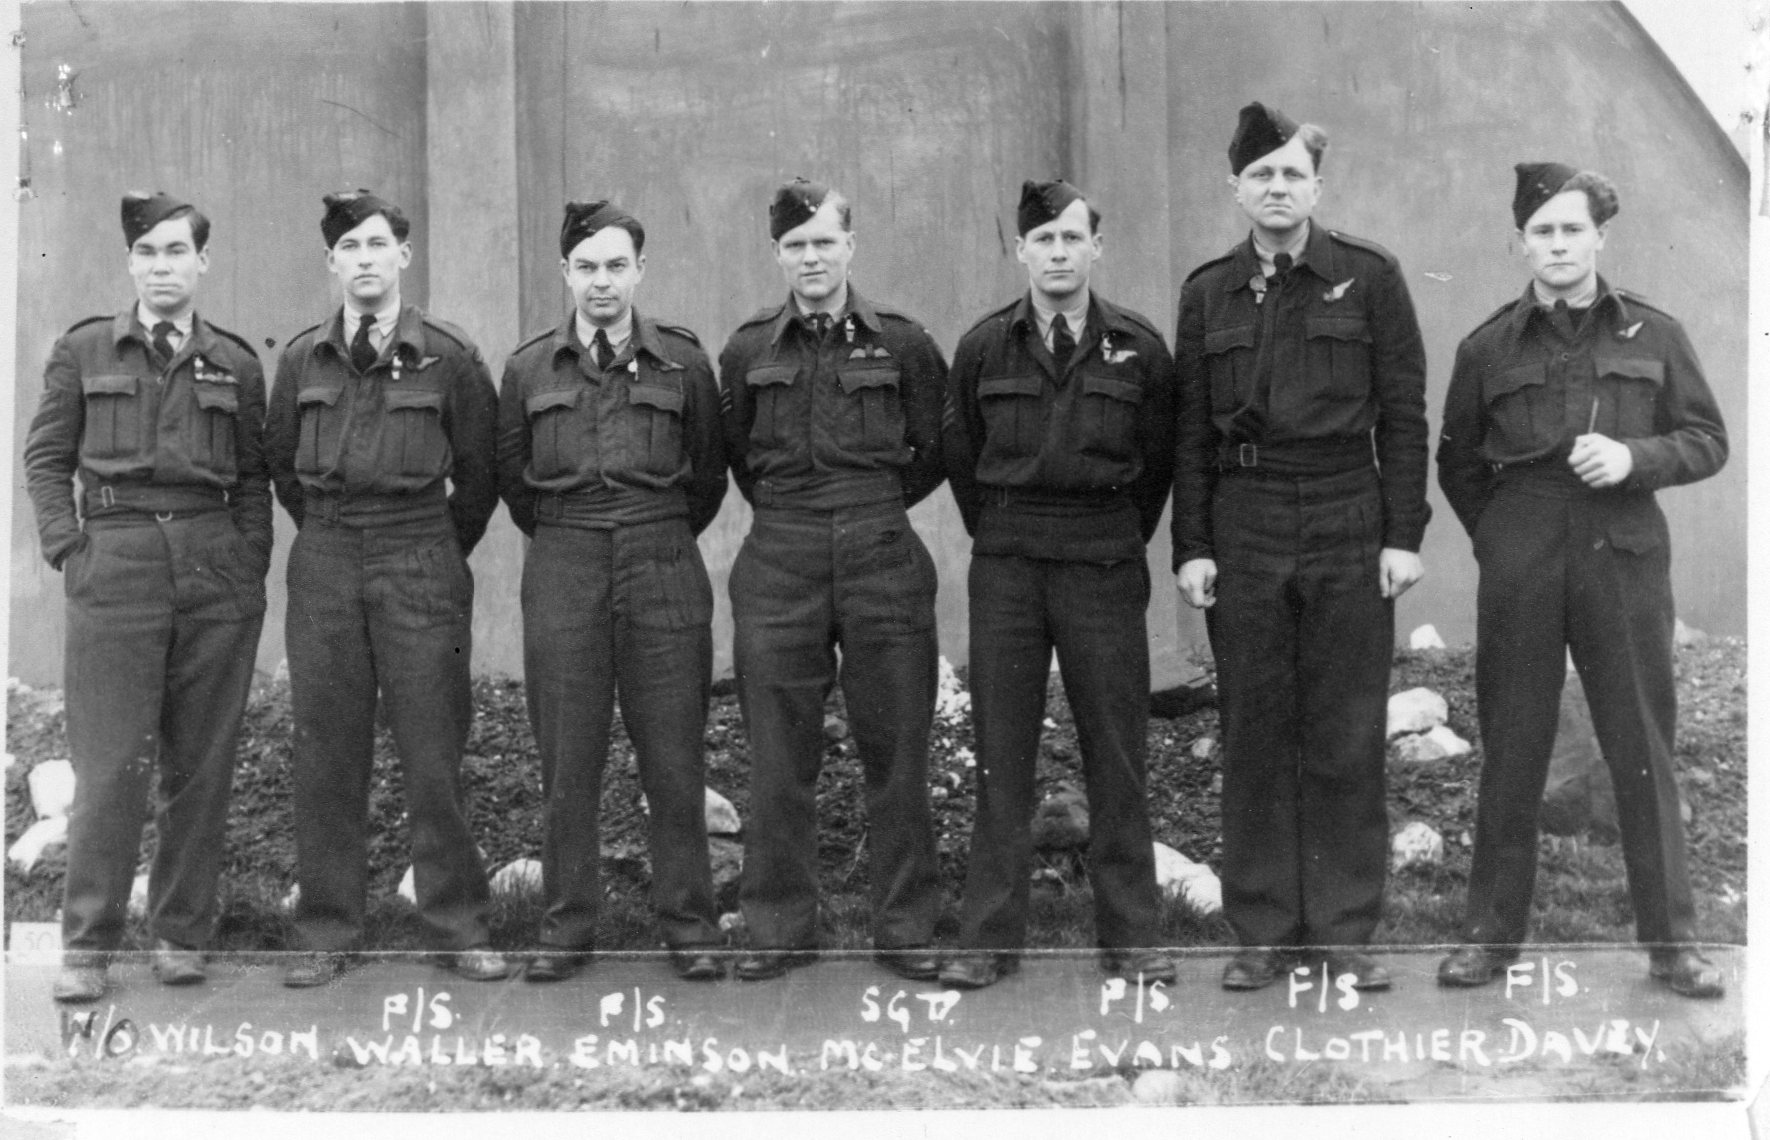 |
For further information and photos click here |
F/Lt D E A Luger and Crew
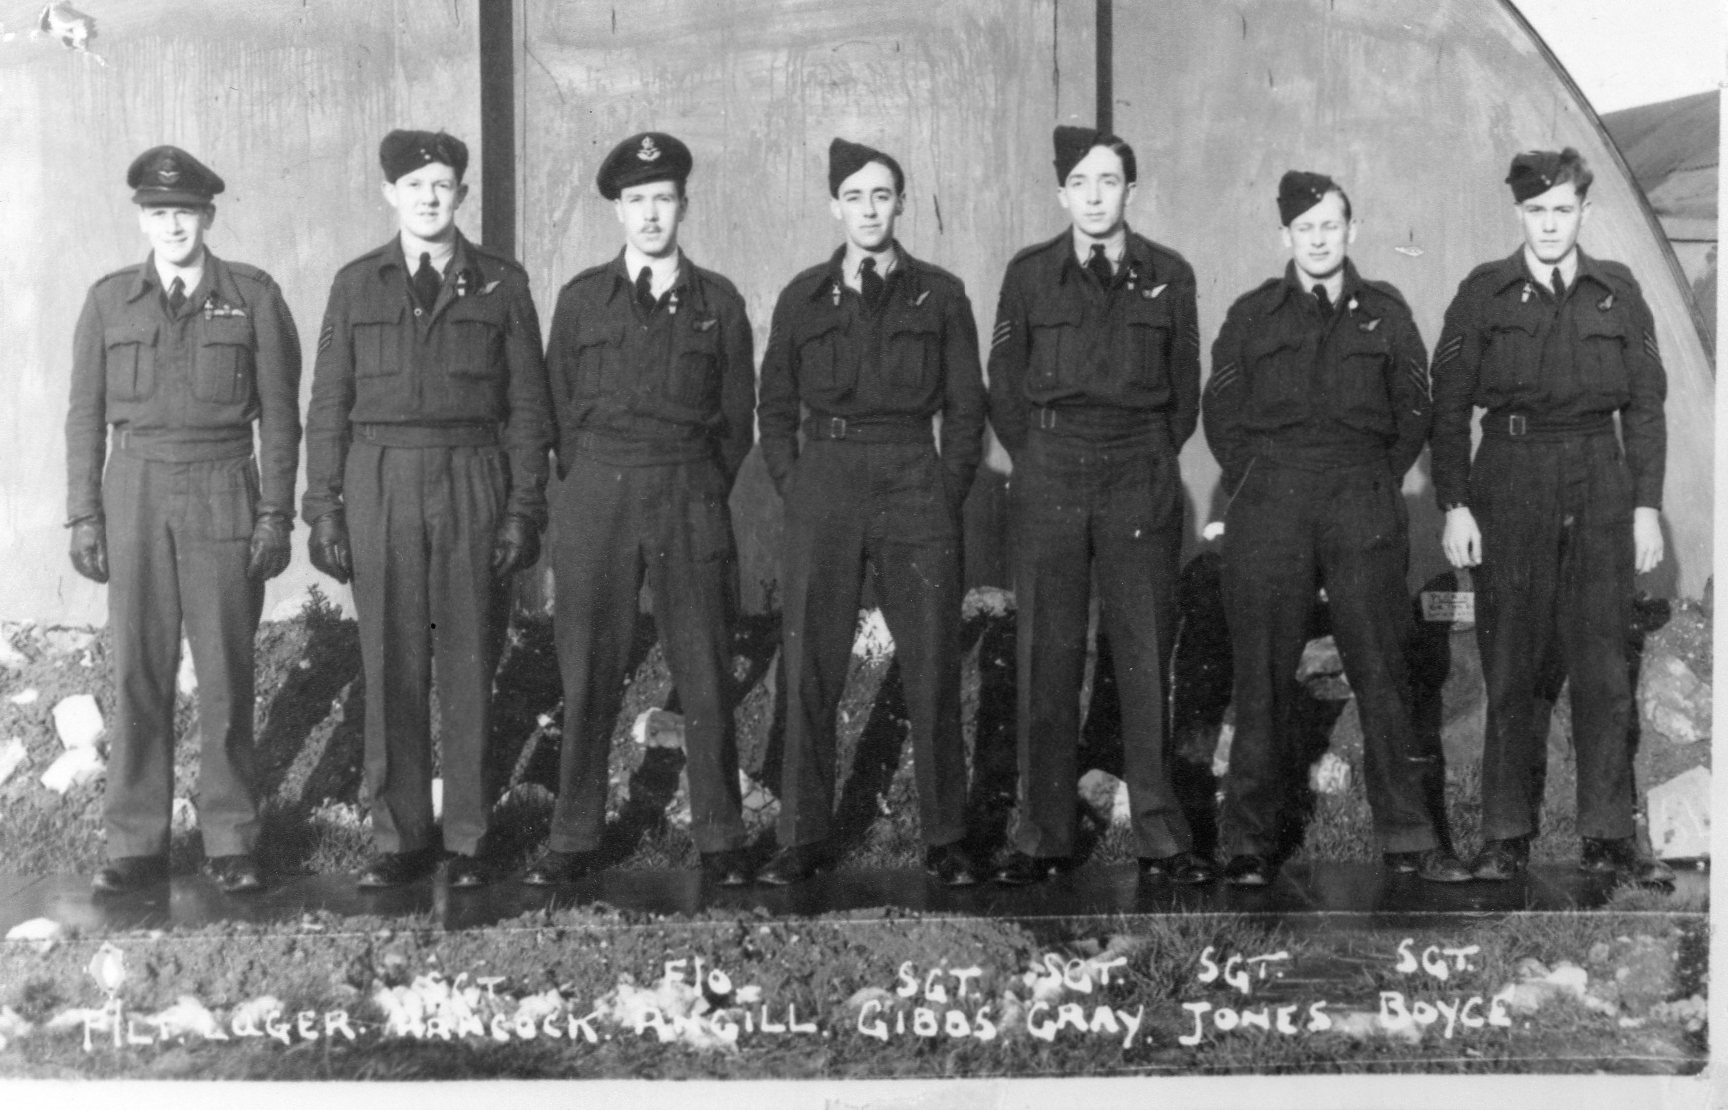 |
For further information and photos click here |
P/O R A Jones and Crew
All of these photos are members of P/O Jones crew; to date a photo of the full crew is unavailable.
All pictures courtesy of Mark Simpson.
For further information about this crew click here.
 |
 |
 |
 |
F/Lt E G Blakeway and Crew
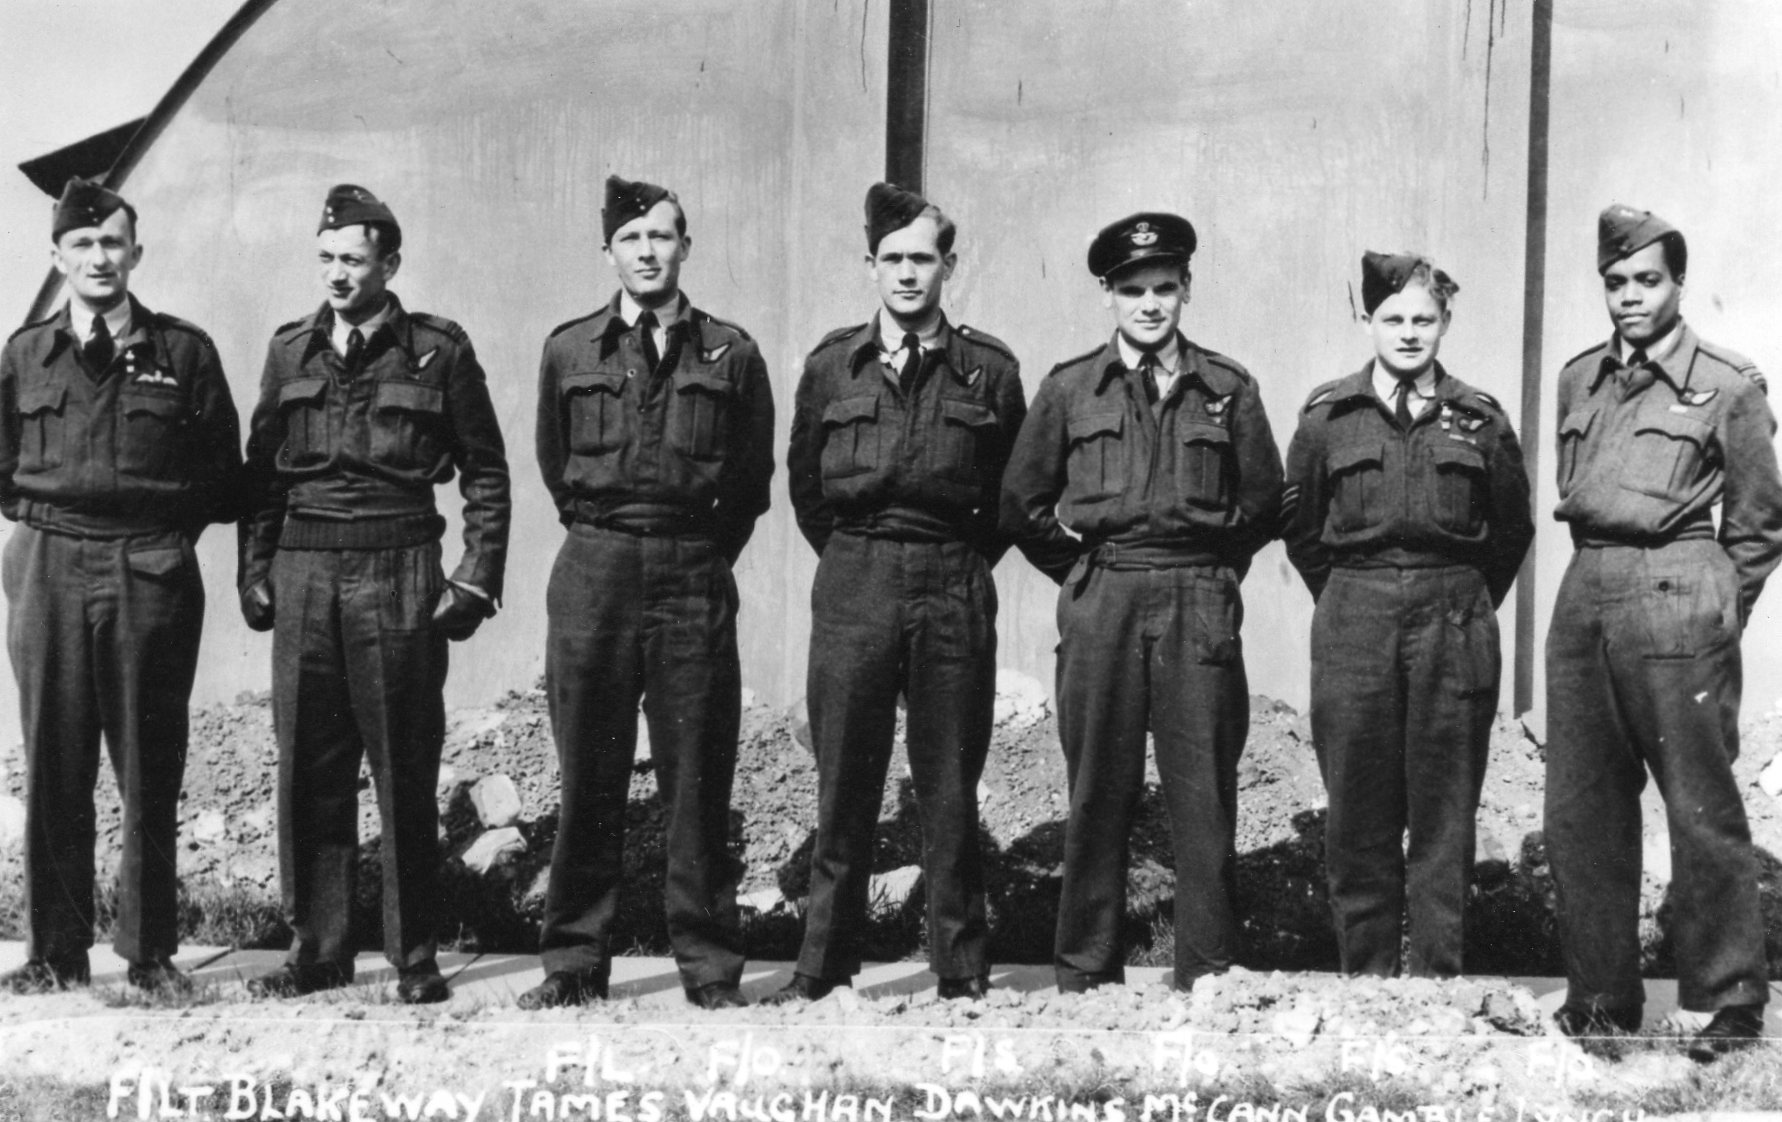 |
For further information and photos click here |
F/Lt N A Burrows and Crew
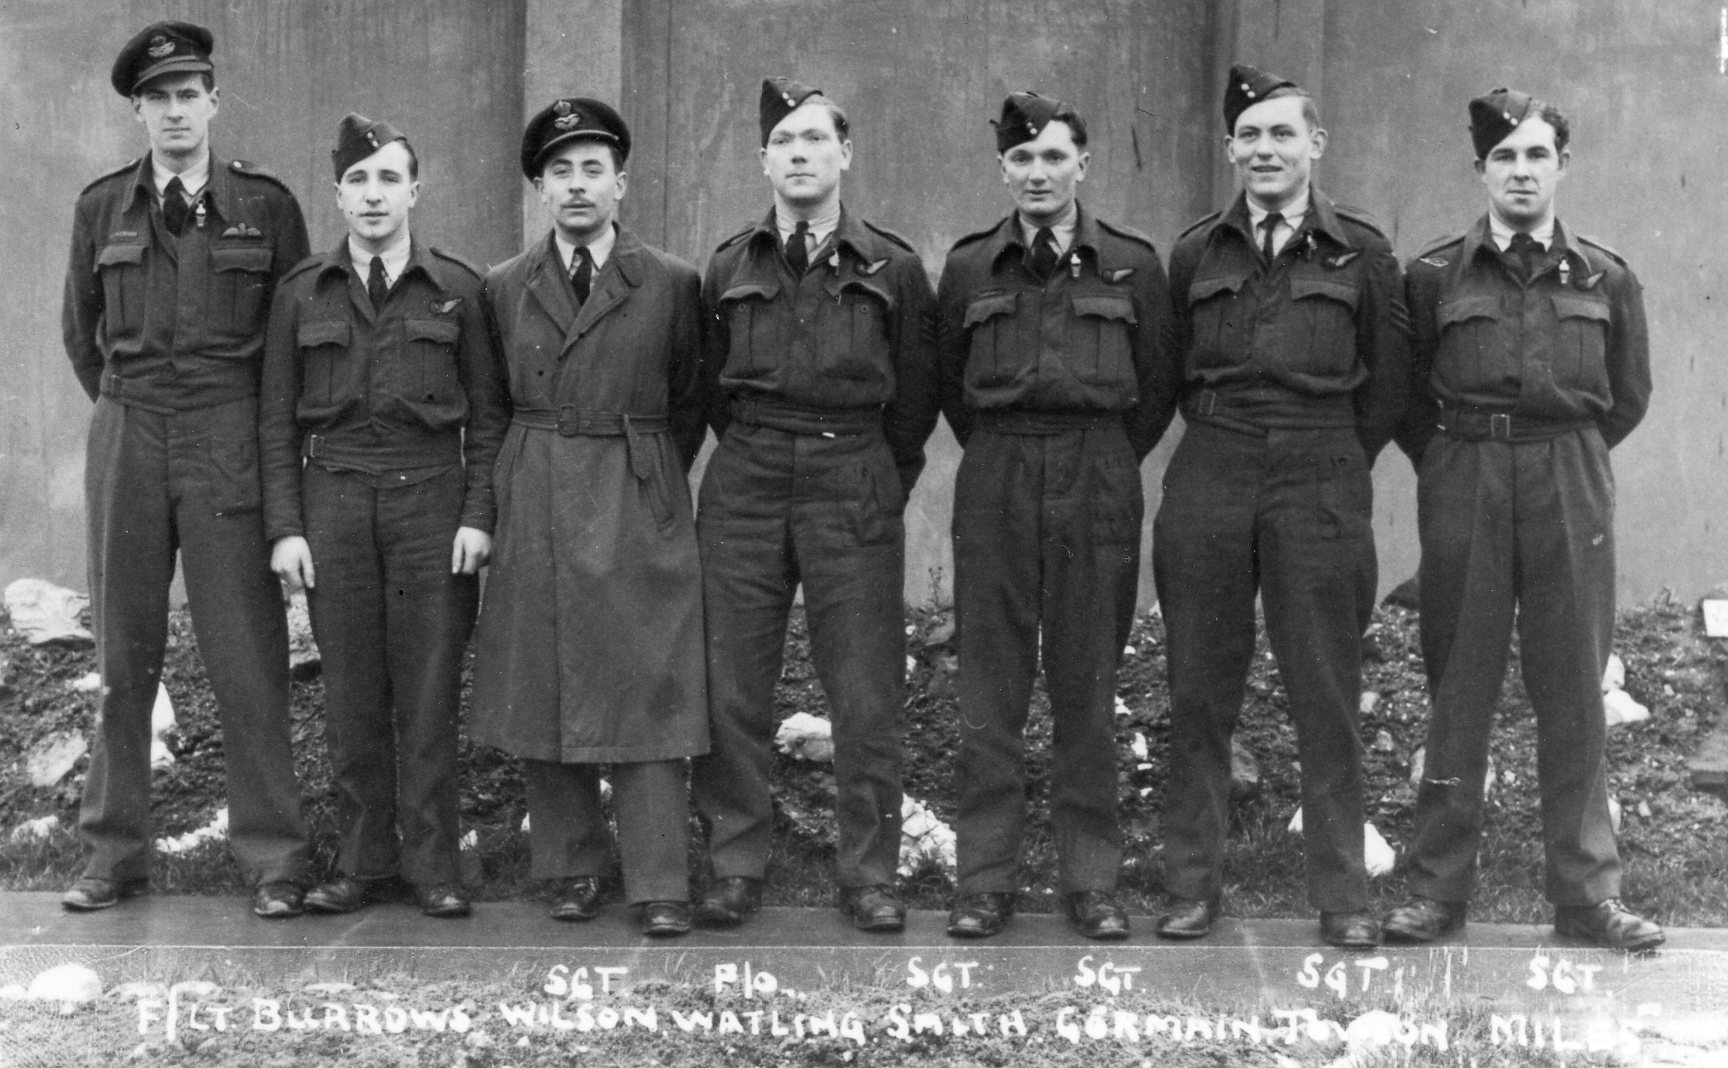 |
For further information and photos click here |
F/Lt E H Luder and Crew
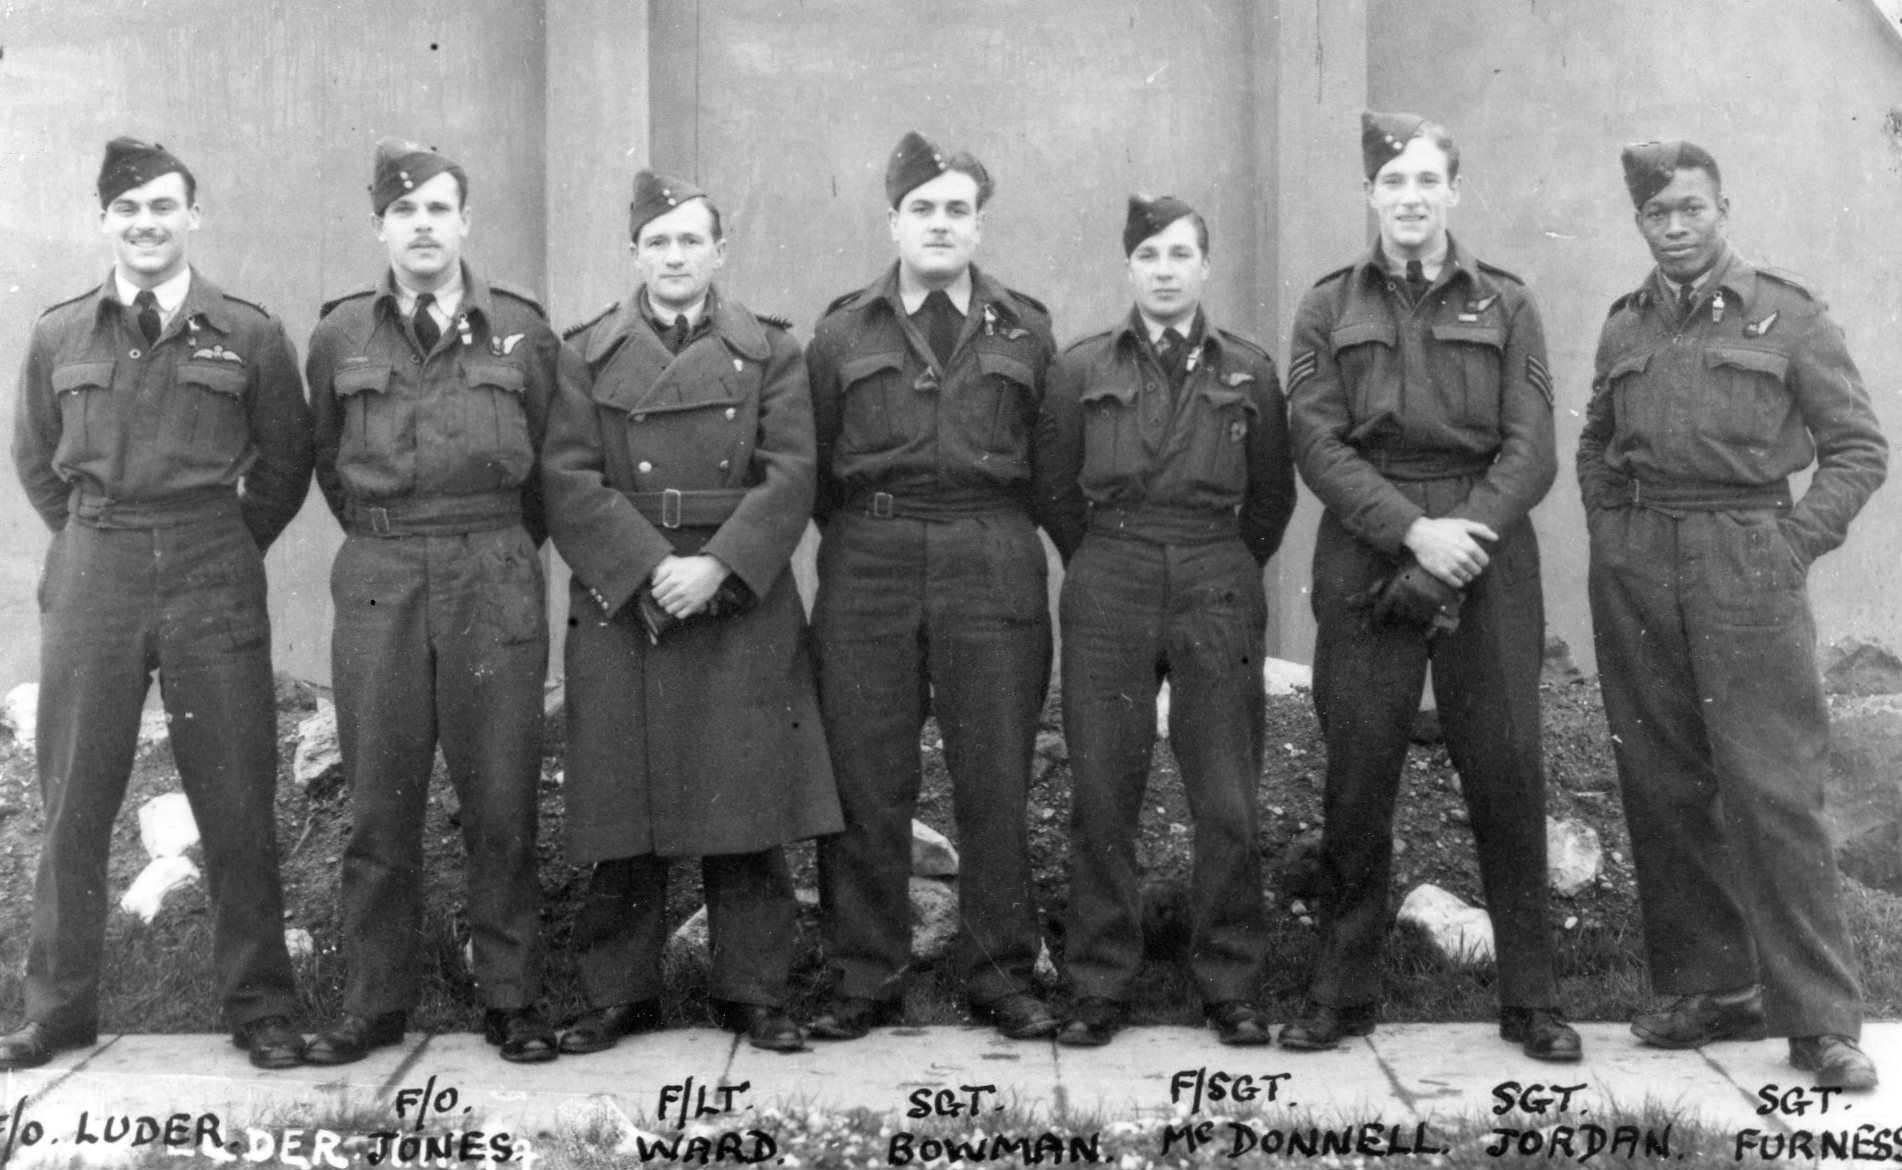 |
For further information and photos click here |
F/Lt J P Morris and Crew
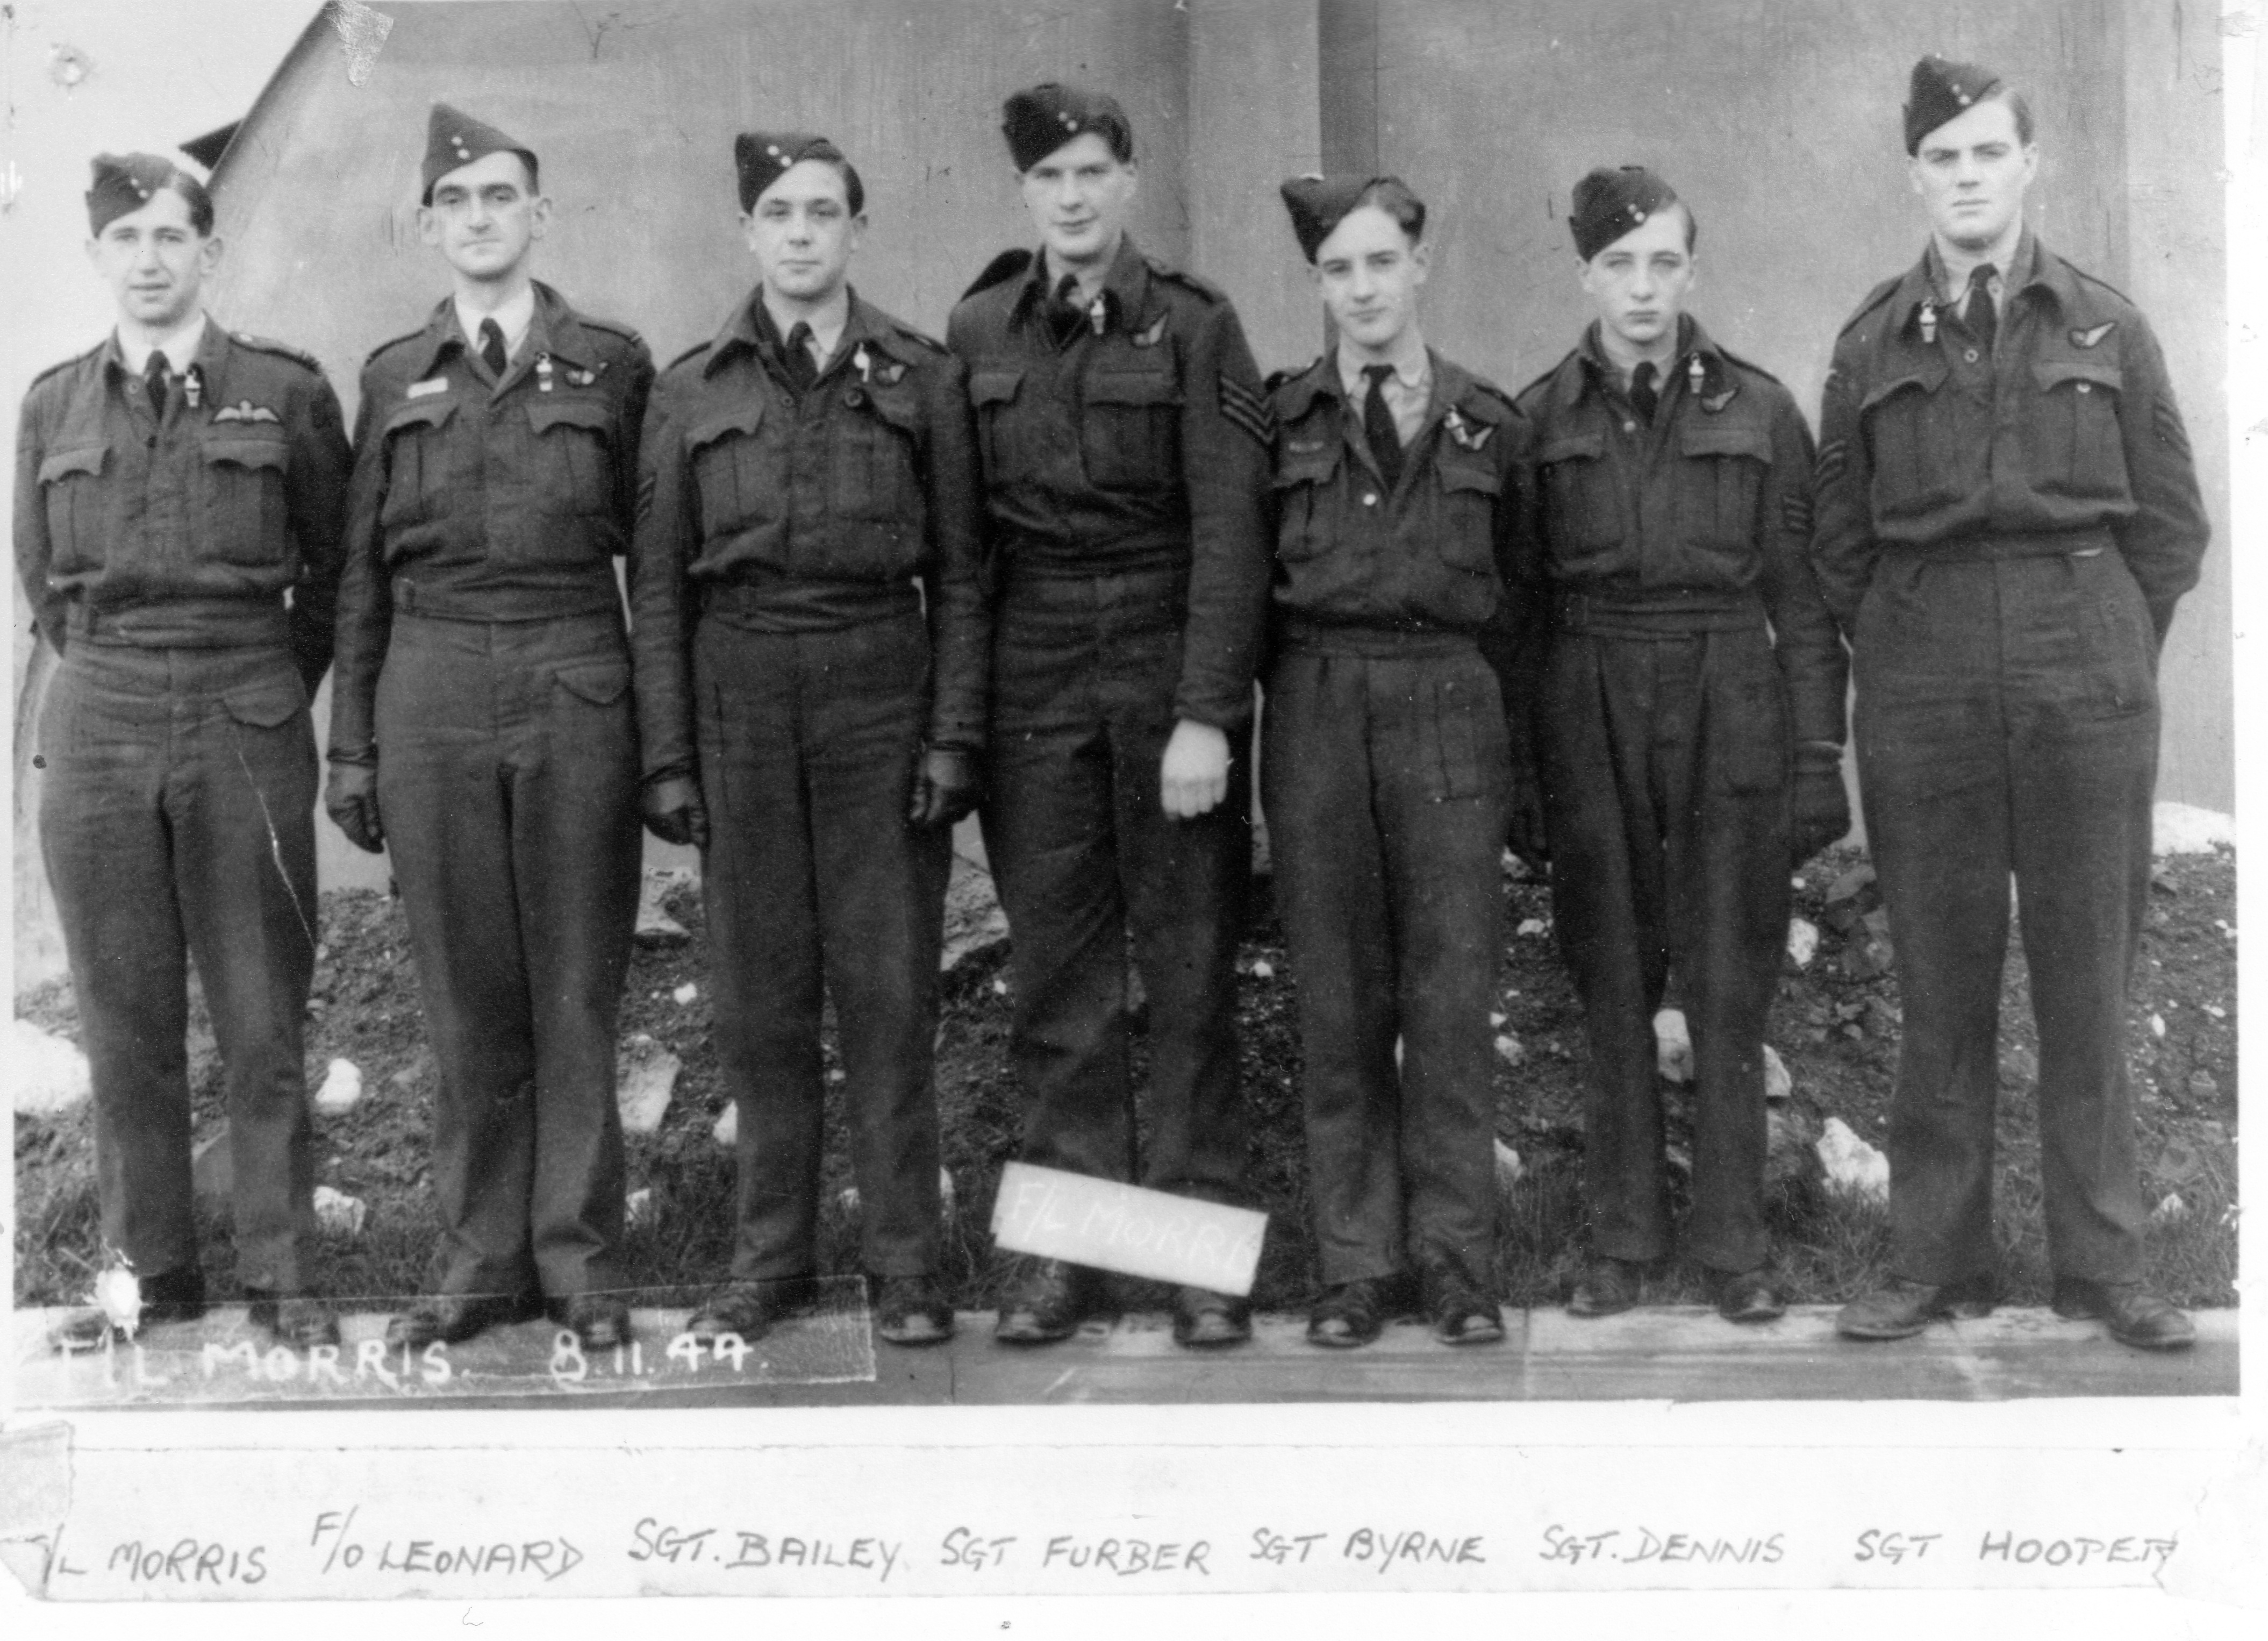 |
For further information and photos click here |
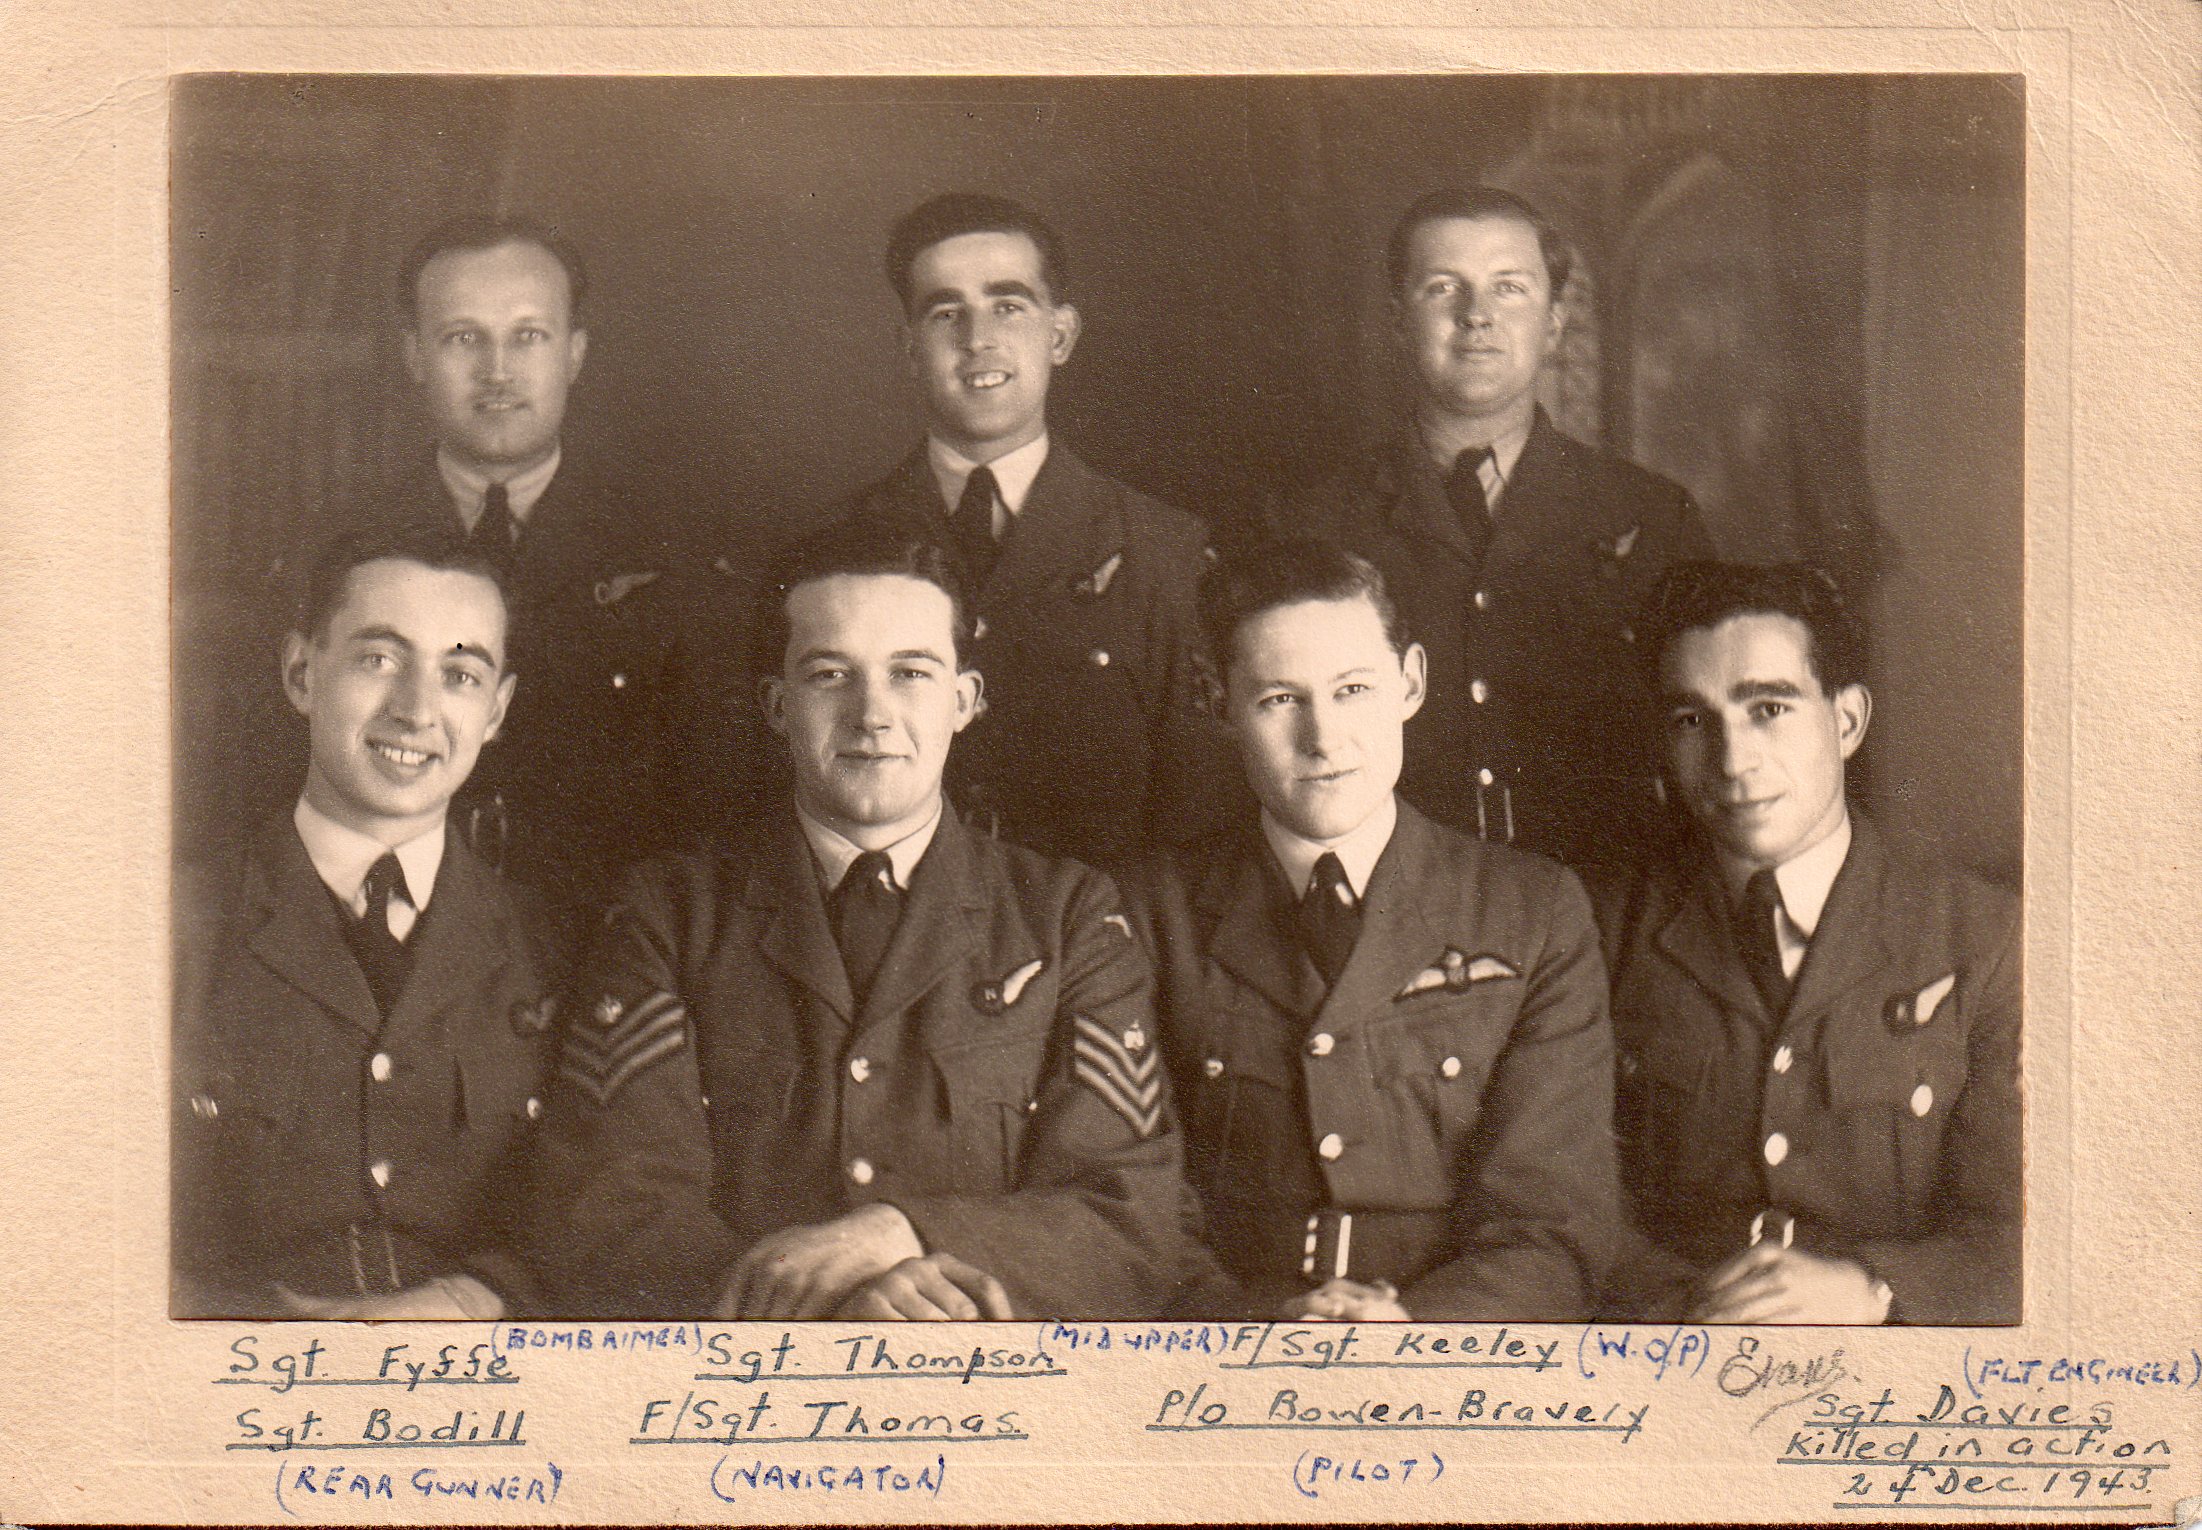
F/O K Bowen-Bravery DFC, CdG and Crew
 |
For further information and photos click here |
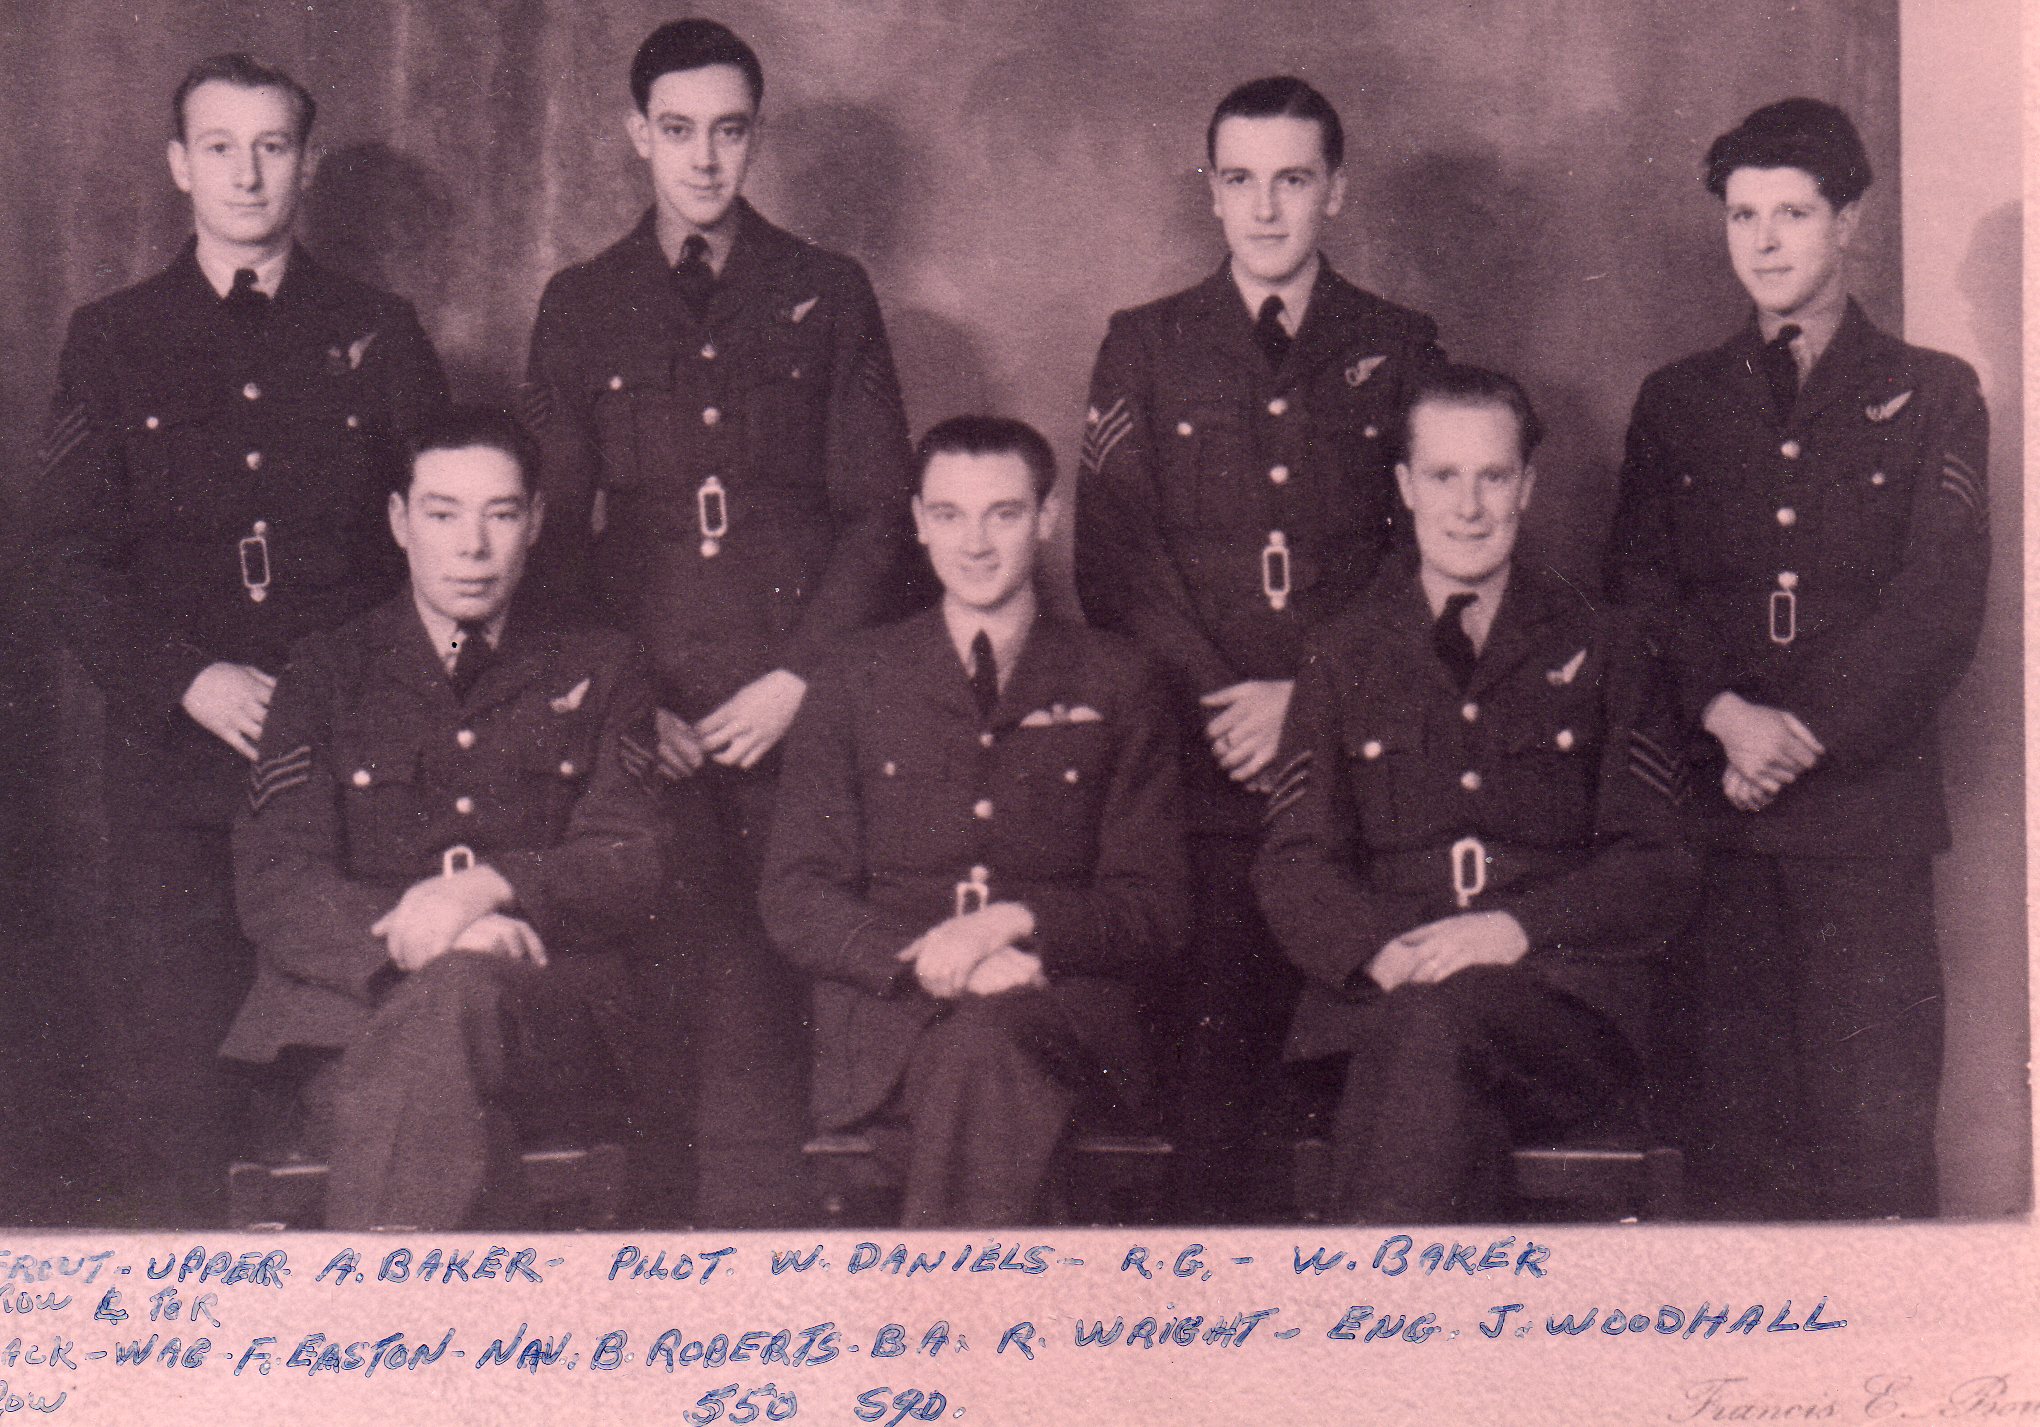
P/O Daniels and Crew
 |
For further information and photos click here |
F/O F J Cox and Crew
 |
For further information and photos click here |
F/O CJ Clarke and Crew
 |
For further information and photos click here |
P/O A G Elliott and Crew
 |
For further information and photos click here |
F/O M L Dubois DFC and Crew
 |
For further information and photos click here |
F/Sgt Wall and Crew
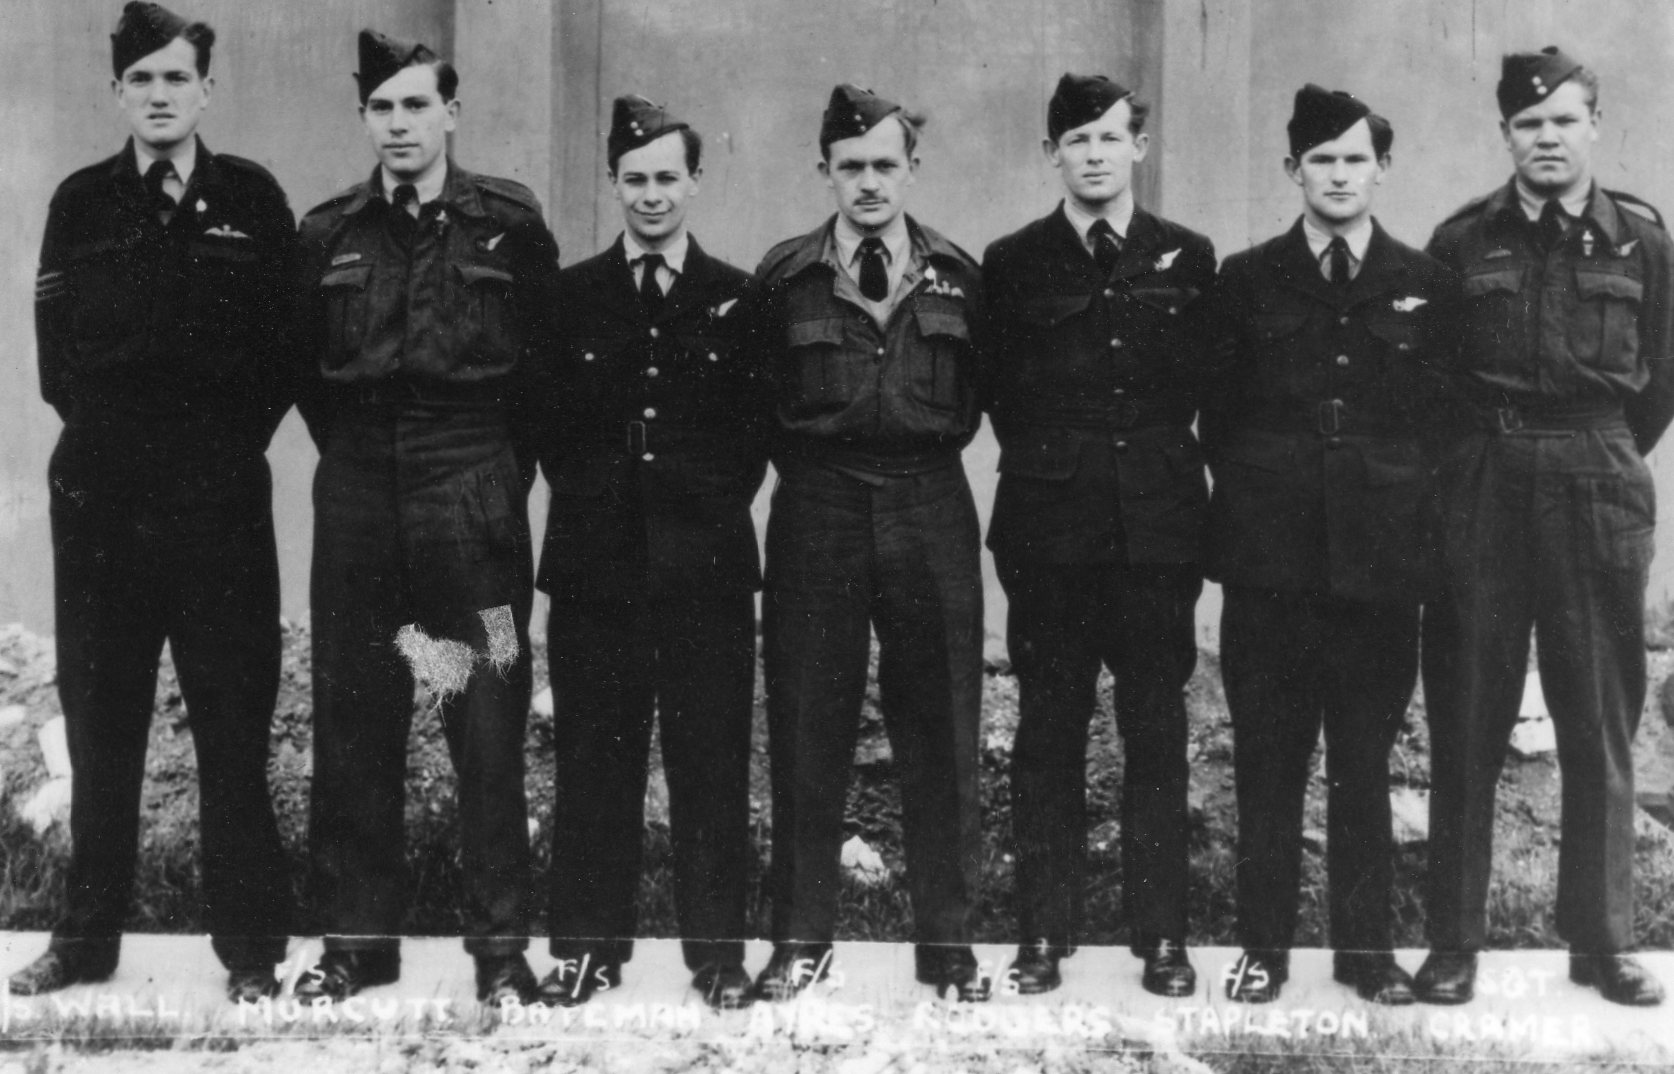 |
For further information and photos click here |
P/O J G Smart and Crew
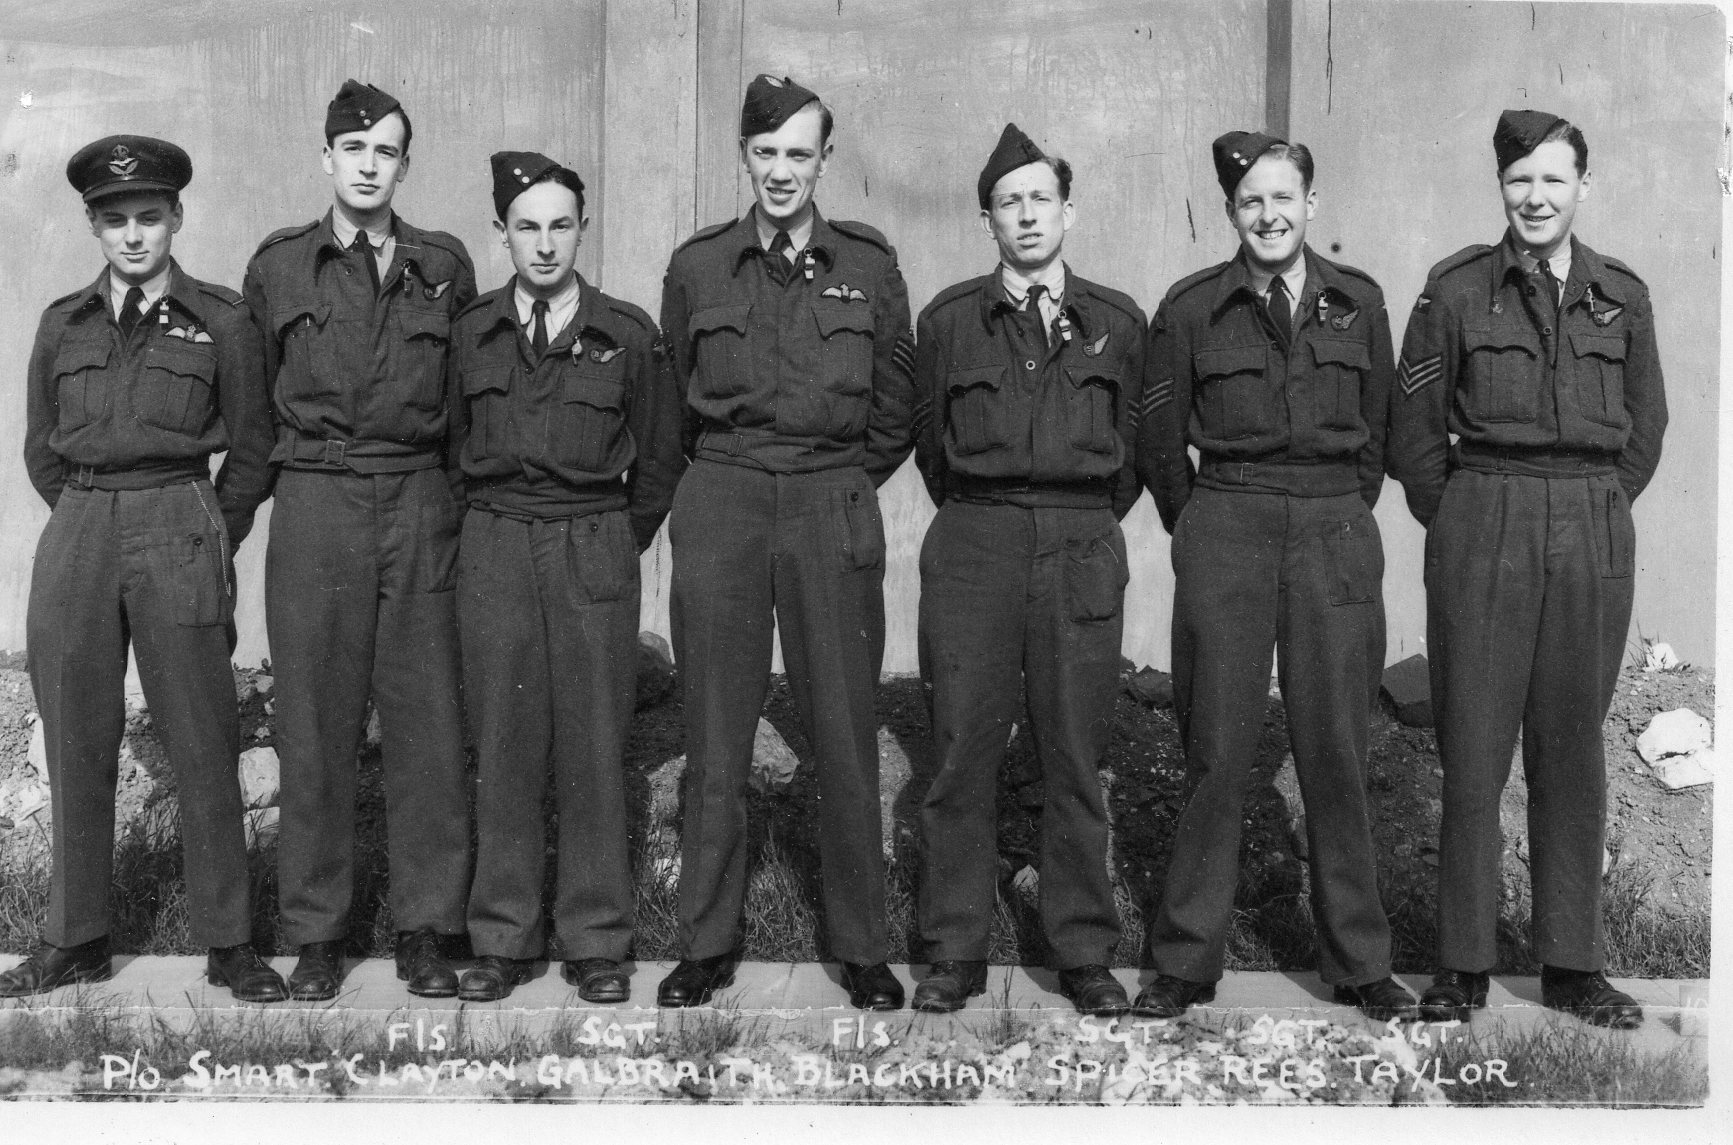 |
For further information and photos click here |
F/Sgt R Hopman RAAF and Crew
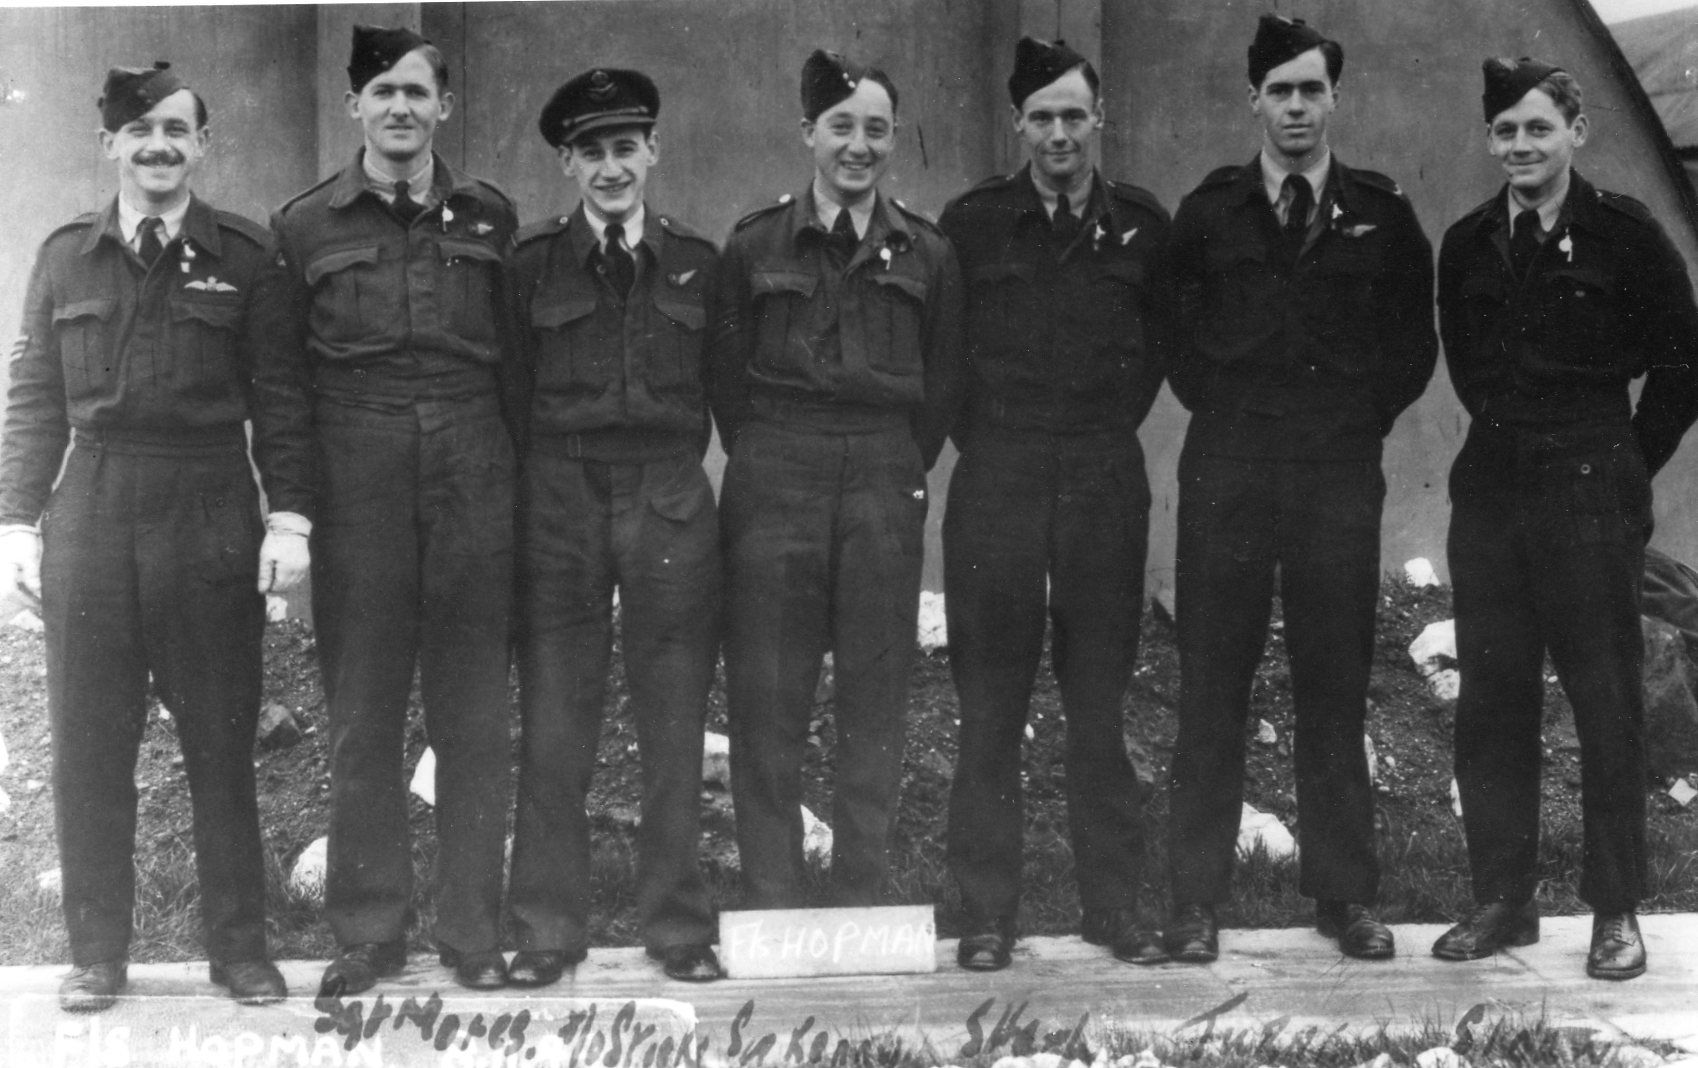 |
For further information and photos click here |
F/O G S Devereau and Crew
 |
For further information and photos click here |
W/O H Davies and Crew
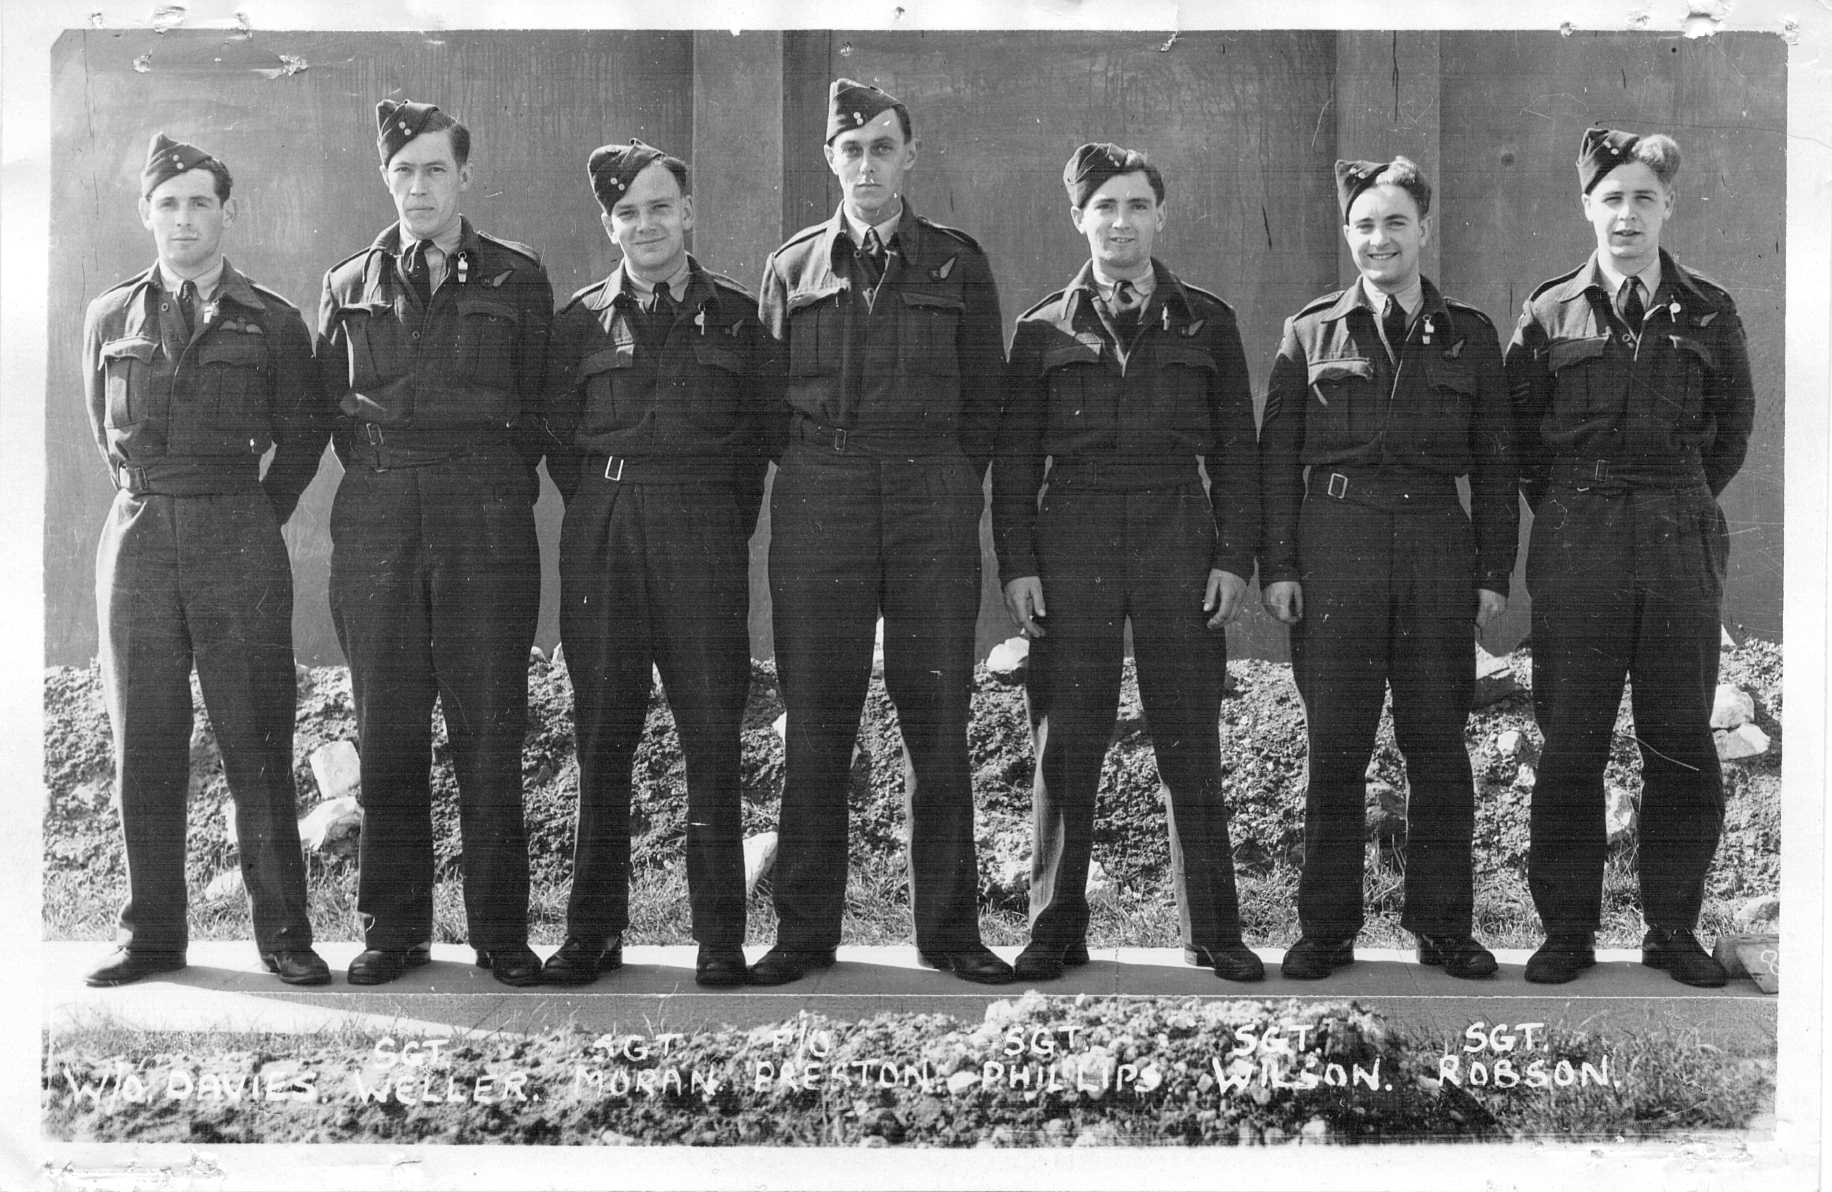 |
For further information and photos click here |
F/Lt F J Mitchell and Crew
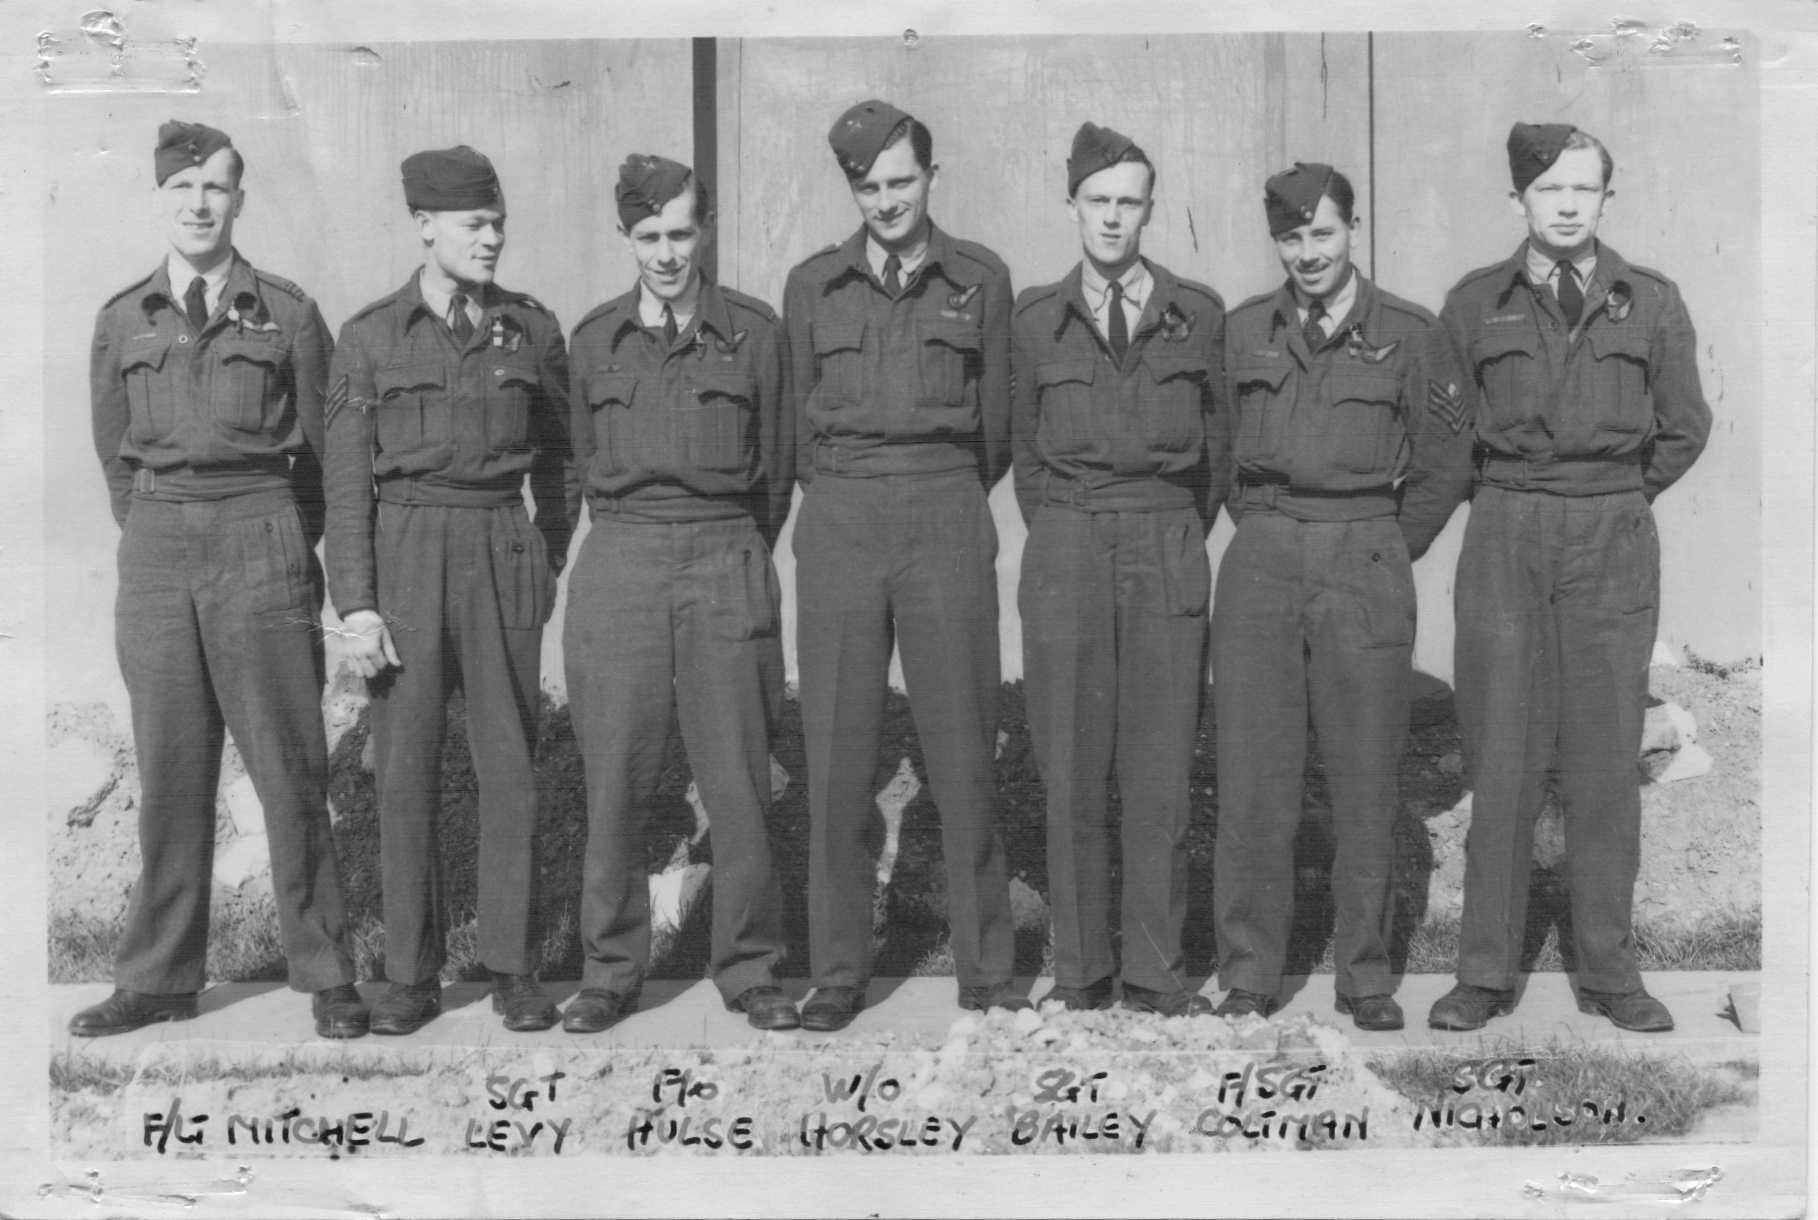 |
For further information and photos click here
Picture courtesy of Mark Simpson |
F/Sgt H Cochrane and Crew
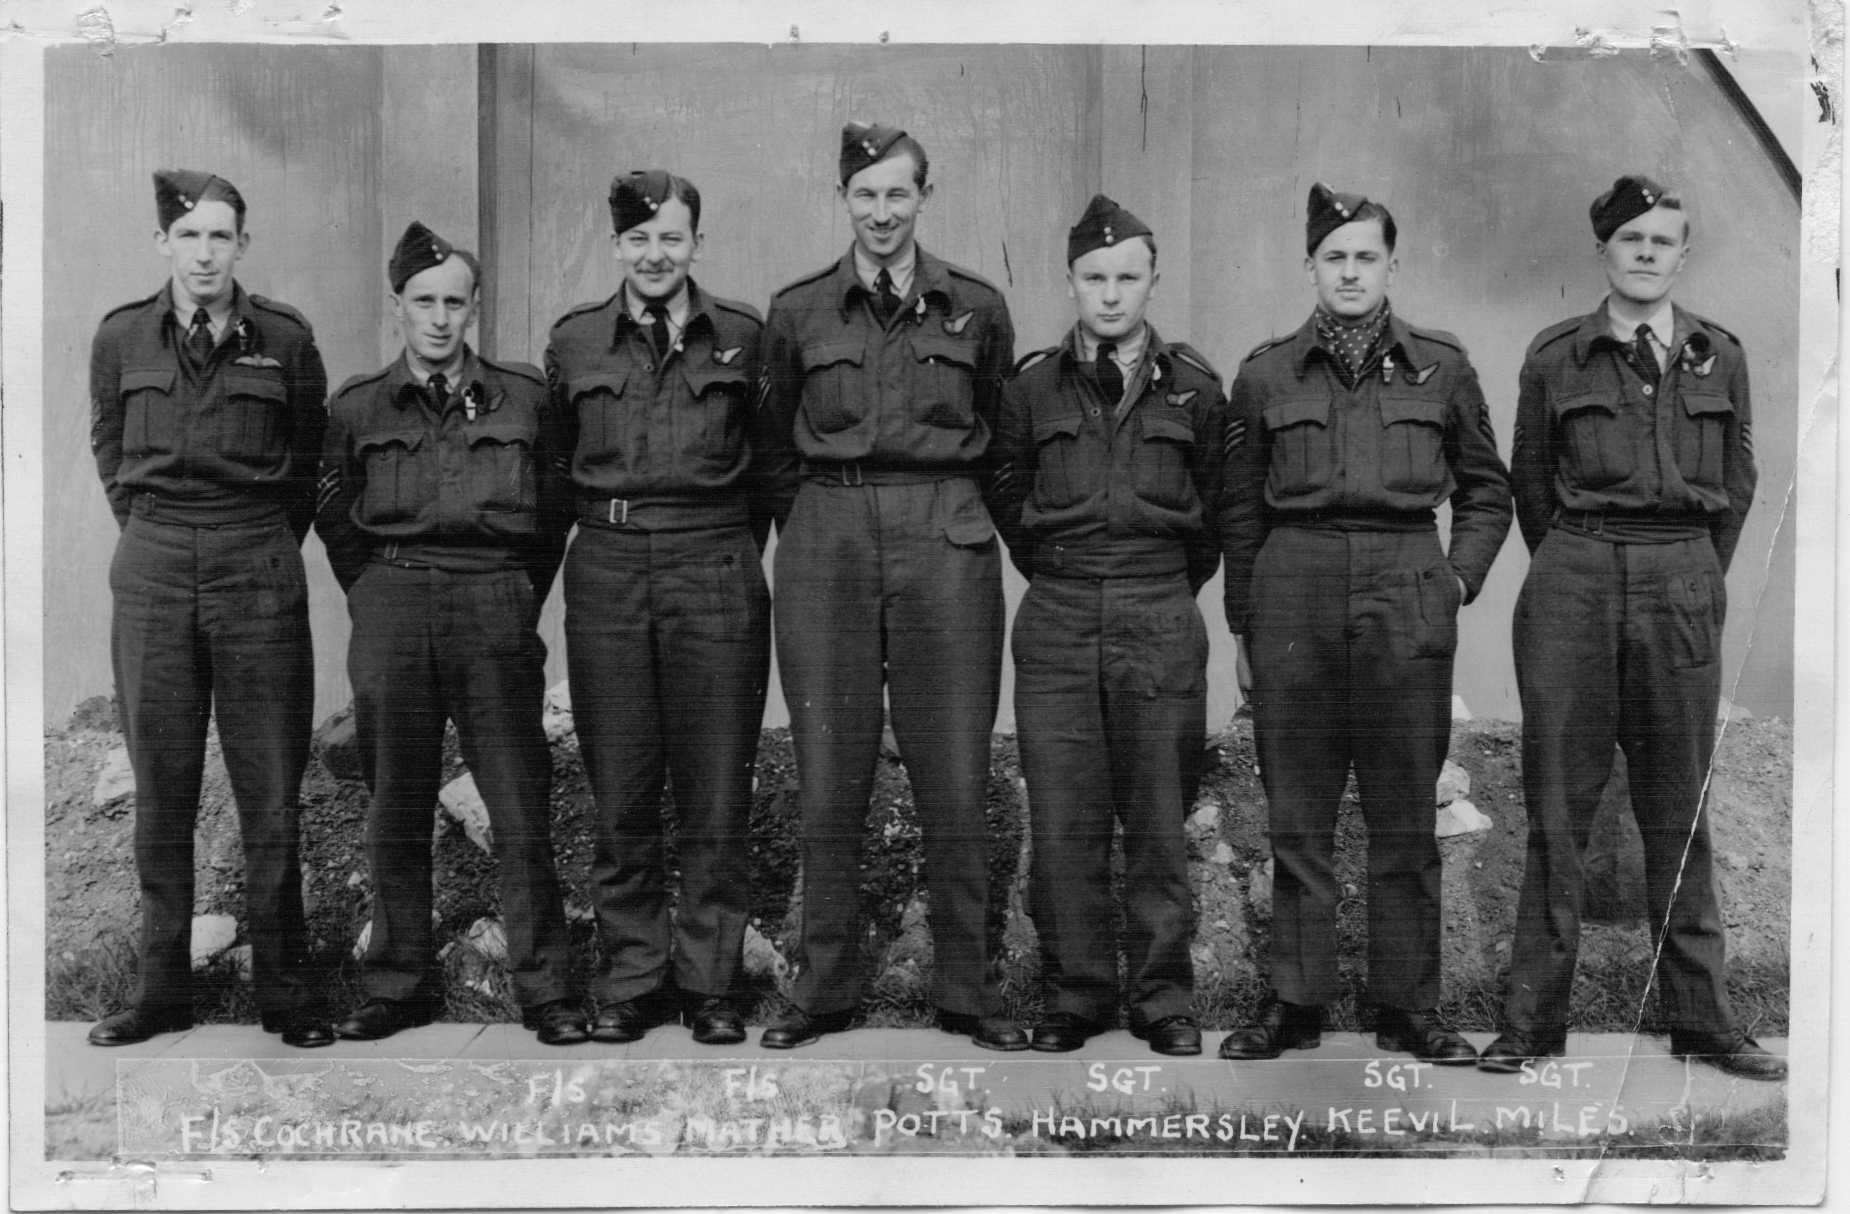 |
For further information and photos click here
Picture courtesy of Mark Simpson |
F/O V P Ansell and Crew
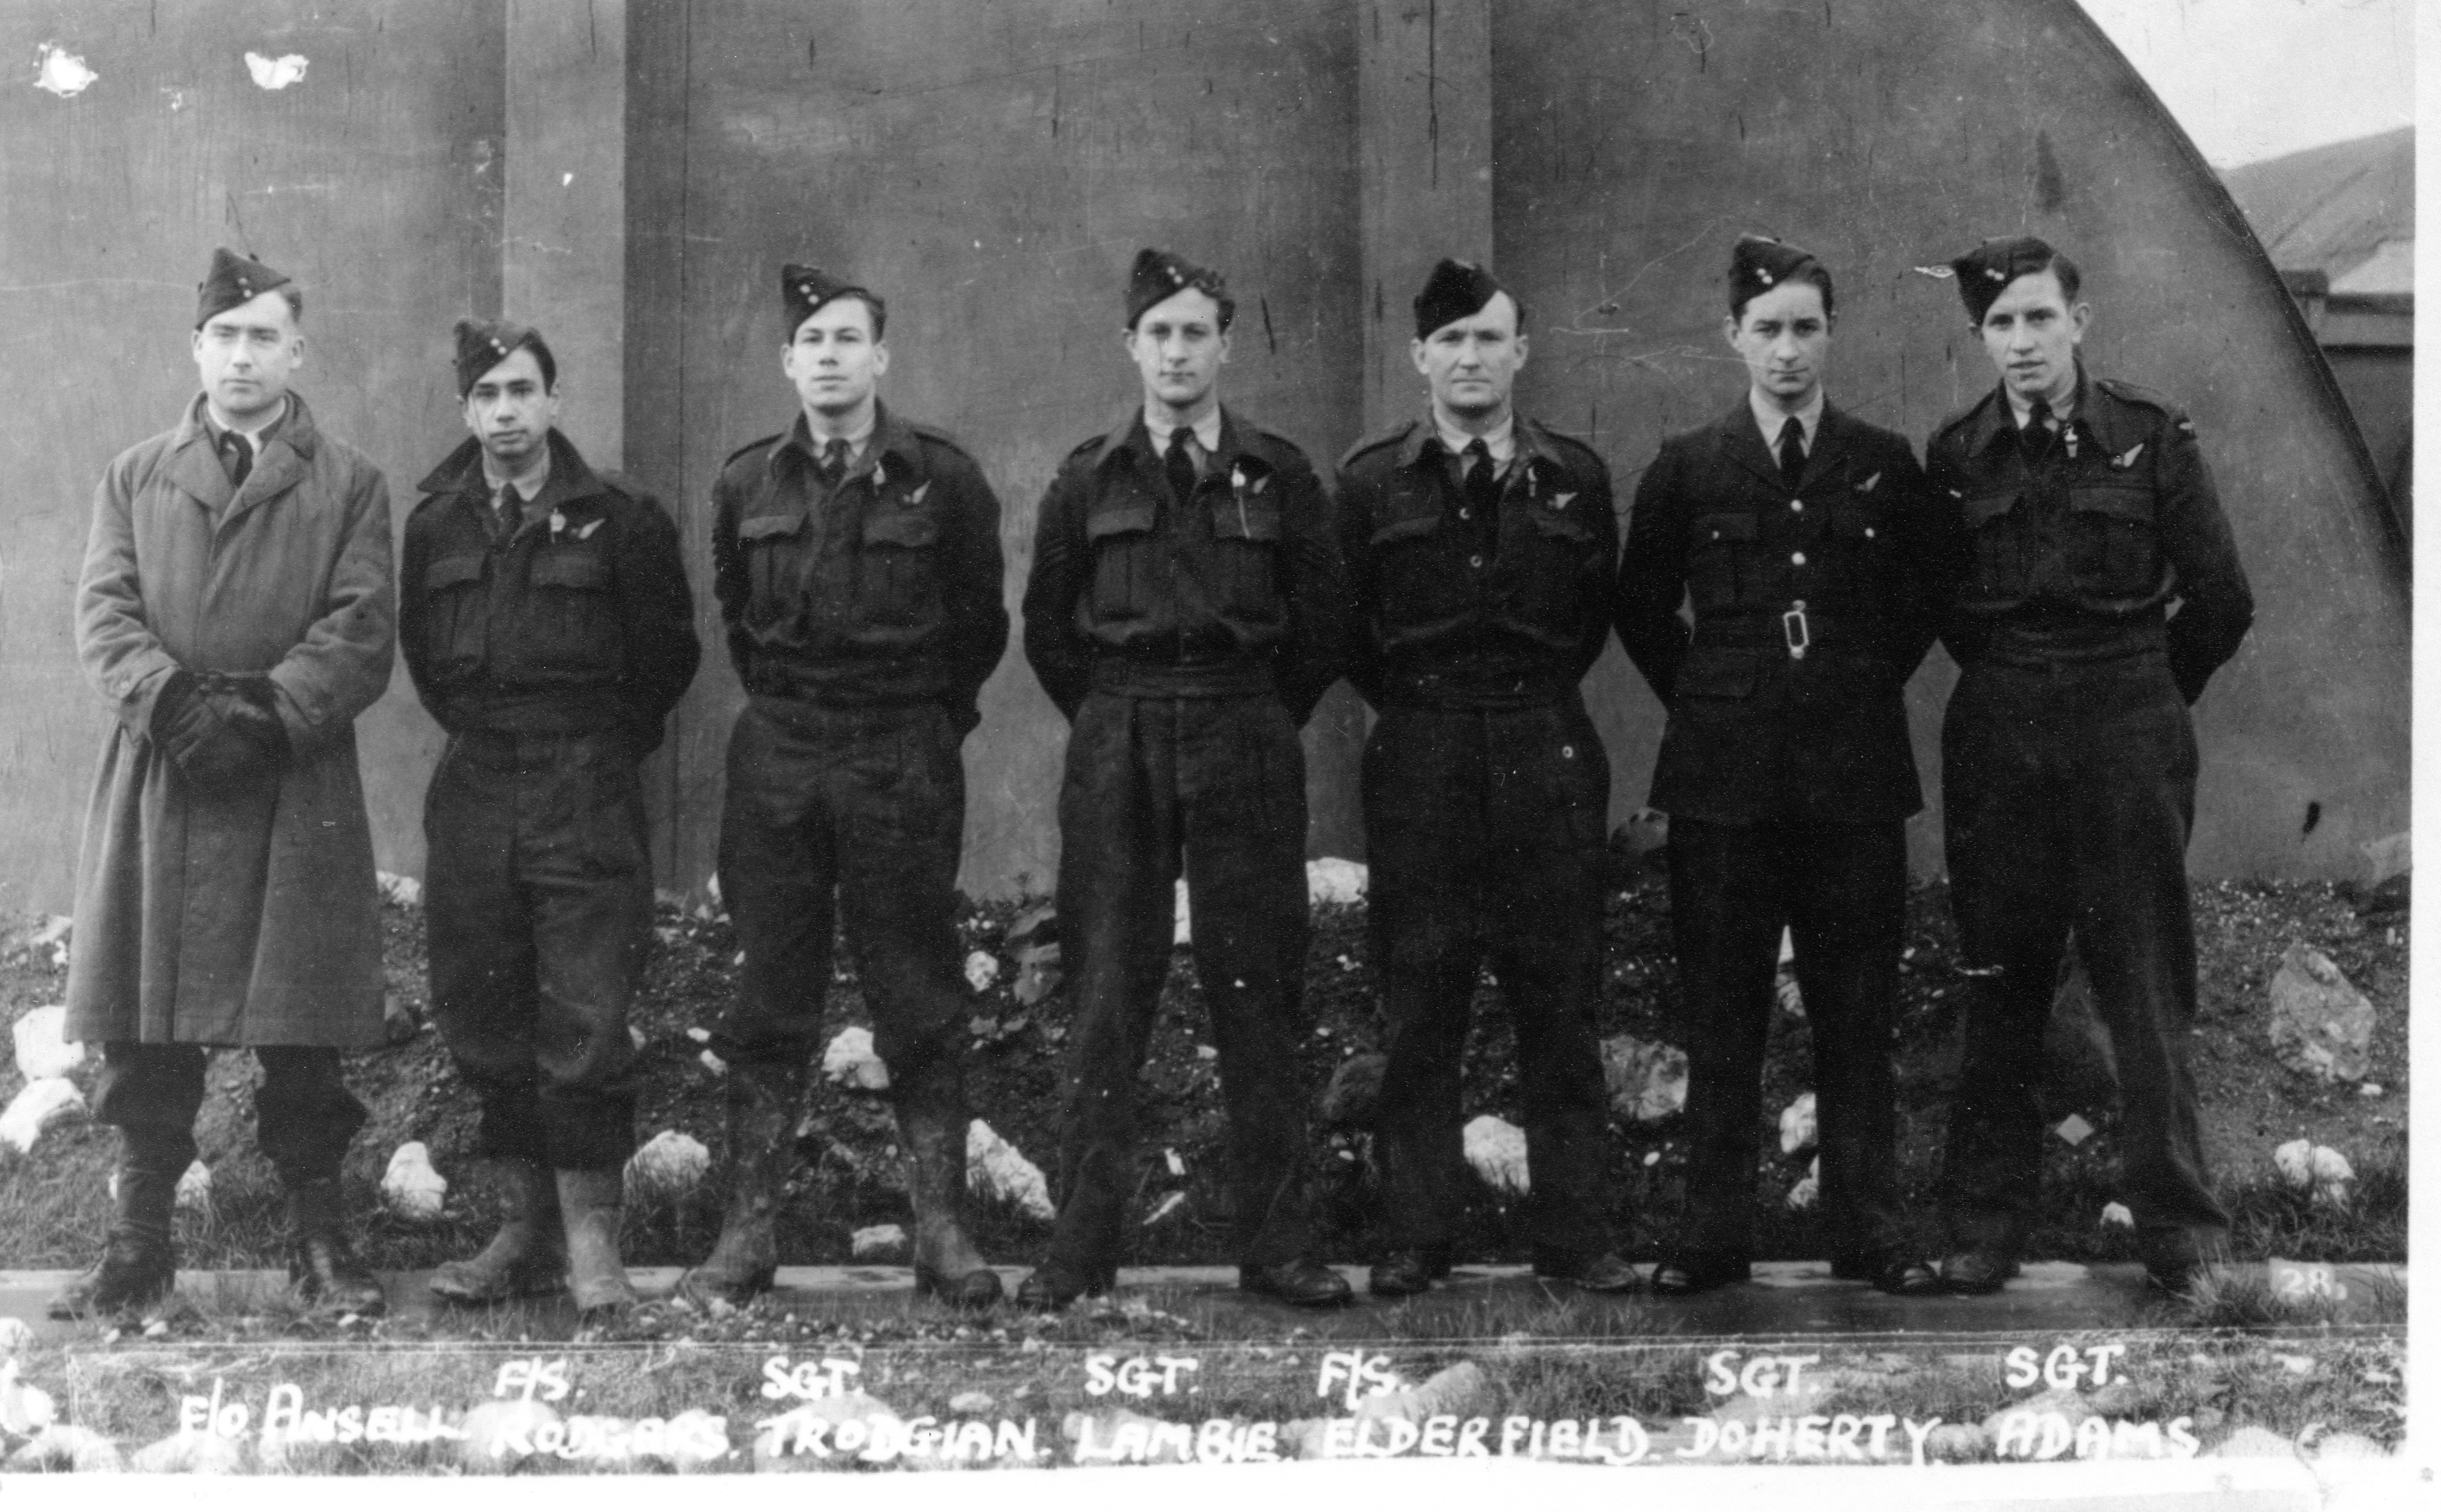 |
For further information and photos click here |
F/O H A Shenker DFC and Crew
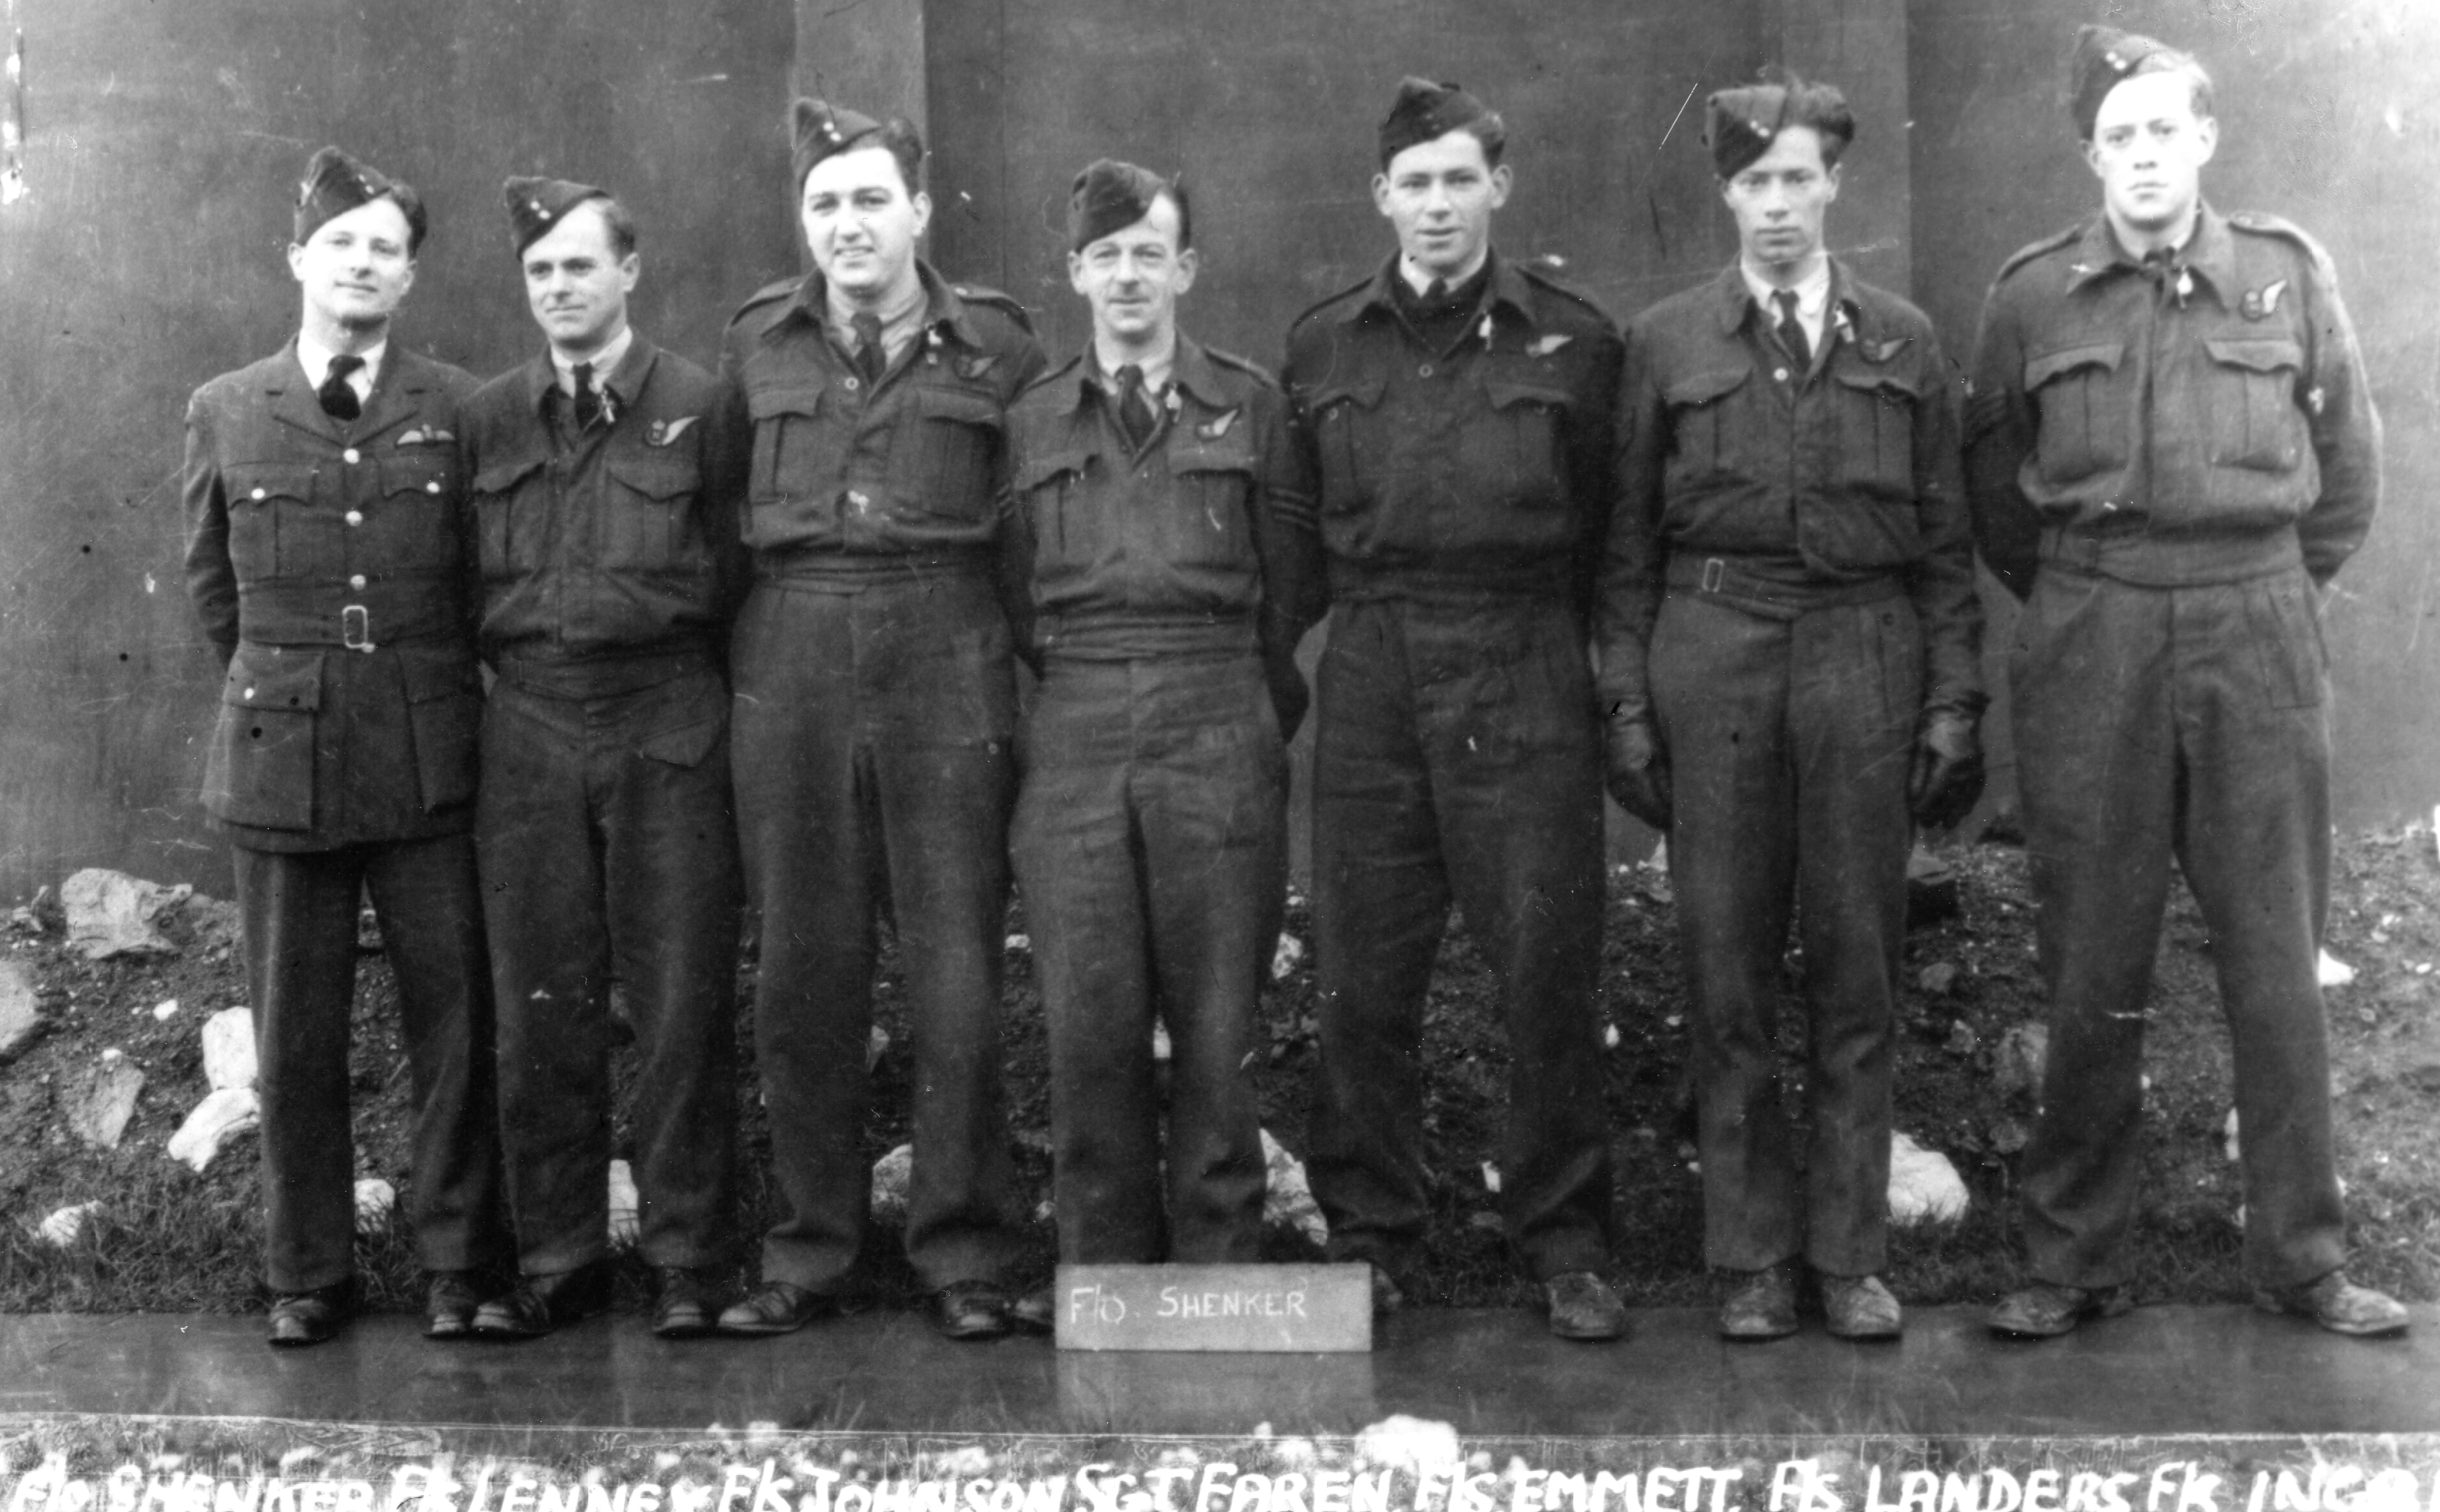 |
For further information and photos click here |
F/Lt G T Pyke and Crew
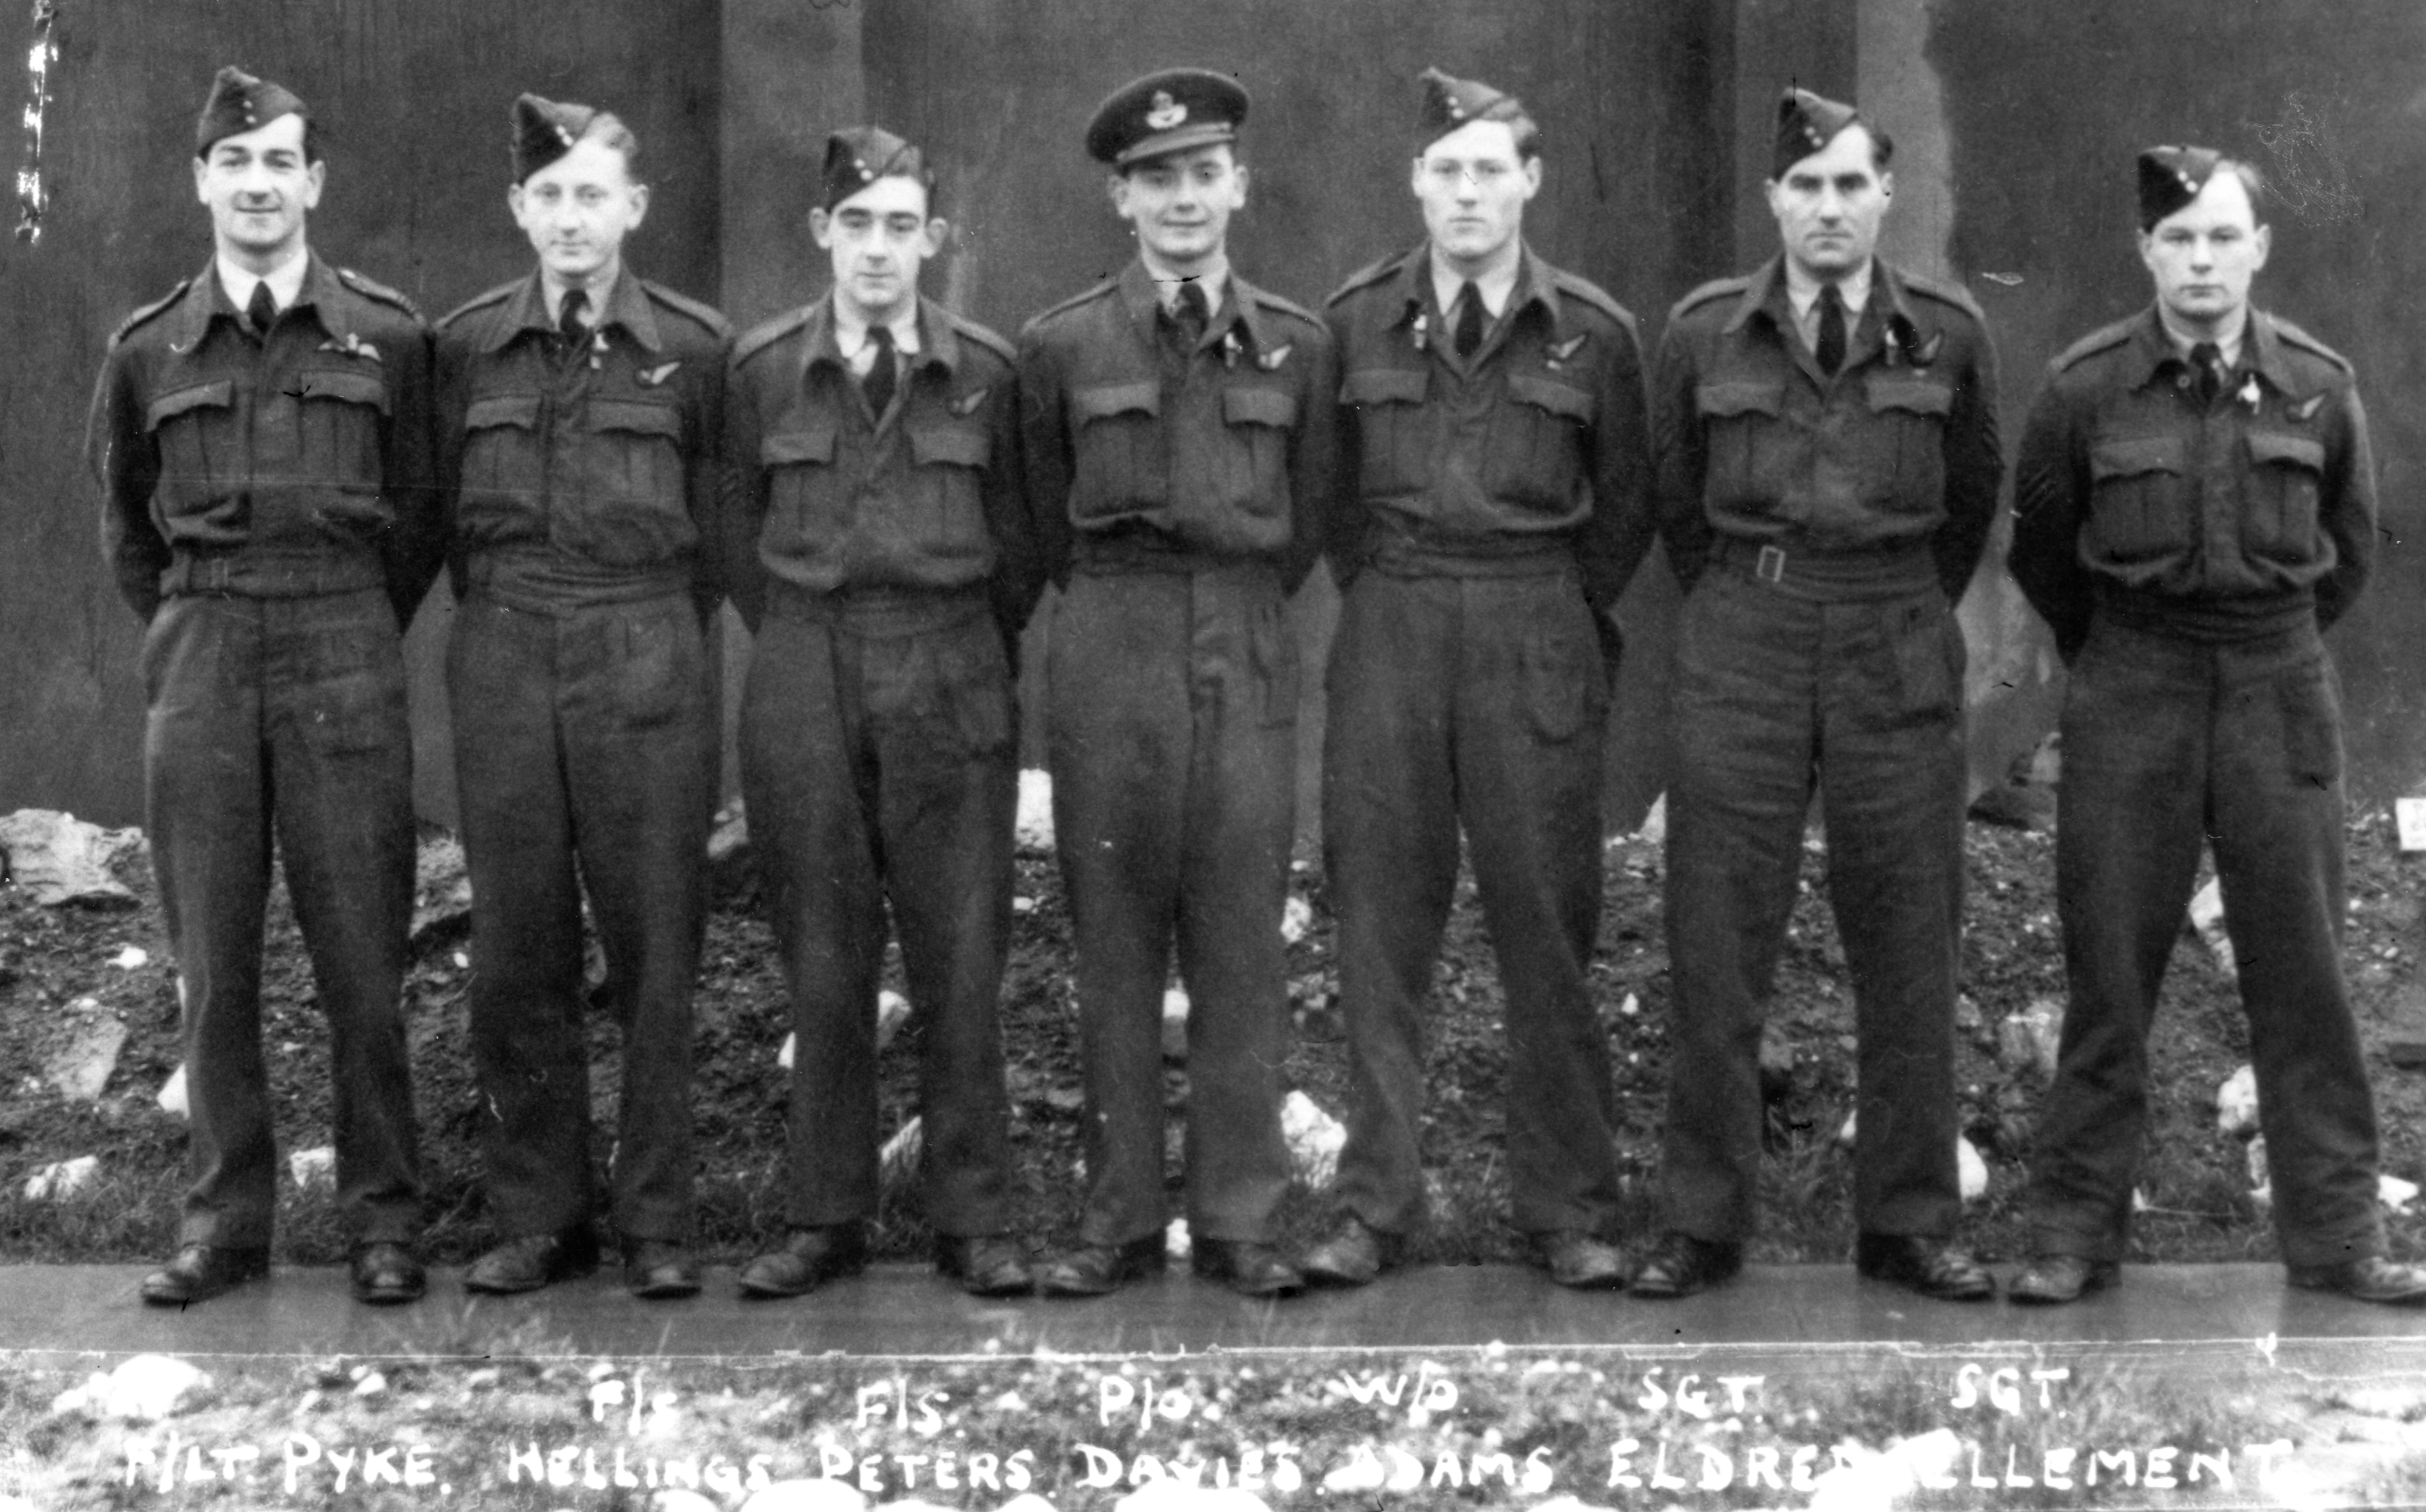 |
For further information and photos click here |
F/O R A Tapsell and Crew
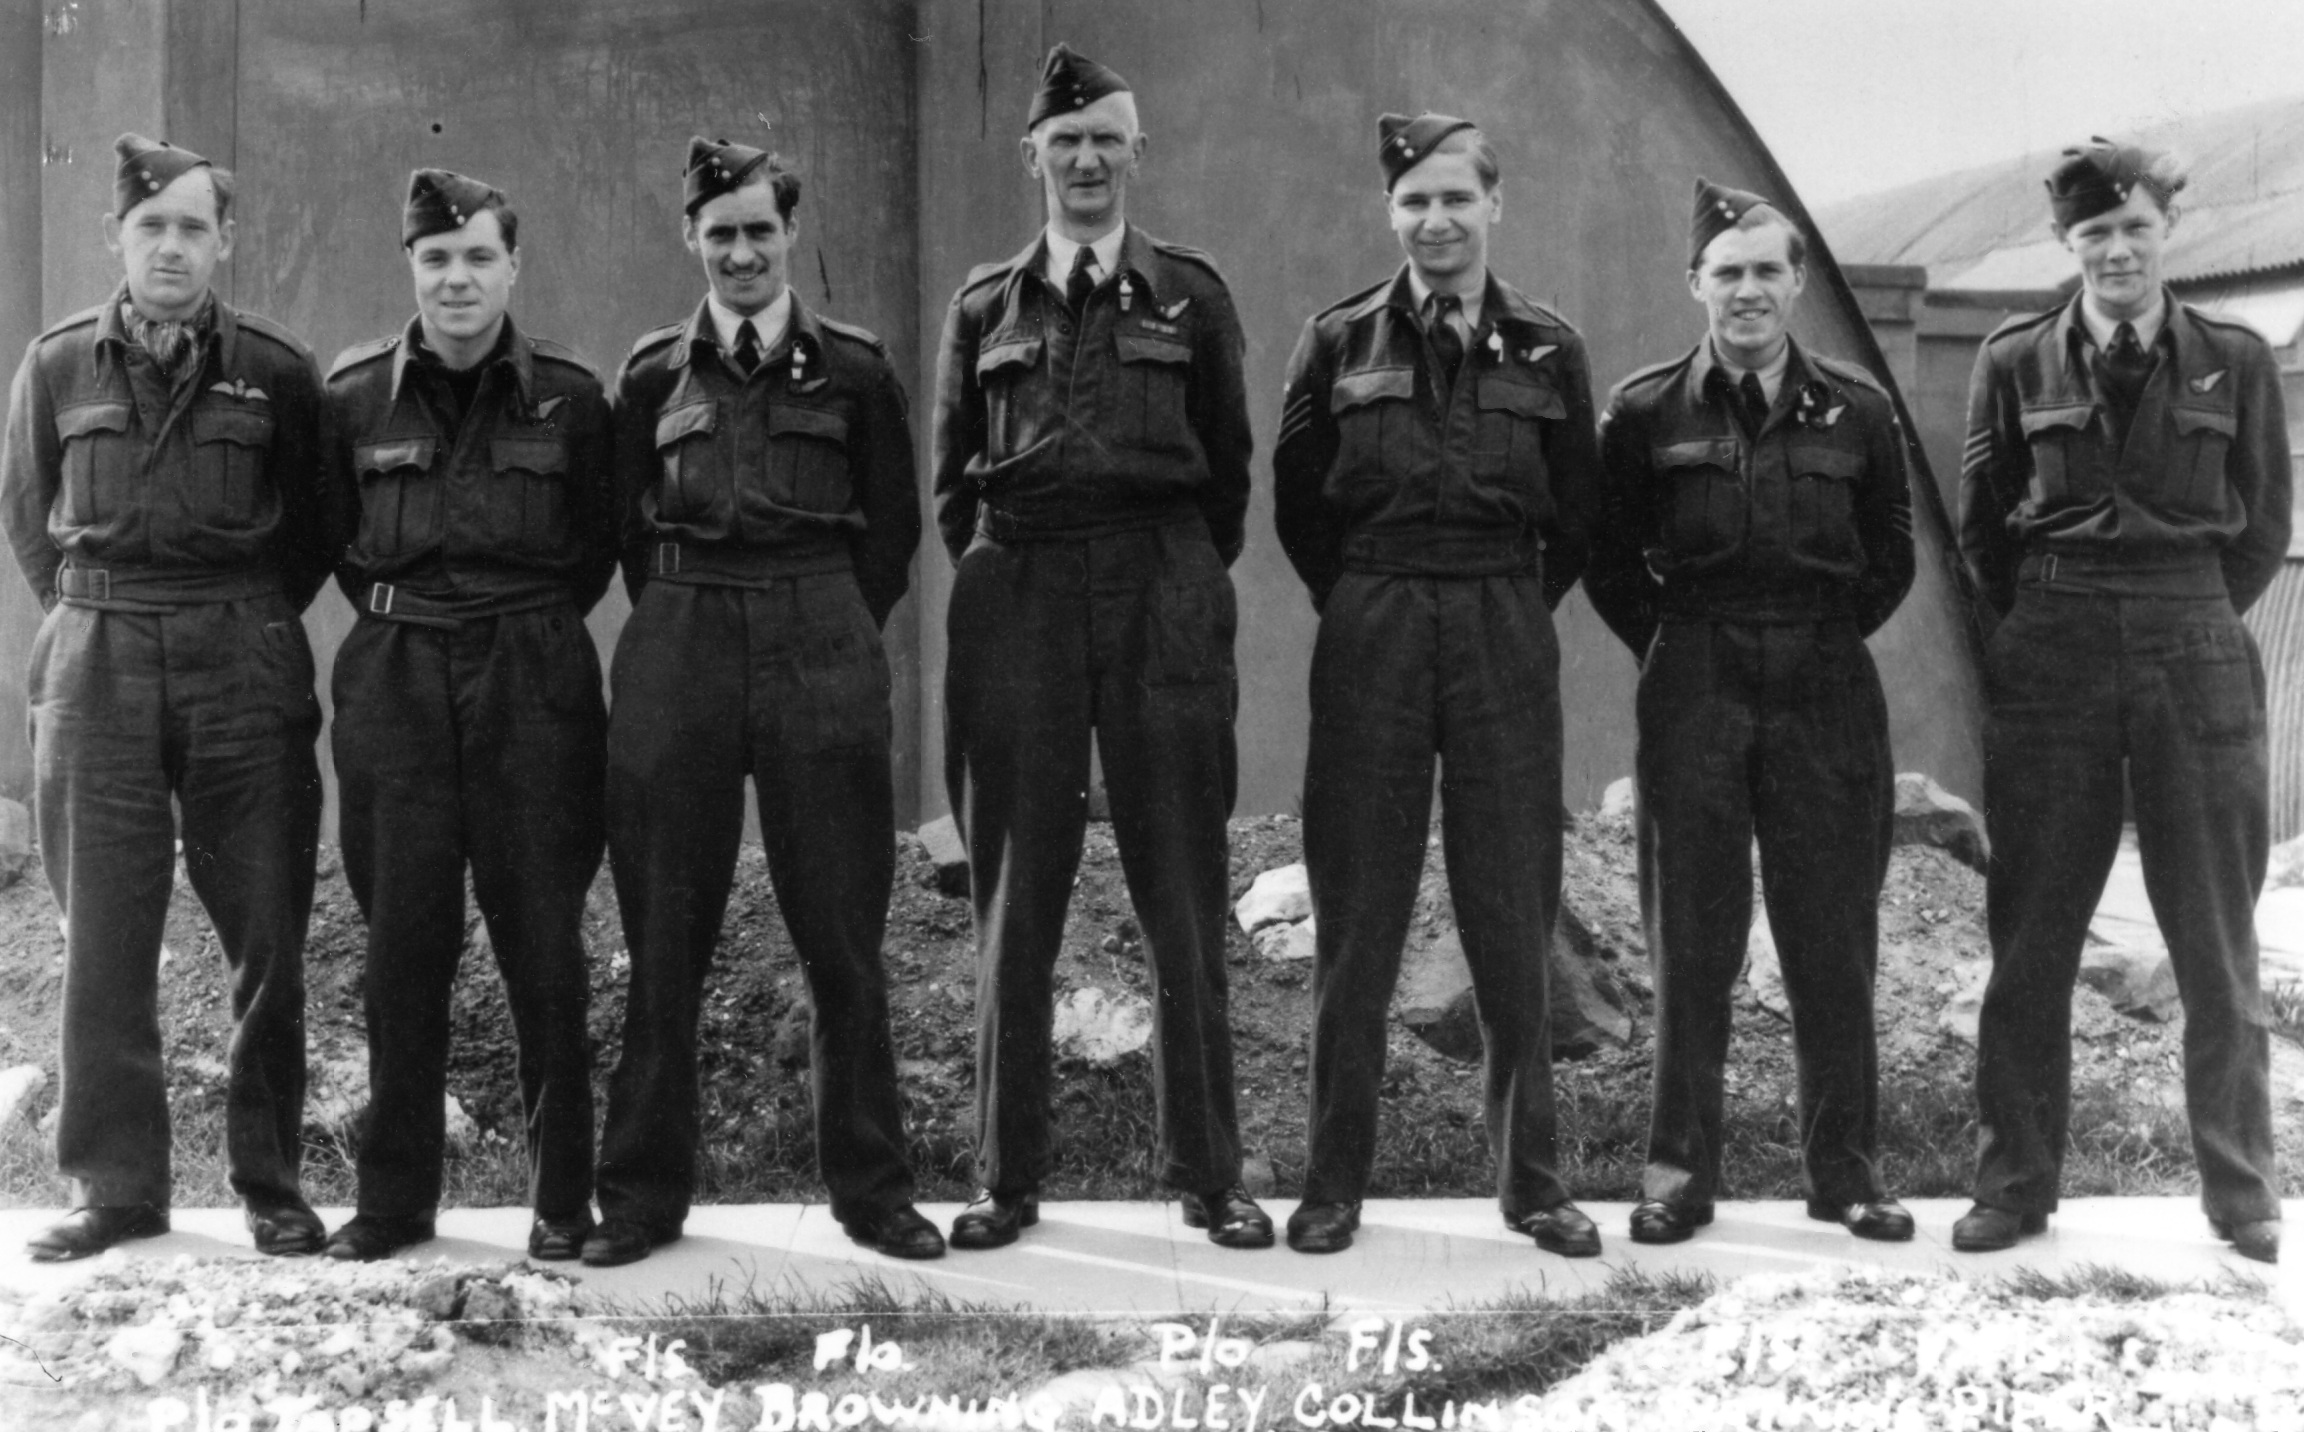 |
For further information and photos click here |
F/O A C Bothe and Crew
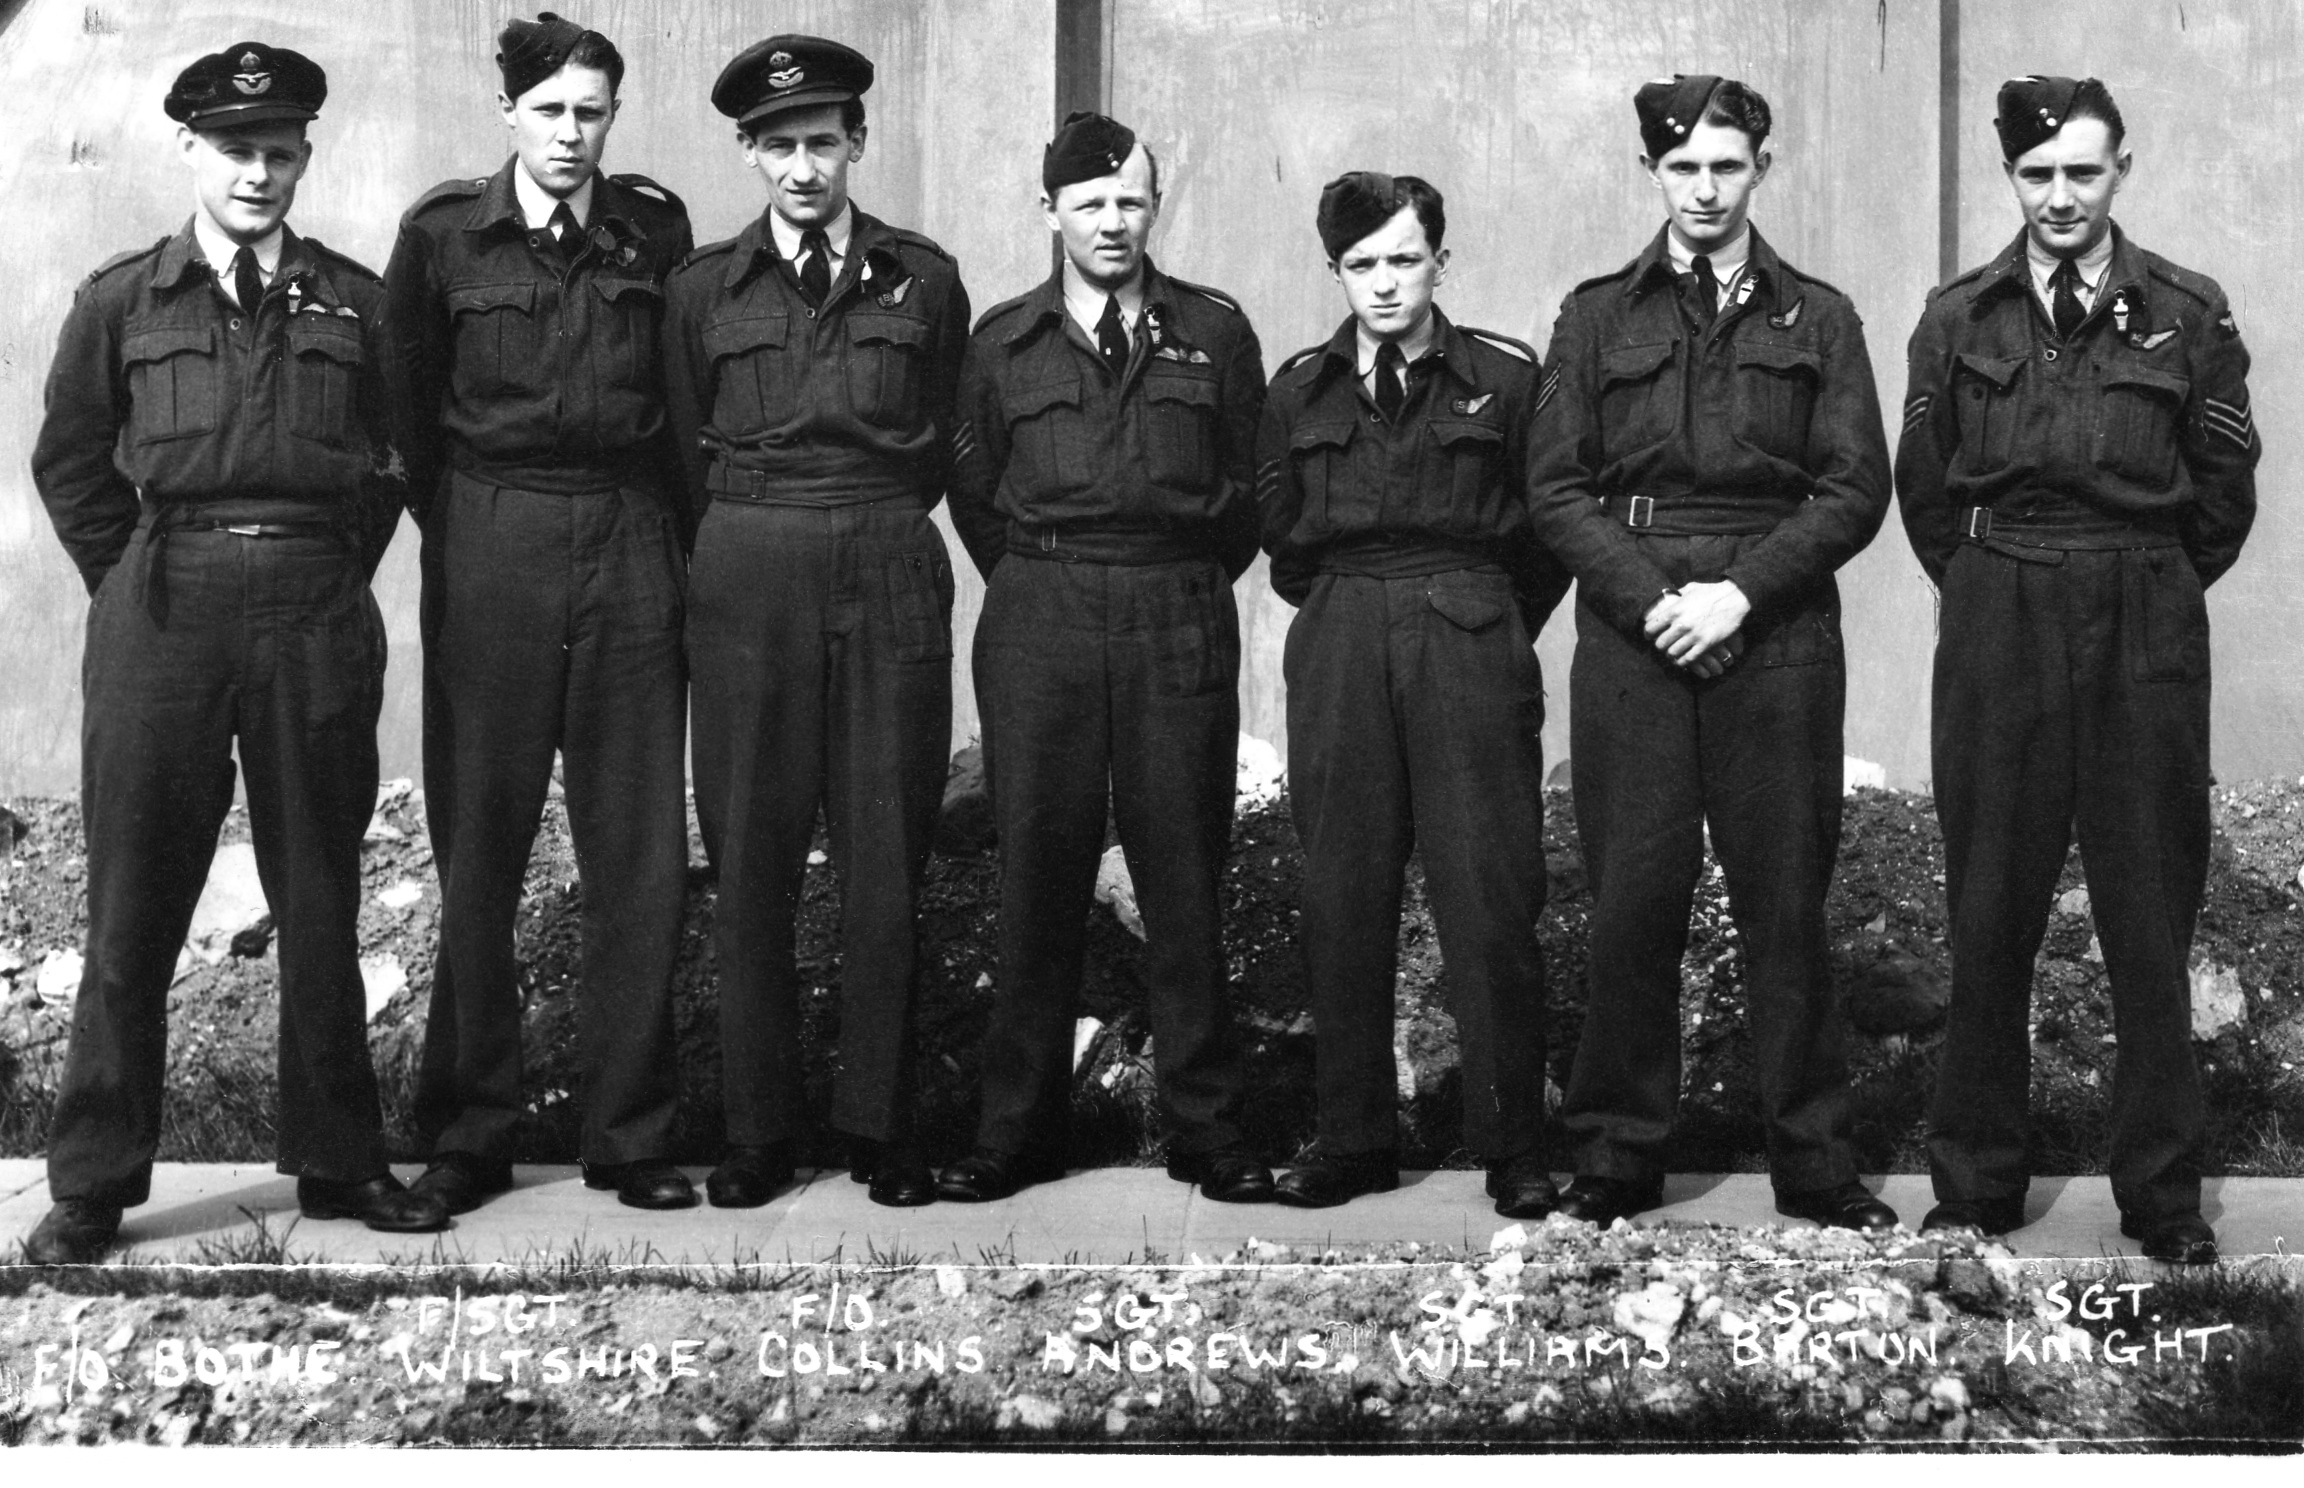 |
For further information and photos click here |
F/O L G Michie DFC and Crew
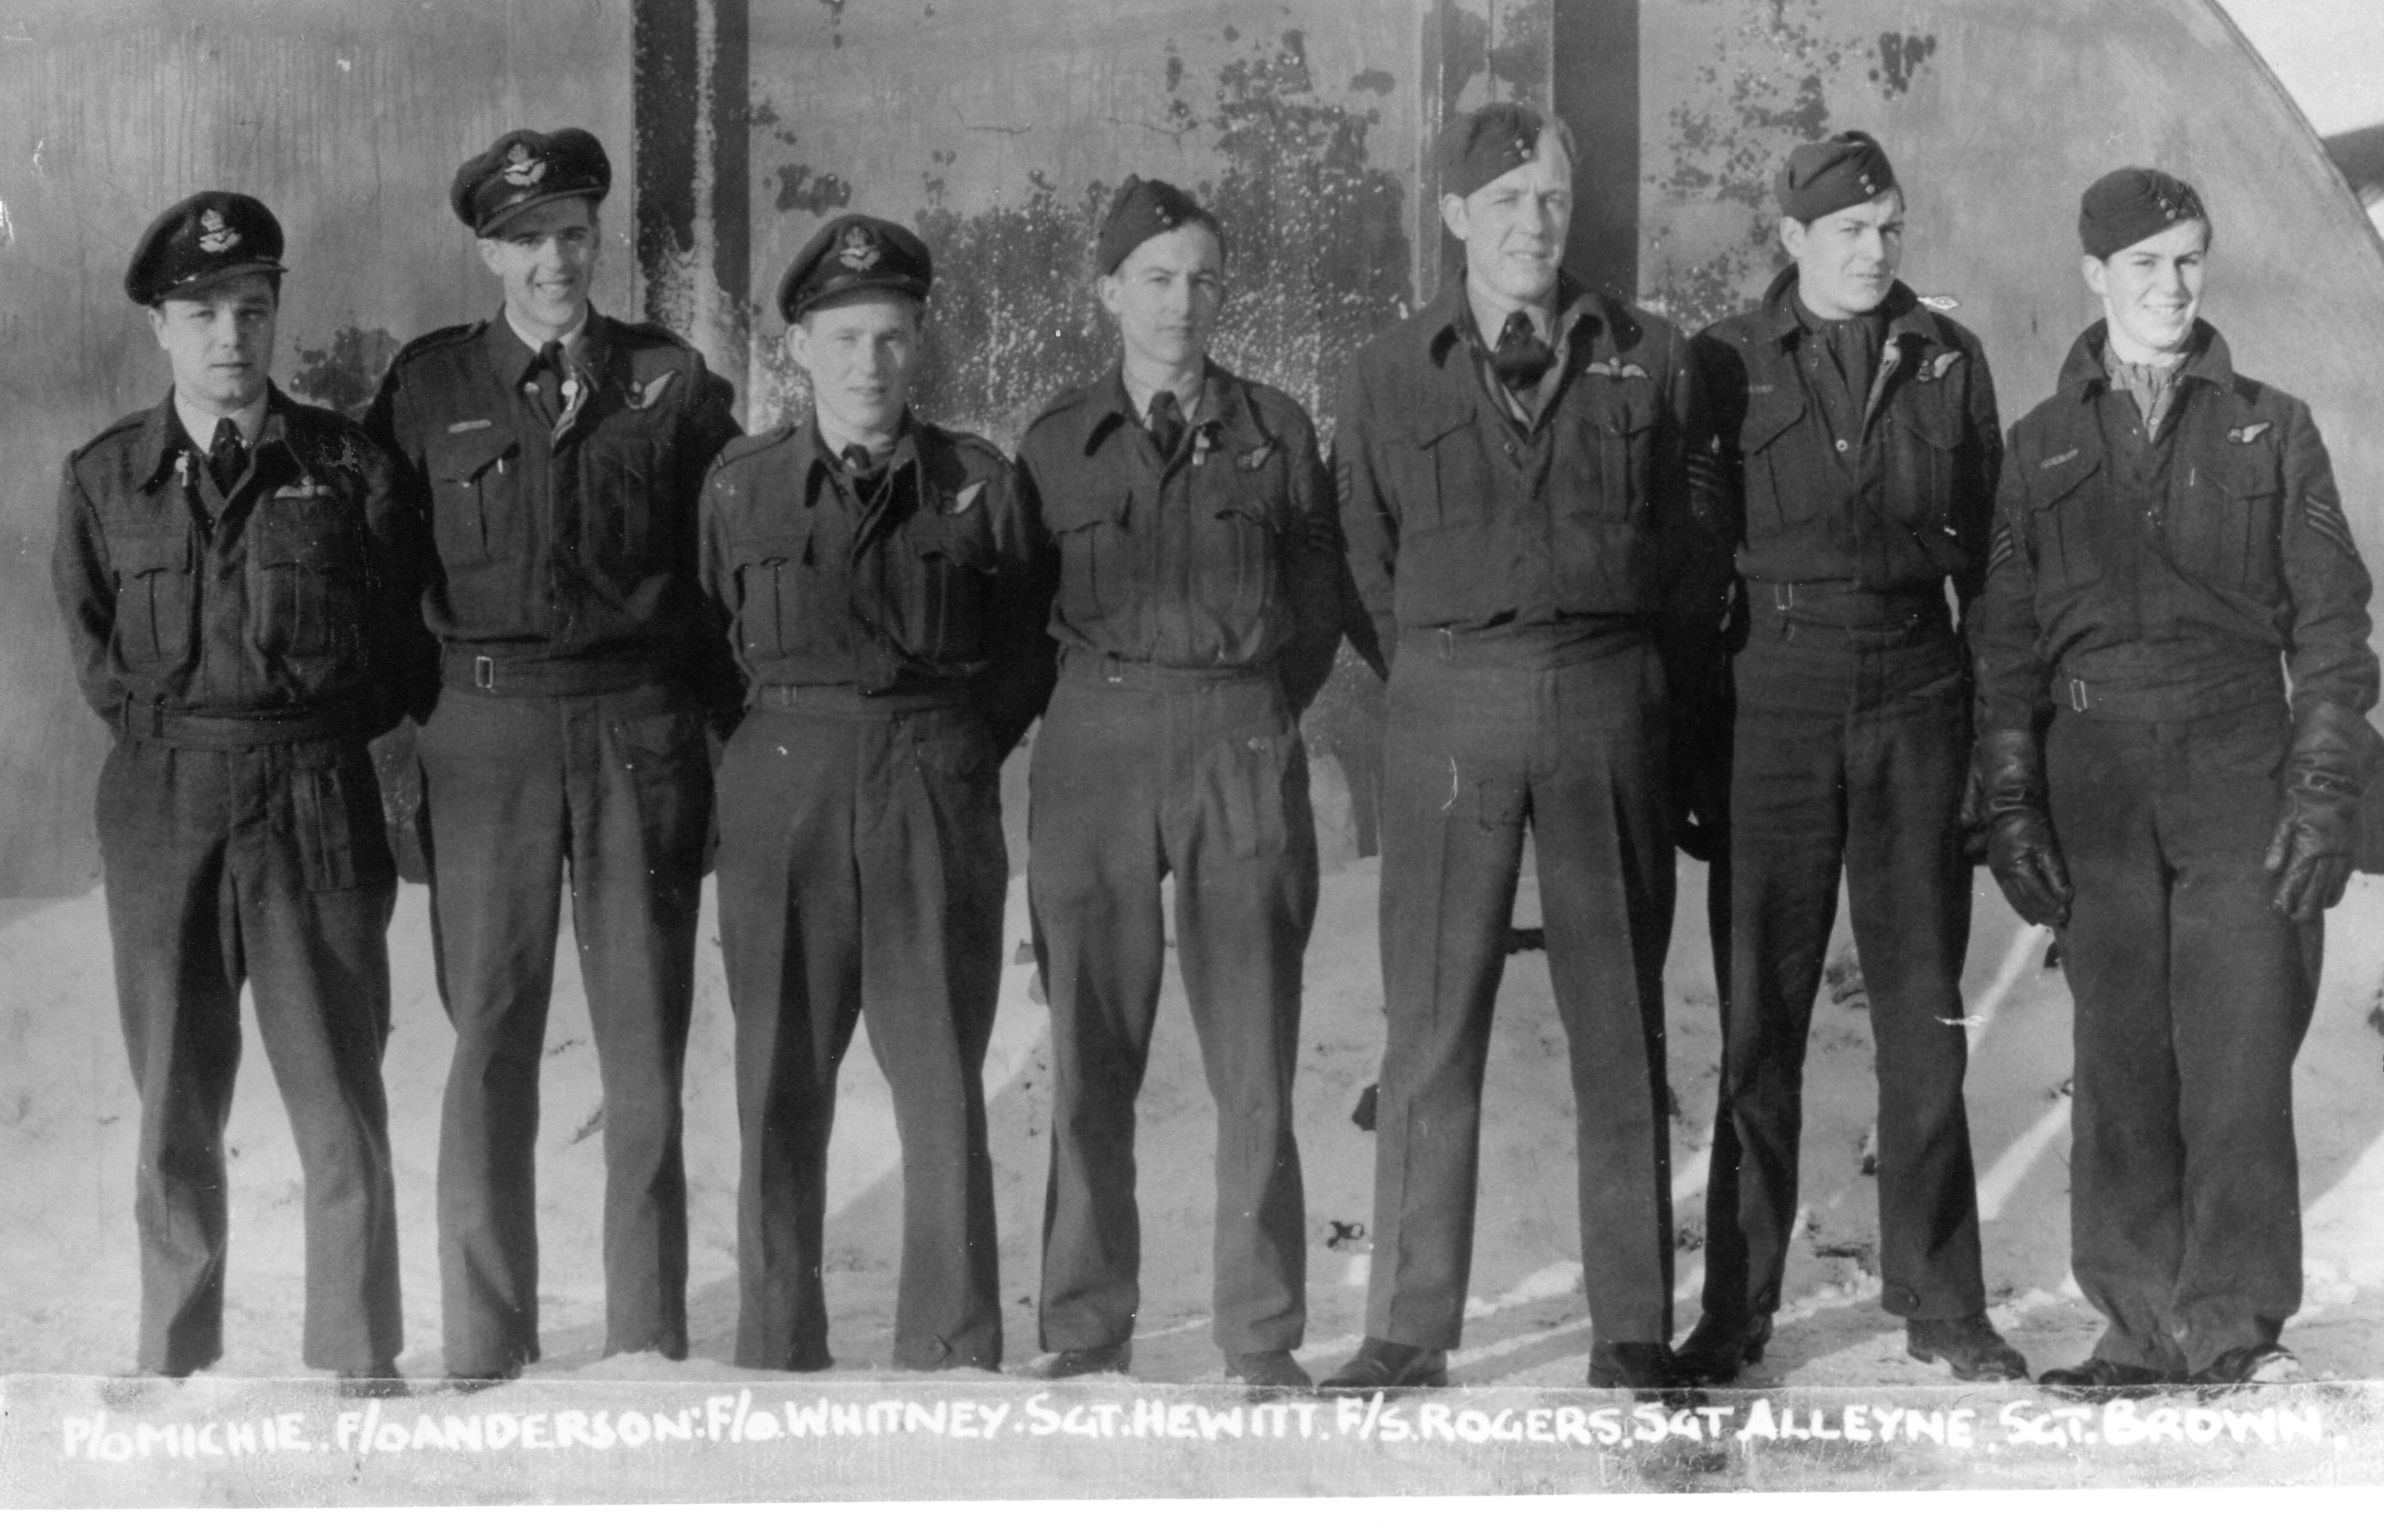 |
For further information and photos click here |
F/Sgt A H Jefferies and Crew
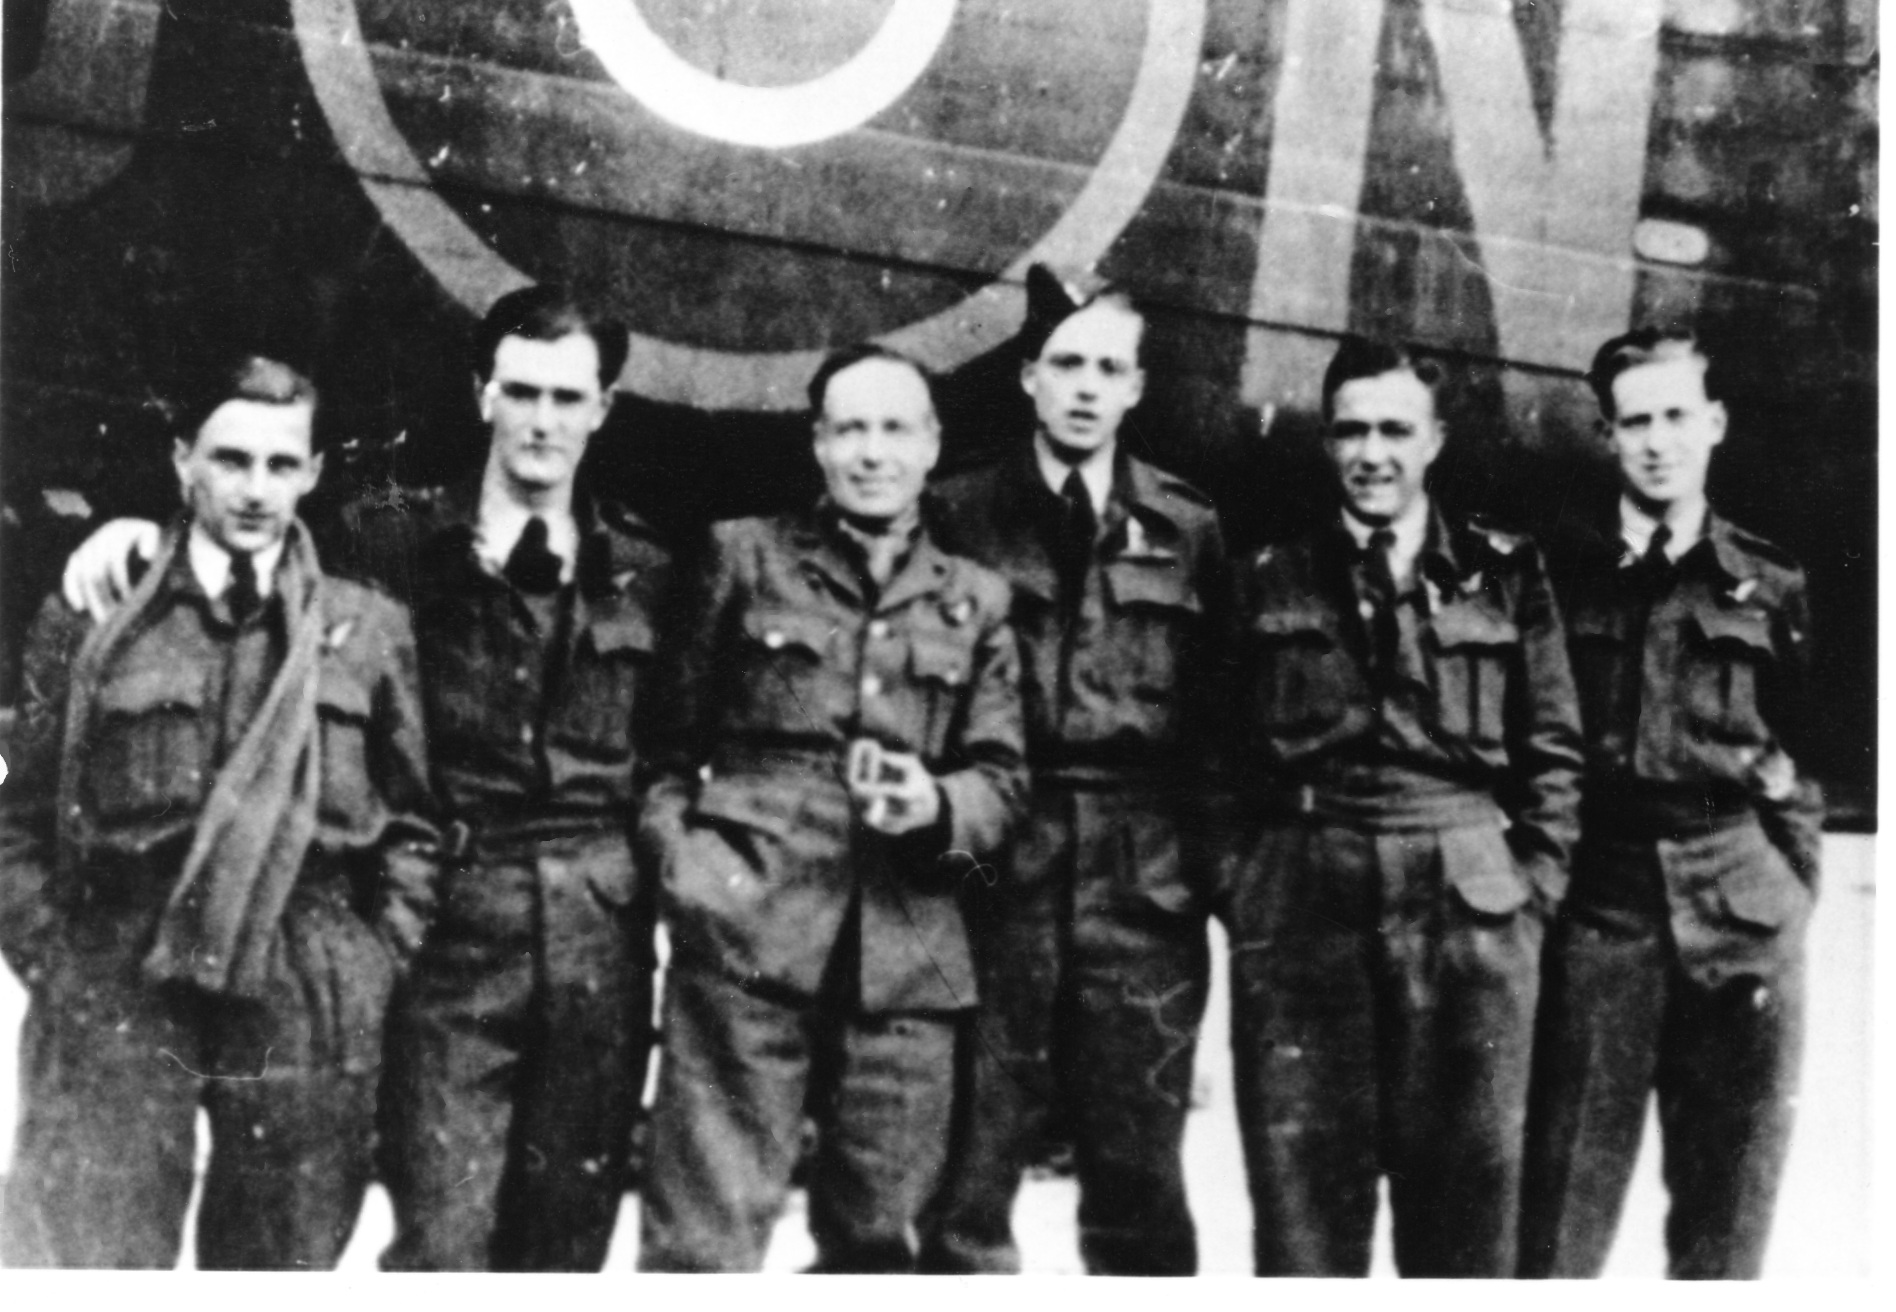 |
For further information and photos click here |
F/O C A Rhude and Crew
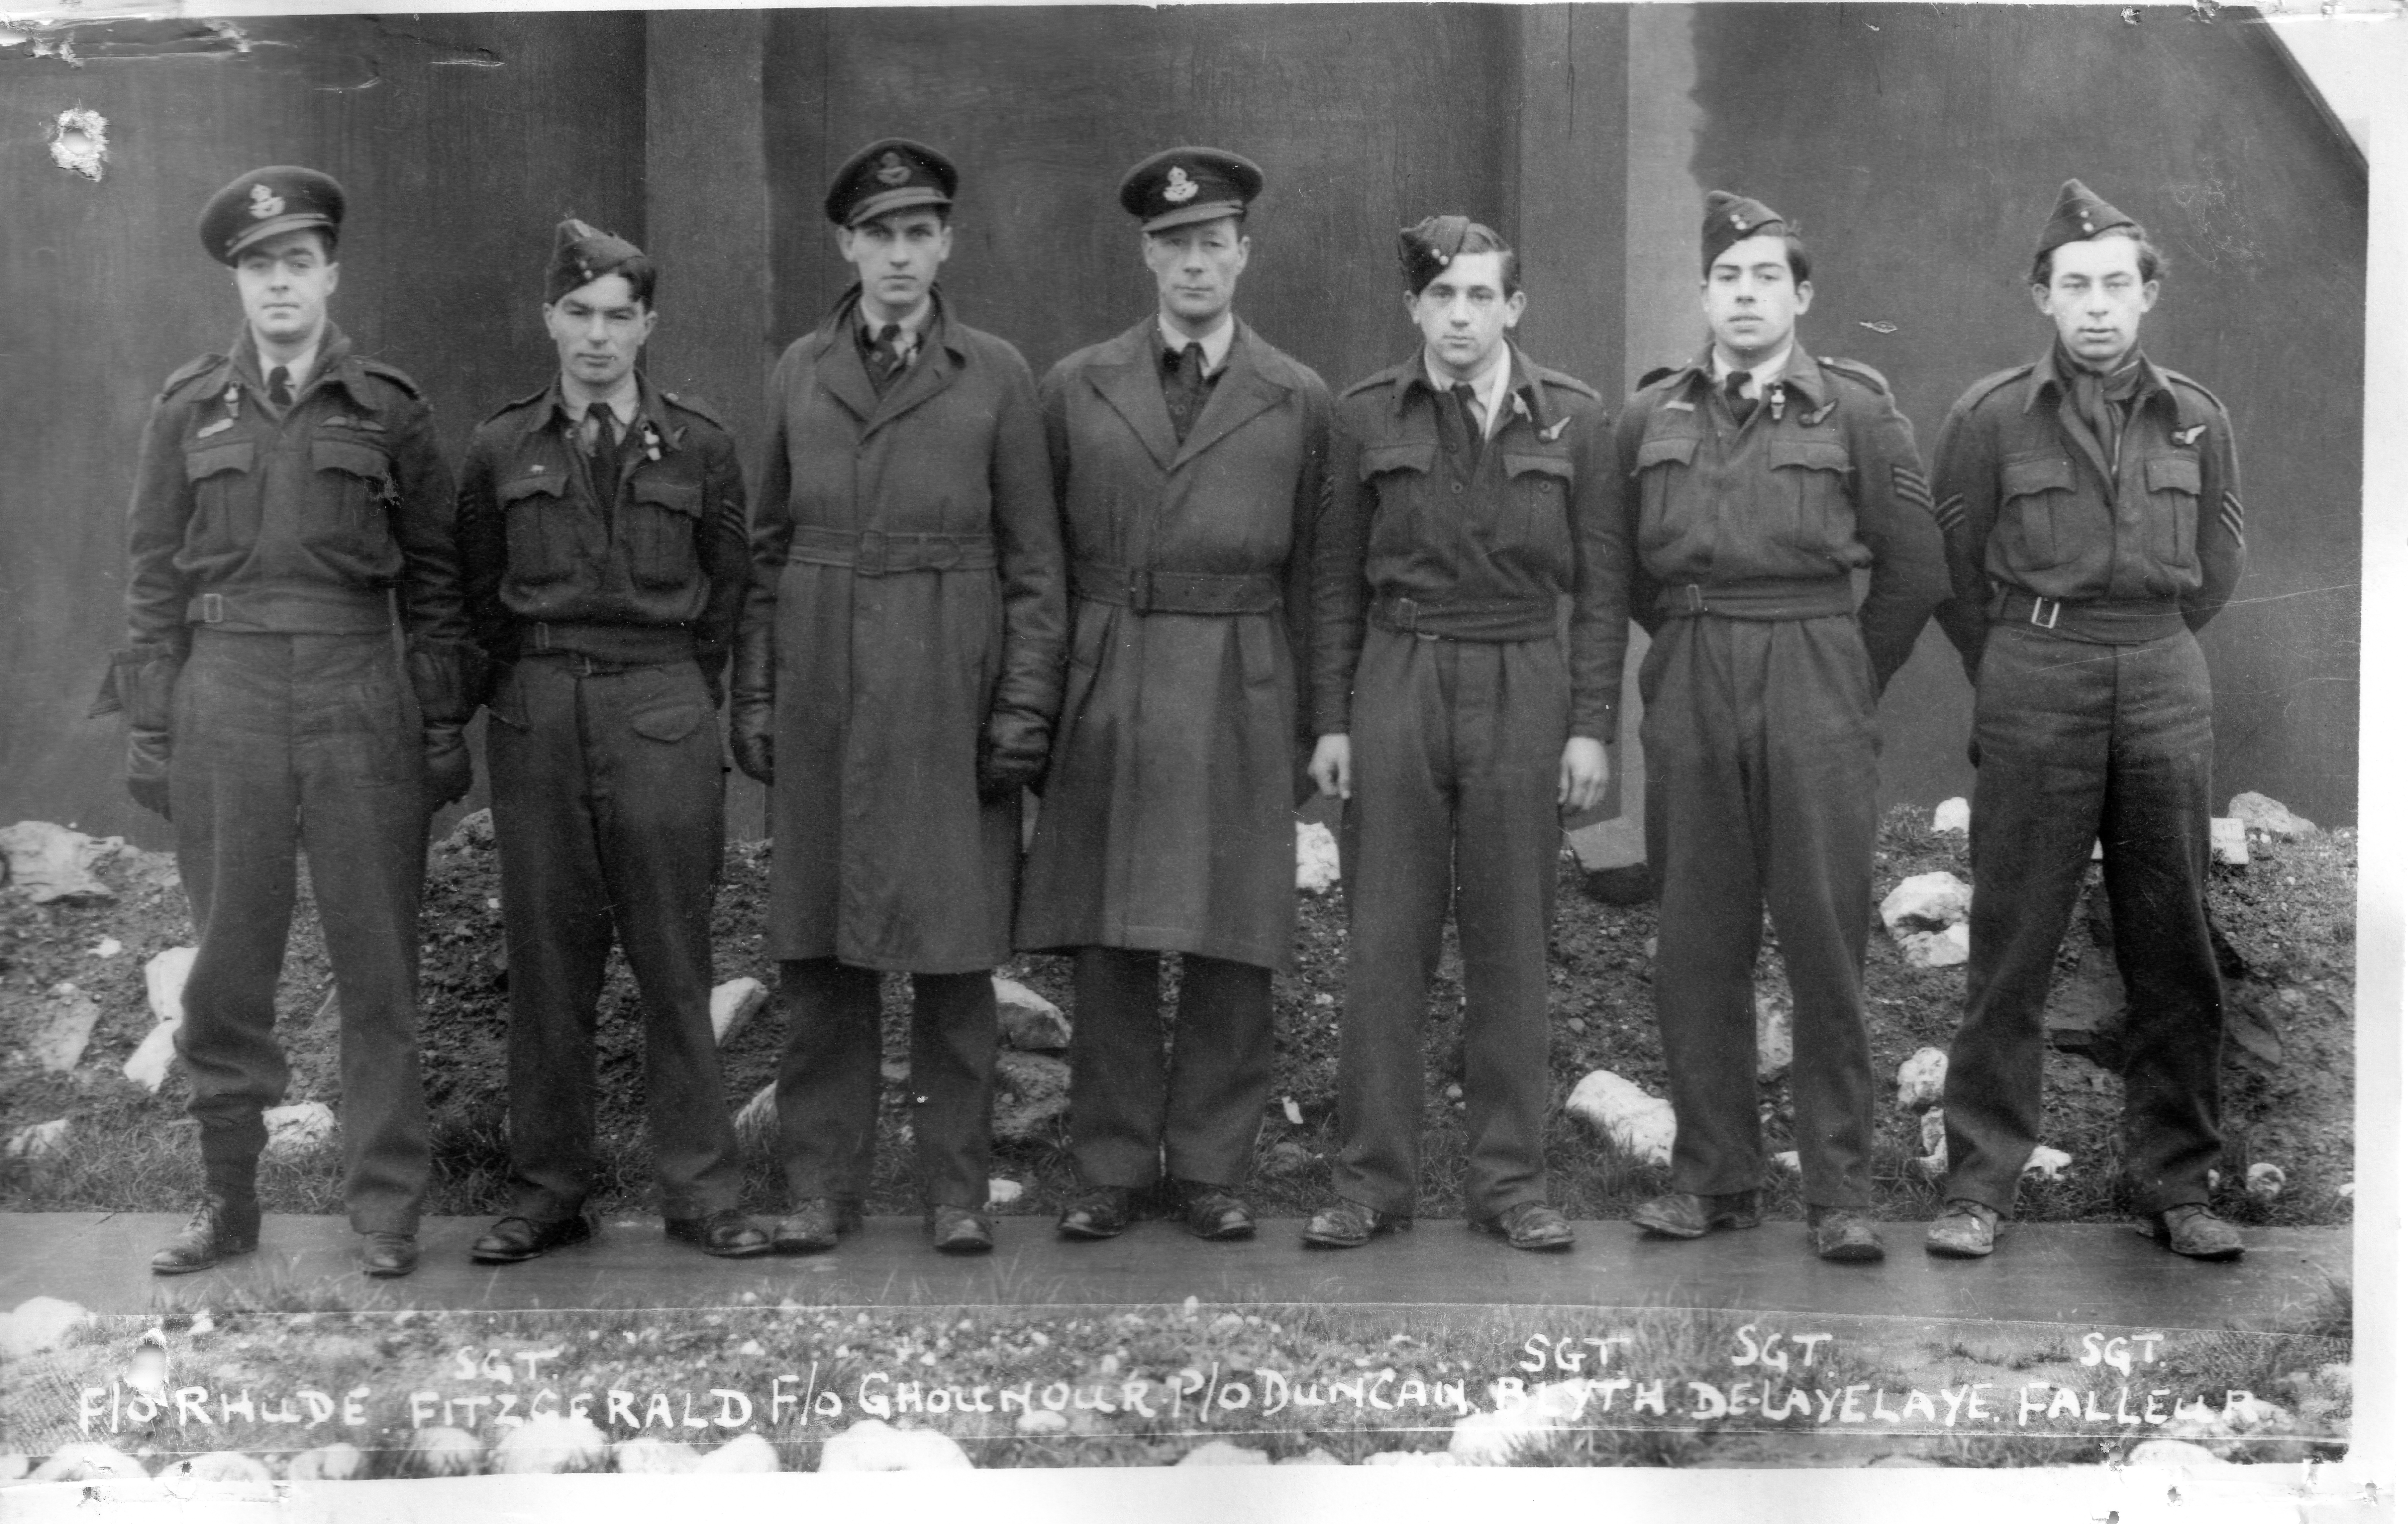 |
For further information and photos click here |
F/Sgt Banahan and Crew
 |
For further information and photos click here |
F/O V G Roberts and Crew
 |
For further information and photos click here |
P/O R Vaughan and Crew
 |
For further information and photos click here |
F/Sgt J R Locke and Crew
 |
For further information and photos click here |
F/Lt H G Johnston and Crew
 |
For further information and photos click here |
F/O L S Johnston and Crew
 |
For further information and photos click here |
F/Sgt F P Knight RAAF and Crew
 |
For further information and photos click here |
F/Lt D R Parsons RAAF and Crew
 |
For further information and photos click here |
F/O J C Hutcheson DFC and Crew
 |
For further information and photos click here |
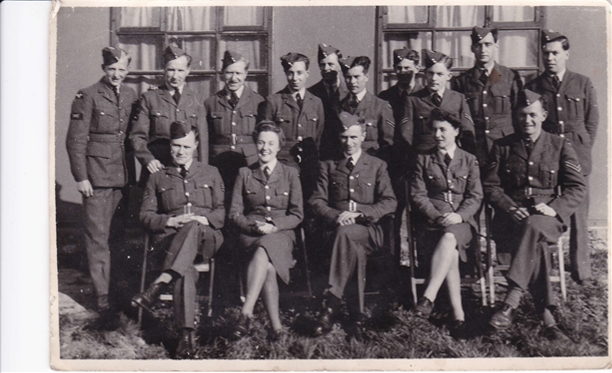
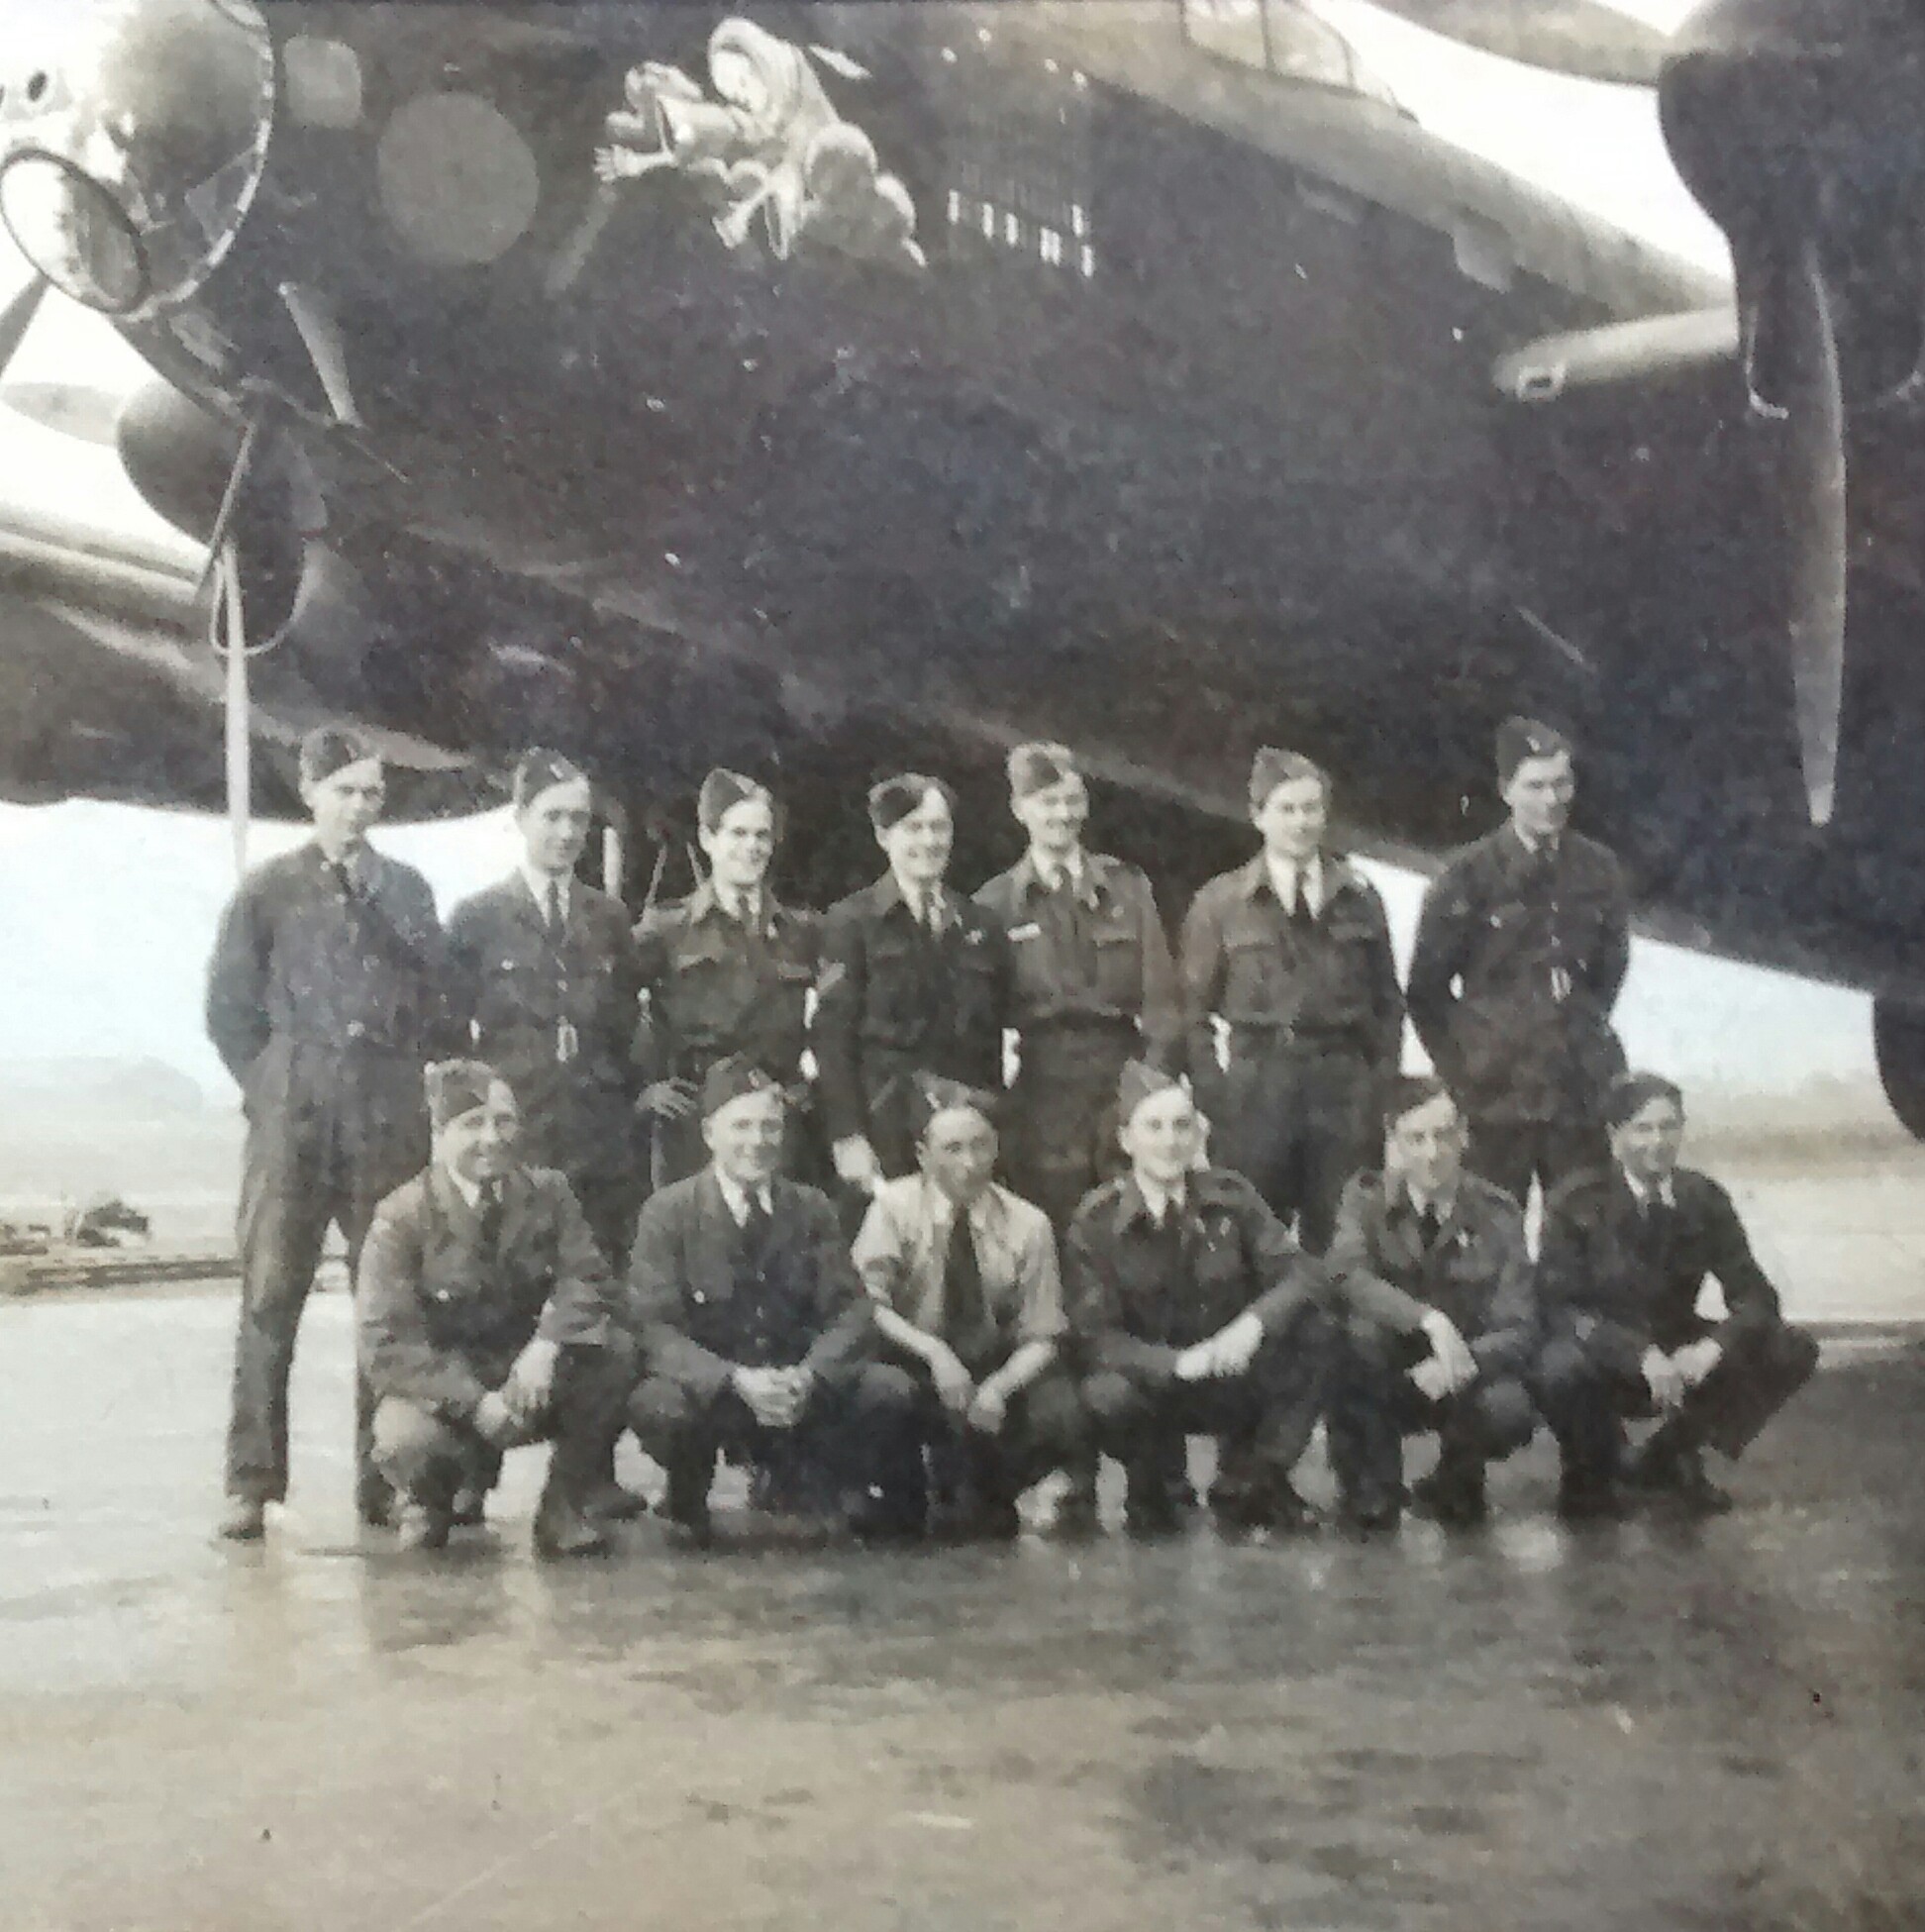 |
Crew and Ground Crew
For further information and photos click here |
P/O P Maxwell DFC and Crew
 |
For further information and photos click here |
F/O J J W Dawson and Crew
 |
For further information and photos (and including crew signatures) click here |
Fl/Lt N L Rose DFC and Crew
 |
For further information and photos click here |
F/O V A Thygessen RCAF DFC and Crew
 |
For further information and photos click here |
Fl/Lt R Thomas DFC and Crew
 |
For further information and photos click here |
P/O W J Bibby and Crew
 |
For further information and photos click here
Pictures courtesy of Mandy Martin |
P/O F Dowson and Crew
 |
For further information and photos click here |
Sgt Allington and Crew
 |
For further information and photos click here |
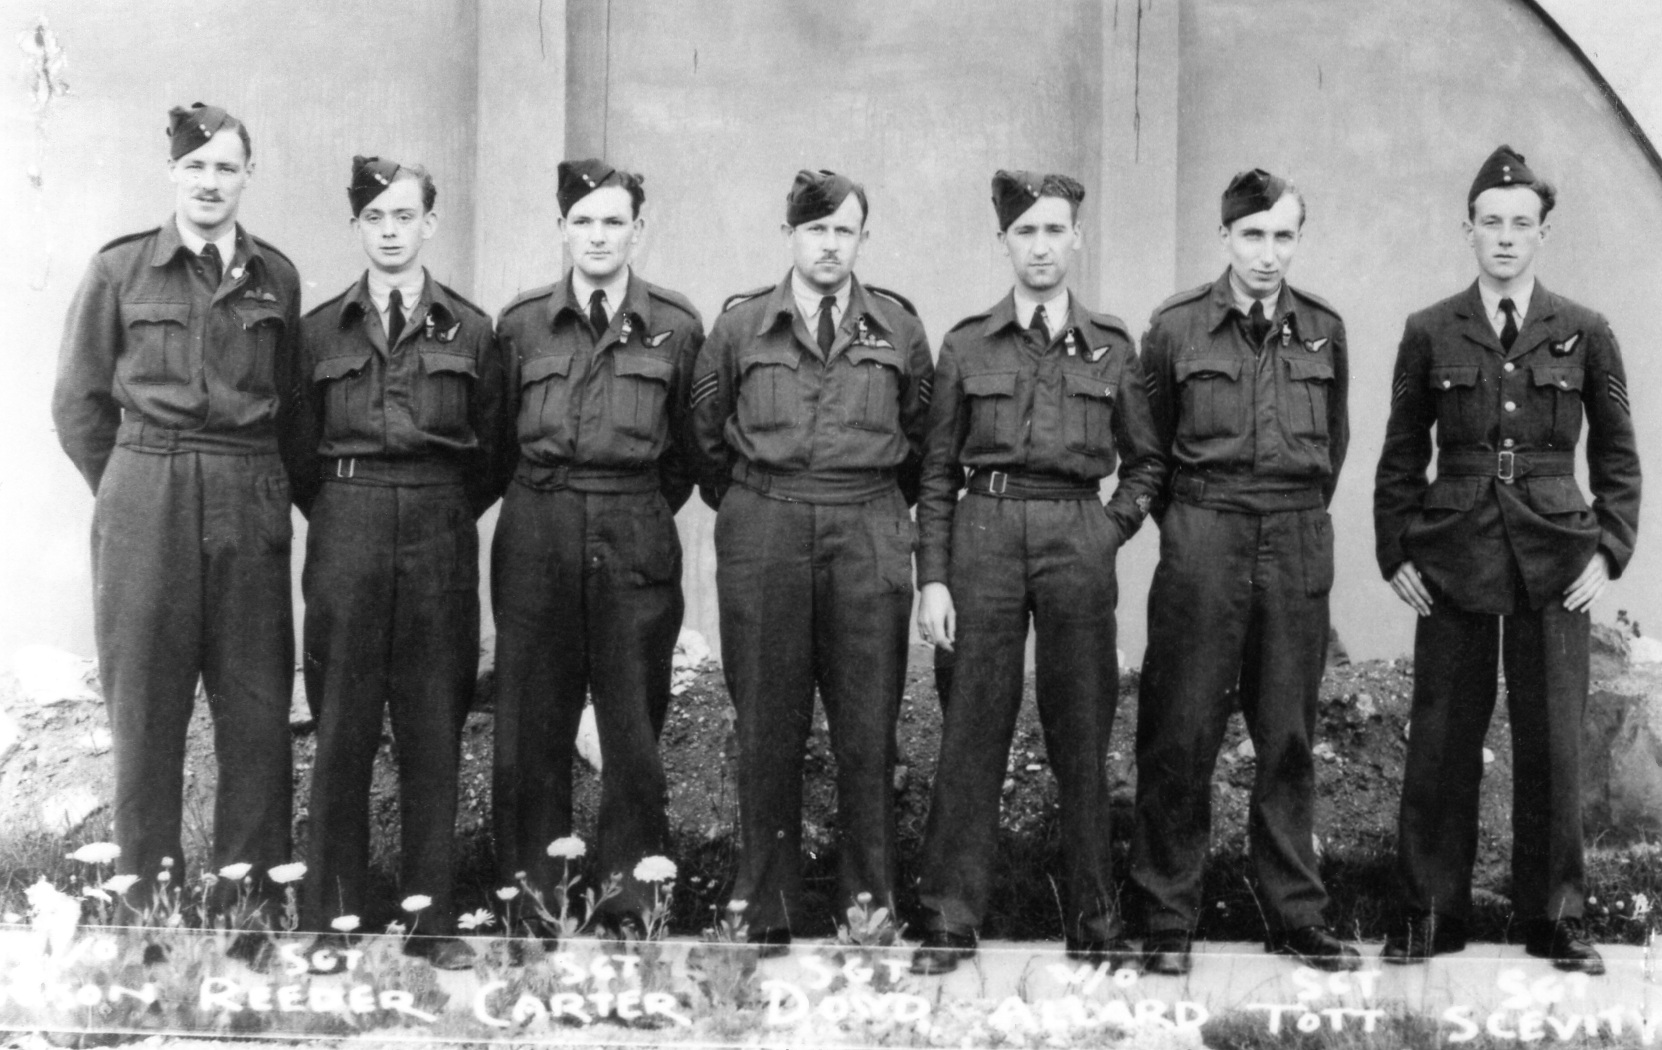
F/Lt J A Sweeney RCAF and Crew
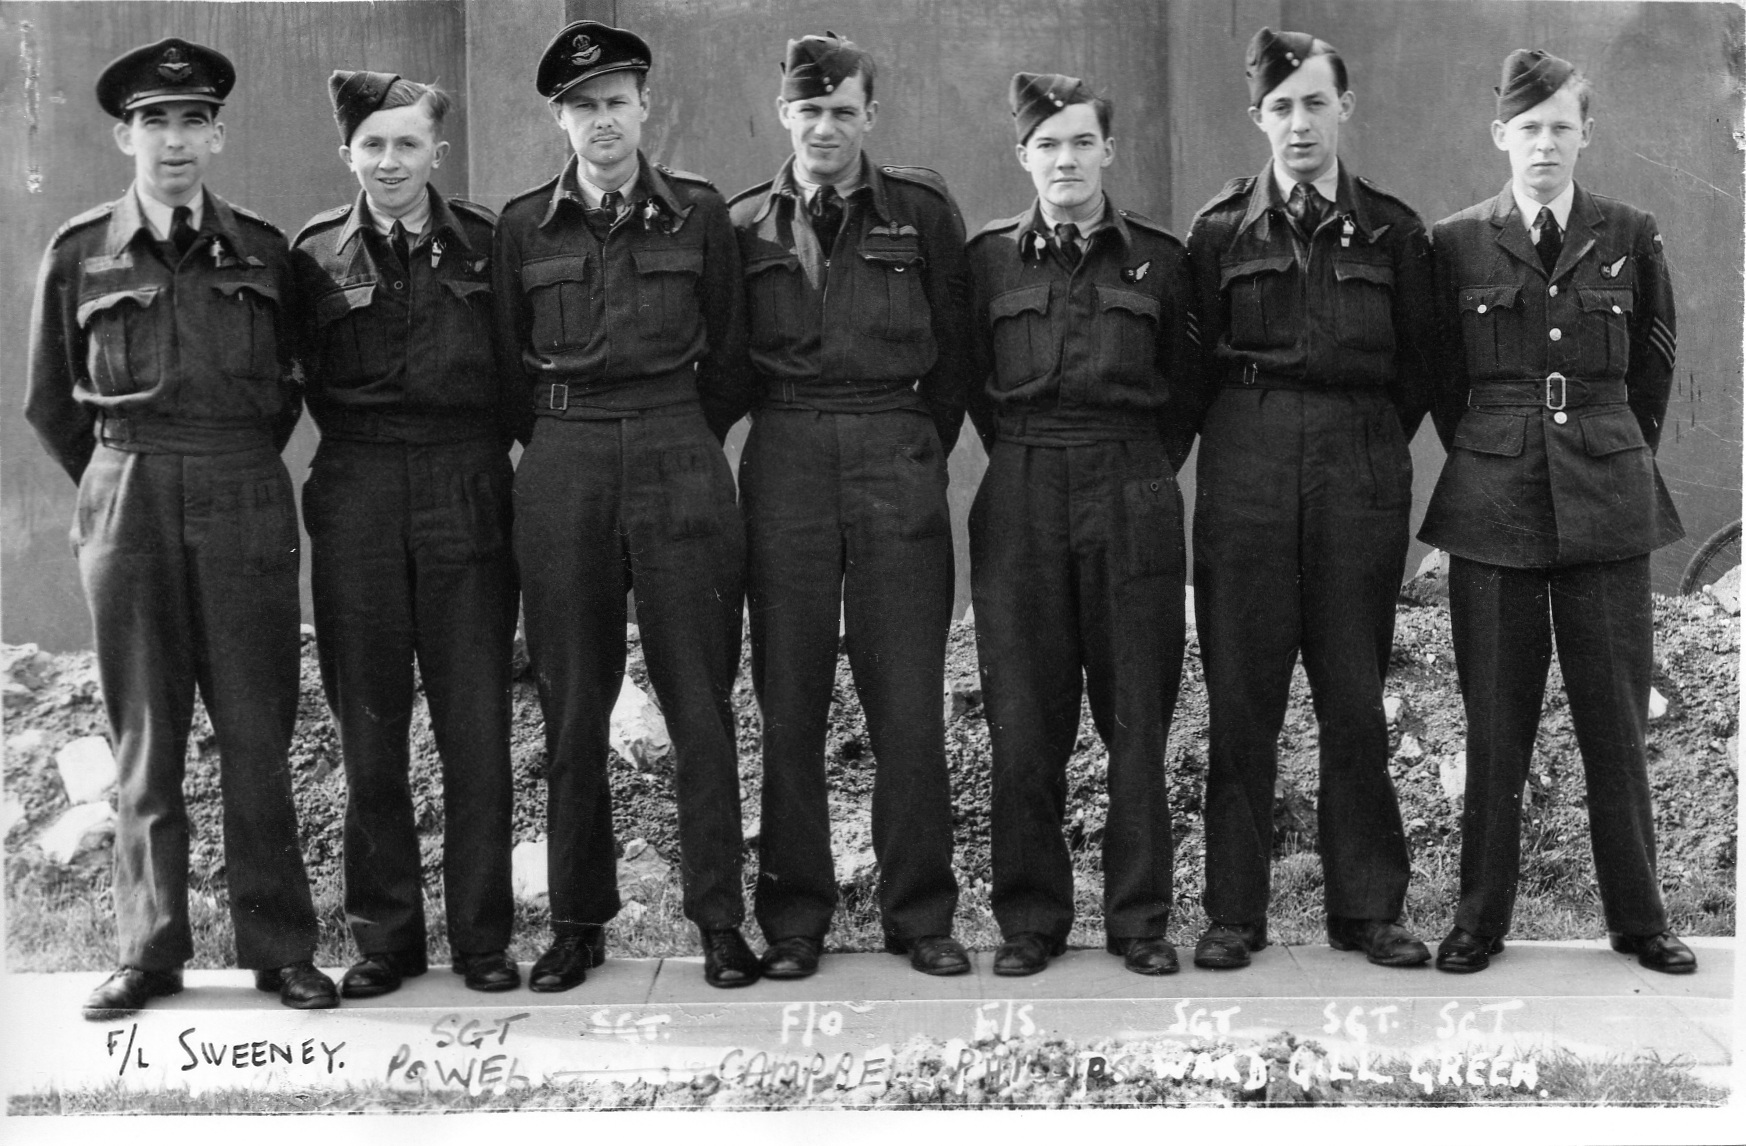 |
For further information and photos click here |
F/Lt Waite and Crew
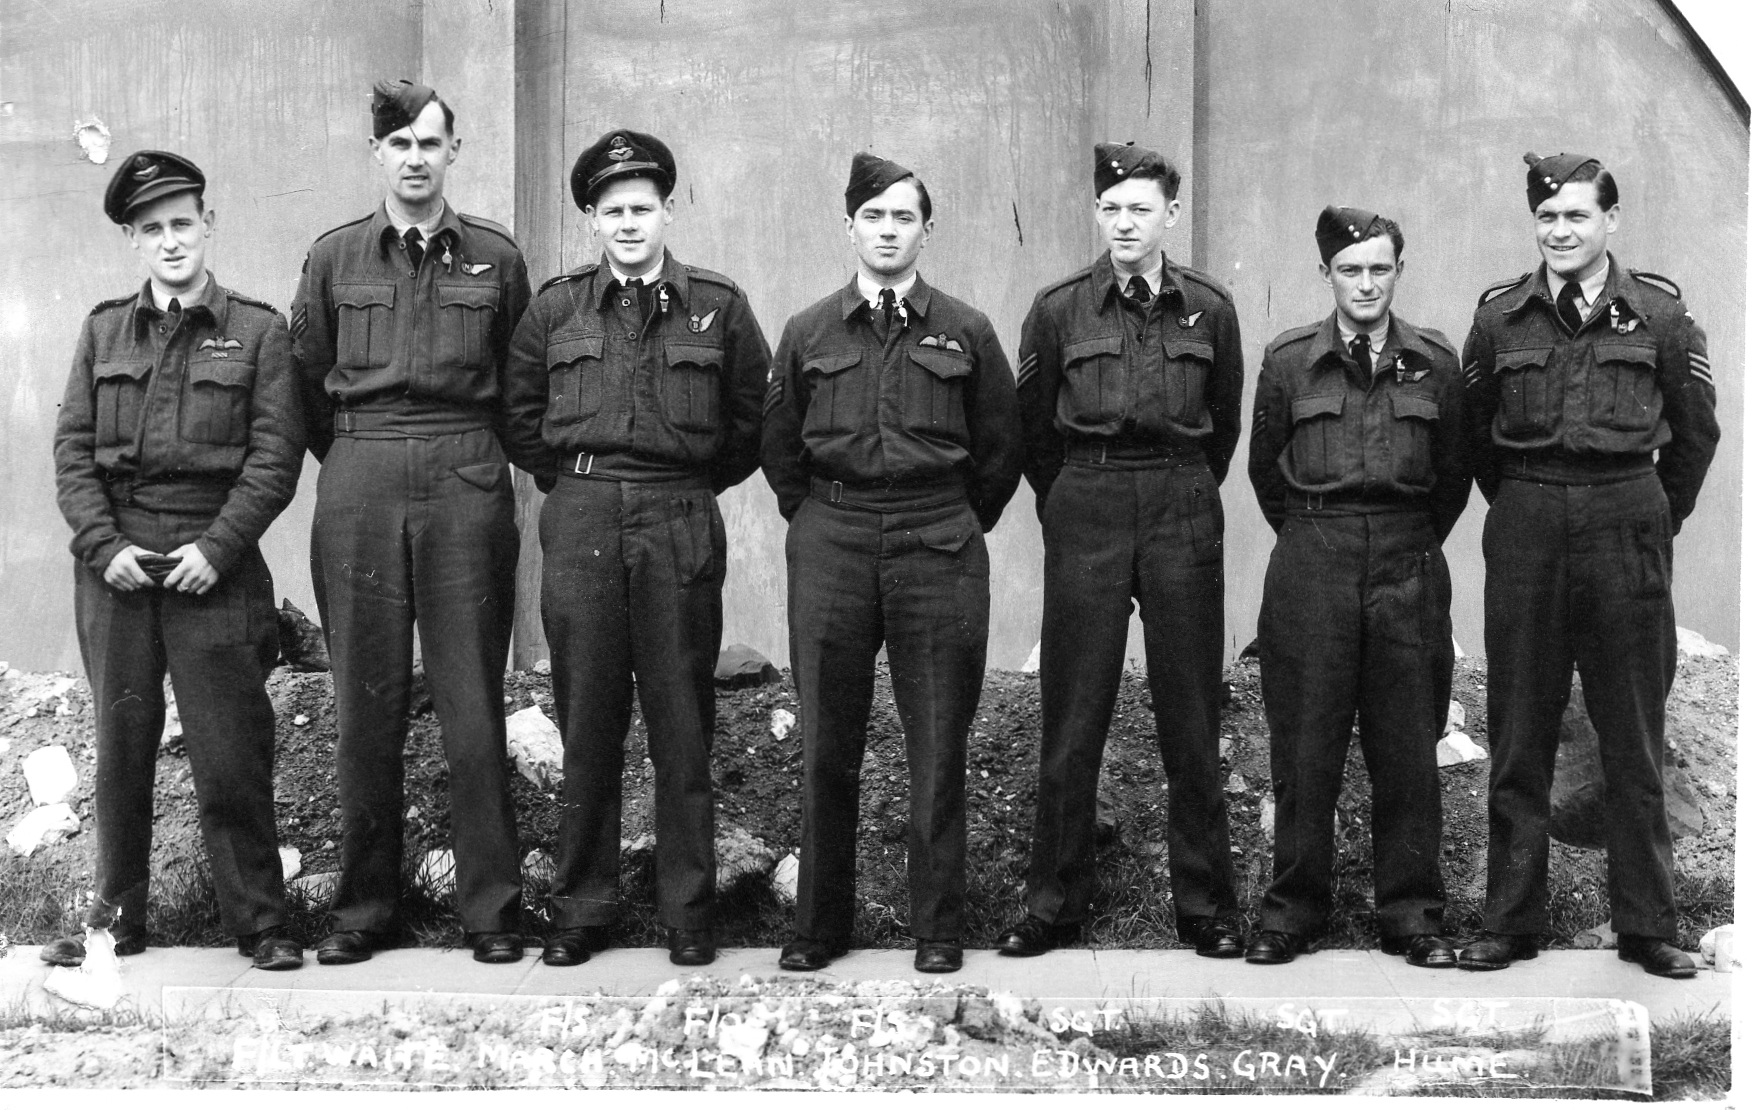 |
For further information and photos click here
Photos of the first tour crew AND second tour crew (left) now online |
F/O L A Doward and Crew
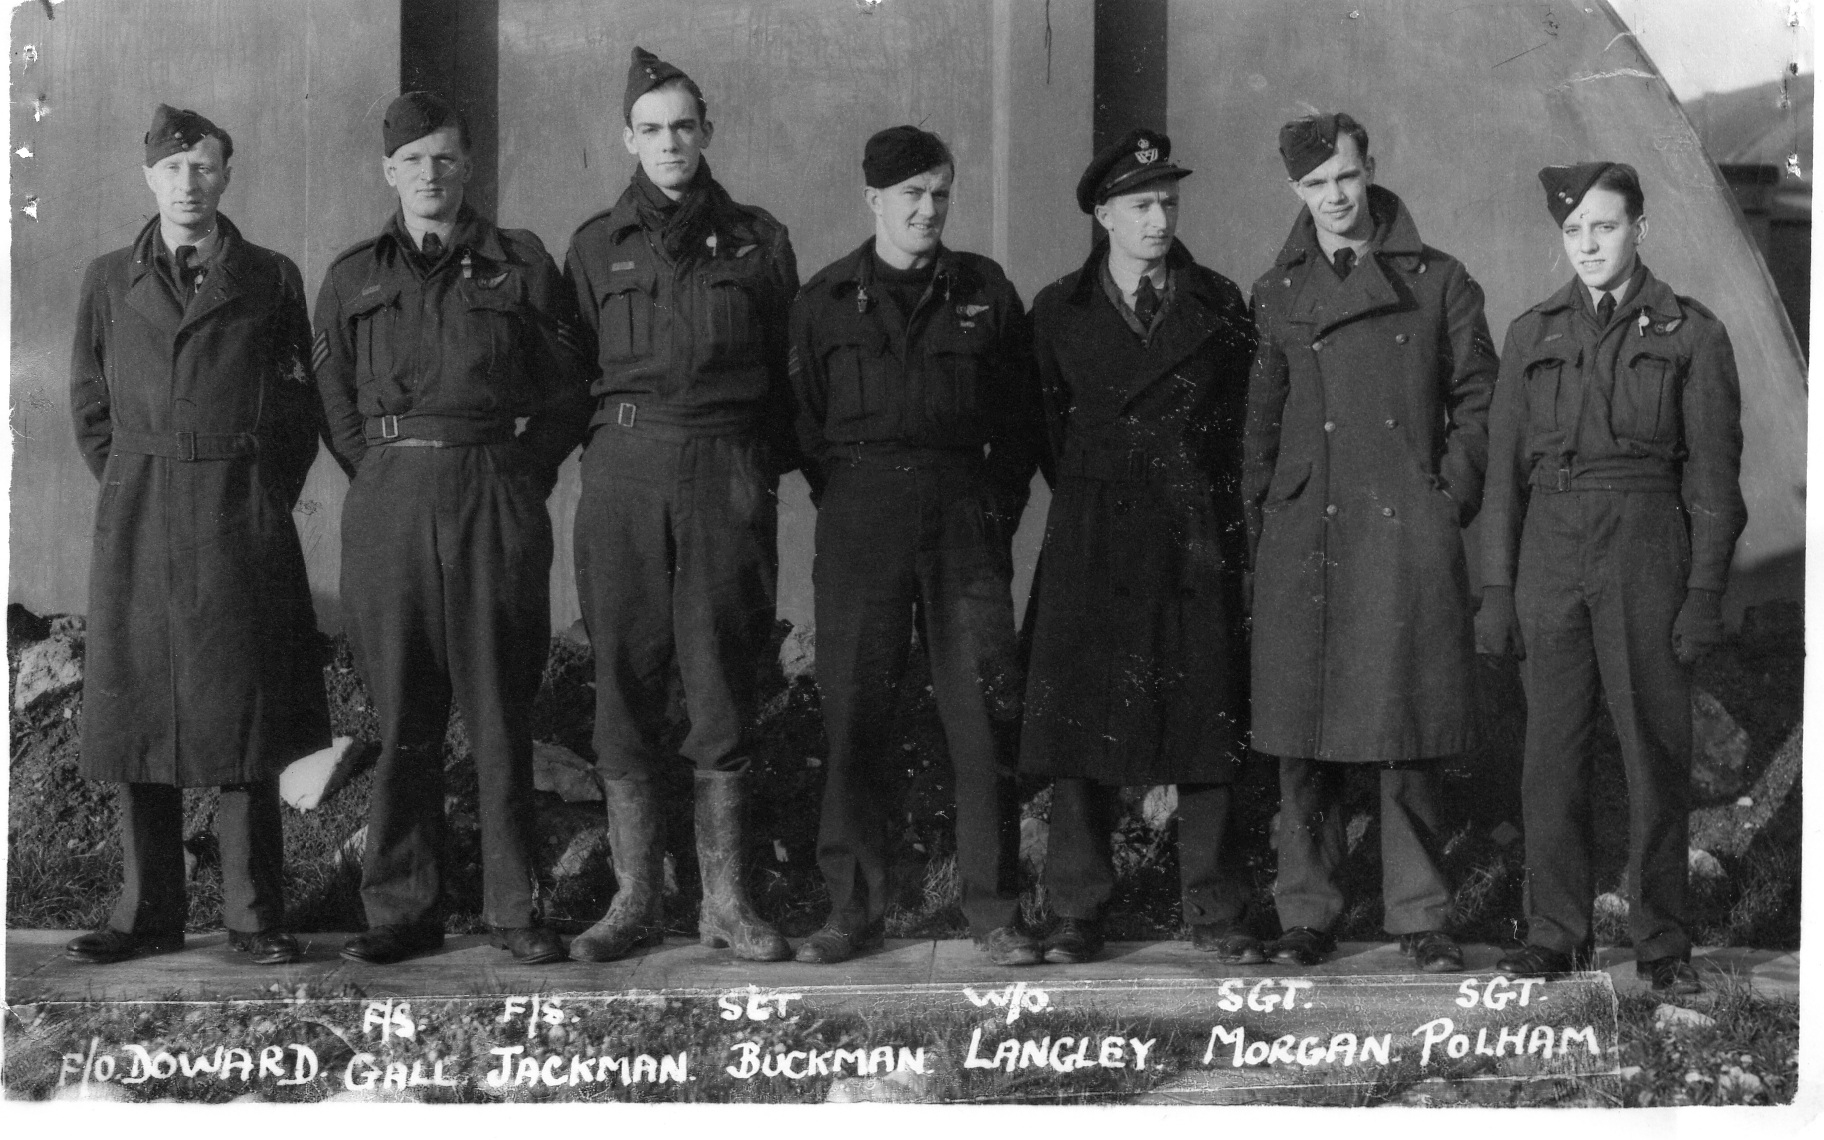 |
For further information and photos click here |
F/Sgt Hodgkiss and Crew
 |
For further information and photos click here |
S/Ldr G D Graham DFC AFC RAAF and Crew
 |
For further information and photos click here |
F/Sgt C W Graham and Crew
 |
For further information and photos click here |
F/Lt D J Boydon and Crew
 |
For further information and photos click here |
F/Sgt D P Lambert and Crew
 |
For further information and photos click here |
F/Sgt C R R Scott and Crew
 |
For further information and photos click here |
P/O V J Bouchard DFC and Crew
 |
For further information and photos click here |
F/O R Purvis DFC and Crew
 |
For further information and photos click here |
F/Sgt J F Thomas and Crew
 |
For further information and photos click here |
F/O D D S Ferguson DFC and Crew
 |
For further information and photos click here |
F/O J B Barnes RCAF and Crew
 |
For further information and photos click here |
F/O Kingsmill RAAF and Crew
 |
For further information and photos click here |
F/O Thompson and Crew
 |
For further information and photos click here |
F/Sgt M J Ball and Crew
 |
For further information and photos click here |
F/Sgt Butler RAAF and Crew
 |
For further information and photos click here |
F/Lt F S Steele DFC RCAF and Crew
 |
For further information and photos click here |
F/O R W Wright and Crew
 |
For further information and photos click here |
F/Lt C M Irving and Crew
 |
For further information and photos click here |
F/Lt L O Williams DFC RAAF and Crew
 |
For further information and photos click here |
F/Lt RW Picton DFC and F/O J J Logan DFC
 |
For further information and photos click here |
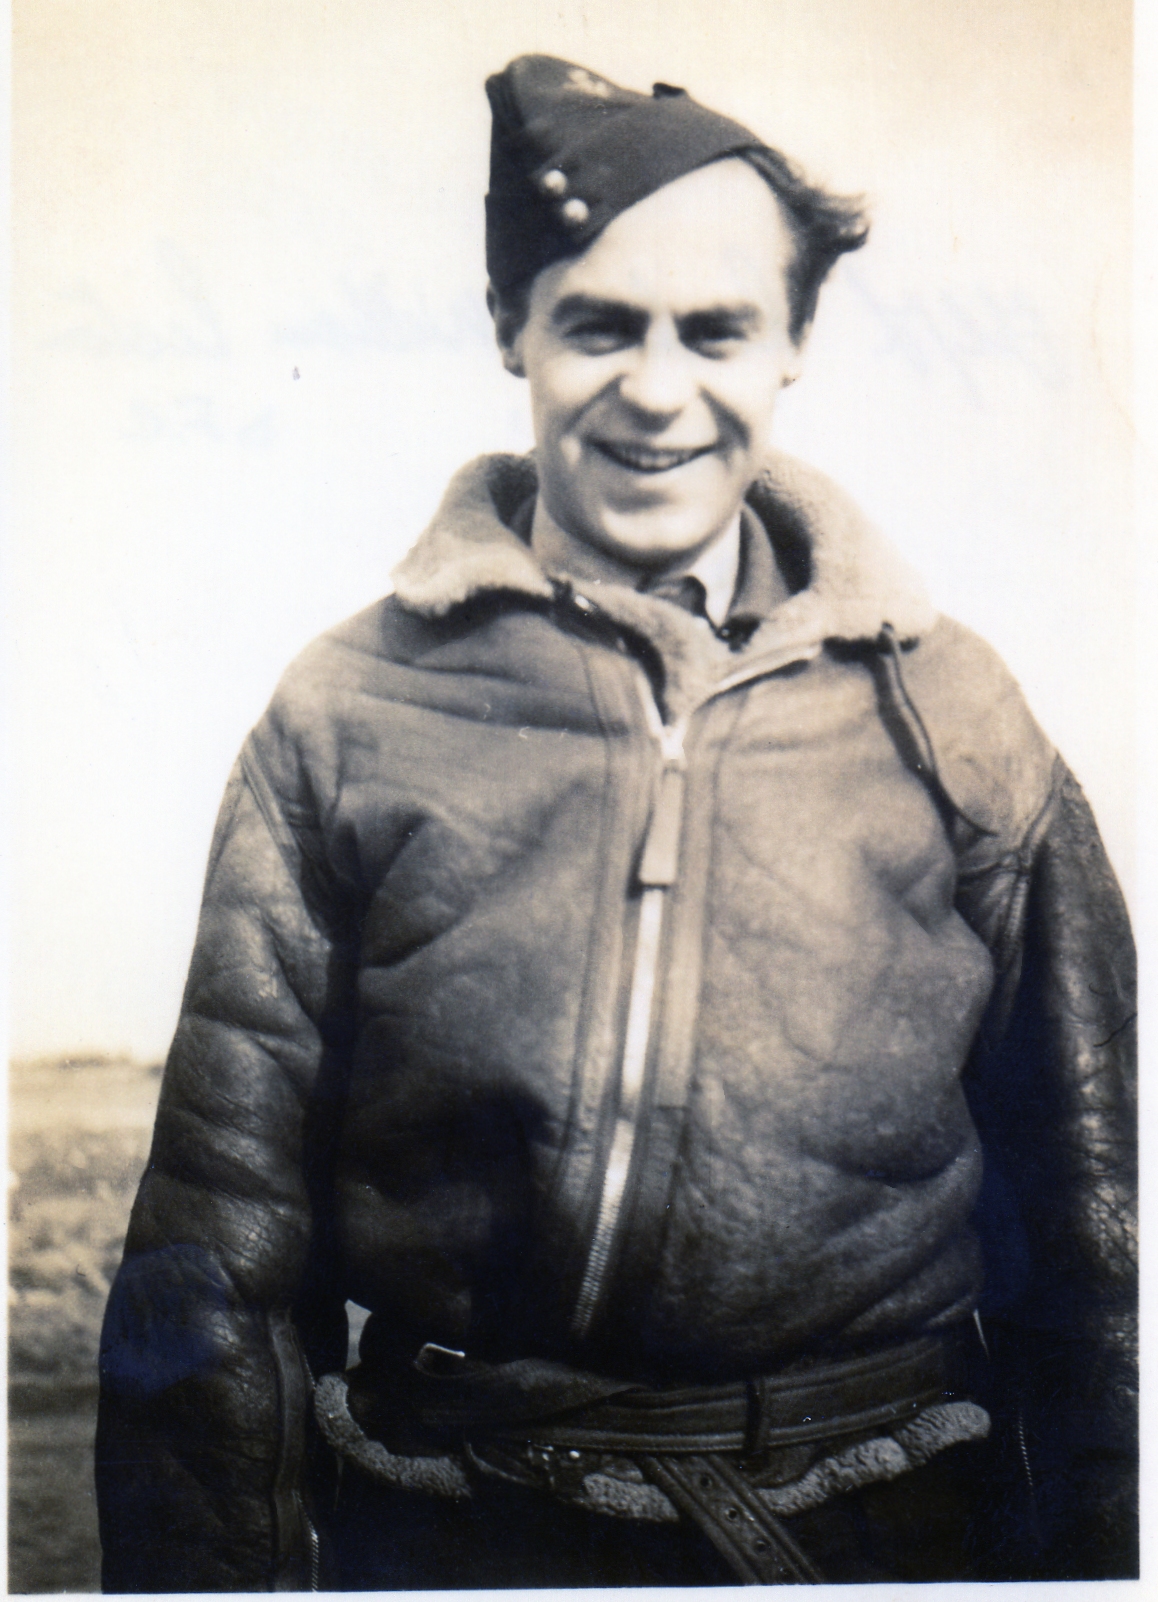
F/Lt J F Craig DFC RNZAF
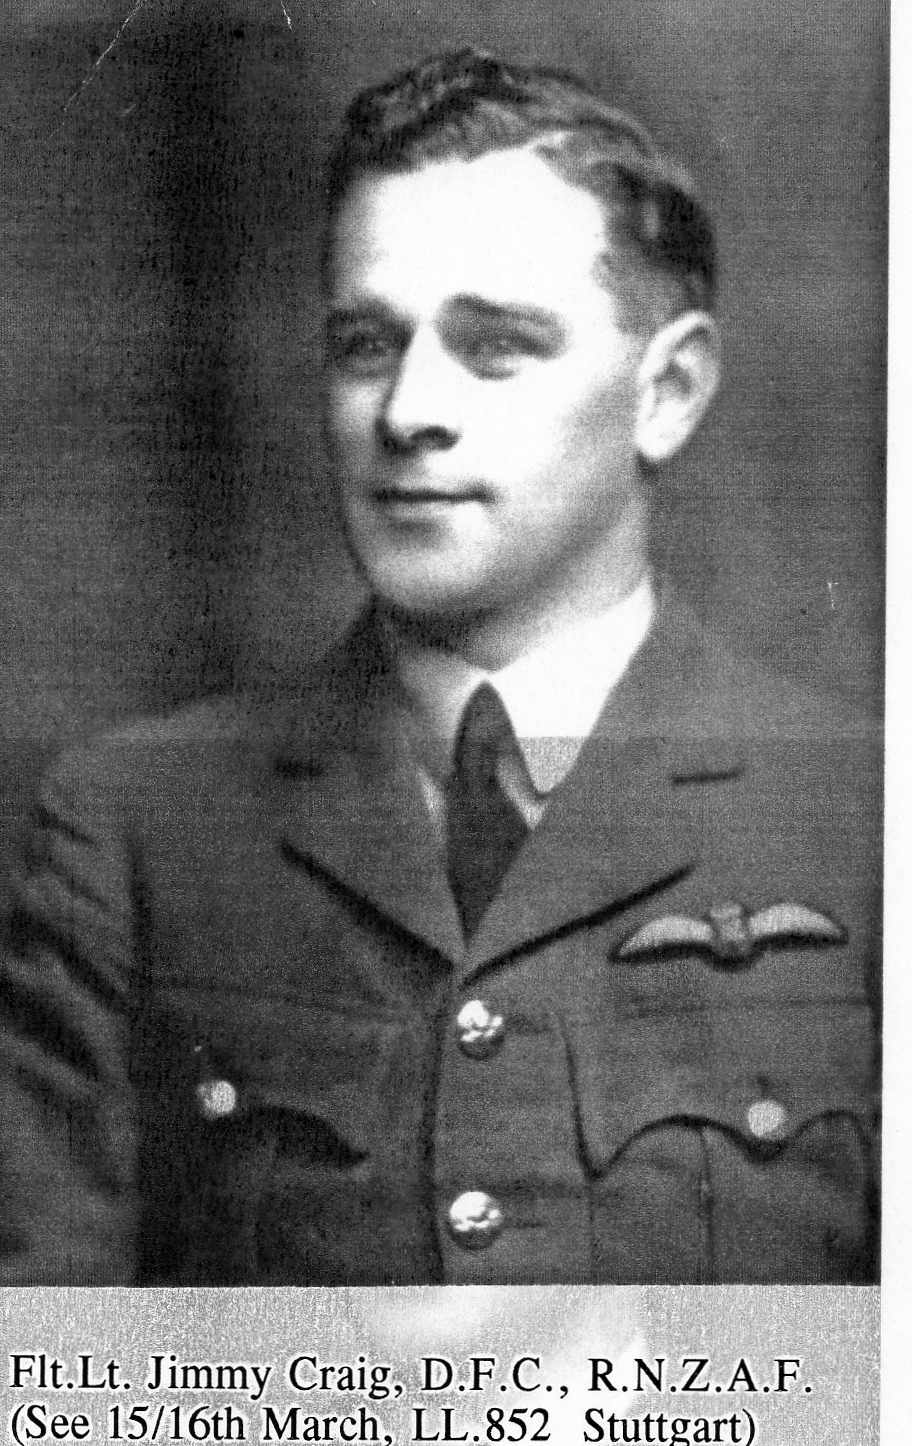 |
For further information and photos click here |
F/O K F Sidwell DFC and Crew
 |
For further information and photos click here
Picture courtesy of Mark Simpson |
F/O P M Roche
 |
For further information and photos click here
Picture courtesy of Christine Lang |
F/O J O Richard DFC Crew
 |
For further information and photos click here
Crew page updated (17/01/2021) with a new group photo (possibly of the F/O Richard crew) Picture courtesy of Rob Rate |
F/Lt J S G Crawford Crew
 |
For further information and photos click here
Picture from Jack Harris collection |
F/O A D Young DFC Crew
 |
For further information and photos click here
Picture courtesy of Julian Hill |
P/O N D Holdsworth DFC Crew
 |
For further information and photos click here
Pictures courtesy of Daniel Granger |
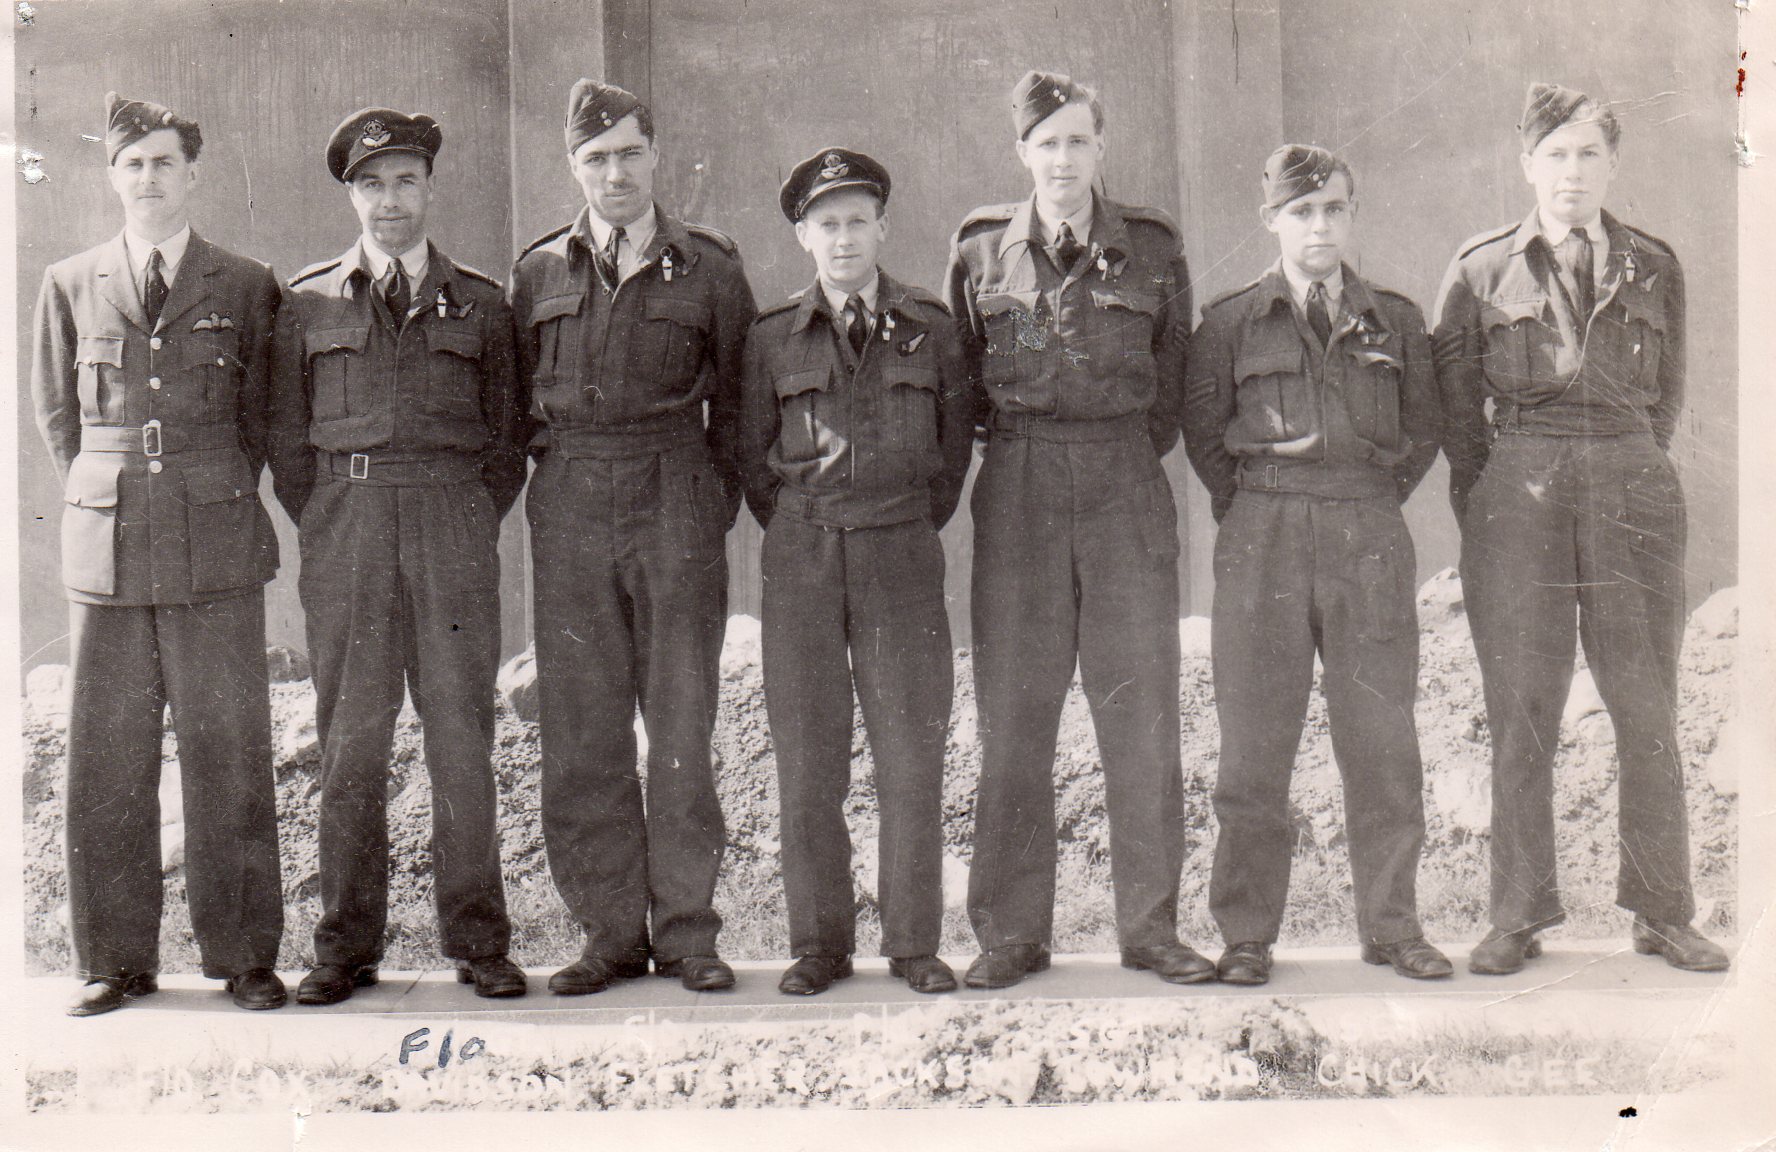
Unidentified Crew
 |
A photo was recently received of a crew labelled as a "550" crew. At the time of writing the crew has not been identified. If you can help identify anyone in the photo and thus possibly also the crew then do please email the web-site (contact details in the page footer)
For further information and photo click here Pictures courtesy of Dave Wicks |
F/Lt A W Thomas Crew
To date a photo of the full crew remains unavailable; the crew were killed on their first operational sortie. However, photos of, and other documents about, Sgt A E Lukeman (R/AG) have recently been received. All of the items are now archived in the 550 Squadron museum in North Killingholme.
 |
For further information and photos click here
Picture courtesy of John Hines |
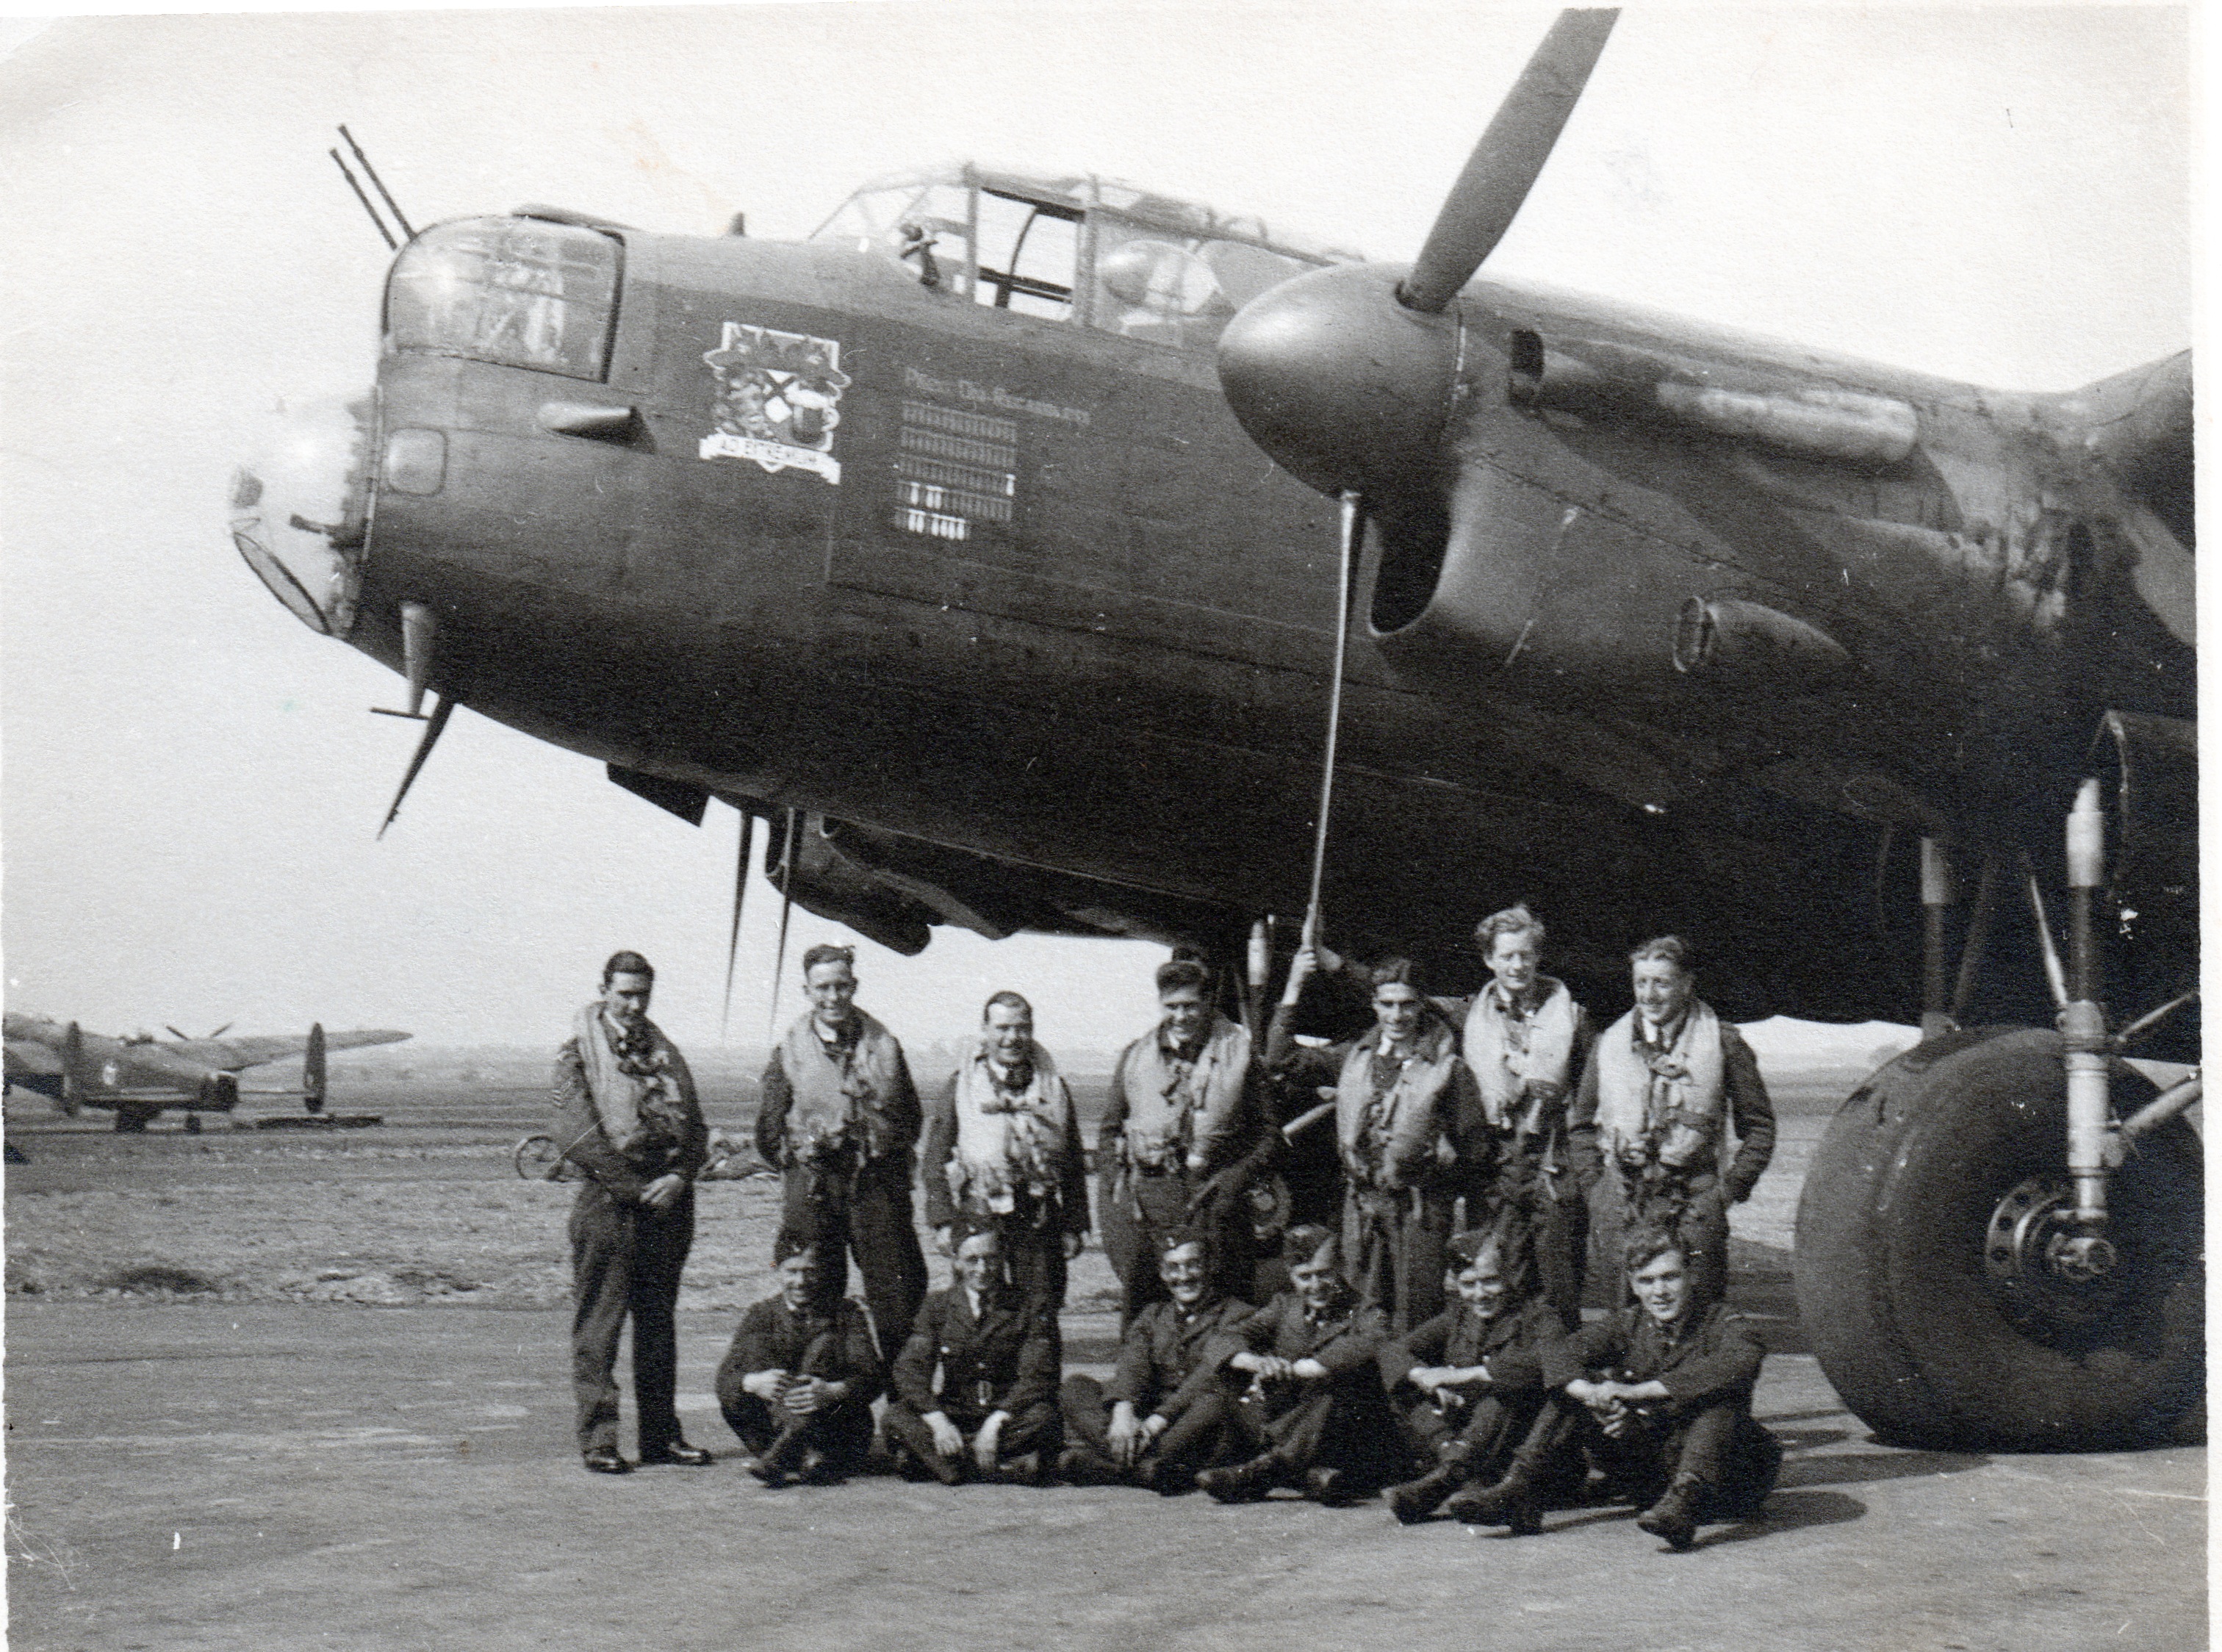
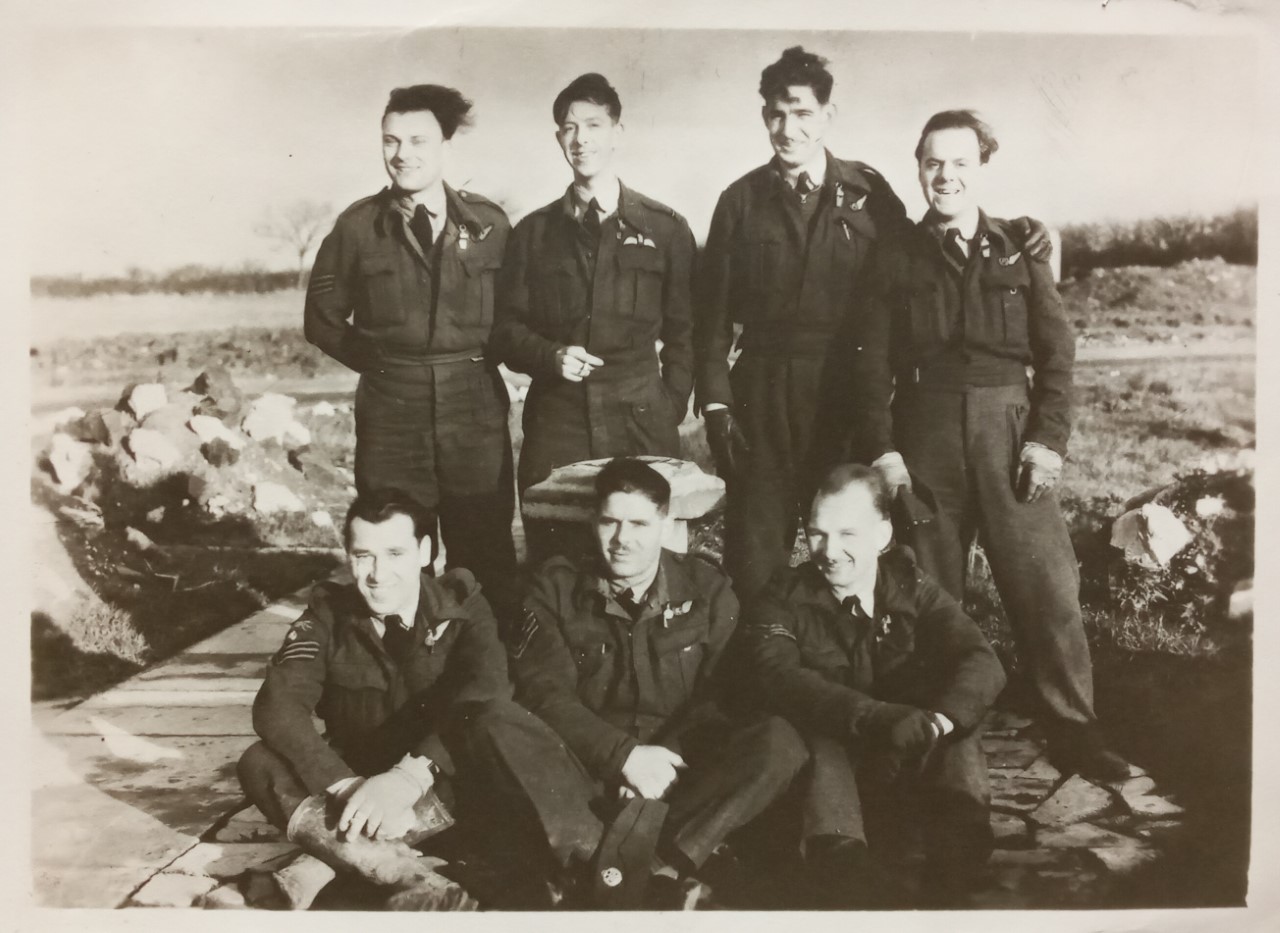
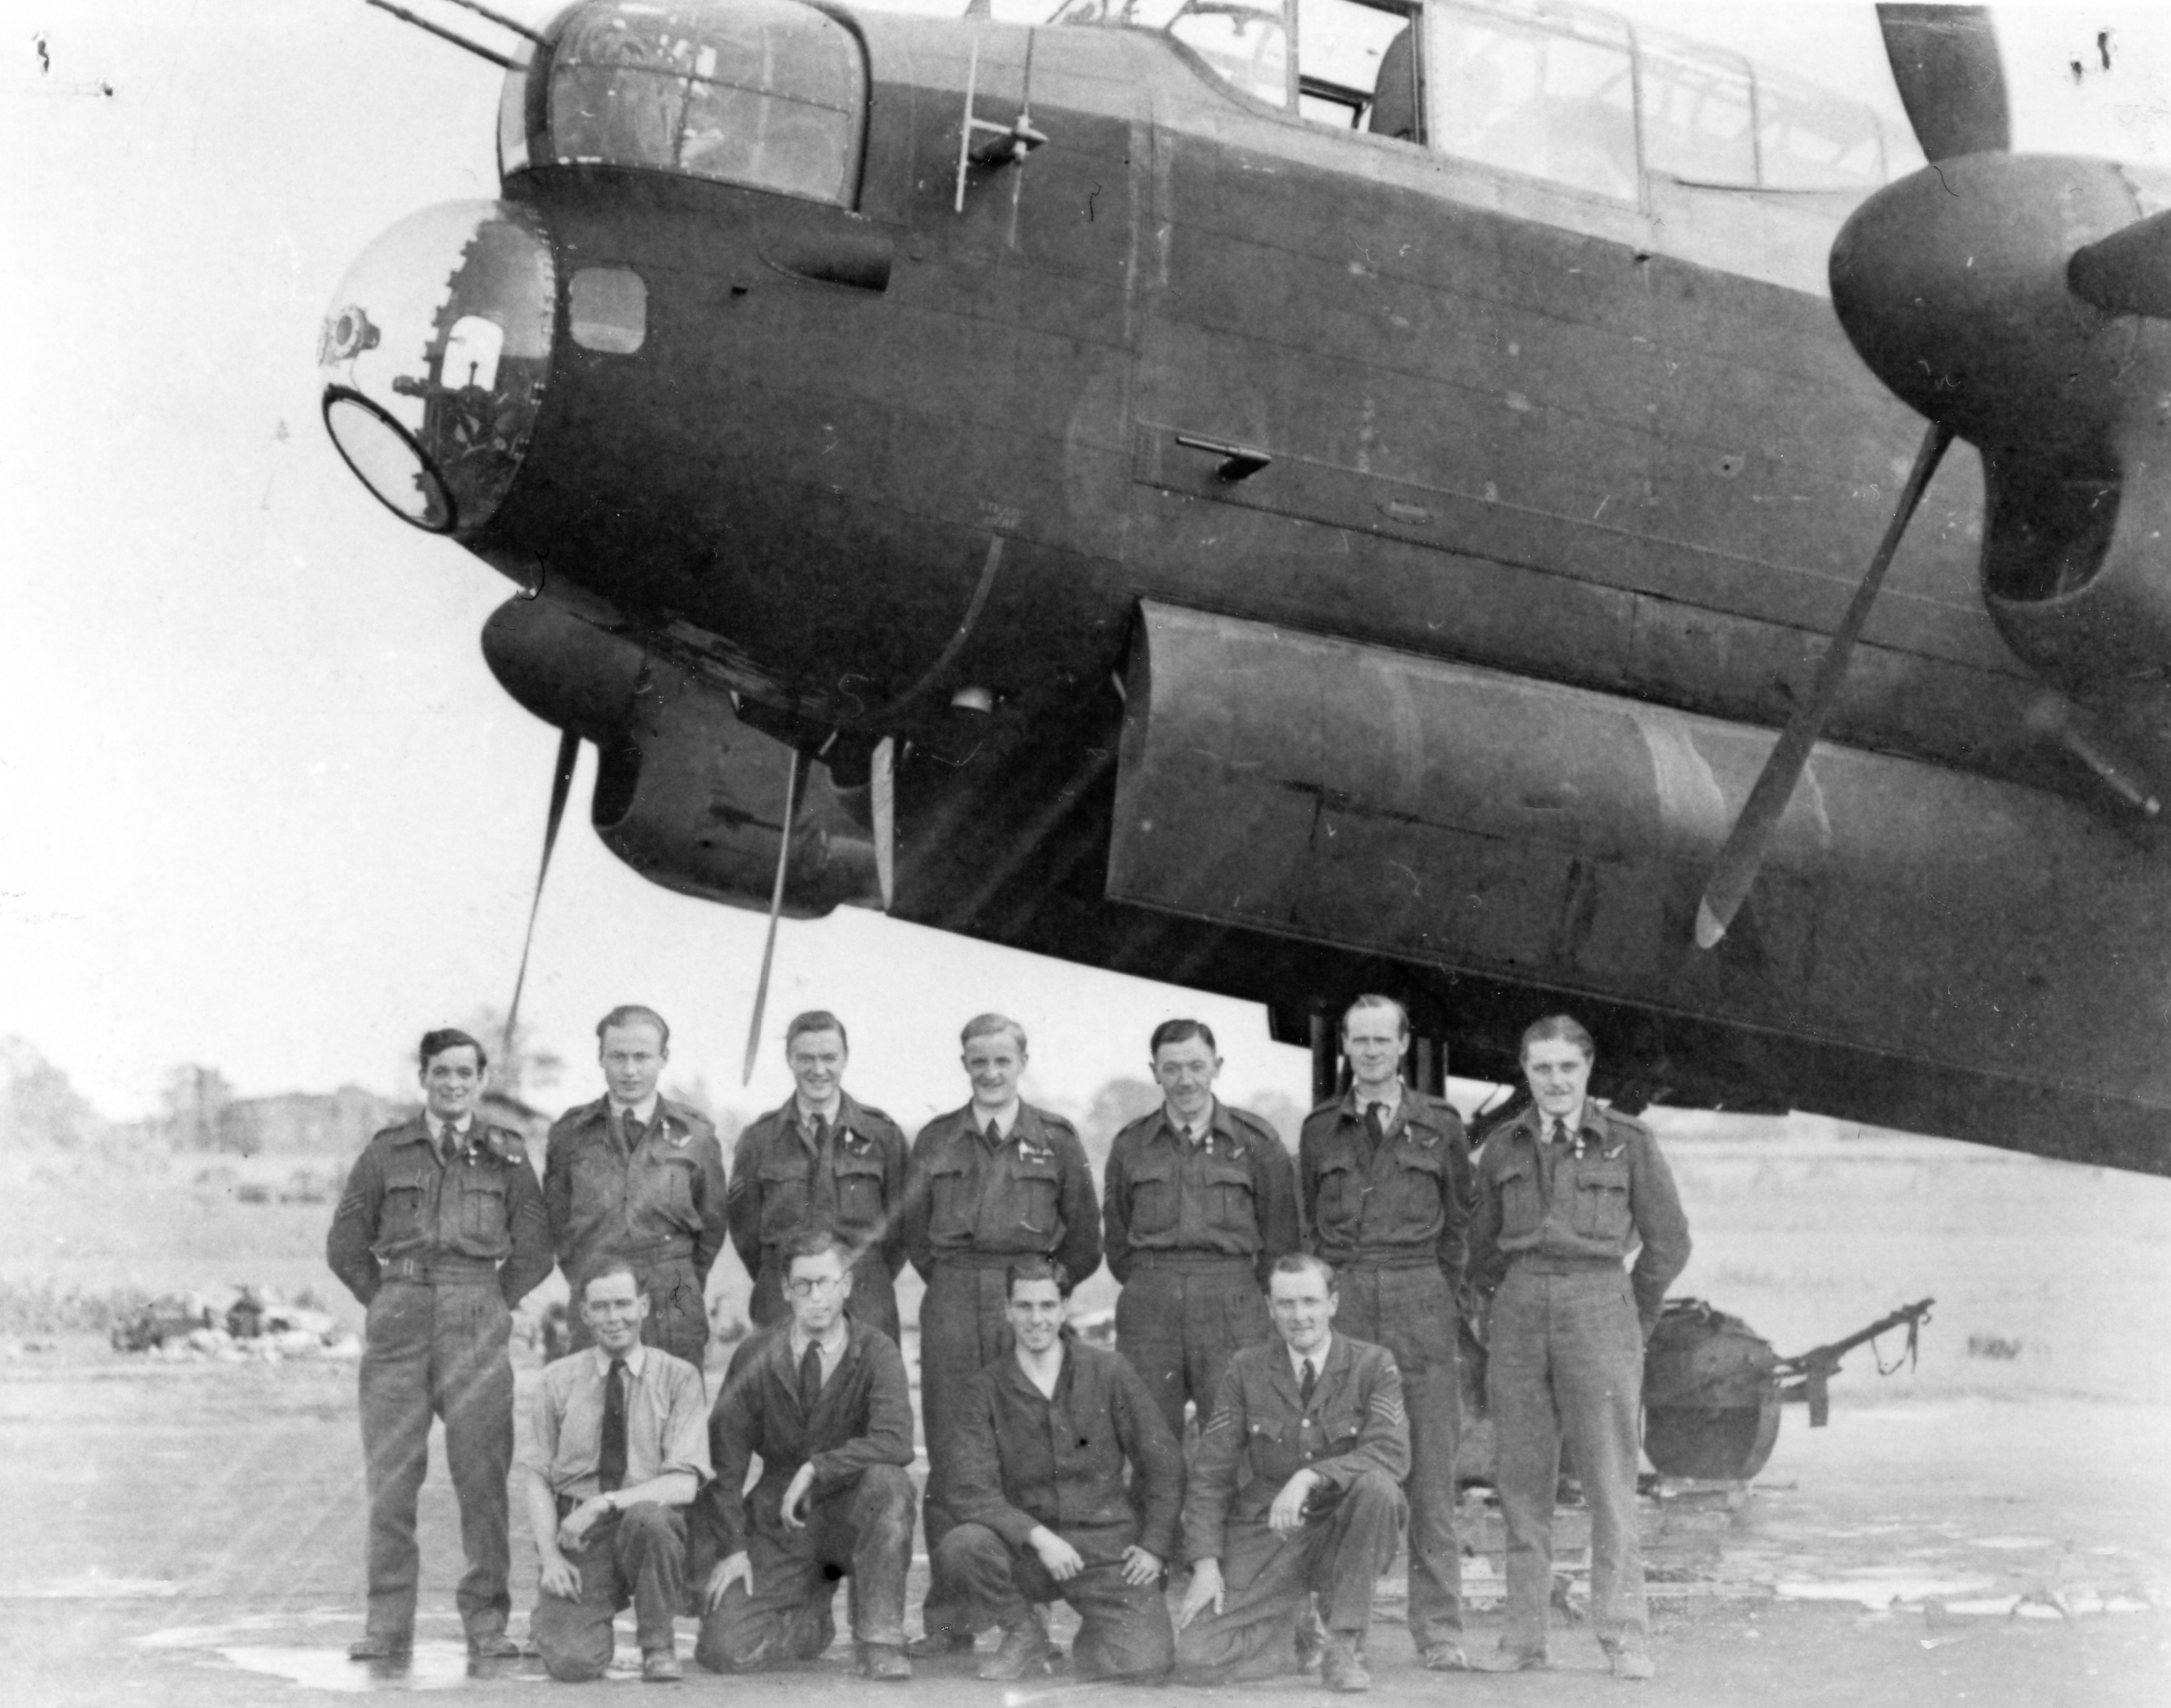
F/Lt R P Stone Crew and Ground Crew
 |
F/Lt RP Stone and crew
For further information and photos click here |
Some information was received from Mark Bradley (01/02/2024) concerning photographs taken by his father Victor Bradley. LAC V Bradley had an interest in photography and was taking photos at North Killingholme Station. An aspect of this is that as the photographer there are few images of him, but the photo below is an exception.
 |
F/Lt Stone with crew and ground crew LAC Bradley is the tall, young chap, fifth from the left Information and photo from Mark Bradley (son of Victor Bradley) Other men in the photo that are identified are the members of the F/Lt Stone crew: L-to-R: -, -, Sgt EW Holliday, -, V Bradley, Sgt LGB Wartnaby (?), W/O DE Norgrove , F/Sgt F Wright(?), F/Sgt CW Sayers, -, F/Lt RP Stone (P) For further information and photos click here |
 |
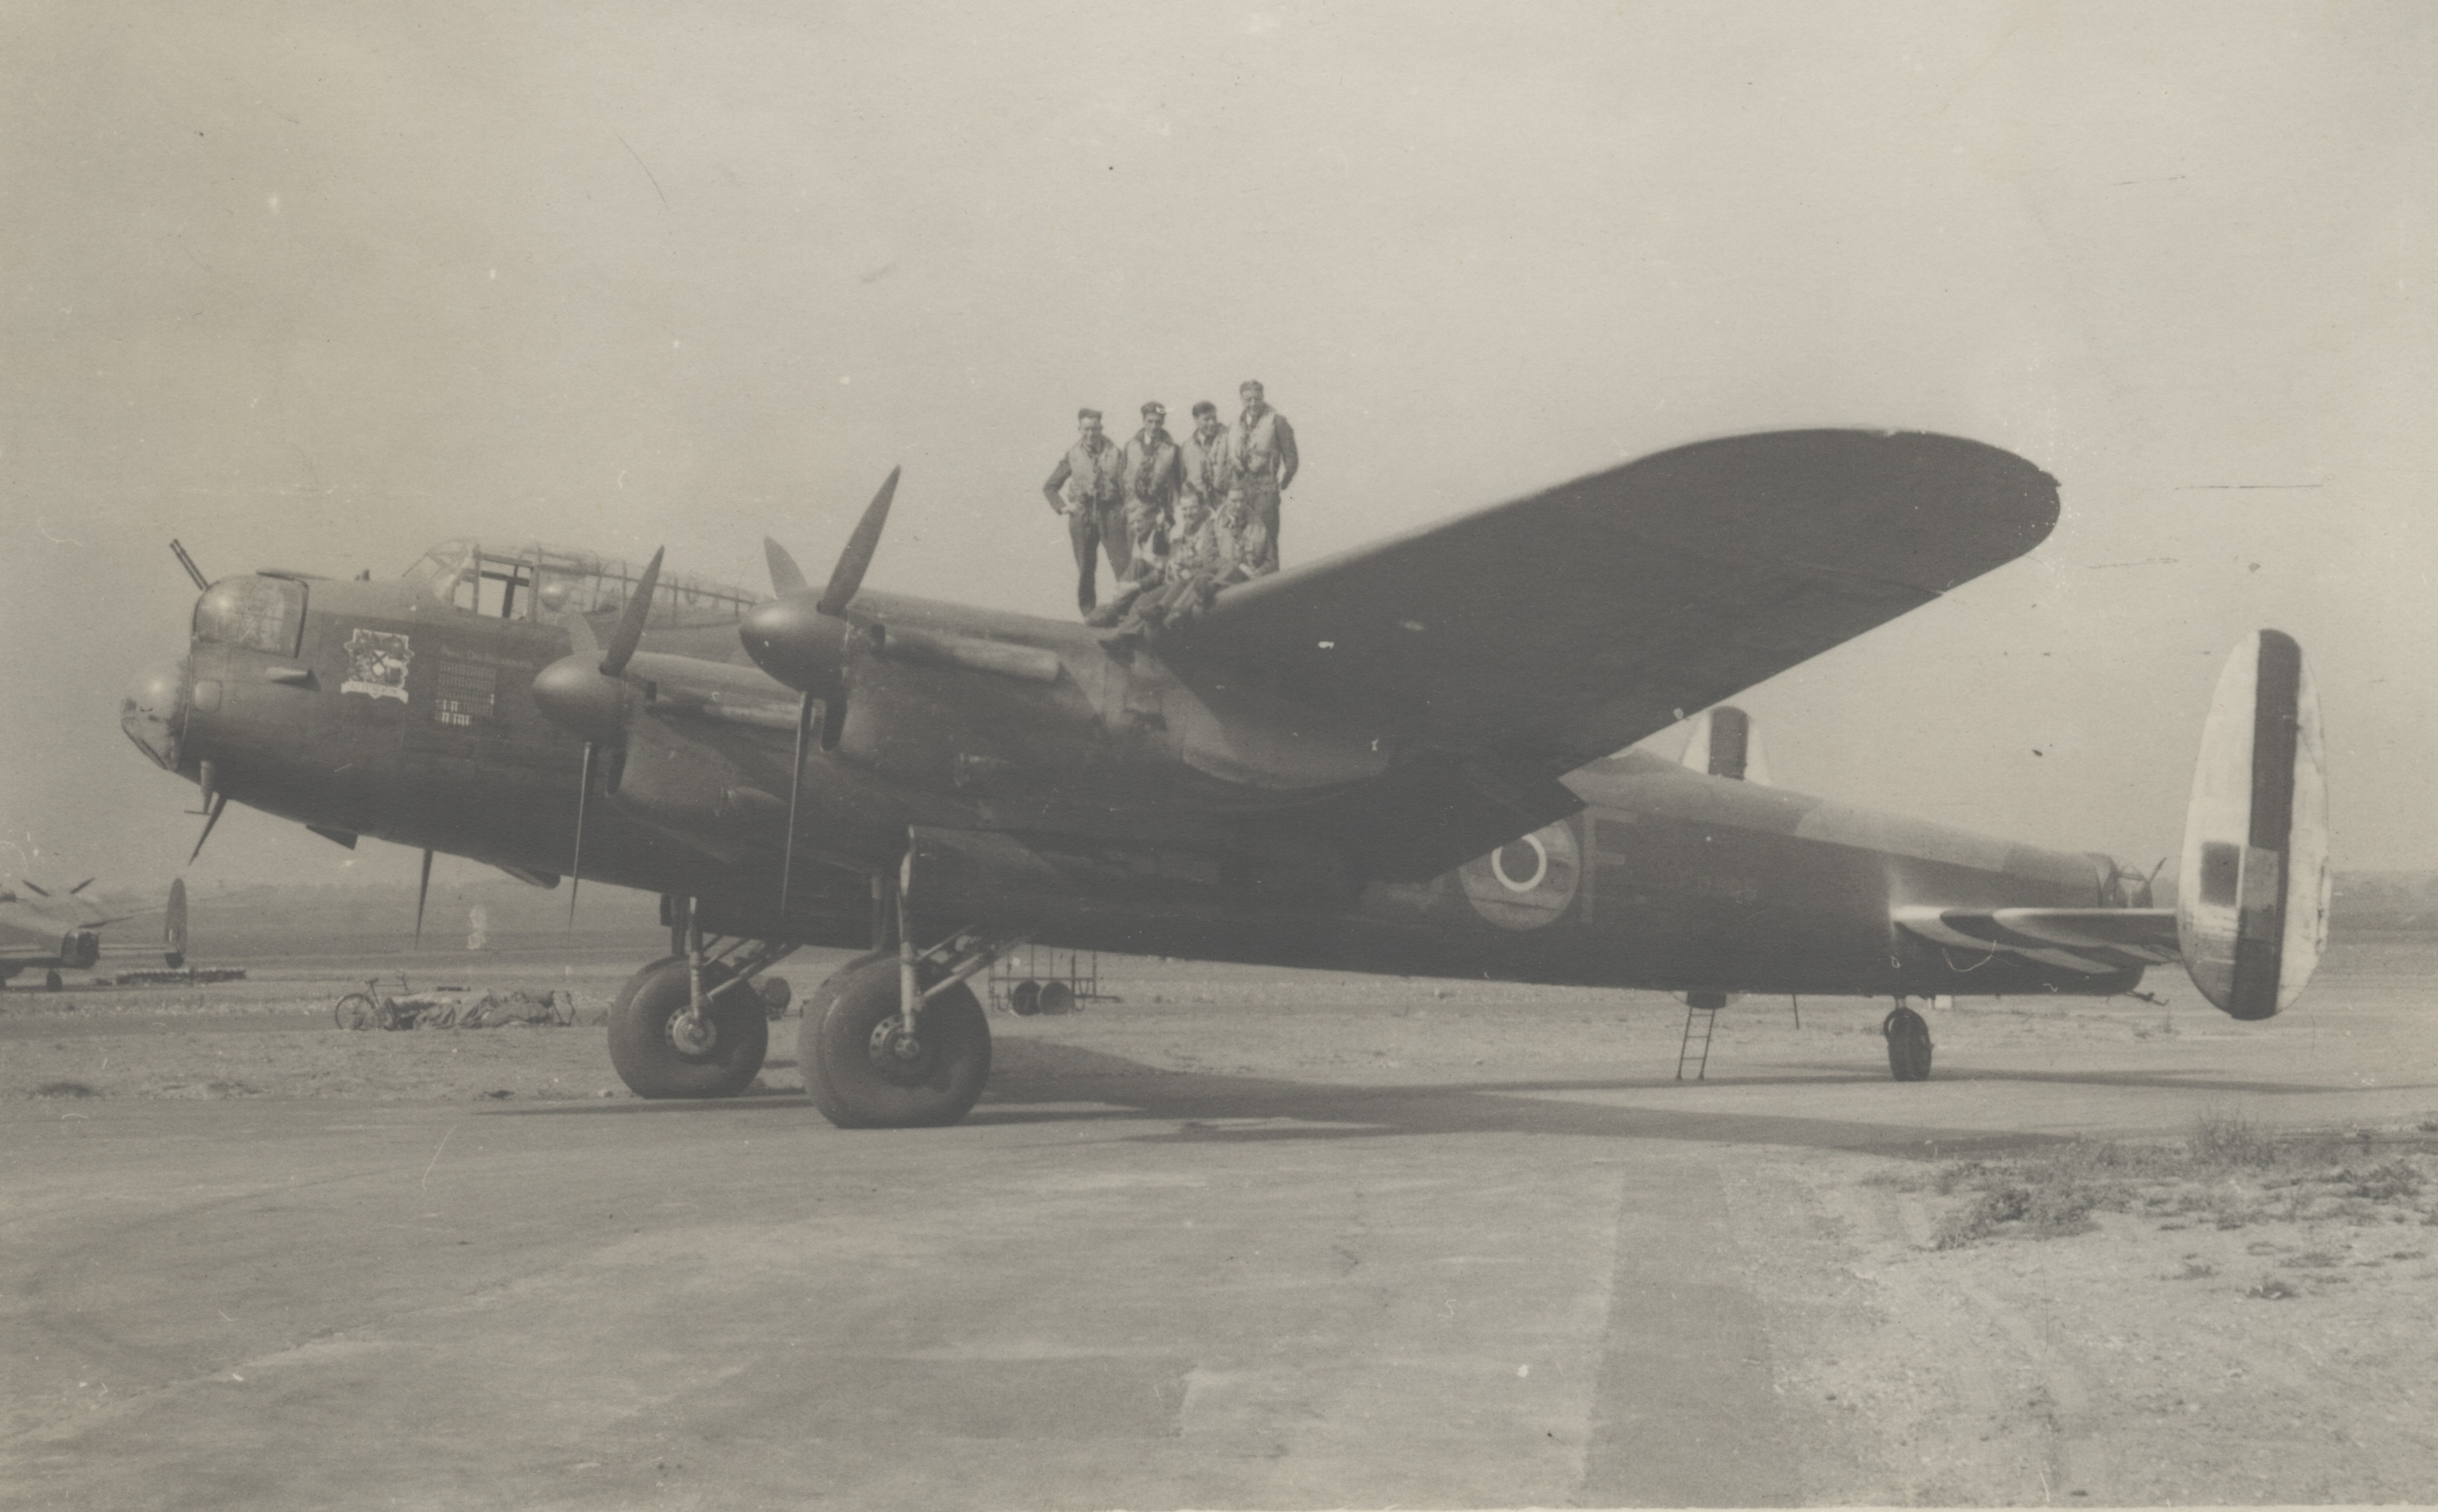
F/Lt R P Stone in the cockpit of LL811/BQ-J "Bad Penny II", with the remainder of the crew on the aircraft Photo from Mark Bradley collection For further information and photos click here |
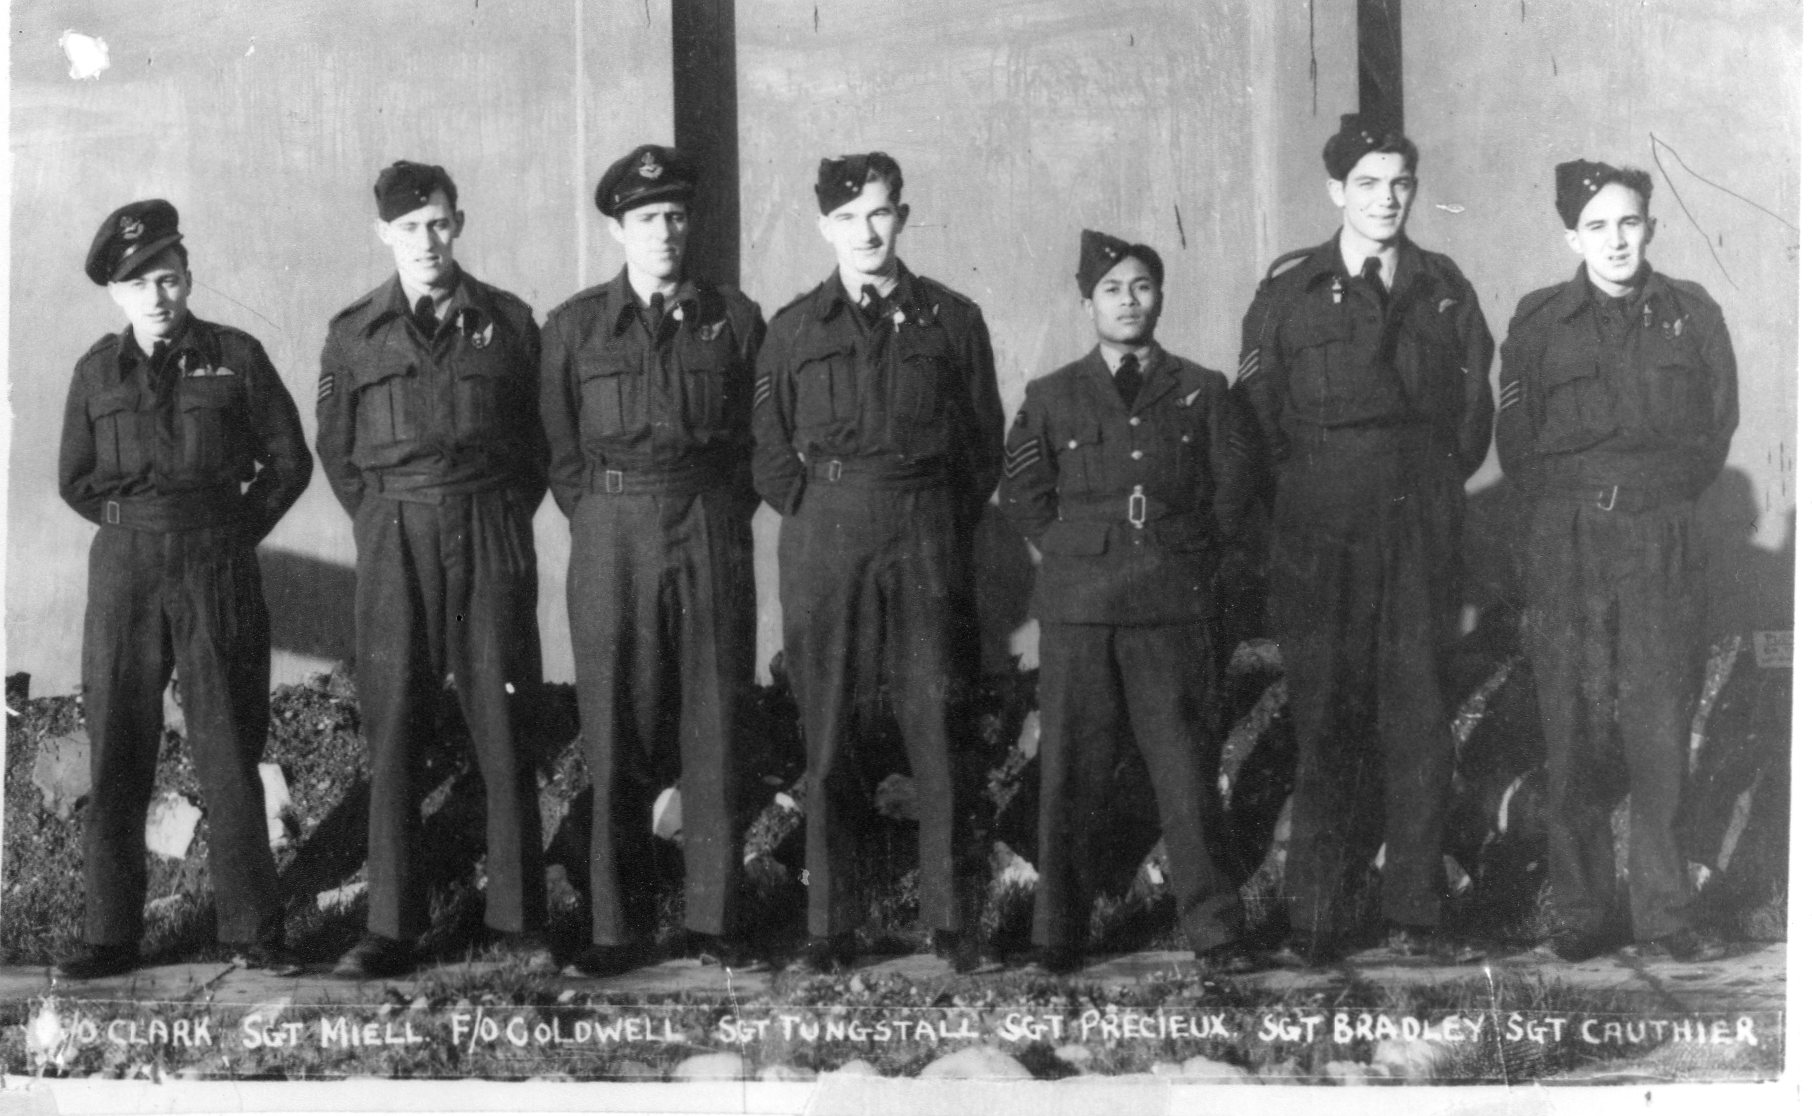
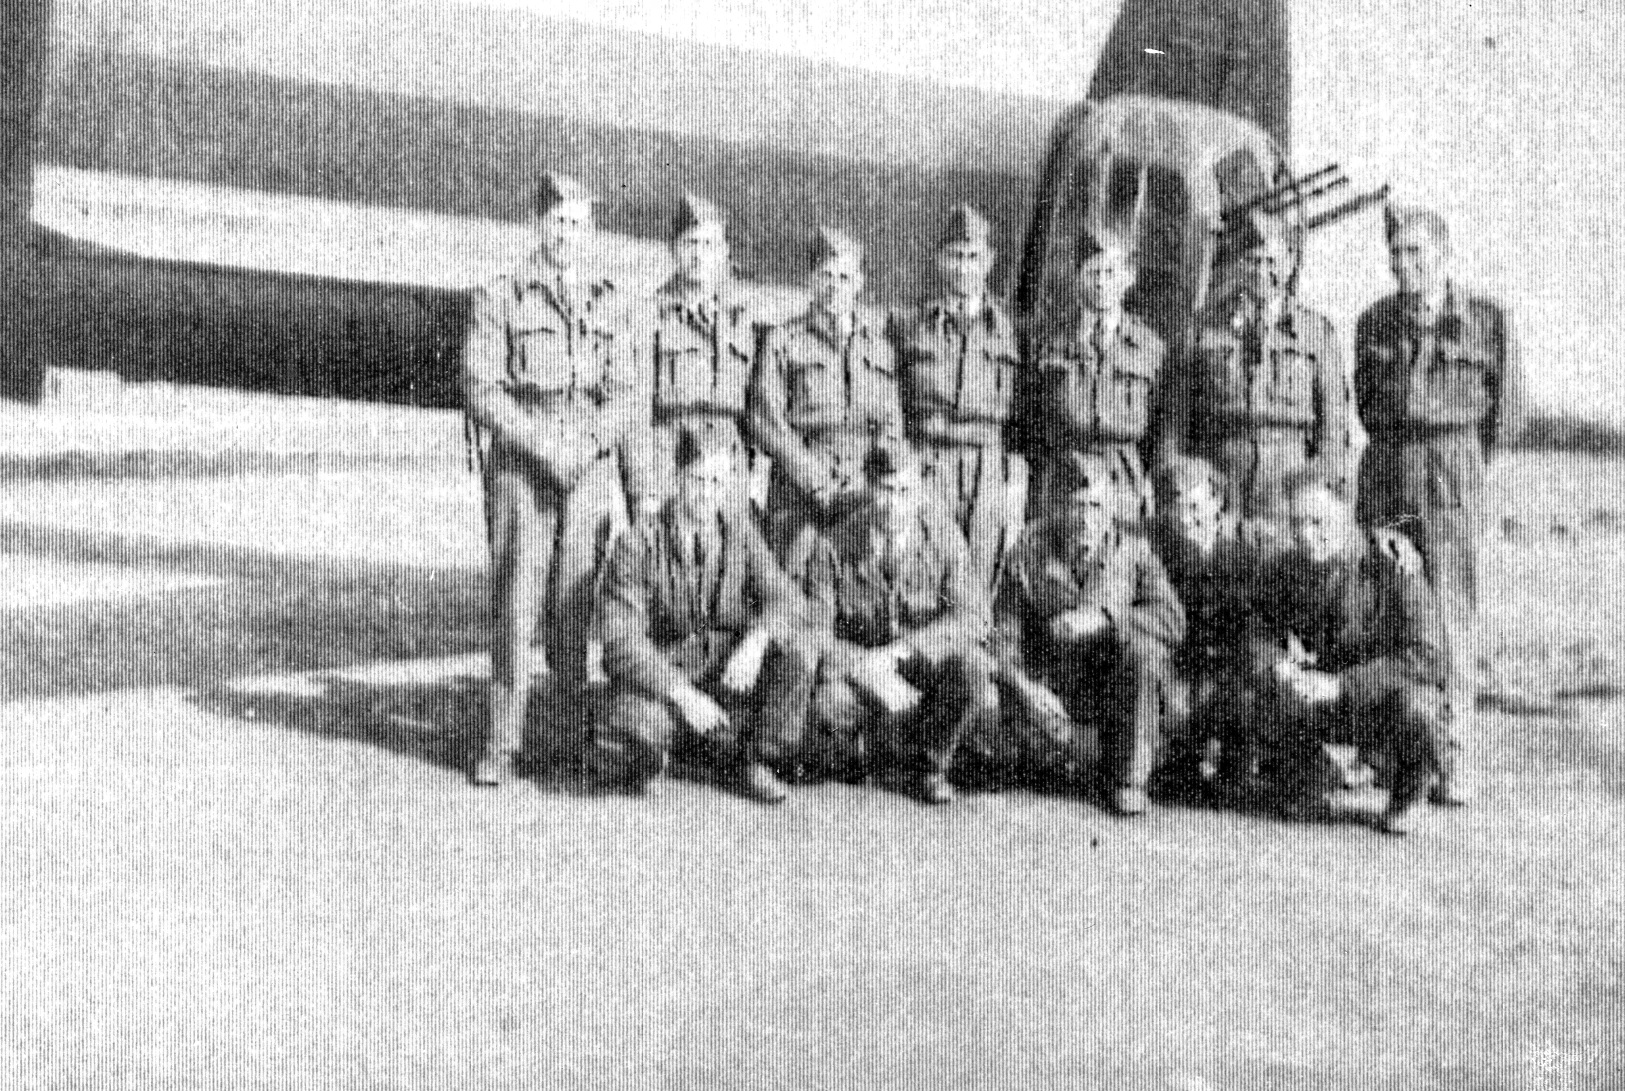
Mystery Crew (mystery solved)
 |
A photo was received of a crew sitting on an aircraft. At the time of receipt the crew had not been identified. 17/12/2024: Identification, this appears to be the F/Lt NL Rose crew. For further information about the F/Lt Rose crew click here, where a copy of the same photo, in addition to other photos, has been available for some years. |